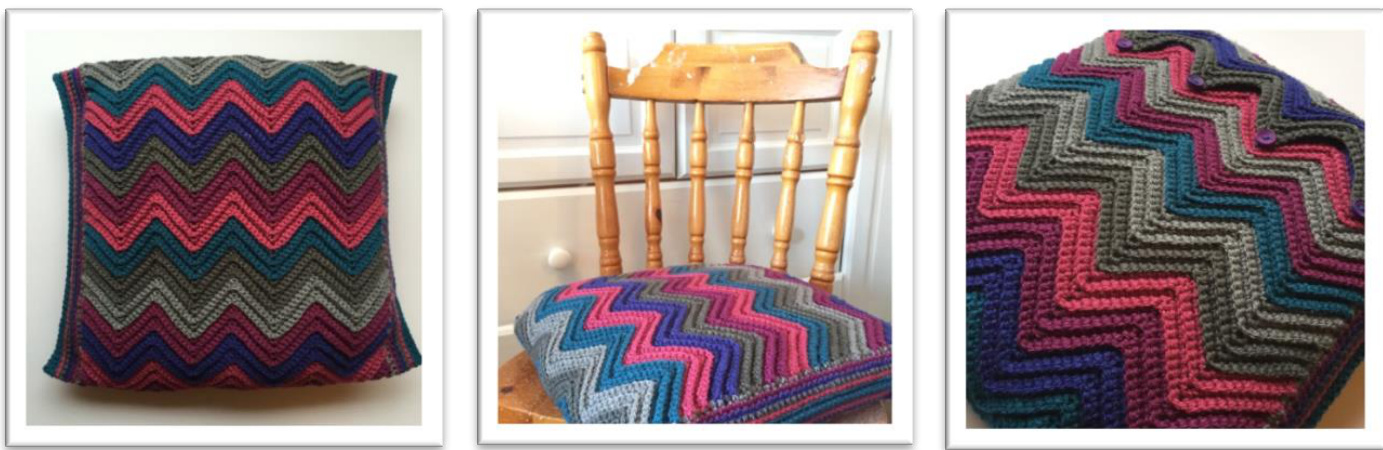
Pilar1 Cushion Pattern
A #pandagoloopy 2 pattern by Elin Stoodley/Panda Go Urgh
You will need:
Mossa & Pilar Yarn Pack from www.lusciouslyloopy.co.uk (Stylecraft Special DK, 1 ball of each colour; Raspberry, Plum, Petrol, Lobelia, Grey and Graphite) A 14"x14" cushion 4 buttons 3 mm crochet hook A pair of scissors Darning needle
Notes
The pattern is written using UK crochet terms. To make this cushion cover you will need to know how to do chains, double crochet, half treble crochet, work in back loops and slip stitch. The main part of the cushion is worked back and forth, turning your work in between each round. The border is worked in rows from right to left without turning.
Tension/Gauge
The gauge is not hugely important for this project. If you know that you are a particularly loose or tight crocheter, I suggest you change the hook size accordingly. However, I do provide instructions and measurements for you to make your cushion the size you want. It's very important that you maintain the same tension throughout the project, which can be tricky if you are working in back loops for the first time. I suggest you make a little test swatch to practice working in back loops before you begin.
Key
Ch(s) - chain(s) St(s) - stitch(es) Slst - Slip stitch DC - double crochet HTC - half treble crochet
Main part
The main part of the cushion is consisting of a long piece of crochet that wraps around the cushion to make both the back and front of the cushion. Foundation row: In Lobelia, Ch 88. Notes on making a different size: This is a diagram of the chains used in my pattern, amounting to 88 chs.
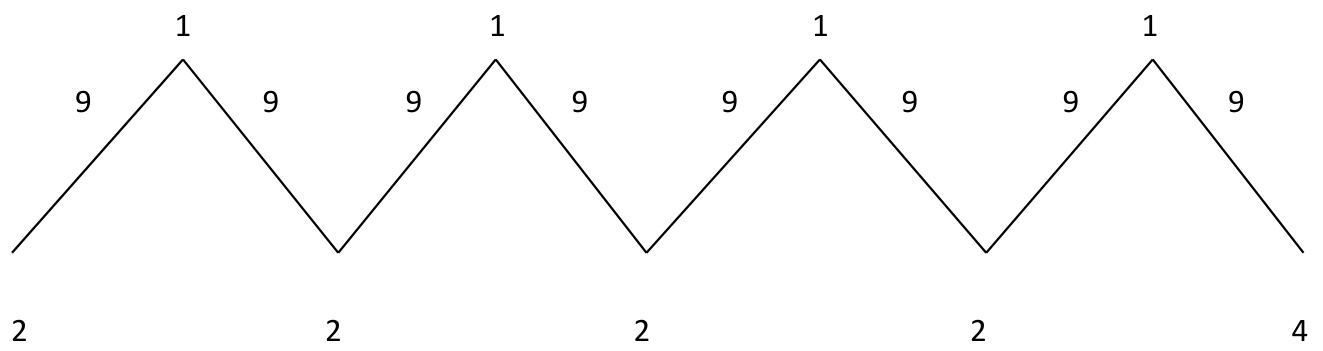
To make a smaller or larger piece, you can increase or decrease the repeats of the "peaks and valleys" of the pattern by subtracting or adding chains. Note that the pattern will always need to start with 4 chains (right hand side in diagram, to make the first dc and skipped ch, as well as finish with 2 chs to make the last skipped st and DC. You can also make the peaks and valleys wider apart by increasing the amount of DC's in between the peaks and valleys. The starting and finishing chains, as well as the peak and valley chains will remain the same.
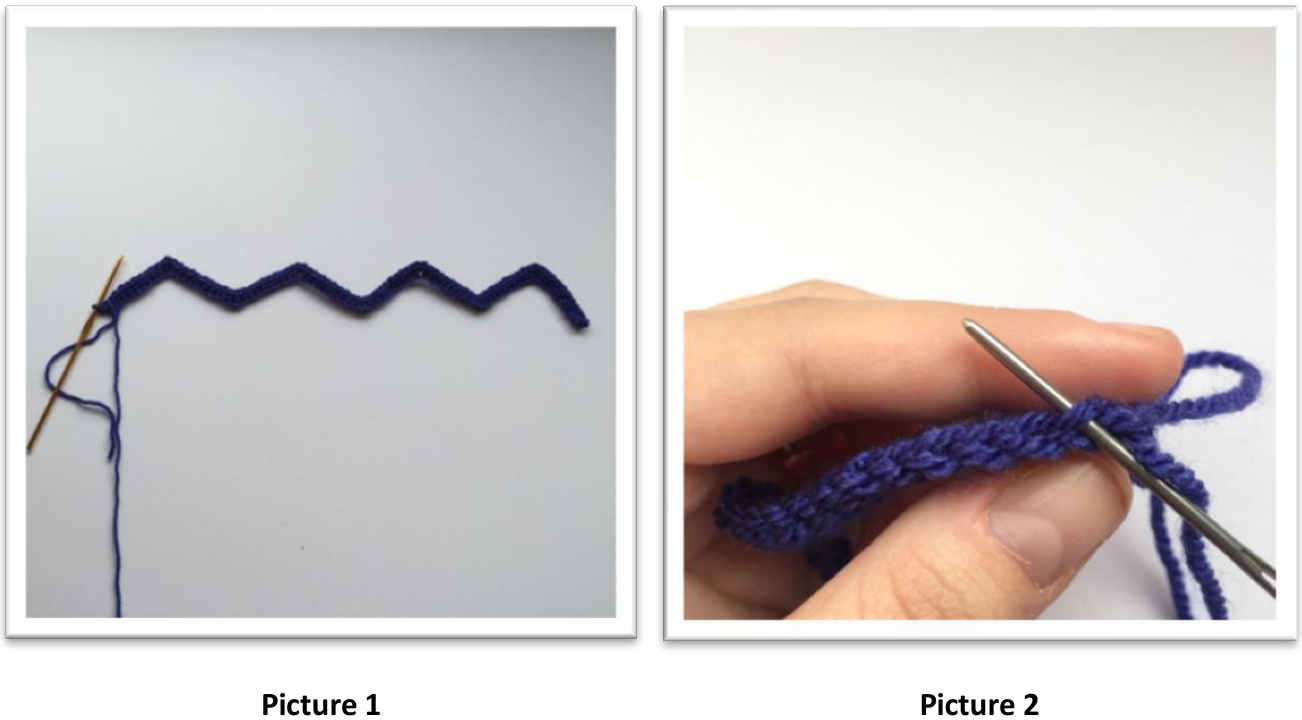
Row 1: DC in the third chain from hook, skip 1 ch, \*DC 9, 3 DC in next st, DC 9, skip 2 st, repeat from \* until 2 chs remain. Skip 1 ch, DC in last ch. (Picture 1) The first row should measure roughly 13" (the main part of the cushion is worked slightly smaller than the cushion, as we are adding a boarder later and we want the cover to be nice and snug) Row 2: Turn, ch 1, DC in next back loop, skip 1 st, \*DC 9 in back loops, 3 DC in next back loop , DC 9 in back loops, skip 2 st, repeat from \* until 2 sts remain, skip 1 st, DC in last back loop. (Picture 2 -the needle indicates the back loop where you should insert your hook) It's very important that you make sure to skip the st at the beginning and end of each row, otherwise your sides will continue to grow and not be straight.
Sometimes, when working in back loops it can be tricky to see what stitch you should work in, it's therefore important to count your stitches until you are used to the patterns, and every 4th row or so, to make sure you are still on track, otherwise your peaks will look wonky! Even I, who have worked with this pattern a lot, accidentally drop a stitch sometimes. Below are some tips for recognising your stitches. The 3 DC should be inserted in the middle stitch of the previous 3 Dc, however, as we have turned the row, it almost looks like the 1st stitch, and not the 2nd, as only one half of the first stitch appears to be in the peak of the 3'd Raspberry row. So remember to not accidently DC 10 stitches and miss that middlestitch.
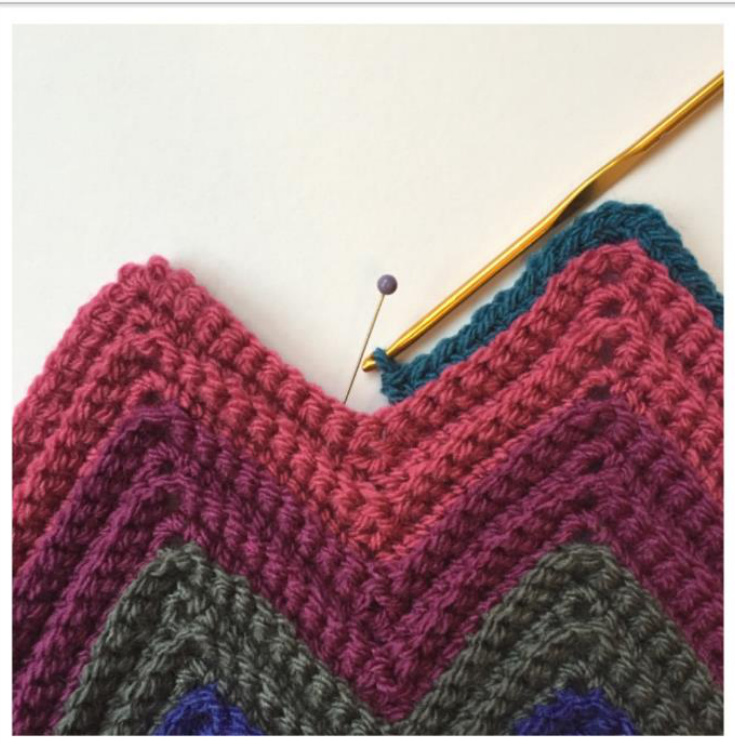
The two missed stitches look like the last stitch of the "downhill" part and the middle stitch that looks like it's got one "leg" on both "hills". You want to insert your hook into the stitch that is marked with a pin. Row 3: Repeat row 2 until desired length (the piece should overlap by about one and a half stripe), working 4 rows in each stripe. For me, it was 24 stripes of 4 rows each - 96 rows. (For instructions on how to crochet the last row, please see below as this is a bit different from the others) See table below for the order of the stripes and how I do colour changes.
| 1 Lobelia | 7 Graphite | 13 Grey | 19Lobelia |
| 2 Raspberry | 8 Raspberry | 14Petrol | 20 Raspberry |
| 3 Grey | 9 Plum | 15 Raspberry | 21 Plum |
| 4 Plum | 10 Lobelia | 16 Petrol | 22 Grey |
| 5Petrol | 11 Petrol | 17 Grey | 23Lobelia |
| 6 Grey | 12 Graphite | 18 Plum | 24 Graphite |
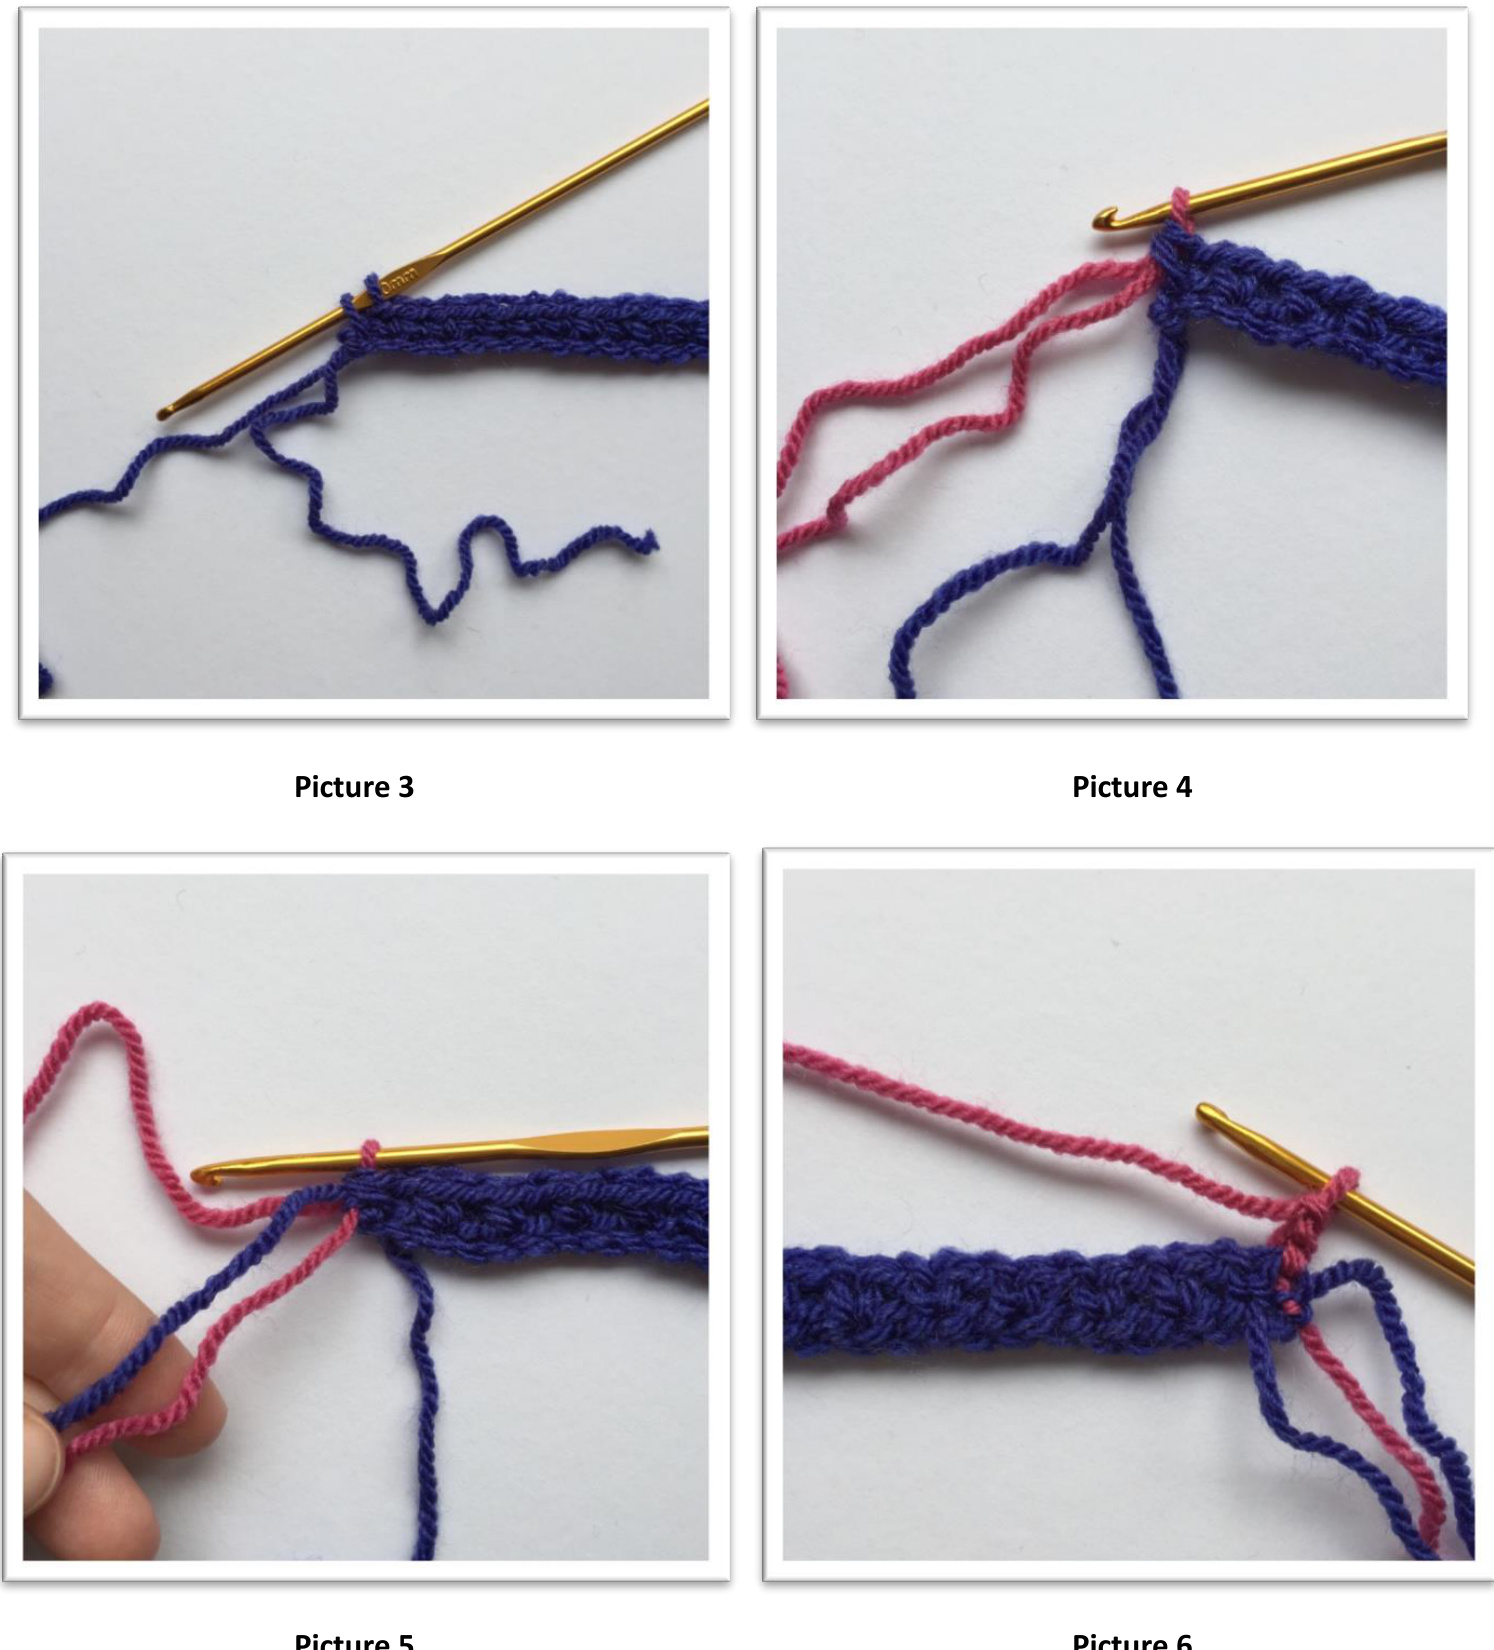
Colour changes: I will now describe how I change colour. There are many different ways of doing this, but this is how I prefer to do it. (Another pattern is pictured in the description of the colour changes, but the way of doing it is exactly the same) Pull up a loop of Lobelia in your last DC of previous round (Picture 3). Draw through a loop of Raspberry (Picture 4) Cut Lobelia and tie a double knot with the Lobelia and Raspberry tail (Picture 5). Use a darning needle to sew the ends in later. Turn your work and ch 1 (Picture 6).
Last row: Turn, ch 1, DC in next back loop, skip 1 st, \*DC 9 in back loops, ch 3, skip next st , DC 9 in back loops, skip 2 st, repeat from \* until 2 sts remain, skip 1 st, DC in last back loop. Decide which side will be the outside of the cushion cover and fasten and sew your tails at the back of your work.
Border
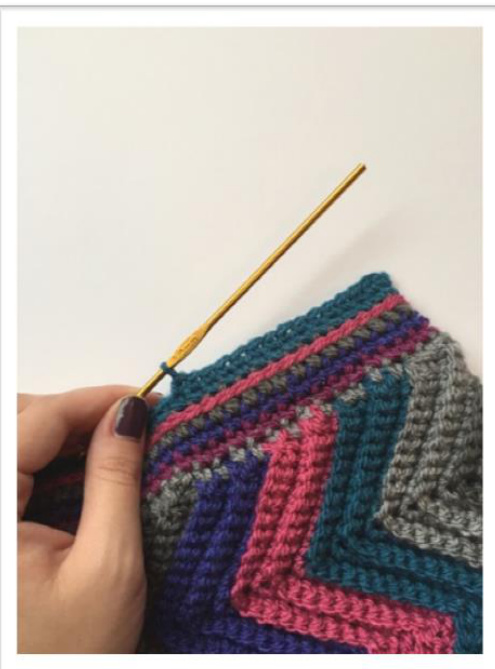
The border is worked in rows from right to left, without turning. Working from the right side: Row 1: Join Grey in the first DC on the first row with a sl st, ch 1, DC in each row along the edge. Fasten off. Row 2: Join Plum in the first DC of border with a sl st, ch 1, DC in each st along. Fasten off Row 3: Repeat row 2 in Lobelia. Row 4: In Graphite, join with a sl st, ch 2, HTC in each st along. Fasten off. Row 5: In Petrol, repeat row 2.
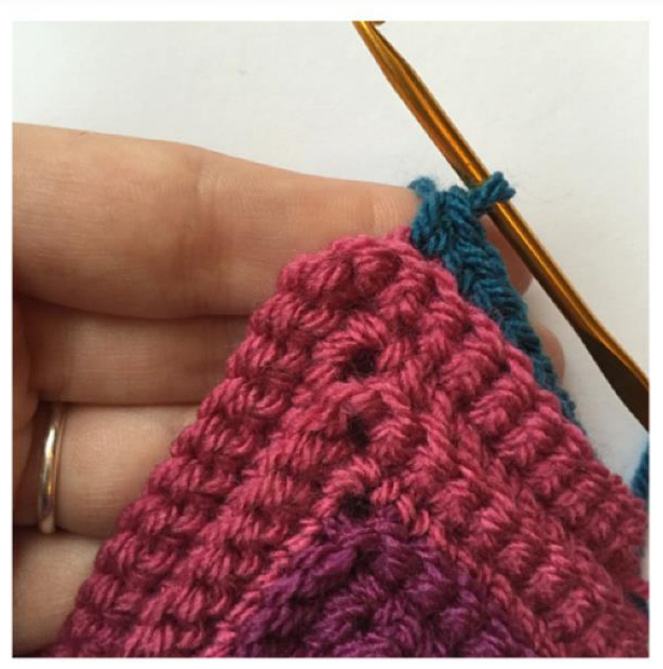
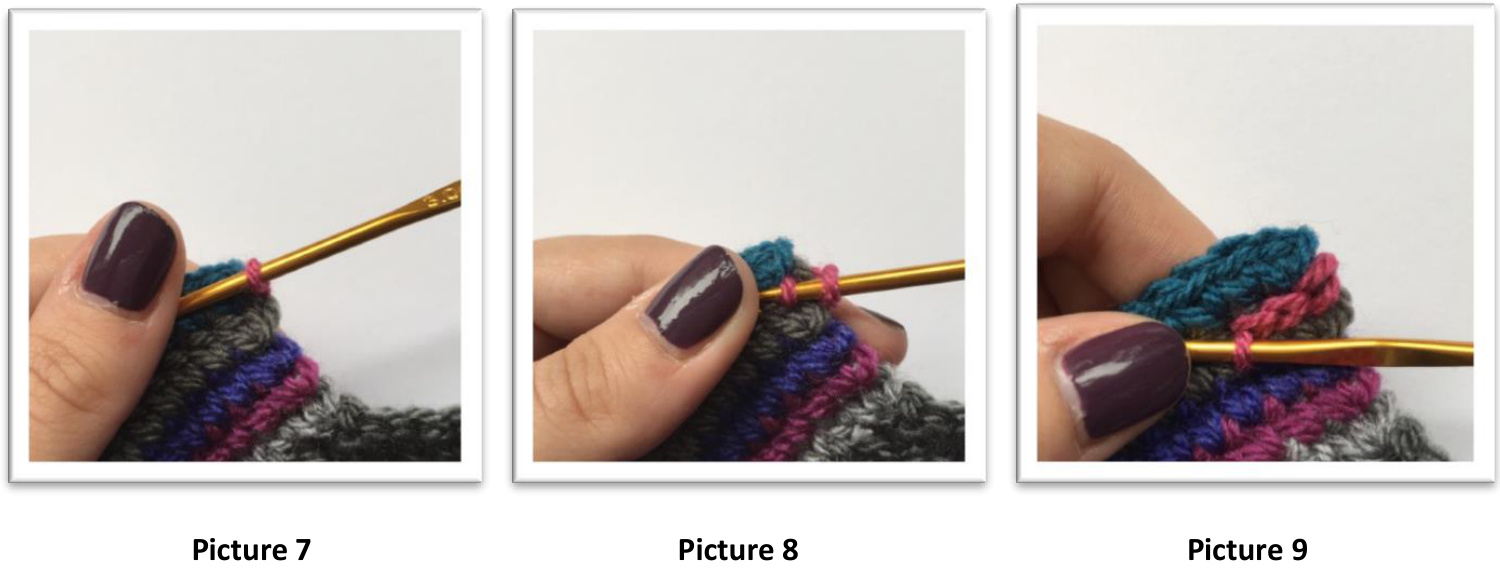
Surface stitch: Now work a surface slip stitch in the HTC round using Raspberry. Spin the yarn around your hook so that you have a loop on you hook (Picture 7). Insert it in between the first and second HTC and pull up a loop from behind your work (Picture 8) and pull through your first loop. Sl st around the next HTC by pulling up a loop in the space in between HTC's (Picture 9). Continue along to the last HTC. Fasten off.
Joining
Your piece will wrap around the cushion, slightly overlapping, about 1,5 stripe, about 7 sts of the border. Mark the 7th overlapping stitch by inserting a stitch marker in both the back and front of the cushion, and on both sides of the border (Picture 10). The overlap will be the cushion cover opening. Now, sew the 7 overlapping stitches together so that your piece now becomes a "tunnel".
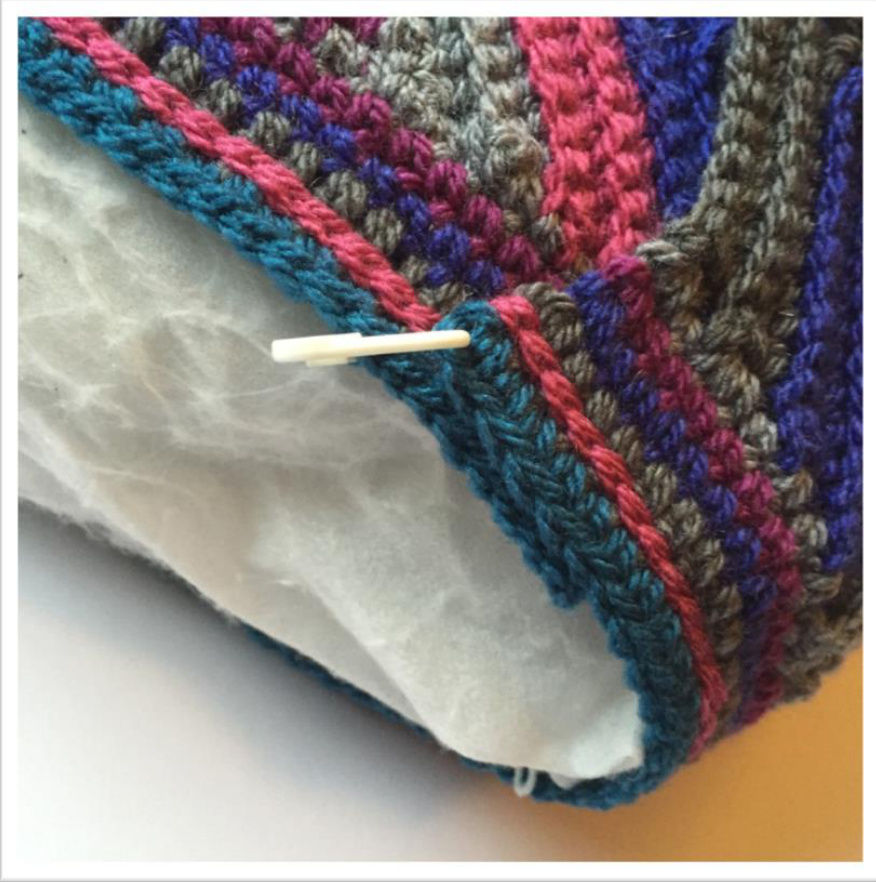
Picture 10
Lay your work flat. Crochet together the sides of the cushion by joining Petrol to the stitch at the fold on the right hand corner. DC in same stitch and continue to DC into both the front and the back along the edge to close the cushion (Picture 11). Repeat on the other side. Button closing Sew 4 buttons in between the second and third row of the Raspberry stripe, corresponding to the button holes of the final, Grey round. Fasten off and sew any remaining tails.
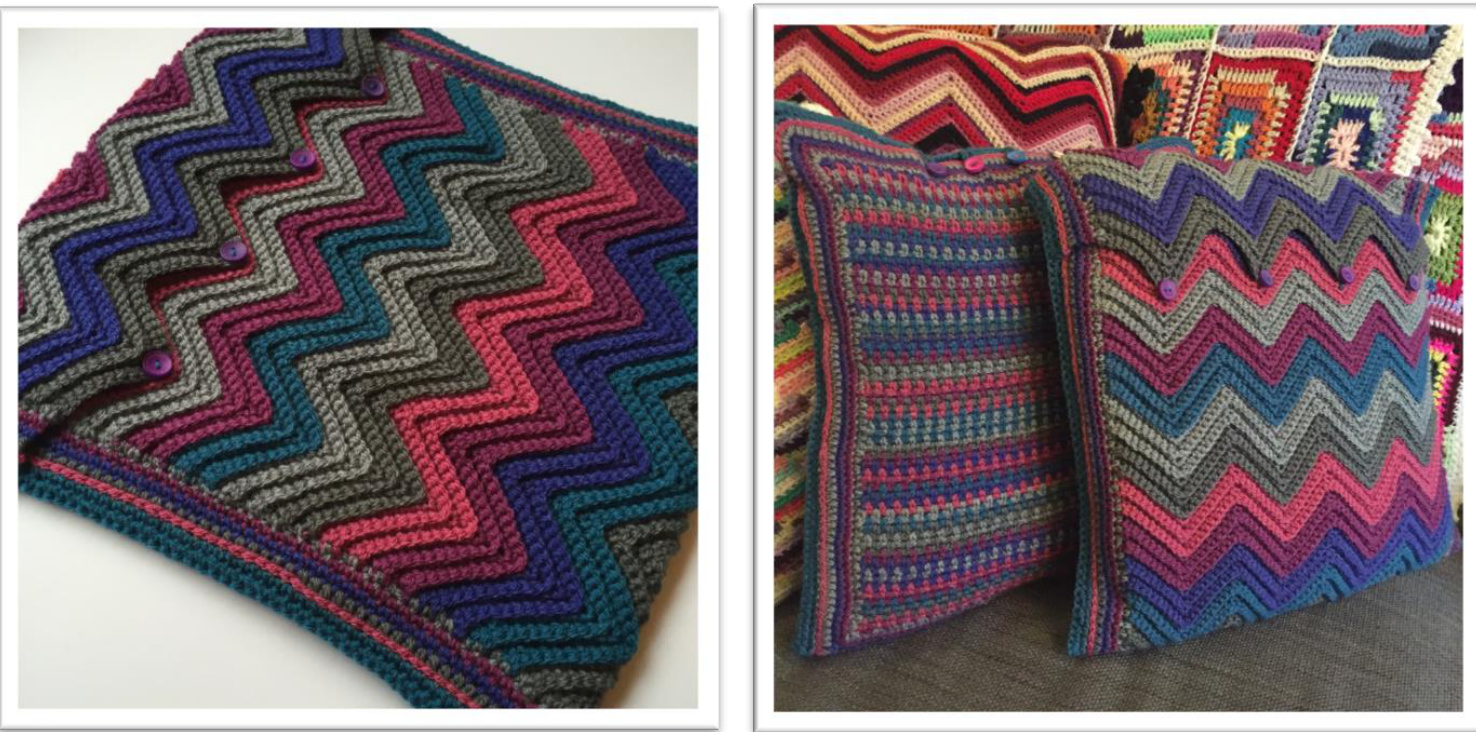
Well done! You have finished your cushion cover! Now comes the lovely part of putting your cushion cover on and fluffing it up - enjoy! If you purchase the Moss & Pilar Yarn Pack from Lusciously Loopy, you will get access to the matching Mossa Cushion Pattern! They look great together and one pack is enough yarn and buttons to make both cushions!

@pandagourgh #pandagoloopy pandagourgh@hotmail.com Please follow me on Instagram and use the hashtag to share your cushion cover! Please don't hesitate to contact me on social media or by email if you need help with the pattern and I will try my best to assist you. Love Elin Stoodley/Panda Go Urgh Copyright Elin Stoodley/Panda Go Urgh 2015. This pattern is a free pattern. You may share it, but not sell it or call it your own. You may sell items made from this pattern, but please credit Elin Stoodley or Panda Go Urgh as the designer. Thank you!
This pattern was made in collaboration with Lusciously Loopy


