Jules Vintage Style Tea Cosy
$\copyright$ Unraveling Sophia all rights reserved
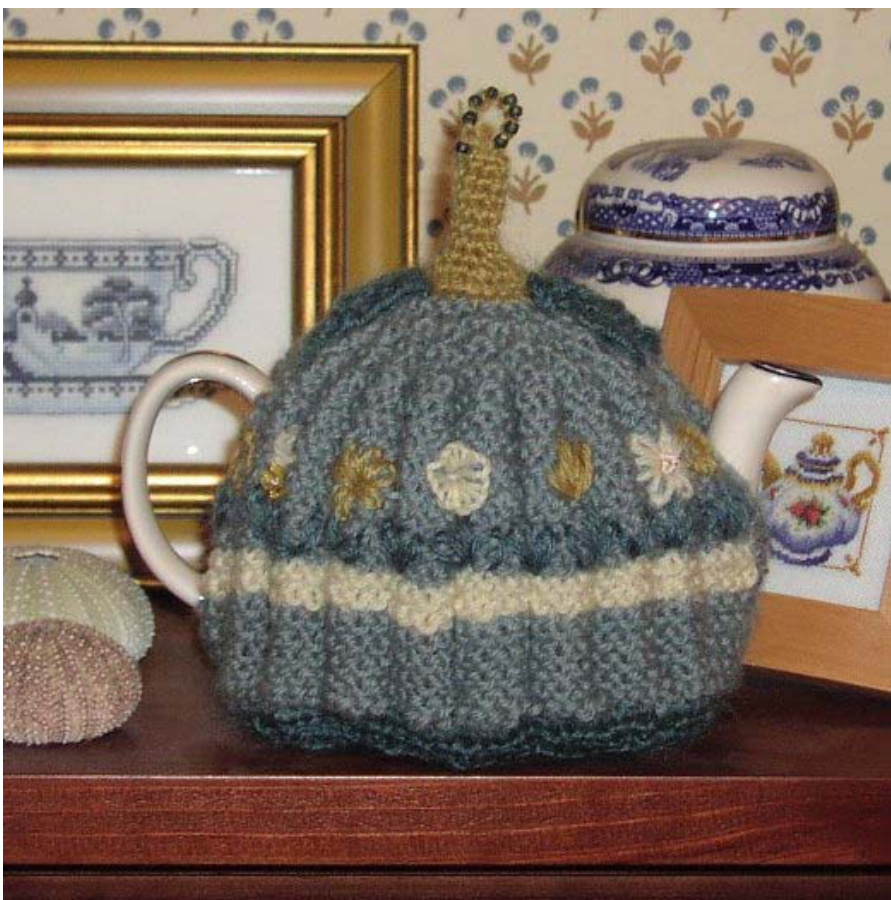
This vintage tea cosy pattern will fit tea pots that are 5 inches high and 14 inches around, and larger ones that are up to 7 inches high and 18 inches around. It isn't "my”' pattern, but has been around since at least the early 1900's. My mother made this pattern, and her mother before her, and so on.... It's a type called a "Bachelor Cosy”’ with openings for both spout and handle. This enabled the supposedly more informal single men who lived alone in rented rooms, to pour their tea without removing the cosy. This particular knitting stitch creates a double layer of fabric that is smooth on the inside and ribbed on the outside, so it keeps the tea hot, just like it's supposed to!
MATERIALS
2 (3) skeins of your Main Colour Helio (or other fingering-weight yarn) and Partial skeins of 3 other colours: Two of the skeins should be a light hue and a dark hue of the same colour range. The other two colours can be any harmonious colours. They will be used for the stripe and the stem and flowers. Important note: Mark your two identical skeins in some way so that you know one is Skein #1 and the Other is Skein $\#2.\,\mathrm{1}$ tied a red ribbon to the inside of one. US size 7 straight needles Crochet hook, size F Gauge: 32 stitches $=4$ inches Make 2 sides the same Using your Main Colour (MC), cast on 52 (72) stitches. Slip 1 stitch, knit to end of row; repeat this on a second row Join the second skein of MC yarn: Row $1\colon{\mathrm{Sl}},^{\ast}\ \mathrm{K}5$ with first skein of yarn, K5 with second skein of yarn. Repeat from \* until you come to the last stitch, K1 with the first skein of yarn Row 2: Sl, \*bring your first skein of yarn to the front of your work, and put the second skein to the back. K5 with the first skein. Repeat from \* until you come to the last stitch; put second skein to the back of the work and bring first skein to the front. K1 with the second skein. Repeat Rows 1 and 2 Three (Seven) times. Drop your MC skeins and add in your second colour (the cream colour) that you have wound into two balls. Knit Rows 1 & 2 with the Cream yarn. Repeat both rows, catching up your MC on one side to prevent a long loop on the inside. Cut off the Cream yarn leaving a tail to weave in later) and bring the MC back up to begin Row 1 with Skein 1. Knit Rows 1 & 2 Seven (Fifteen) times [this results in 14 or 30 rows]. Row 3: S1, $^{*}\mathrm{K}1$ , K3tog, K1 with Skein 1; K1, K3tog, K1 with Skein 2. Repeat from \* to last stitch; K1 With Skein 1. Row 4: S1, $^{*}\mathrm{K}3$ with Skein 2; K3 with Skein 1. Repeat from \* to last stitch. K1 with Skein 2. Row 5: S1, $^{*}\mathrm{K}3$ with Skein 1; K3 with Skein 2. Repeat from \* to last stitch, K1 with Skein 1. Row 6: Repeat Row 4. Row 7: Repeat Row 5. Row 8: Cut off one of the skeins, leaving a tail to weave in later. S1, Knit to end of row. Cut off yarn, leaving a tail. Run the tail of yarn through allremaining stitches, draw up tightly and fasten off. Make second side identical to first. SEW sides together: At this point you should hold the cosy up to your intended tea pot and mark where the handle and spout openings should be. Teapot styles and shapes are endless. If you are making this for a gift and can't measure directly, you can use these general directions from the 1919 version: Sew up one side seam leaving a $1~\%$ inch opening for a smal tea pot and a 3 inch opening for a large pot $1~\%$ inches( $2~\%$ inches) up from the lower edge for the spout. Sew up the other seam leaving $2\;{}^{1}\!/\!_{2}\;(4\;{}^{1}\!/\!_{2})$ opening $1~\%$ inches up from the lower edge for the handle.
CROCHET TRIM:
Using darkest yarn, crochet double crochet stitch in one row all along the bottom edge of cosy, with right side facing. Second row: shell stitch: 3 DC in first stich, 1 DC in second stitch. Repeat around. Using fourth-colour yarn, attach yarn with single crochet all around top opening of cosy. Continue with single crochet around and around until "stem is the length you prefer. Fasten off and weave in ends. Alternately, you can knit or crochet a loop at the top of the cosy instead of a stem.
LEAVES and FLOWERS: (I made 3 leaves)
Small Leaves - Cast on 1 st. K1, P1, K1 into first st. Row 2: Turn, Sl 1 K2. Repeat Row 2 Ten more times. K3tog. Cut yarn, fasten off. . Large Leaves - Cast on 2 st. K1, M(make)1 in first stitch. K1, M1 in second stitch. Row 2: Turn, S1, K3 Repeat row 2 Eighteen more times. Turn Row 3: K2tog Twice. Turn Row 4: K2tog. Cut yarn, fasten off. Use yarn tail to sew leaves to tea cosy top, around stem.
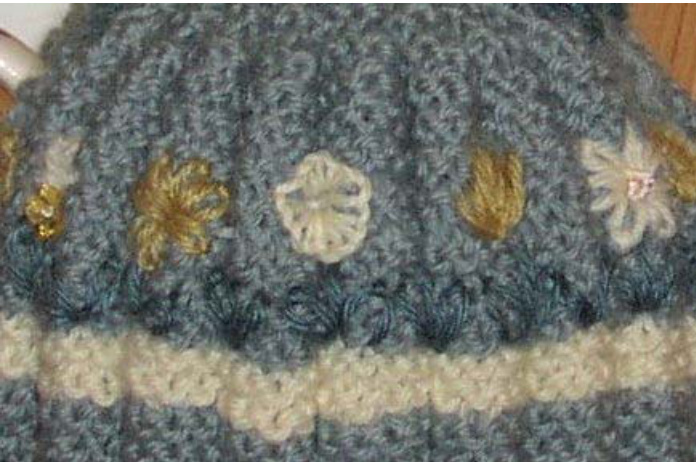
Embroidered Flowers: Using your leftover yarn, embroider a row of flower stems and leaves above the stripe. I used a simple “lazy-daisy” petal three times to represent both stems and leaves. At various intervals around this ring of stems, embroider any kind of flowers you like. I used Lazy-Daisies, Blanket Stitch circles, and single stitches radiating from a common point for 3 different types of flowers. You can also decorate the cosy with beads.


