Infinity Gum Wrapper Puzzle Bracelet
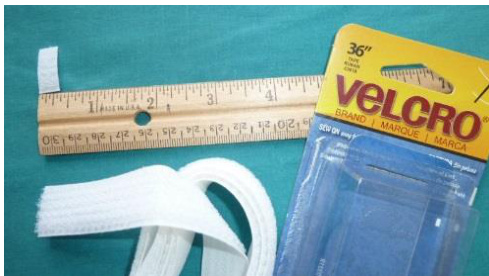
A great rainy day project. Kids can have fun linking the colors together. Did you save gum wrappers to fold and piece together in grammar school? Back in the 60's, it was quite a fad. I remember trying to collect enough wrappers to make a necklace. Some kids made mammoth chains that would break theGuinnessBookof World Records. Well, this pattern can be pieced together, and can be as long as you want. And you don't have to chew excessive amounts of gum to make one. You could make a bracelet, a necklace or garland. It is very easy, and it's great for using up scrap yarn. And when the links are made, the FUN begins. Materials: Worsted Weight Yarn \~ 60" (153cm) for one link \~ 20 yards for one bracelet (I used Sugar n Cream Cotton) 4.5mm (G) hook Scissor or Snips Yarn needle Velcro (cut to fit the width of the Connector Link \~1/4"(\~0.6cm) Or you could use a snap (l used no snag velcro) Sewing needle and thread Gauge: Not essential to construction Size: One Open Link = \~ 2" (\~5cm) in length Abbreviations: \~ = Approximately Ch(s) = Chain(s) FO = Fasten Off Sc = Single Crochet Ss = Slip Stitch St(s) = Stitch(es)
US Terminology
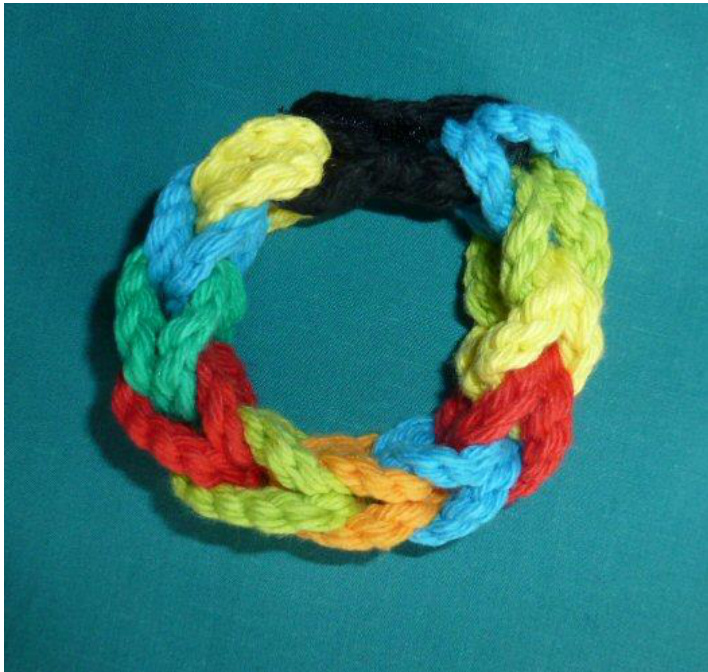
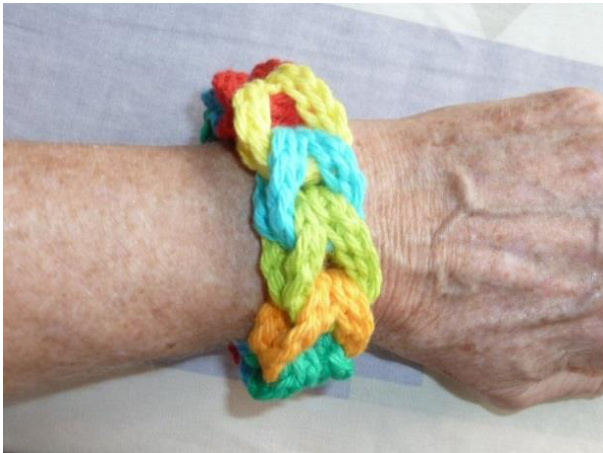
A bracelet that fits my hand takes 11 Links and a Connector. A necklace that fits over the head will require about 35 Links or so and a connector. Garland can be made as long as you want. And you might want to experiment with other types of yarns and hooks or even crochet thread and a smaller hook.
One Link:
Ch 11, Ss in the 2nd ch made (it will be the 10th ch from the hook). [Photo 1] Then Ss in the 1st ch (which will be last ch, the 11th ch from the hook). [Photo 2] Ch 9, Working on the other side of the beg two chs, [Photo3] Ss in the 1st ch again and then in the 2nd ch. [Photo 4] Ss in the top loop of each ch and ss around. (9 chs, 2 ss, 9 chs, 2ss / Total = 22 ss) [Photo 5] FO. Of course you could weave in the ends, but if you plan to make a lot, it could be quite daunting.
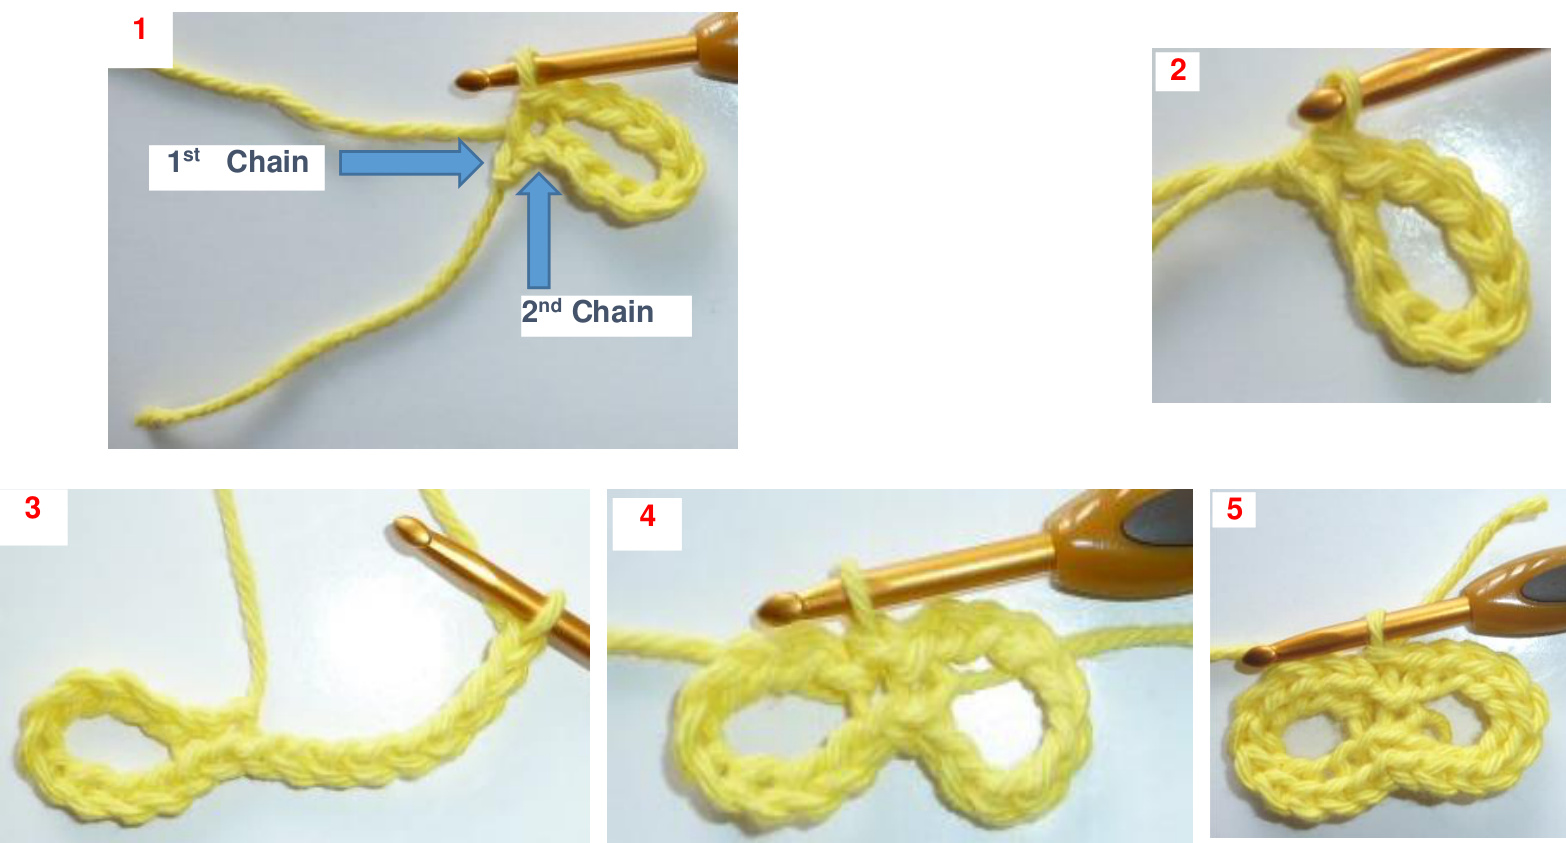
It should now look like an infinity symbol or the number “8"on its side.
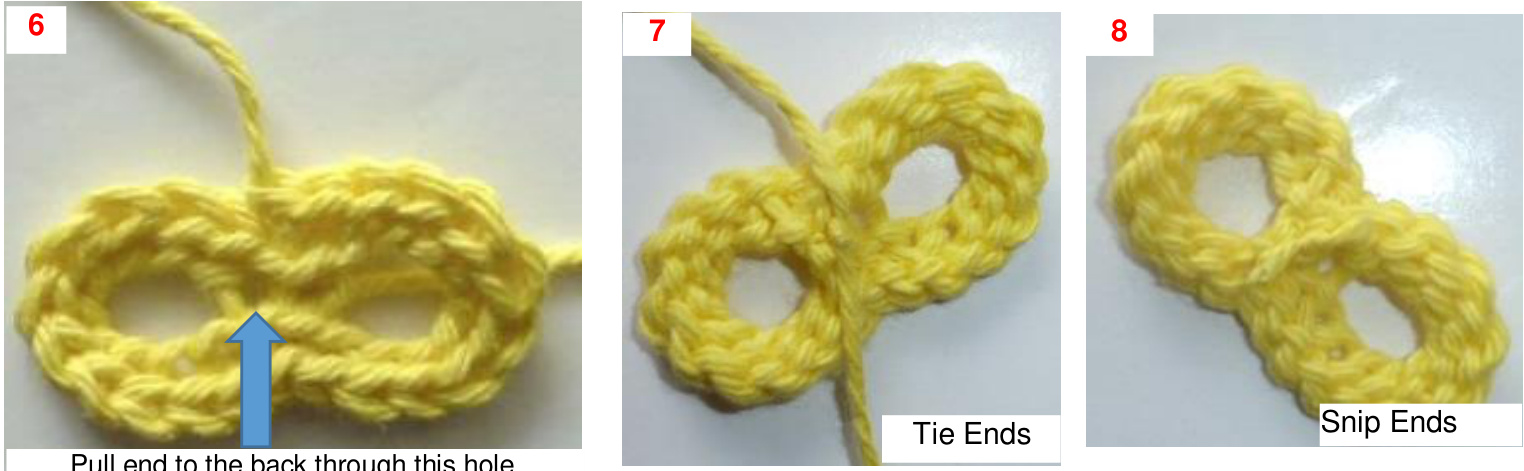
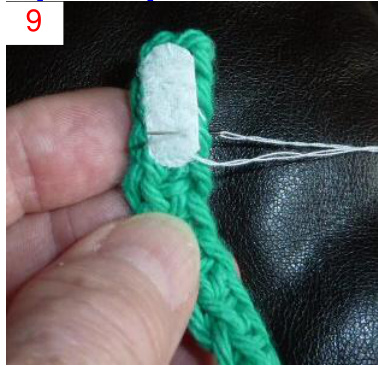
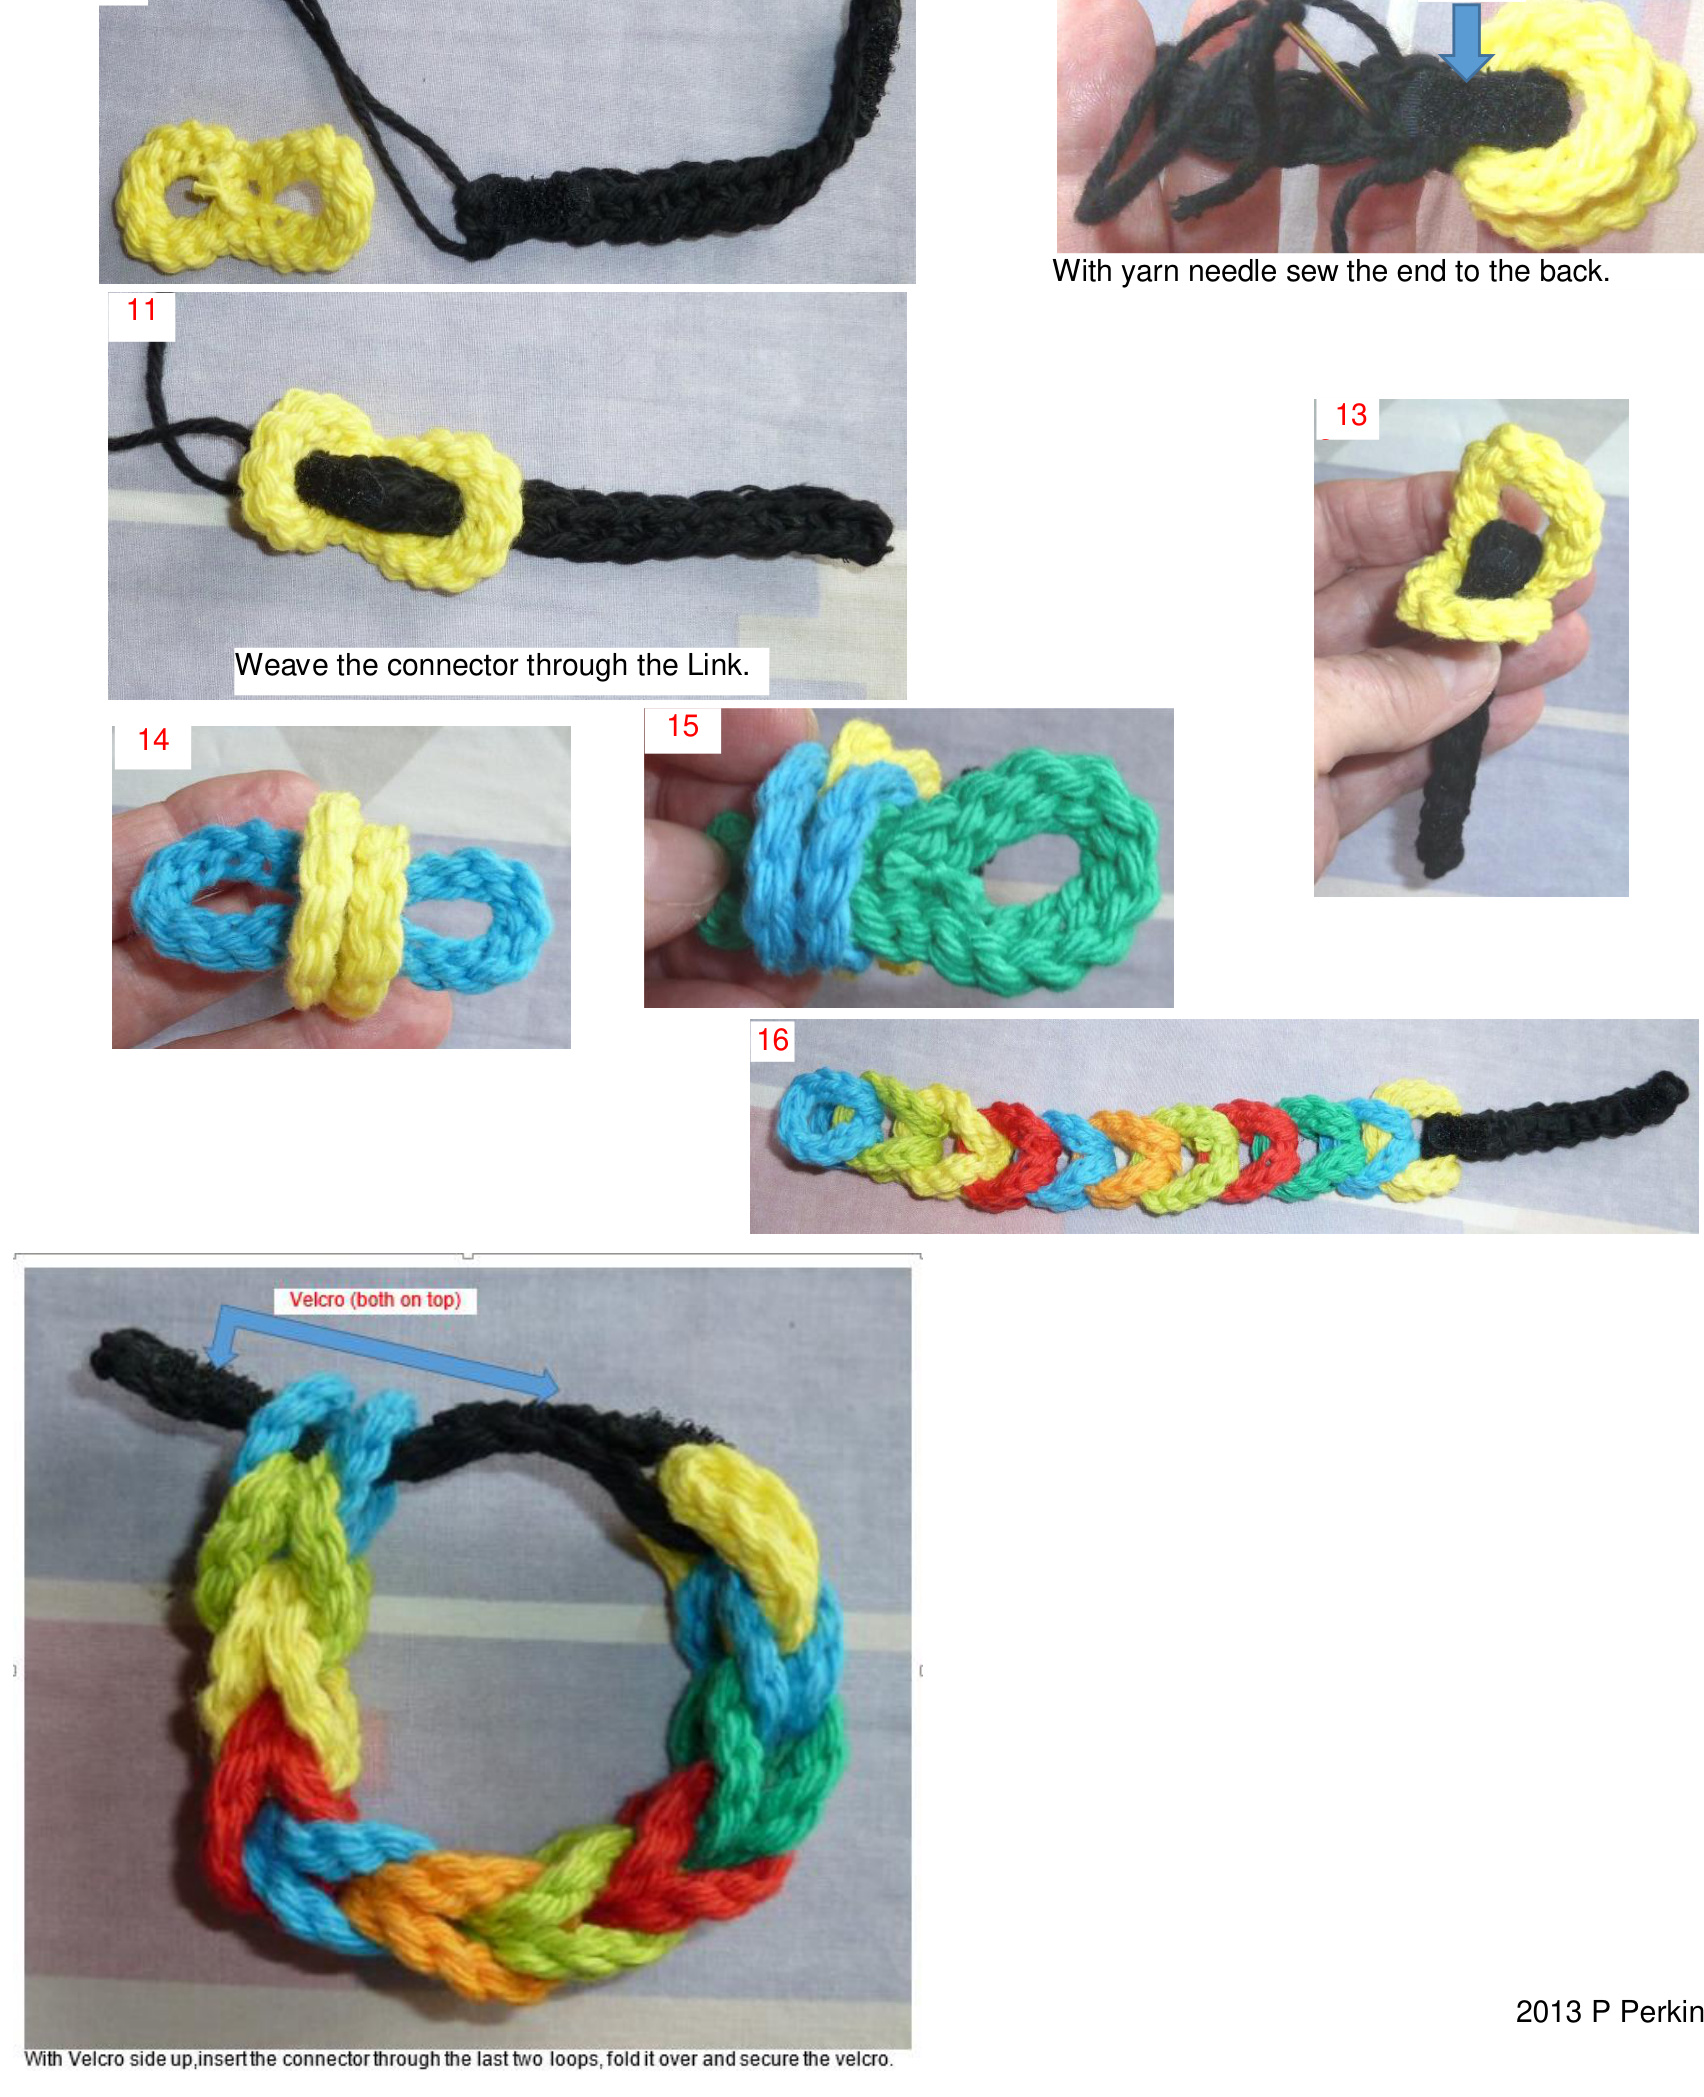
Isuggest that you pull the end through the ch-hole directly below the final st to bring it to the back of the work. [Photo 6] Then tie the fastened-off and beginning ends together with 4 overhand knots. the last 2 knots tight to secure. [Photo 7] ends \~ 1/4" or less (\~1/2cm). This will be on the inside and will not show._[Photo 8] Ch 16, in the Back Ridge-Bump Sc in the 2nd ch and across. FO with \~ 5" (12 cm) to sew (to connect to the first Link). (15 sc) Sew a velcro strip [Photo 9] on opposite sides of each end. Follow Photos 10 -12 to attach to a Link. Place one Link wrong side (knotted side) up, and the connector-end (the side with the yarn ends and Velcro facing up) next to it. [Photo10] Then with wrong side up weave another Link through the loops. Continue adding until you have enough for a bracelet or necklace or whatever.