by Catherine MeMiln
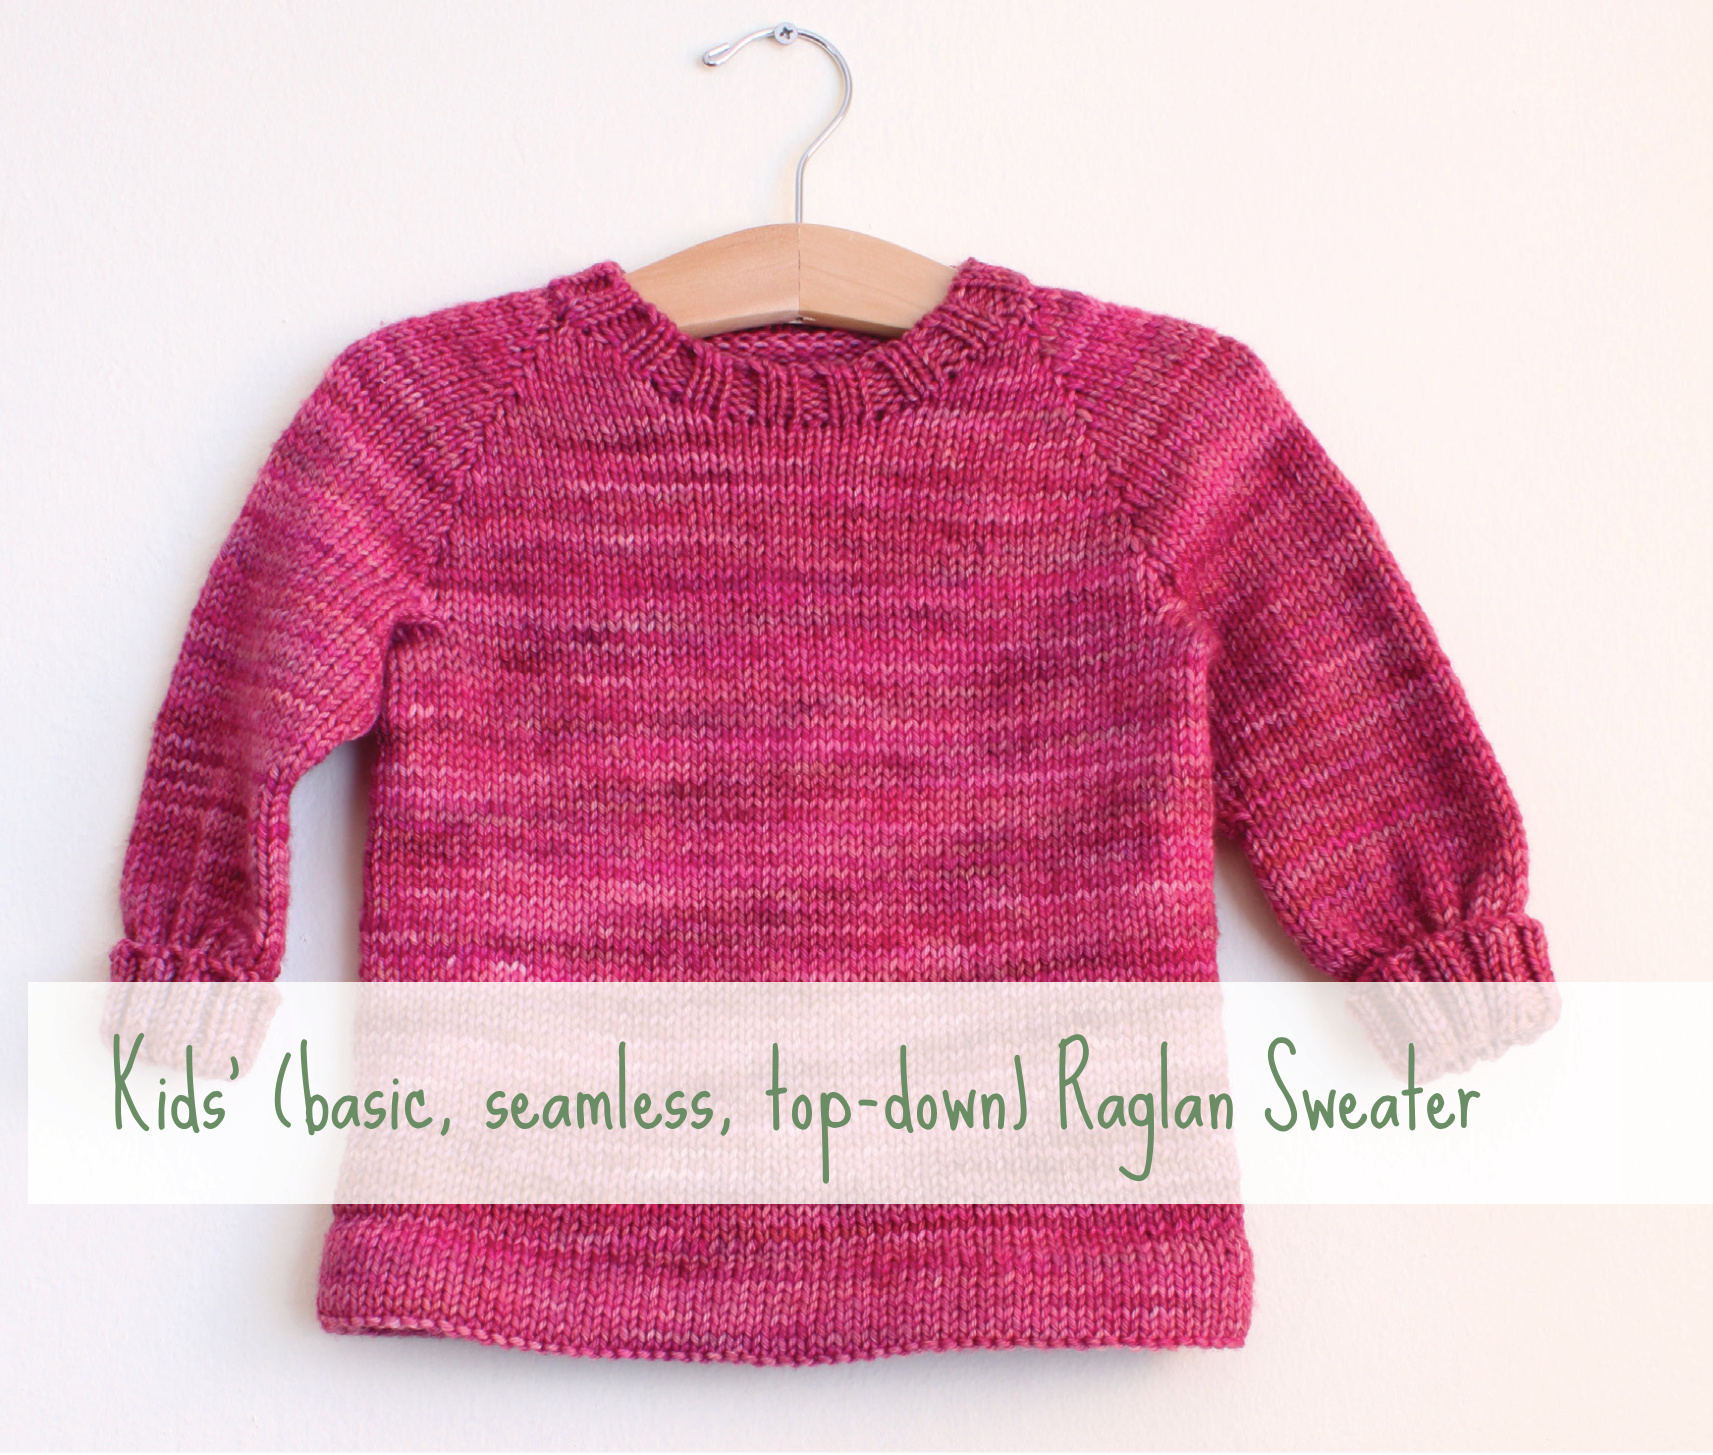
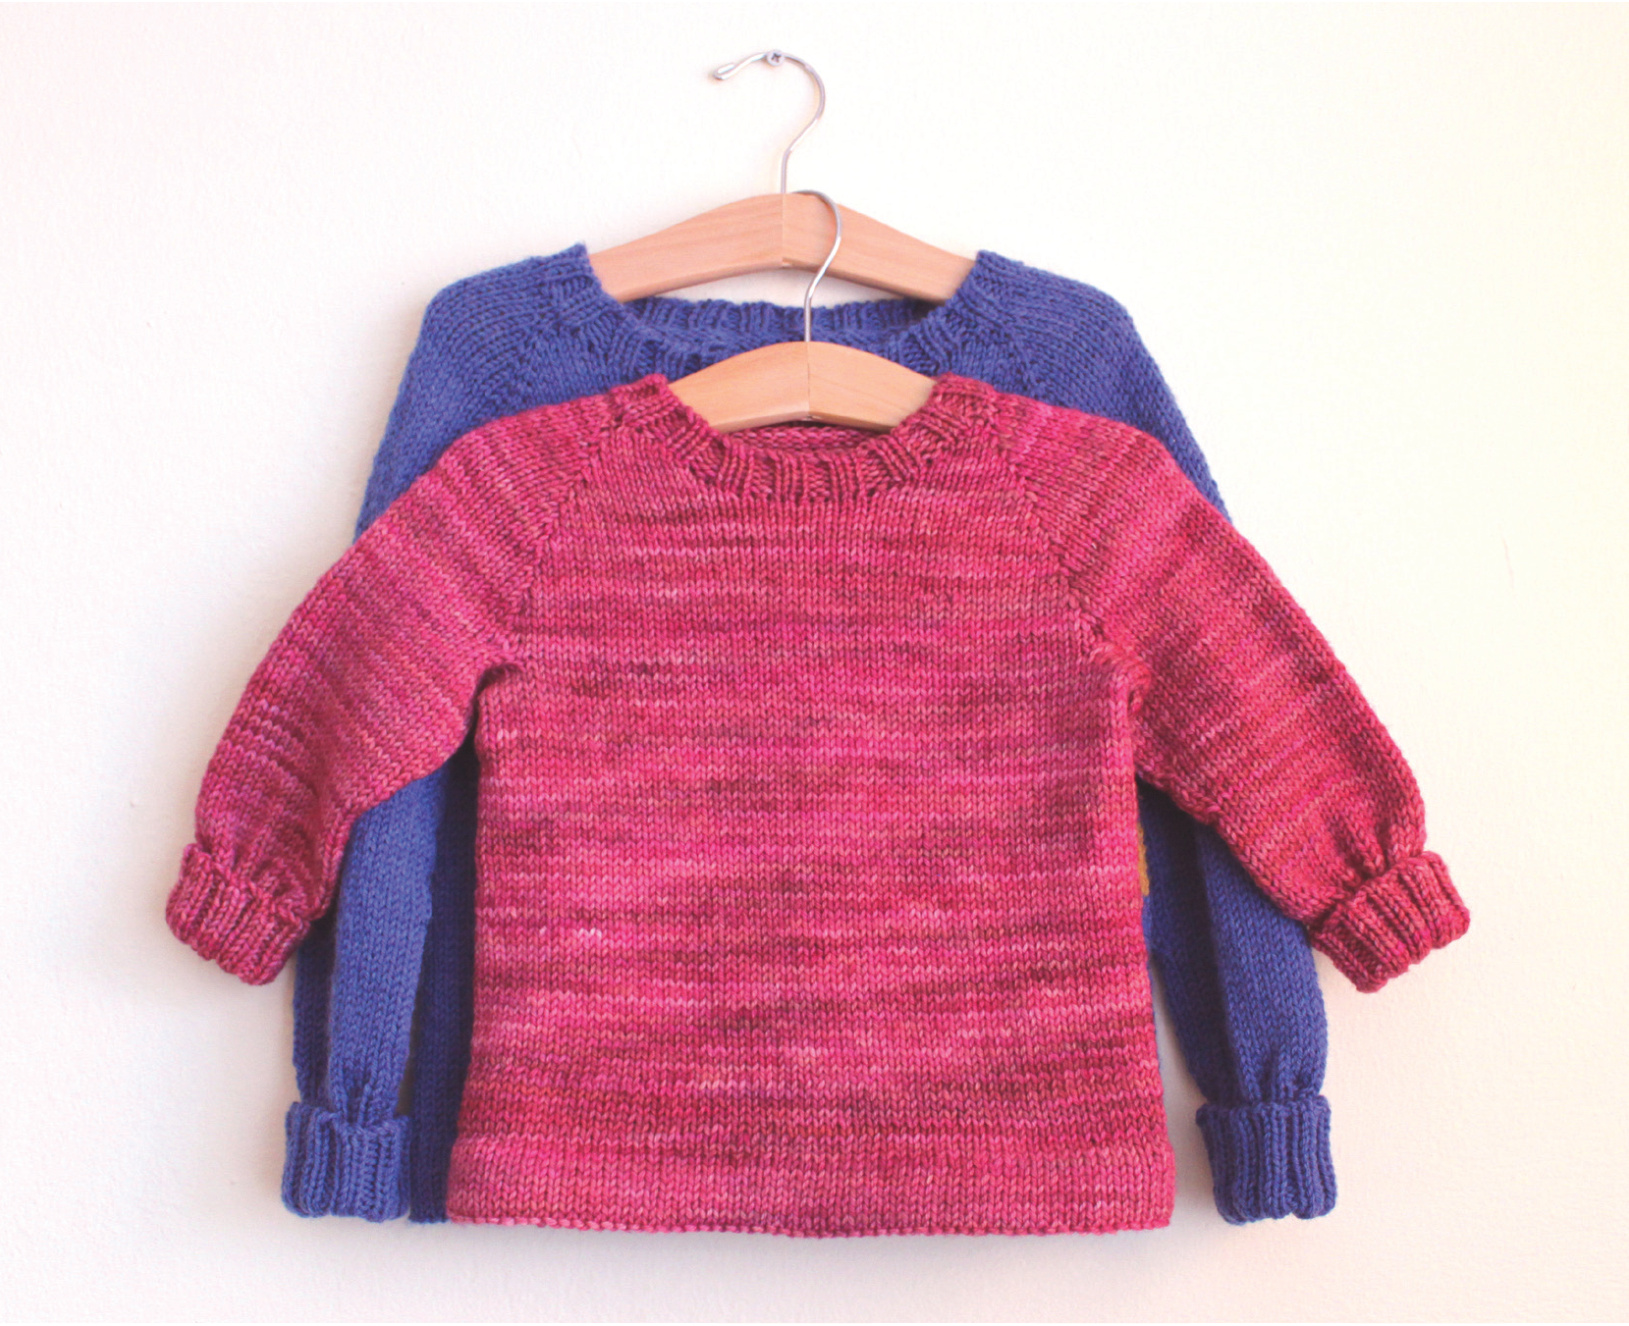
There are many patterns for basic raglan sweaters. Not all of them are top-down, and since I'm picky, none of them are written quite the way I like. I've designed this pattern to be easy to follow and easy to customize. I hope you like it too! This is a kids'sweater with ribbed neck and ribbed or straight hem and cuffs. The ribbed version of the cuffs is designed to fold so that you can adjust the sleeve length as the child grows. The fit is classic and comfortable. If possible, choose the size to knit not by the child's age but by his or her measurements. I strongly recommend knitting a good gauge swatch ("good"= at least 6 in. x6 in. and measured for gauge before and after blocking) to give your sweater the best chance of ftting your recipient. Also, remember to check your gauge as you knit along to make sure you haven't strayed. SIZES
| Size | 2 | 4 | 6 | 8 | 10 | years |
| Chest | 22 | 24 | 26 | 28 | 29 | in. |
| 56 | 61 | 66 | 71 | 74 | cm |
YARN
Samples were knitted in: Malabrigo Rios [100% superwash merino wool, plied 210 yards (192m), 18-22 sts = 4 in. /10 cm} Color: English Rose (shown in size 2) Cascade 220 Superwash {100% superwash merino wool, 100g (3.5oz) / 220yds (200m), 20-22 sts = 4 in. /10 cm} Color: 1951 Sapphire Heather (shown in size 6)
| 2 | 4 | 6 | 8 | 10 | years | |
| Yarn | Lion Brand Vanna's Choice Solid | 470 | 590 | 690 | 780 | yards |
| required | 370 | Color C: 1 skein (color shown is Rust) | Tapestry needle for weaving in ends | Crochet hook 10mm (US size N) | Color A: 3 skeins (color shown is Mustard) | meters |
@2015 Uurchin Knits
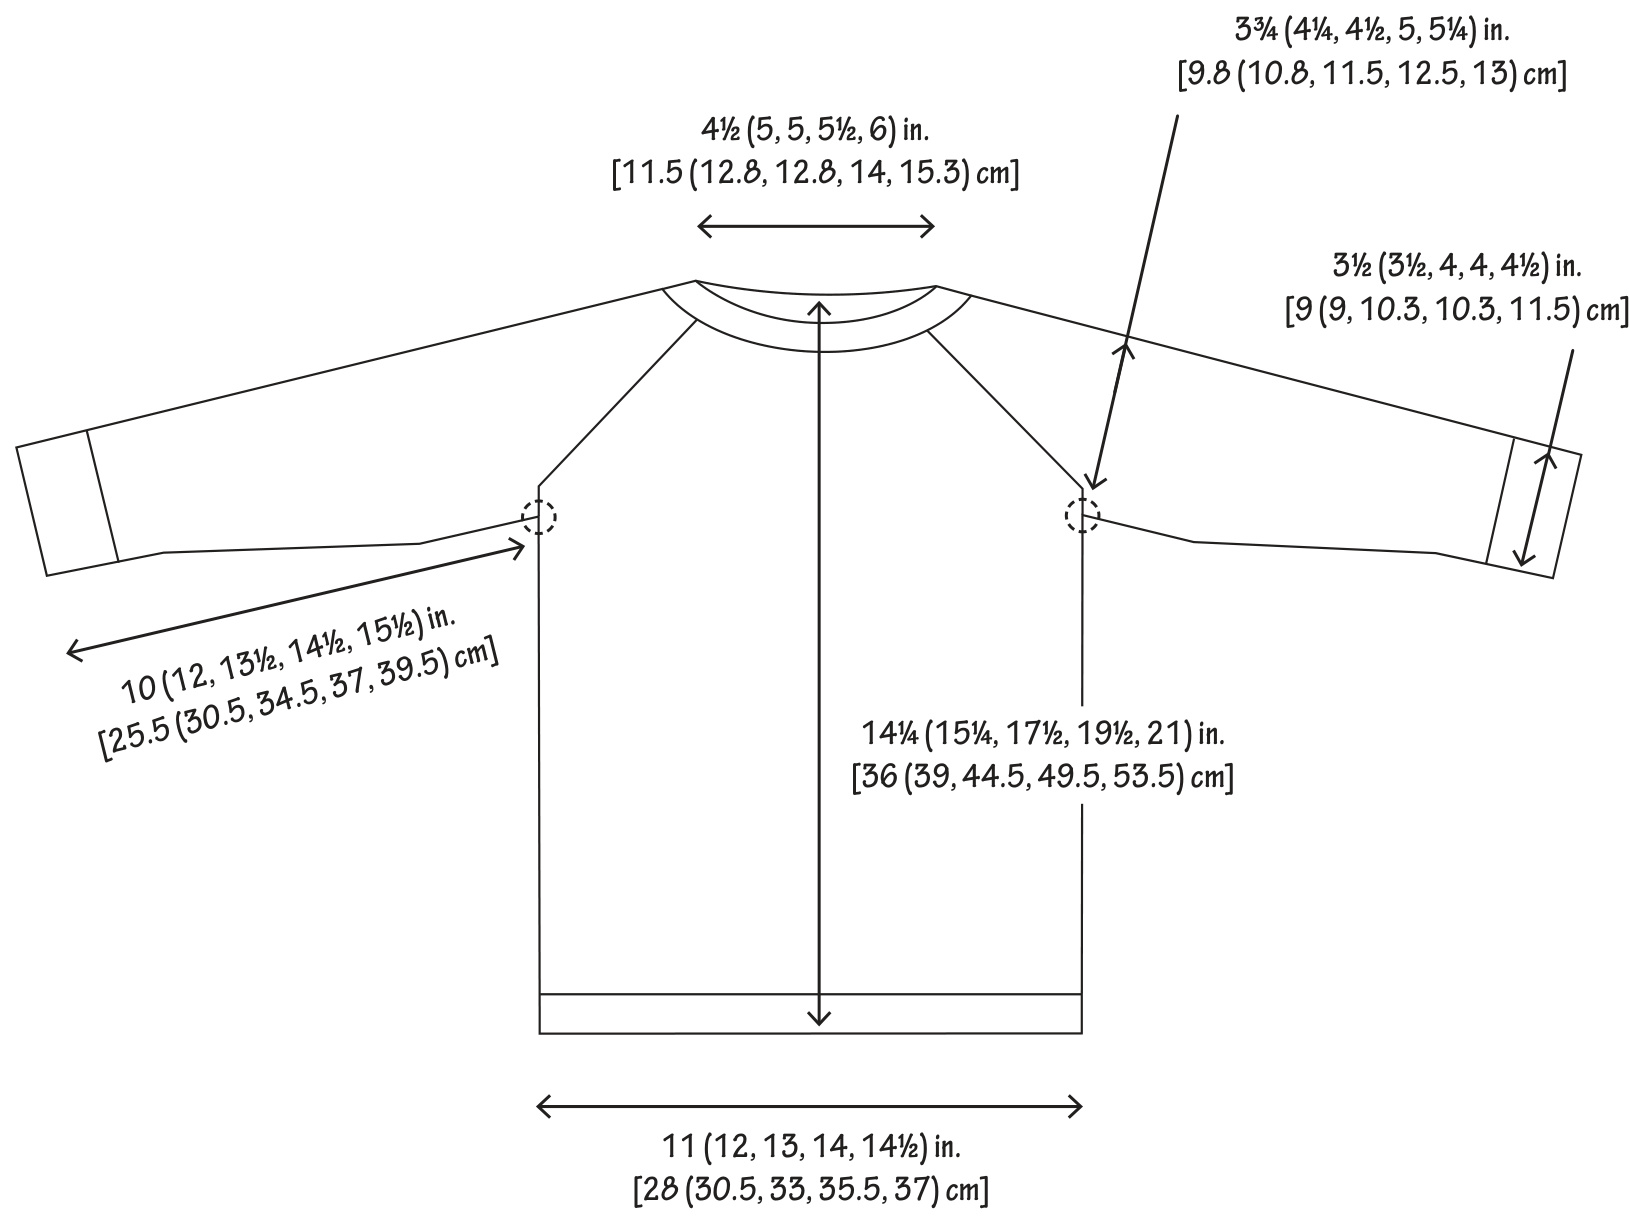
FINISHED DIMENSIONS
Sizes 2 (4, 6, 8, 10)
NEEDLES
Needle A US 6 16 in. (sizes 2, 4) or 24 in. (sizes 6, 8, 10) circular needle and/or set of double pointed needles, or size required to achieve gauge NeedleB 16 in. (sizes 2, 4) or 24 in. (sizes 6, 8, 10) circular needle and/or set of double pointed needles one size smaller than Needle A
NOTIONS
》Stitchmarkers 》 1 locking stitch marker or coil-less safety pin 》 Approximately 2 yards of smooth, non-felting waste yarn in a color contrasting with your MC 02015 Uurchin Knits
Get Set
GAUGE
20 sts = 4 in./ 10cm 28 rows/rounds = 4 in. / 10cm
ABBREVIATIONS
cm centimeters CO cast on dec('s) decrease(s) idi Invisible double increase: This lovely double increase shows up in Barbara Walker's book"Knitting from the Top" where she call it "Double Increase #4." It produces a very tight and almost invisible double increase. In this pattern you will have knitted to 1 st before a marker. This stitch is your increase stitch. Step 1: option A: Insert R needle downward into the back of the stitch below your increase stitch (downward into the purled head of the stitch below, coming at it from the wrong side) and knit it. -ORoption B: With R needle, pick up the R leg of the stitch below from the back side and place it onto L needle. Knit this loop. : back of the increase stitch itself and drop the stitch off the L needle. Slip marker if presen? Step 3: With L needle, pick up the L leg of the stitch below the increase stitch from back to front (the other leg of the same stitch below that you used in step 1), and knit into the back of this loop. A full raglan increase round using idi looks like this: \*k to 1 st before marker, idi, repeat from \* 3 times. in. inches inc('s) increase(s) K knit k2tog knit two together (right slanting decrease) kfb knit front and back increase L left P purl pfb purl front and back increase pm place marker R right rnd(s) round(s) sm slip marker SSK slip slip knit (left slanting decrease) st(s) stitch(es) @2015 Uurchin Knits
NECK BACK RISE
》Using Needle A, CO for working the neck back rise.
| CO | 50 | 50 | 58 | 60 | 60 sts | |
Setup row: Pfb, pm, p (R shoulder sts), pm, p (neck back sts), pm, p (L shoulder sts), pm, pf
| Rshoulder | 10 | 10 | 12 | 12 | 12 | sts |
| Neckback | 28 | |||||
| Lshoulder | 10 | 28 10 | 32 12 | 34 12 | 34 12 | sts sts |
A NOTE ABOUT INCREASES
There are many choices of increase that can be applied to the top-down raglan sweater. Some are invisible and some are decorative. Choose the inc method that suits your sweater's style. Just make sure that each marker receives 2 inc's per raglan inc rnd, and therefore that there are 8 sts inc'd per inc rnd. This pattern is written using the kfb inc. However, the sample sweaters are knitted using idi (see glossary) to show what it looks like. 》Row 1: Kfb, \*k to 1 st before marker, kfb, sm, kfb, repeat from \* 3 more times, kto last st, kfb. 司 Row 2: P, slipping markers. 》 Repeat rows 1 and 2 until the neck back rise is almost complete. 》 K row 1 once more.
| TotalrowssinceCO: | 8 | 8 | 10 | 10 | 10 | rows |
| St count: | 92 | 92 | 110 | 112 | 112 | total sts |
| Eachshoulder: | 18 | 18 | 22 | 22 | 22 | sts |
| Neckback: | 36 | 36 | 41 | 44 | 44 | sts |
| Eachsideofneckfront: | 10 | 10 | 12 | 12 | 12 | sts |
02015 Urchin Knits 》Continuing forward, CO sts for half of neck front, pm for new start of rnd, then CO sts to complete neck front.
| CO before marker: | 8 | 8 | 9 | 10 | 10 | sts |
| CO after marker: | 8 | 8 | 9 | 10 | 10 | sts |
》Join for knitting in the rnd, then K 1 rnd. 》Begin with an inc rnd. Perform an inc rnd every 3 rnds. Continue until you have reached your final yoke st count 》 Continue knitting straight until you have reached your shoulder height.
| Number ofinc rnds altogether: Totalrndsfromneckfront: | 6 | 7 | 7 | 8 | 9 | inc rnds |
| 18 | 21 | 21 | 24 | 27 | rndstotal | |
| Stcounttotal: | 156 | 164 | 184 | 196 | 204 | sts |
| Eachfrontandbacksection: | 48 | 50 | 56 | 60 | 62 | sts |
| Eachsleevesection: | 30 | 32 | 36 | 38 | 40 | sts |
| Straight knitting distance: | 1 (2.5) | 1 (2.5) | 1 (2.5) | 1 (2.5) | .75 (2) | in. (cm) |
| Yoke heightfrom neckfront: | 3.75 (9.5) | 4.25 (10.8) | 4.25 (10.8) | 4.5 (11.5) | 4.75 (12) | in. (cm) |
SLEEVE SEPARATION
Remove start-of-rnd marker. ront of L sleeve) and place the L sleeve sts on a length of waste yarn. (See st count above.) 》Remove the next marker (back of L sleeve) and K across the back. :r (back of R sleeve) and place the R sleeve sts on a length of waste yarn (see st count abov 02015 Uurchin Knits
| 7 | 4 | 9 | 8 | 10 |
》 CO half the sts for the R underarm, pm, then CO the rest of the underarm sts. This will be your new start-of-rnd marker.
| R underarm, CO before marker: | 4 | 5 | 5 | 5 | 5 | sts |
| R underarm,CO aftermarker: | 4 | 5 | 5 | 5 | 5 | sts |
》 Remove the next marker (front of R sleeve) and begin knitting the body.
| St count: | 112 | 120 | 132 | 140 | 144 | sts |
》K until you've reached the start of the hem. 》 Change to Needle B. Make sure your st count is a multiple of 4. If needed, make st count adjustments (inc's or dec's) in the first rnd of the hem. 》 Work in 2x2 ribbing until you've reached the final sweater length (before collar)
| Body length from NECK BACK: | 13.5 (34.3) | 14.5 (37) | 16.5 (42) | 18.5 (47) | 20 (51) | in. (cm) |
》Bind off using a stretchy bind off. My favorite for 2x2 ribbing is the 2x2 invisible ribbed bind-off , but any very stretchy bind off will do. BOTTOM HEM OPTION 2: SMOOTH 》Thread a tapestry needle with smooth, non-felting, contrast color waste yarn that can reach 1.5x around the body. Run the yarn through all the stitches while keeping them on the needle. This yarn will serve as a visual guide for sewing the hemdown later. 》 Continue knitting in the rnd until you've reached the final sweater length (before collar)
| Body length from NECK BACK: | 13.5 (34.3) | 14.5 (37) | 16.5 (42) | 18.5 (47) | 20 (51) | in. (cm) |
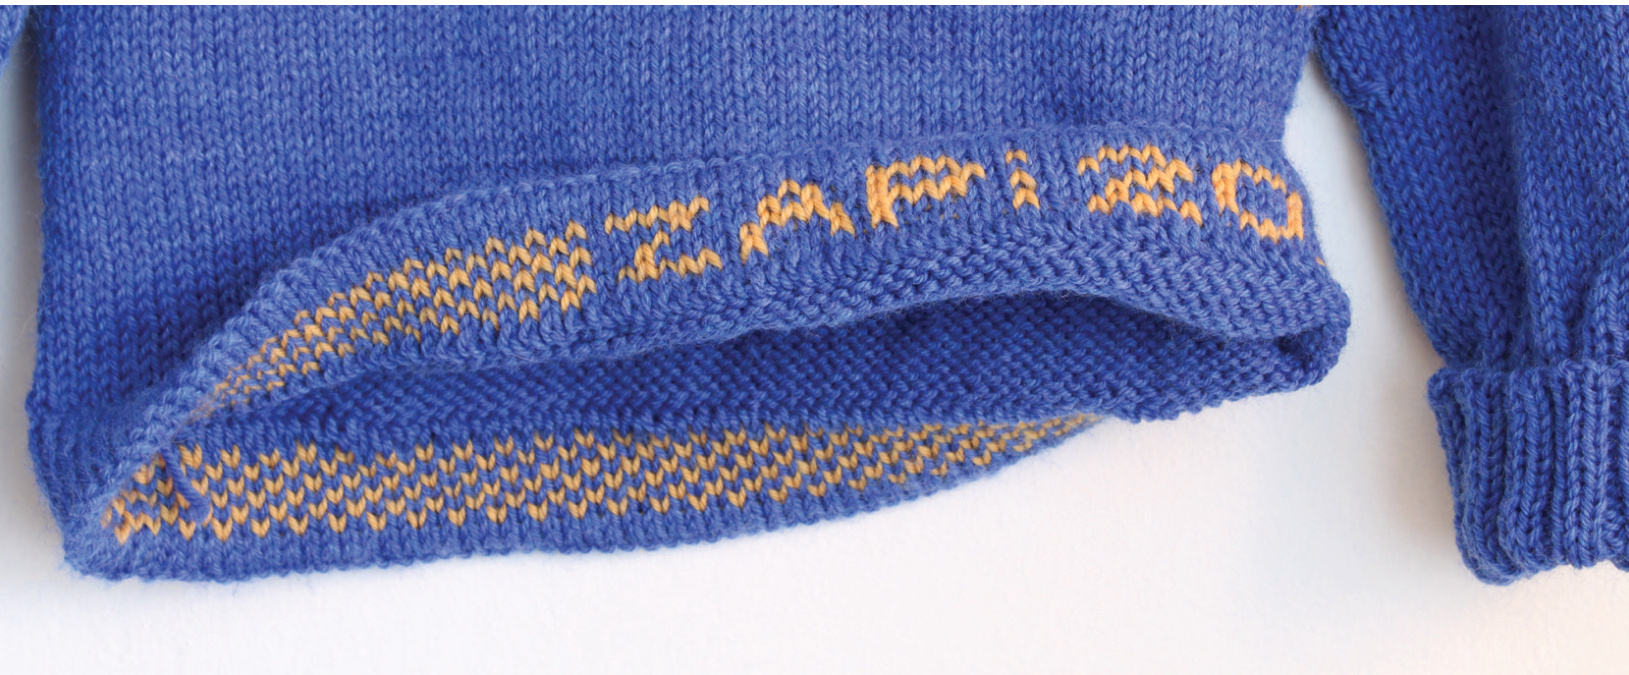
》 P1 rnd. ontinue knitting in the rnd for the same distance as between your waste yarn and your P rr This inside hem is a good place, if you are so inclined, to work in your lucky recipient's name, your name, the date, a message, or anything else that's meant only for the wearer to see. 》Break yarn, leaving a tail equal to approximately 3x around your sweater body. 》 Using a tapestry needle, sew down the hem to the inside of the sweater using a LoosE whip stitch, folding at the P rnd. Use the contrast colored yarn you installed earlier as a visual reference. (Sewing, rather than binding off to the inside of the sweater, will preserve stretchiness and minimize bulk.) Once you are finished you can remove the wasteyarn. ?2015 Urchin Knits
》Place sts from one of the sleeves back onto Needle A. At the underarm and with the working yarn, pick up and K sts from the body to join in the sleeve underarm. Leave a long tail with the working yarn for closing up the holes that will form at the front and back of the underarm.
| Sts to pick up at underarm: | 8 | 10 | 10 | 10 | 10 | sts |
| St count: | 38 | 42 | 46 | 48 | 50 | sts |
>Place a non-moving st marker (such as a coil-less safety pin) into one of the underarm sts to mark the underarm join. leeve once until you return back to the center of the underarm. Pm to mark the start of rn! 》 K in the rnd without dec'ing before beginning to taper the sleeve. 》 Continue knitting in the rnd until you reach the beginning of the cuff
SLEEVE CUFF OPTION 1: RIBBED
》 Change to Needle B. Make sure your st count is a multiple of 4. If needed, make st count adjustments (inc's or dec's) in the first rnd of the cuff. 》 K in 2x2 rib until you've reached twice the length of the finished cuff
| DistancetoKin2x2: | 3 (7.5) | 3 (7.5) | 4 (10.3) | 4 (10.3) | 4 (10.3) | in. (cm) |
》Bind off using a stretchy bind off. My favorite for 2x2 ribbing is the 2x2 invisible ribbed bind-off , but any very stretchy bind off will do SLEEVE CUFF OPTION 2: SMOOTH 》Thread a tapestry needle with smooth, non-felting, contrast color waste yarn that can reach 1.5x around the cuff. Run the yarn through allthe stitches while keeping them on the needle. This yarn will serve as a visual guide for sewing the hem down later. > Continue knitting in the rnd until you've reached the wrist.
| Sleeve length from underarm join: | 9.5 (24) | 10.5 (26.7) | 11.5 (29.2) | 12.5 (31.8) | 13.5 (34.3) | in.(cm) |
》 P1 rnd. > Change to Needle B. Continue knitting in the rnd for the same distance as between your waste yarn and your P rnd. 》Break yarn, leaving a tail equal to approximately 3x around your sleeve cuff. 》 Using a tapestry needle, sew down the hem to the inside of the cuff using a LOosE whip stitch, folding at the P rnd. Use the contrast colored yarn you installed earlier as a visual reference. Once you are finished you can remove the wasteyarn.
SECOND SLEEVE
》 Complete this sleeve as you did the first one.
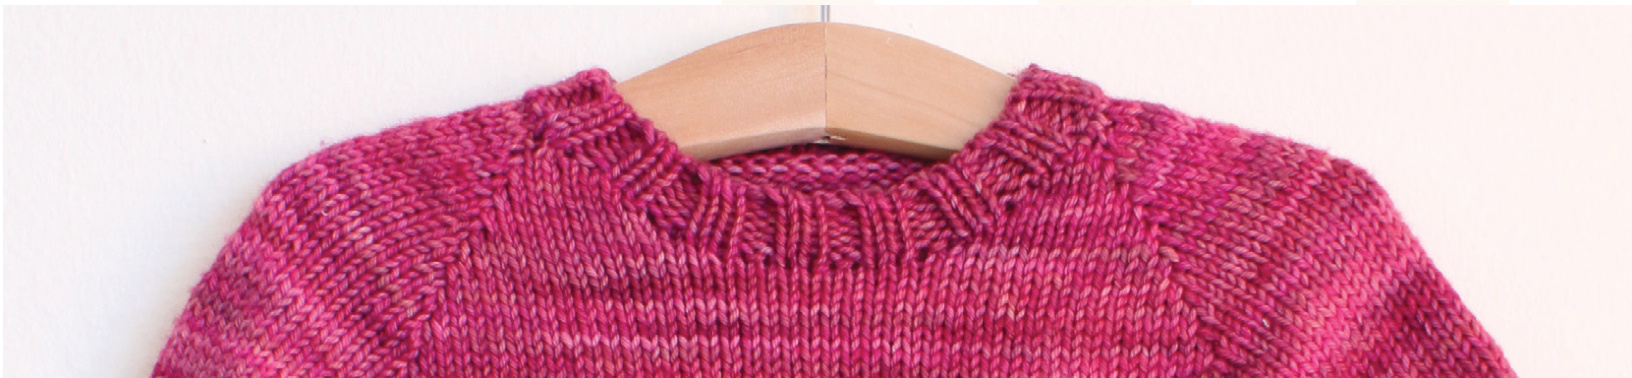
@2015 Uurchin Knits COLLAR 》 Change to Needle B, and begin at the back of the L shoulder. Pick up and K sts around the neck like this:
| Pick up across L shoulder: | 10 | 10 | 12 | 12 | 12 | |
| sts | ||||||
| Pick up across front L diagonal: | 6 | 6 | 8 | 8 | 8 | sts |
| Pick up across front straight section: | 16 | 16 | 18 | 20 | 20 | sts |
| Pick up across front R diagonal: | 6 | 6 | 8 | 8 | 8 | sts |
| Pickup acrossRshoulder: | 10 | 10 | 12 | 12 | 12 | sts |
| Pick up across neck back: | 28 | 28 | 34 | 36 | 36 | sts |
| Total sts picked up: | 76 | 76 | 92 | 96 | 96 | sts |
| 7 | 9 | 8 | 10 |
If you have a different size collar than this, count your stitches. You need to have a multiple of 4 stitches.If you do not have a multiple of 4, make any adjustments (inc's or dec's) as you work your first rnd. Try to distribute your dec's or inc's evenly around the collar and/or locate them at the raglan"corners" 》 Join to work in the rnd and begin working in 2x2 ribbing. >Work until you've reached the finished collar height 》Bind off using a stretchy bind off. My favorite for 2x2 ribbing is the 2x2 invisible ribbed bind-off2, but any very stretchy bind off will do.
FINISHING
》If you have holes at the front and back of the underarm joins, go back and use yarn tails or extra lengths of yarn to closetheseup. 》 Weave in ends but do not snip yet. 》Wet block. After you are satisfied with fit and finish, snip all ends and enjoy! 1. Walker, Barbara G. Knitting from the Top. Pittsville: Schoolhouse Press, 1996. Print. 2. KnitFreedom with Liat Gat."2x2 Invisible Ribbed Bind-Off" Online video clip. YouTube. YouTube, 21 Sept. 2011. Web. 25 Mar. 2015. https://www.youtube.com/watch?v=9UBE-CuHXYM Written pattern and photos @ 2015 Urchin Knits. This pattern is for personal, noncommercial use only and shall not be monetized in any way, ever. If you have any questions or feedback about the pattern, please feel free to send them by email to knit@urchinknits.com, or through Ravelry to username urchinknitter.


