Herbstinspirationen -Tuch (engl.) (von babs12351)
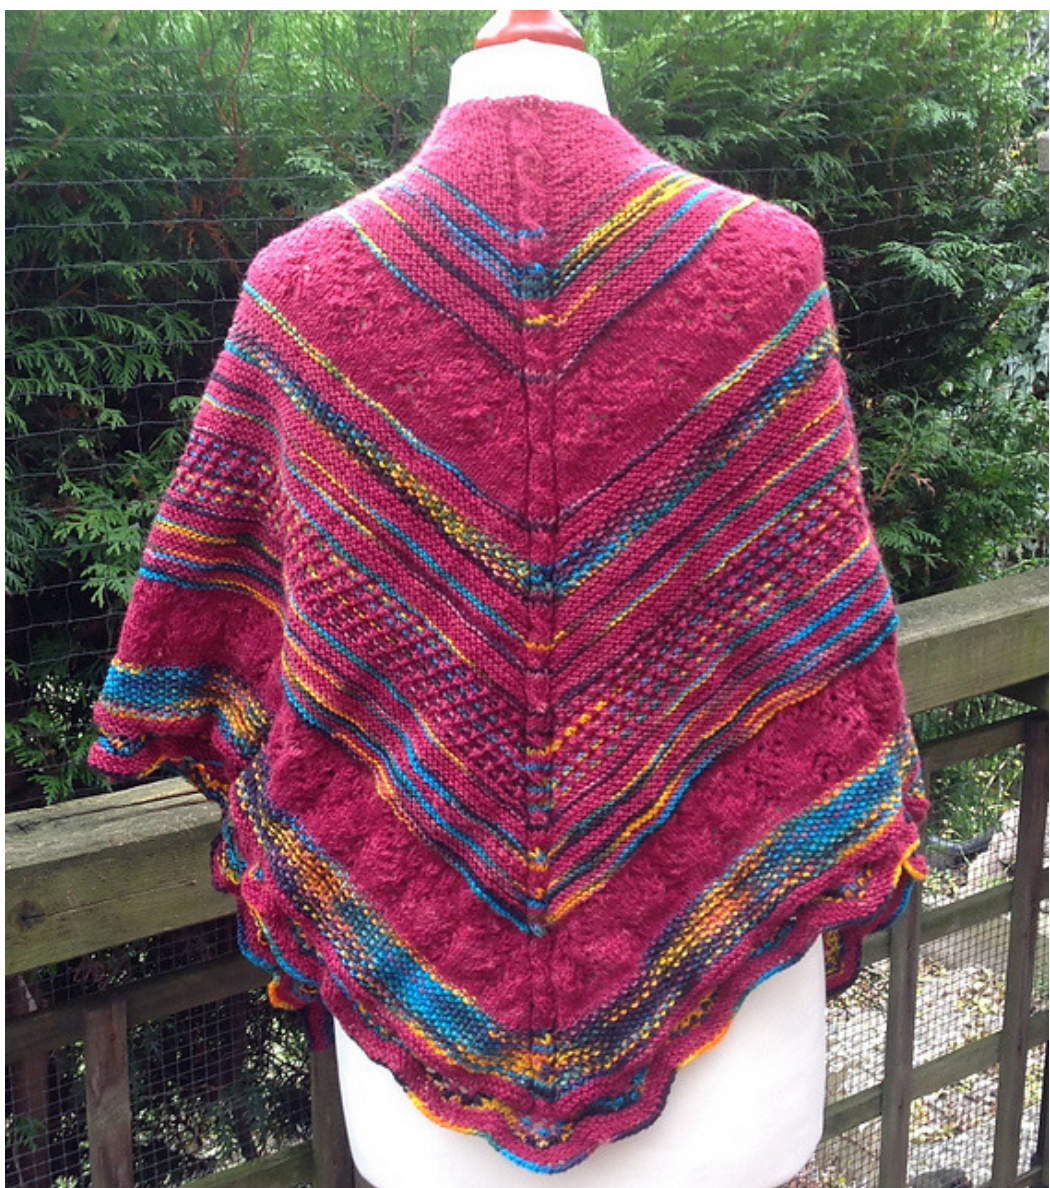
,A nice and warm Shawl for cold days?"
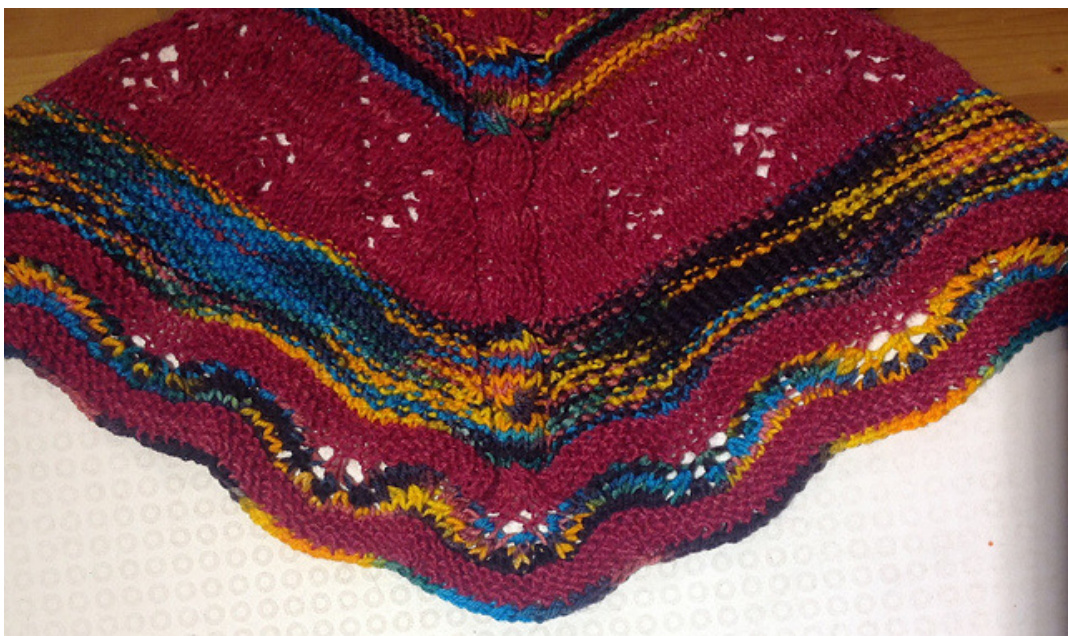
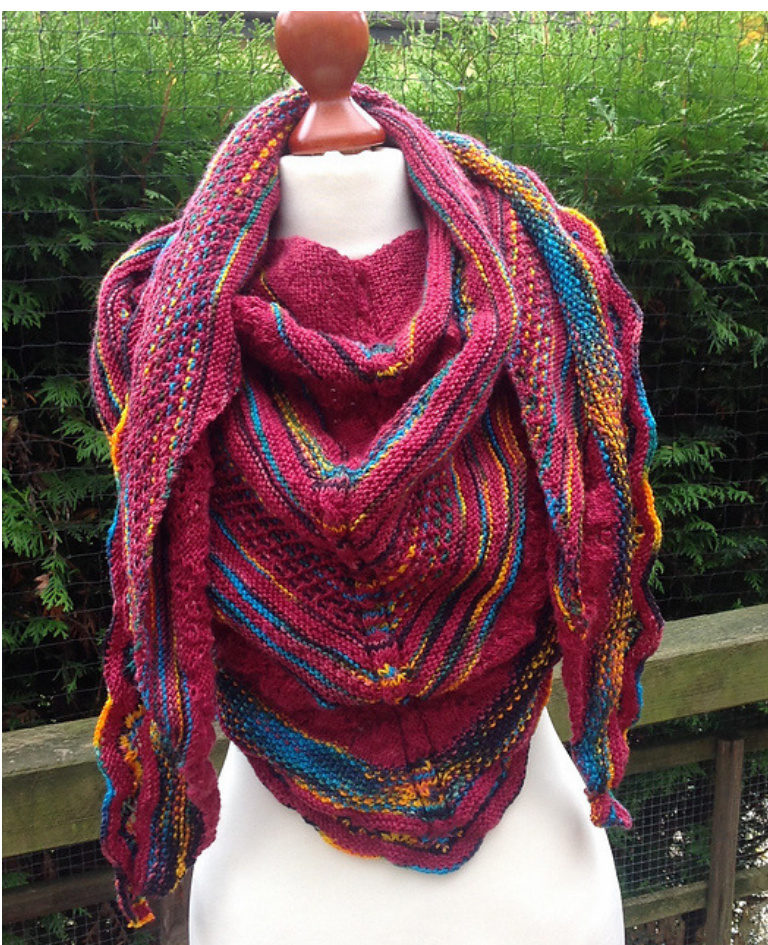
The shawl has a wide wingspan, so you could wear it like a stole or wrap it around your neck. Mostly worked in garter stitch, with a seed stitch pattern, a Lace pattern, a slipped stitch pattern and a Wave boarder.
Materials:
Needle size 3,5 - 4,0 mm crochet hook in Needle size 80 - 150 cm long Circular needles 2 stitch marker or more Row counter (essential!) and / or paper and pen 1 Tapestry needle 1 cable needle
Yarn:
Yardage complete approx. 1350 - 1500 m In example used: Colour A- approx. 820 m (approx. 200g) Uni - coloured, hand dyed Sock yarn from SuperGarne Aktiv 17/4 Colour B - approx. 560 m (approx. 200g) Colour gradient - hand dyed Sock yarn from Zitron - Lifestyle You could use every yarn that you like, from lace over Sock yarn to bulky yarns! But keep in mind, that the finished size and the yardage needed may vary highly, depending on the yarn and needlesizeused!
Finished Measurements:
In example used Needle size 3,5 mm Size for unblocked shawl: span length at shoulder line approx. 220 cm height from peak to middle of shoulder line (along the centre cable) approx. 62 cm
Cast on:
cast on 12 stitches with crochet hook in colour A k all 12 stitches (12 sts.)
Notes:
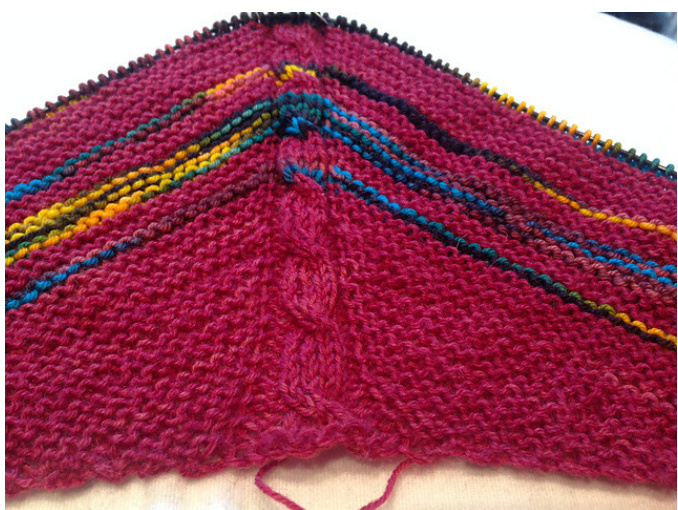
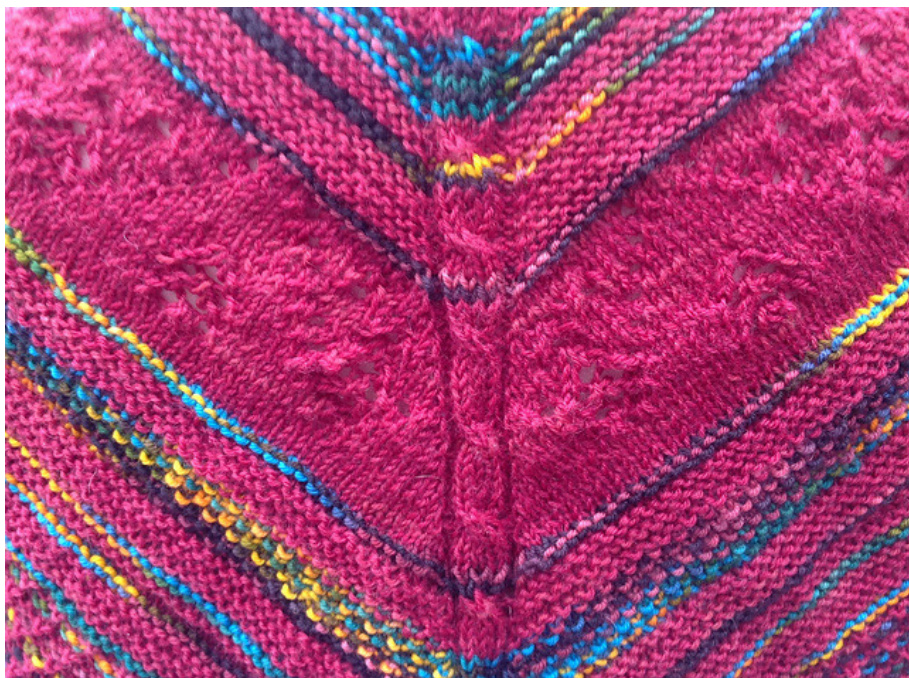
instead of one middle stitch, the shawl has a centre cable, it means you have 8 middle stitches These 8 stitches are worked as follows - in the right side rows (RS): p2 - k4 - p2; in the wrong side rows (WS): k2 - p4 - k2; they are “cabled" in the following rows (R): R 5, 13,21, 29, 37, 45, 53, 61, 69, 77, 85, 93, 101, 109, 117, 125, 133, 141, 149, 157, 165, 173, 181, 189,197,205, Important: the centre cable is continually worked through all chapters of the pattern; for that the "Chart 2" (for the cable) needs to be continually inserted between the separate pattern Charts (between the YELLOW lines). Please be aware that in the Cable Chart (chart 2) the wrong side rows (the even row numbers) are shown and the Charts for the Lace pattern (Chart 3a and 3b) shows only the right side rows (the uneven row numbers) also keep in mind, that the Chart don't start always with Row 1, it means if the cable is at Row 5 by the end of one chapter, continue at the beginning of the next chapter with Row 6 and not with Row 1 Colour changes only graphically declared in the Chart for the slip stitch pattern Before every Chart is a declaration in witch row the colour changes, how many stitches should be on the needles at the end of a wrong side row by the end of a block of rows, how often and in witch row the cable is “crossed" in a block of rows For example: A R. 1- 28 (96 M) 3 x cabling R. 5, 13, 21 it means: colour ,A" Rows 1- 28 96 stitches on the needles the cable are worked 3 times in the block of rows, in the following rows: R 5, 13 and 21
Garter stitch in colour A and B (Chart 1 and 2):
A-R.1-28 ( 96 M) 3 x cabling R. 5, 13, 21 B-R.29-30 (102 M) 1 x cabling R. 29 A-R.31-34 ( 114 M) B-R.35-40 (132 M) 1 x cabling R.37 A-R.41 - 44 ( 144 M) 1x cabling R.45 B-R.45-46 ( 150 M) 1x cabling A-R.47-54 ( 174 M) 1 x cabling R.53 B-R.55-56 (180 M) Note: insert chart 2 “logically" between the Yellow lines!
Chart 1:
Borders
Stitches Keine Masche (Platzhalter)/No stitch (place holder) re / k li / p kfb QF reR/mlkR QF re L/M1kL Pattern repeat - ( repeat these Rows) repeat these stitches as often as needed positionformarker connect Charts at this line
Chart 2 (Center cable):
Borders
Pattern repeat - ( repeat these Rows) connect Charts at this line
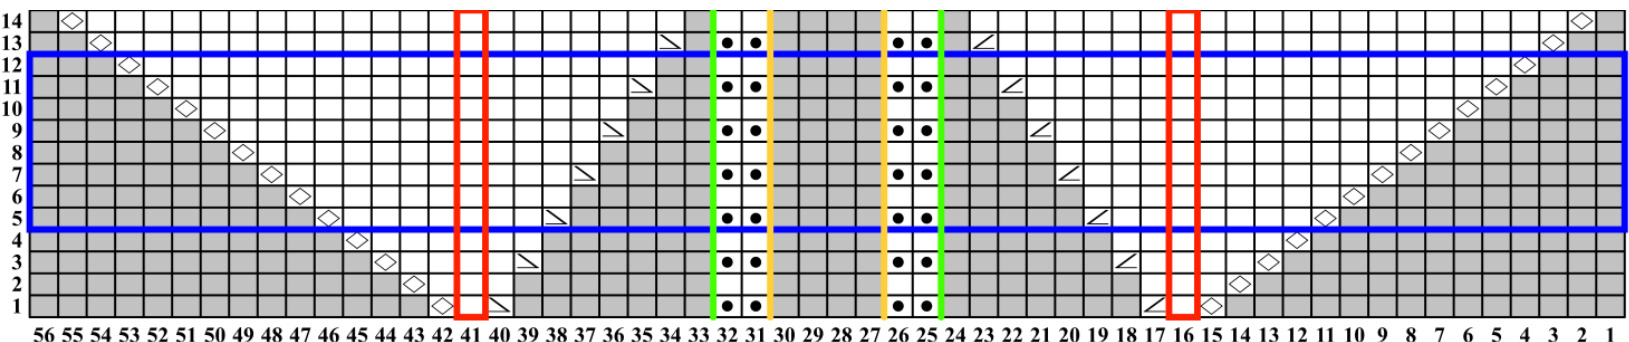
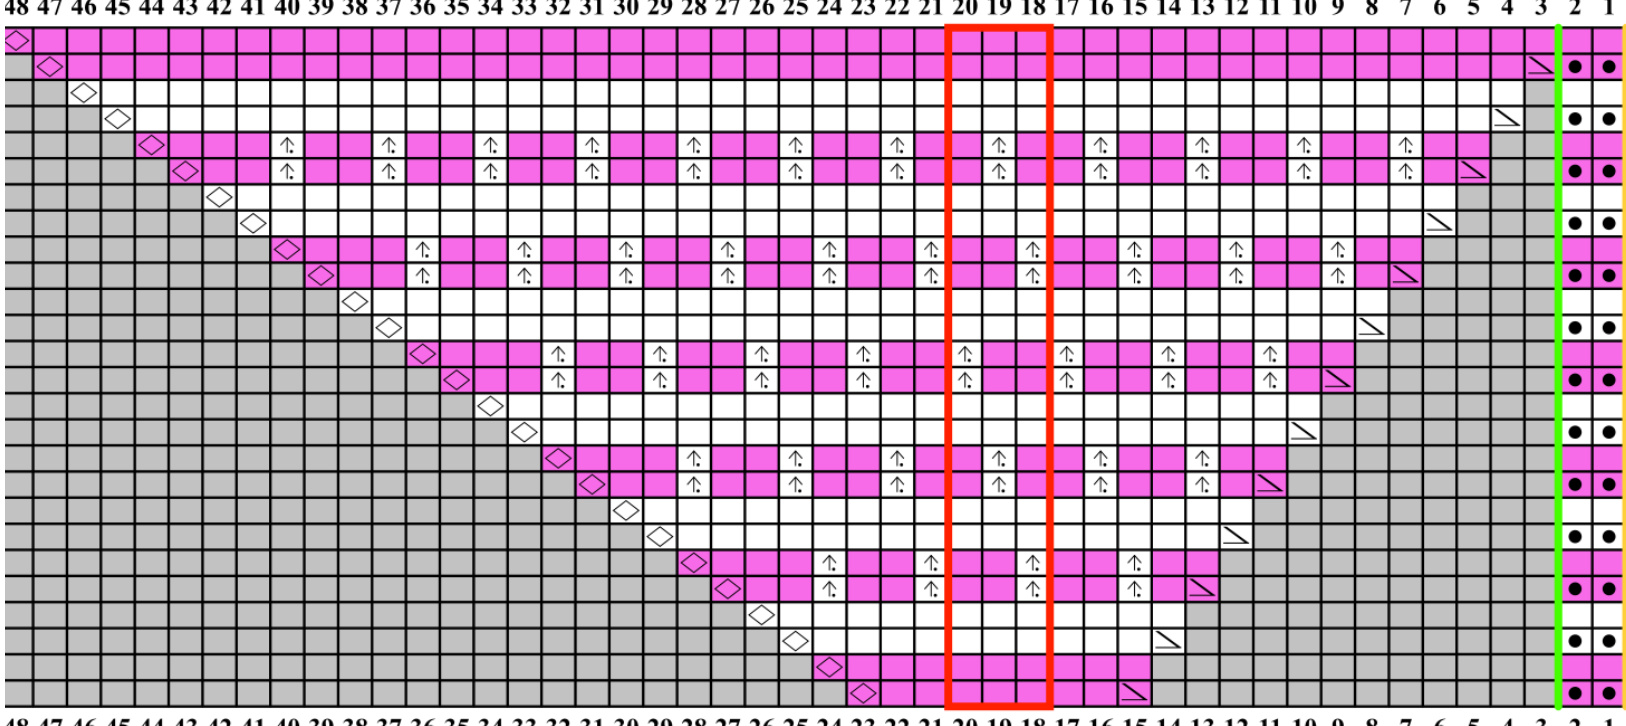
Lace pattern Chart in colour A (Charts 3 a / 2 / 3b):
A-R. 57- 78 (246 M) 3 x cabling R. 61, 69, 77 Note: insert chart 2 “logically" between the Yellow lines! Please be aware that in the Cable Chart (chart 2) the wrong side rows (the even row numbers) are shown and the Charts for the Lace pattern (Chart 3a and 3b) shows only the right side rows (the uneven row numbers)
Right side of the shawl (Chart 3a):
Left side of the shawl(Chart 3b):
Garter stitch in colour A and B (Chart 1 and 2):
B -R.79 -82 ( 258 M) A-R.83-88 ( 276 M) 1 x cabling R.85 Note: insert chart 2 “logically" between the Yellow lines!
Seed stitch pattern in colour B (Chart 4 and 2):
B -R.89- 96 ( 300 M) 1 x cabling R.93 Note: insert chart 2 “logically" between the Yellow lines!
Seed stitch pattern Chart 4:

Stitches Keine Masche (Platzhalter)/No stitch (place holder) re /k li / p kfb QF re R /m1kR QF re L/M1kL
Borders
Pattern repeat - ( repeat these Rows) repeat these stitches as often as needed positionfor marker connectCharts at thisline
Garter stitch in colour A and B (Chart 1 and 2):
?2015Barbara Dahnke! Plaace reenert mv rnnvriahtl Tha nattarn ic for vour nrivate 1ee A-R.97-102 ( 318 M) 1 x cabling R.101 B -R. 103 -104 ( 324 M) A-R.105-108 ( 336 M) B-R.109 -110 ( 342 M) 1 x cabling R.109 A-R.111 -116 ( 360 M) Note: insert chart 2 “logically" between the Yellow lines!
Slipped stitch pattern in colour A and B (Charts 5a / 2 / 5b):
| B -R.117-118 | (366 M) | 1 x cabling | R.117 | ||
| A -R. 119 -120 | (372 M) | ||||
| B -R. 121 - 122 | (378 M) | ||||
| A -R. 123 -124 | (384 M) | ||||
| B -R. 125 - 126 | (390 M) | 1 x cabling | R.125 | ||
| A -R. 127 -128 | (396 M) | ||||
| B -R. 129 -130 | 402 M) | ||||
| A -R. 131 -132 | 408 M) | ||||
| B -R.133 - 134 | 414 M) | 1 x cabling | R.133 | ||
| A -R. 135 -136 | 420 M) | ||||
| B -R. 137 -138 | 426 M) | ||||
| A -R. 139 -140 | 432 M) | 1 x cabling | |||
| B -R. 141 -142 | (438 M) | R.141 |
Note: insert chart 2 “logically" between the Yellow lines!
Slipped stitch pattern Chart 5 a right side:


Garter stitch in colour A and B (Chart 1 and 2):
A-R. 143 -146 ( 450 M) B -R.147 -150 ( 462 M) 1 x cabling R.149 A-R.151-154 ( 474 M) B-R.155-158 ( 486 M) 1 x cabling R.157 A-R.159 -160 ( 492 M) B -R.161 -164 ( 504 M) Note: insert chart 2 “logically" between the Yellow lines!
Lace pattern Chart in colour A ( Charts 3 a / 2 / 3 b):
A-R.165-186 ( 570 M) 3 x cabling R.165, 173, 181 Note: insert chart 2 “logically" between the Yellow lines! Please be aware that in the Cable Chart (chart 2) the wrong side rows (the even row numbers) are shown and the Charts for the Lace pattern (Chart 3a and 3b) shows only the right side rows (the uneven row numbers)
Seed stitch pattern Chart in colour B (Charts 4 and 2):
-R.187-202 ( 618 M) 2 x cabling R.189 Note: insert chart 2 “logically" between the Yellow lines!
Garter stitch in colour A (Charts 6 and 2):
To set up for the wave Boarder, in the middle of the last wrong side row of this chart a KFB is worked, so the wave pattern is fully centered over the middle of the peak of the shawl. A-R.203-208 (636 M) 1 x cabling R.205 Note: insert chart 2 “logically" between the Yellow lines!
Chart 6:

Stitches Keine Masche (Platzhalter)/No stitch (place holder) re /k li / p kfb QF re R / m1kR QF re L/M1kL
Borders
connect Charts at this line position for marker repeat these stitches as often as needed
Wave boarder Chart in colour A and B (Chart 7):
?2015Barbara Dahnke! Plaacaracnertmvcnnvriahtl Thanattarniefnrvnurnrivatalco
From now are no more increases will be worked at the sides and the cable in the middle of the shawl arefinished
B -R.209 -214 A-R.215-218 B -R. 219 - Bind of with crochet hook
| 8 | |||||||||||
| connect Charts at this line position for marker | |||||||||||
| Borders | |||||||||||
| KeineMasche(Platzhalter)/Nostitch(placeholder) | |||||||||||
| Stitches 2 | |||||||||||
017/ HV'snz
The Finish:
Wave in all ends, but don't cut them too short. Now a relaxing bath in warm water (best over night) is required. Next morning carefully squeeze out the water and lay flat out to dry and only pick it a little bit in shape.
The shawl should not be blocked!
When the shawl is fully dried, carefully cut the rest of the ends! Now it is ready to wear!
Happy knitting!
Dear knitter, because I don't speak English, my daughter (cdknuddel) is translating for me. Her English is out of school and also not very good, she is trying her best to translate my German patterns for the English speaking community on Ravelry. If you find any errors, or if you have any questions about the pattern, or if something is not understandable, please contact me or her over PM on Ravelry (my user name is babs12351 and my daughter is cdknuddel) so that we could learn and correct theerrors!
Stitch Glossary
Masche abheben wie zum links stricken mit Faden hinten / slip stitch as if to purl with yarn in back. Keine Masche (Platzhalter)/No stitch (place holder) Kein Stich nur Platzhalter / This stitch is ignored.
kfb
Nachste Masche rechts und rechts verschrankt abstricken. (1 M Zun.) / knit next stitch through front loop and back loop (1 stitch increased).
kfbf
Nachste Masche rechts - rechts verschrankt und noch einmal rechts abstricken ( 2 M Zun.) / knit next stitch through front loop - back loop and front again ( 2 stitches incr.). li / p Linke Masche / purl.
QF re L / M1kL
Links geneigte rechte Masche zunehmen / left lanted knited stitch increase --> Querfaden zwischen den Maschen mit der li Nadel von vorne aufnehmen und rechts verschrankt abstricken ( 1 M zun. ) / From the Front, lift the horizontal strand between 2 stitches with the left needle. Knit trough the back loop. ( 1st incr.).
QF re R / m1kR
Rechts geneigte rechte Masche zunehmen / right slanted knitted stitch increased --> Querfaden zwischen den Maschen mit der li Nadel von hinten aufnehmen und rechts abstricken ( 1 M zun. ) / From the back, lift the horizontal strand between 2 stitches with the left needle. Knit trough the front loop. ( 1st incr.). re / k Rechte Masche / knit. U/YO Umschlag / Yarn over.
1F1L/1sclch
Abhakeln: 1 Feste Masche und 1 Luftmasche in eine Masche / Bind of with Crochet Hook: 1 single crochet and 1 chain stitch ir Onestitch.
2MV re /
2 Maschen auf Zopfn. vor die Arbeit, 2 M. re und dann die Maschen von der Zopfn. re abstricken./ slip next 2 st to CN in front of work, k next 2 st., k 2 st. from CN.
2M re zus. / k2tog
2 Maschen rechts zusammenstricken ( 1 Abn.) / knit next 2 stitches together ( 1 decr.). 2MUZzus. / skpass 1 M. abheben wie zum rechts stricken - 1 M re stricken - abgehobene Masche druiberziehen / slip next stitch knitwise - knit 2nd. stitch - pass slipped stitch over. 2 zus. AH / C 2 tog. 2 Maschen zusammen abhakeln / crochet 2 stitches together.
3M UZ/ sk2togpass
1 Masche wie zum rechts stricken abheben - 2 M re zus stricken - abgehobene Masche Uberziehen ( 2 M Abnahme) / slip first stitcht knitwise - knit next 2 stitchess together - pass slipped stitch over. (2 sts decrease). 4 zus. AH / C 4 tog. 4 Maschen zusammen abhakeln / crochet 4 stitches together


