Night Sky Shawl
Double moss stitch shawl with loads of beads and fake fur trim
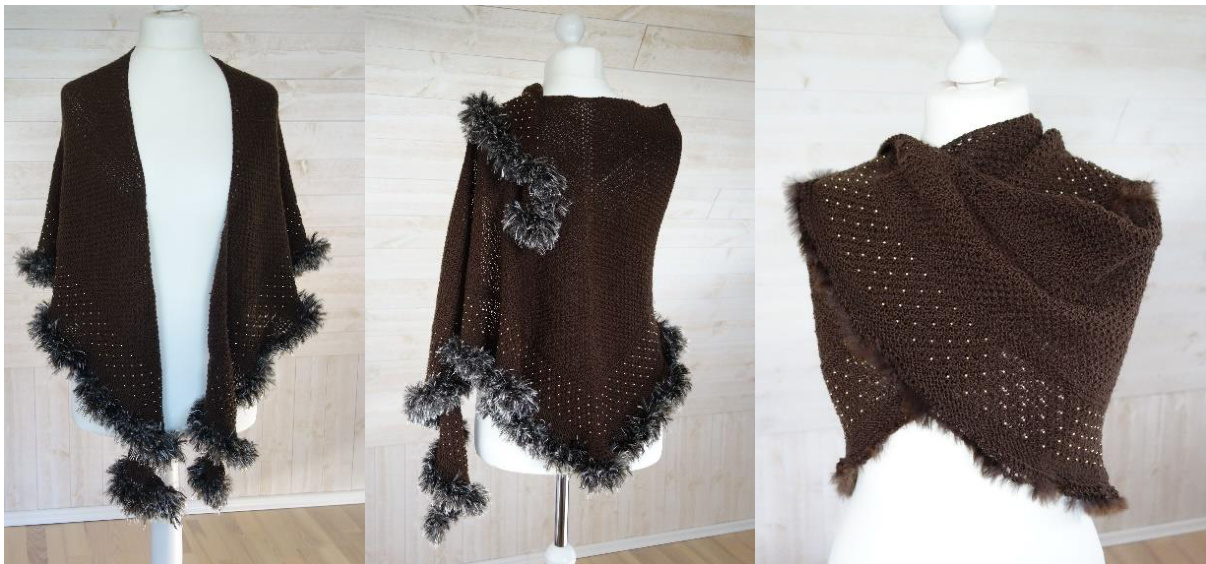
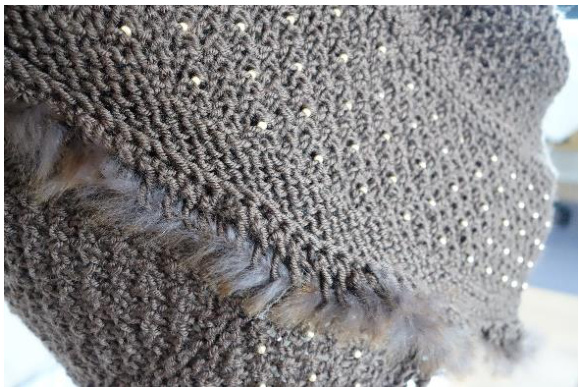
Difficulty: Easy. Charts only. The charts have both RS and WS charted, but WS rows are knit and purl rows only. One unusual increase is introduced and described with photo tutorial. No blocking needed, but it will grow with blocking. Yarn: Zitron Lifestyle 100% merino wool (superwash) (MC). Sport weight / 5 ply, 169 yards (155 m) / 50 g. Colour used is 64 brown. You will need anything from 150 g and up. And approx. 54 yards/ 50 m of fake fur yarn with long “hair". Here was used 2 skeins of "Lanas Stop Koala". Shape and Size: Triangle/heart shaped, any size. Shawl as shown using 250 g of MC yarn measures 27.5"x67" (70x170 cm) lightly blocked. Needles: US 10 % (6.5 mm) circular and US 6 (4 mm) circular OR the needle you need to get a fabric you like. Gauge is not essential to fit. Other notions: Stitch markers. Crochet hook or other gizmo for placing beads. Darning needle. Beads: Seed beads size 8/0 or 6/0 according to taste. In the shawl as shown was used 15g Toho seed beads size 8/0 in the colour Galvanized Starlight. Construction: The shawl is worked in two pieces with no seaming needed. First the shawl proper is worked from the neck and out. Then the shawl is bound off using a narrow sideways knitted on edge. After this, new sts are picked up for the fur edge. The fur edge is designed so that it can be removed without destroying the shawl, if it should become shabby looking with wear and tear or go out of fashion.
Tips
Swatching is always recommended. Go up or down in needle size until you are satisfied with the result. Beads are added to the sts EFRE the sts are worked. If yourbeads are a little irregular, using a piece of bendable fishing line or the like is a practical solution. Print in colour! Or mark the repeat boxes using a marker pen or the like. CO: CO 9 sts using MC yarn and smaller needles. Knit 2 rows. Place markers around center stitch to help you keep track. Slide markers whenever you get to them. Work chart A until you reach desired finished size minus approximately 4 inches/10 cm. Repeat rows 2-5, do not repeat row 1. In this way, you will keep increasing at the edges and on either side of center stitch, work the new sts in double moss stitch. End on a row 5 (RS row). Every repeat of rows 2-5 adds 12 sts to the row, 6 sts each side of the center stitch.
Chart A

Center stitch Continue with chart B and work that two times. You will notice that the first row of chart B is a WS row. Chart B is essentially garter stitch ridges with increases on RS rows. Chart B

Center stitch Resume working chart A rows 2-5 for 6 cm (begin on row 2). Place beads according to the instructions below. Bead placement: Bead every row 5 thus: 1. Place a bead on the first kl stitch in the repeat box, and then on every 4th following stitch until you reach the center stitch. Bead center stitch too. Mirror bead placement after center stitch. 2. Place a bead on the k1 directly before the repeat box, and then every 4th following stitch until you reach the center stitch. Bead center st too. Mirror bead placement after center stitch. Alternate between these two bead placement rows when working row 5. When you are done, end on a row 3 and then work chart B 3 times. Following this, purl one row. At the end of this very last row, CO 2 more sts using a cable CO, and BO loosely with a narrow sideways knitted BO like this: 1. k2, k2tog tbl, turn 2. Slip 1 purlwise wyif, k2, turn 3. Yo, k2tog, k2tog tbl, turn Repeat 2. and 3. until you run out of live shawl sts, end on 3. and then BO remaining 3 sts. Cut yarn, weave in ends. Next, with your needles US 10 % (6,5 mm) and using MC yarn, pick up and knit 1 st in every slipped st loop of the shawl BO. Cut MC yarn. Then knit 1 row using fur yarn, and finally BO using fur yarn. Weave in these new ends from the second CO and BO into the fur rows, not into theshawlproper. If you at some point in the future want to remove the fur edge, simply cut away the last MC CO, and voila! Your new shawl is done. You could also try twisting a length of real fur yarn through the slipped st loops, securing it at either end.
Key to symbols
Abbreviations
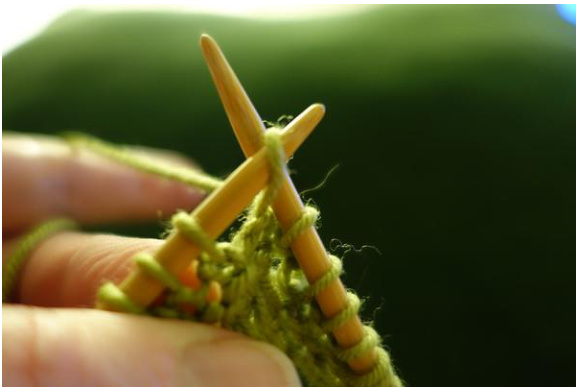
st = stitch sts = stitches CO = cast on BO = bind off WS=wrong side RS=right side yo= yarn over wyif = with yarn in front tog=together k=knit p=purl s=slip stitch (as if to knit, if nothing else is mentioned) ssk=slip, slip, knit slipped sts together psso=pass slipped stitch(es) over knit stitch(es) tbl=through back loop. kl on RS, pl on WS. pl on RS, kl on WS. k1- k1 tbl in the same stitch. One stitch increased. Twist the next stitch by first slipping it as if to knit, then sliding it back onto left needle. Knit the stitch (it will be twisted to the right). Pick up the stitch again, by lifting the strand that lies in front of the stitch from behind. Knit this stitch through what is now back loop. One stitch increased. The increase looks the exact opposite of the one explained above. Repeat box. No stitch. Placeholder to make the pattern easier to read. Font used is Stitchinknit Chunky.
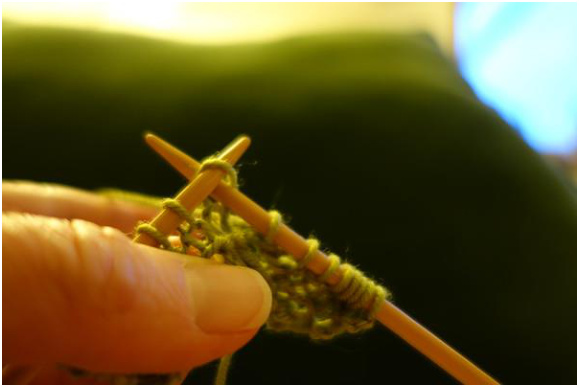
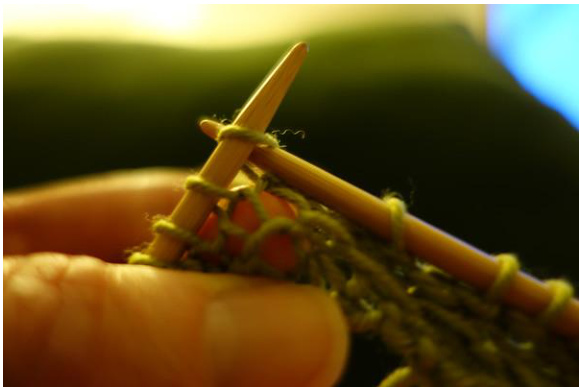
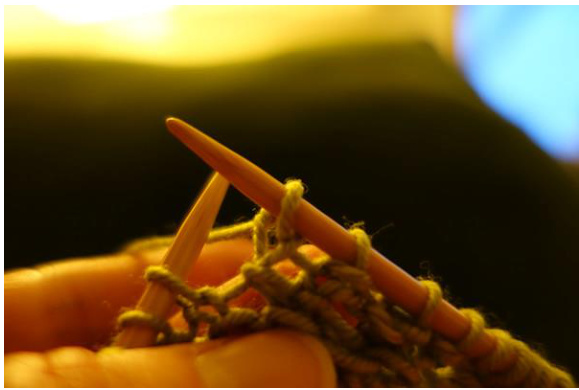
1. Slip stitch as if to knit
3. Slide stitch back onto left needle
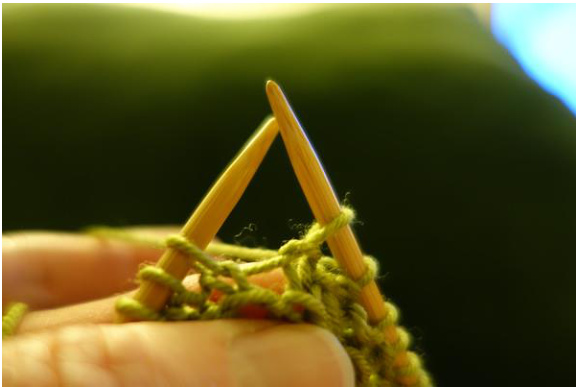
2. The result looks like this. 5. Knit the stitch.
4. The result looks like this.
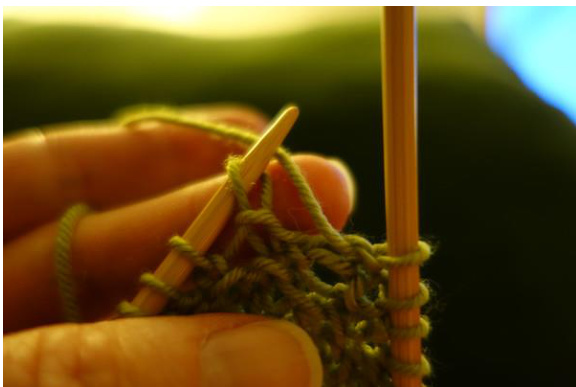
7. Pick up the stitch onto left needle again by lifting the loop that crosses in front of the stitch, from behind.
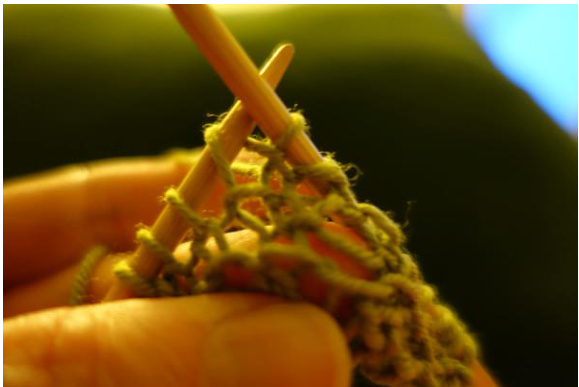
6. The result looks like this.
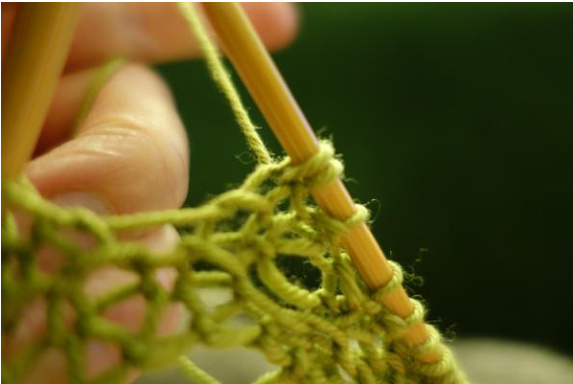
8. Knit the stitch through what is now back loop. The result looks like this.


