Hexagon Granny Square Scarf

Skill Level: Intermediate
Designed by DEJA JETMIR Materials: About 1/4 skein of each Vanna's Choice yarn in the following colors: CA - Chocolate Cake (128) CB - Lullaby Pink (103) CC - Aqua (102) CD - Taupe (125) CE - Dusty Purple (146) -or substitute any medium weight (3) yarn in your color choices. Crochet Hook: 3.5mm [US-E] Gauge: Each hexagon granny square is 2 1/2" x 2 1/2" Finished Measurements: 5"” wide (at widest point) x 50" long. Note: You can make the scarf longer by making hexagons in multiples of 7 and following the diagram to add them to the scarf. CHECK YOUR GAUGE. Use any size hook to obtain the gauge. For Pattern Support, email: Deja@crocheteverafter.com Hexagon (Make 30, see below pattern for exact color choices made for pictured scarf, or improvise and choose your own combinations) RND 1: With first color choice, CH 4, join RND with SL ST in 1st CH. CH 3 (counts as DC), DC in ring, [CH 1, 2 DC in ringl 5 times, CH 1, join RND with SL ST in 3rd CH of beginning "DC". Join second color choice and fasten off first. Note: You can tie a small knot with the two tails from the color change and then crochet them into the 2nd RND by laying them in between your stitches. RND 2: With second color, CH 2 (counts as a HDC), HDC in next ST, [all in next CH 1 space (HDC, CH 1, HDC), HDC in next 2 STS] 5 times, all in next CH 1 space (HDC, CH 1, HDC), join RND with SL ST in 2nd CH of first “HDC". Join third color choice and fasten off second color choice. RND 3: With third color choice, CH 1 (counts as SC), SC in next 3 STS, [all in next CH 1 space (SC, CH 1, SC), skip next ST, SC in next 4 STS] 5 times, all in next CH 1 space (SC, CH 1, SC), join RND with SL ST in CH 1 of first “SC". Fasten off and weave in end. Joining: See diagram for placement of hexagons. It also lists the placement of our color choices if you want to make the exact one from the picture. To join hexagons, place them right sides together and use a SC ST on back loops only of last RND. See pictures below of hook placement. To perform a SC sT to join, you enter your hook through both loops of joined hexagons, pull through a loop, YO, pull through loop, enter hook through back loops of next ST of joined hexagons, YO, pull up, YO, pull through loop. Continue across to end of side of hexagon (8 STS total). Note: You will be able to stitch 2 sides together on some of the hexagons with proper placement of beginning stitch, but most will have to be done one side at a time. This will leave many tails to weave in, to keep from getting overwhelmed, we advise you to weave in as you go. Also, since each hexagon has different colors on the last RND, we chose CA (brown) to join all the hexagons since it is not a stand out color. From the front you cannot see the joins, but the brown is visible from the back (see pictures below for example). Color Choices Made on Pictured Scarf (Make 2 of each for total of 30) 1 - CA, CB, CD 2 - CC, CA, CB 3 - CD, CC, CE 4 - CD, CB, CA 5 - CE, CB, CD 6 - CB, CC, CD 7 - CB, CA, CC 8 - CA, CC, CB 9 - CC, CD, CE 10 - CE, CC, CA 11 - CA, CE, CB 12 - CD, CE, CC 13 - CC, CD, CB 14 - CE, CA, CC 15 - CB, CD, CA See diagram at right for placement of hexagons for scarf. For exact replica of pictured scarf, numbers represent color choices above.
Abbreviations Used:
CH: chain; SC: single crochet; HDC: half double crochet; DC: double crochet; RND: round; ST(S): stitch(es); SL ST: slip stitch; YO: yarn over
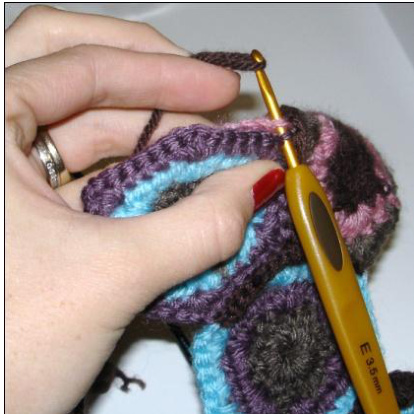
Joining a hexagon, this is first stitch in the line (see the brown yarn from the join below)
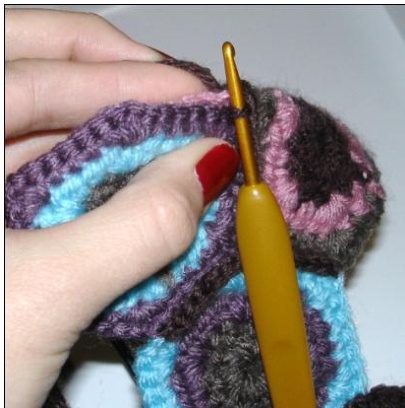
Pulling the yarn through on the first stitch of this joined line. Next step would be YO, pull through loop and then continue down the line.

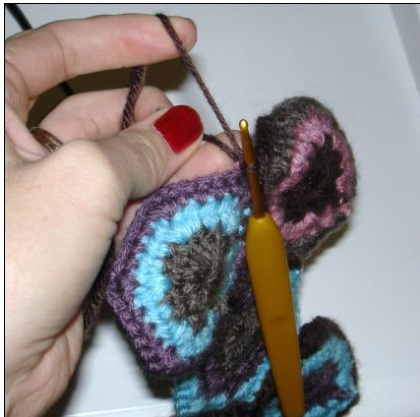
Another view of first stitch of this joined line. See how the tail is held with the thumb, once you YO, and pull through loop, tug on that tail to make the stitch tight. When joining always pull the stitch after you make it to tighten it and get the pieces as close together as possible.
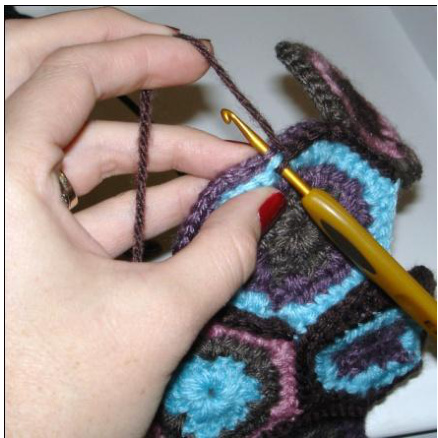
View of hook inserted through back loops only of joined hexagons. Note: You can personalize this scarf anyway you like, use more colors, or less. Keep the hexagons all the same color. This is a great scrap project; use your imagination to make it ycur own.
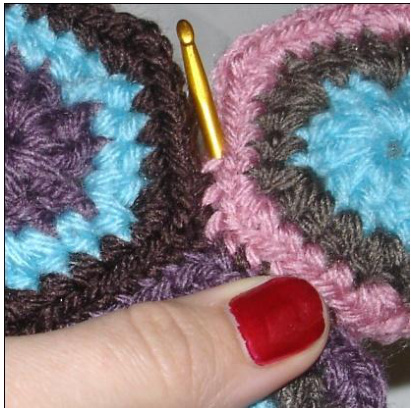
Close up view of front side of joined hexagons. The front loop of the last RND is left alone. Notice how the brown yarn is barely visible on the pink. If the brown is showing through too much, you are not tightening your stitches as you go. Simply pull on the yarn after each stitch when joining to fix the problem.
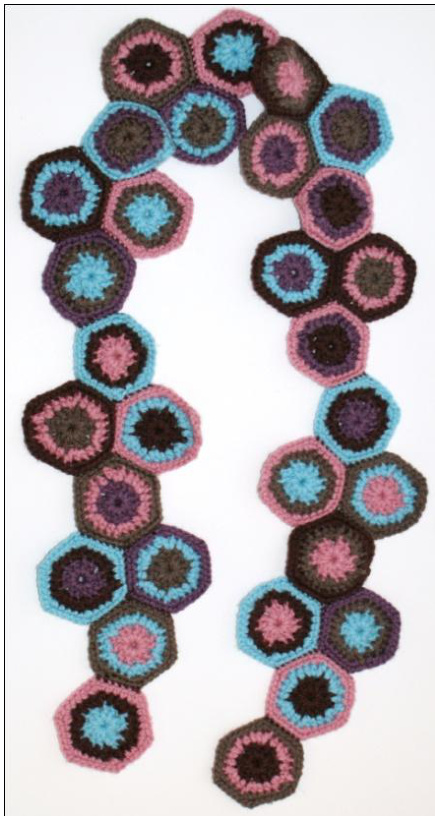
Completed Scarf


