My favourite socks are knitted cuff-down, with a flap and gusset heel and a wedge toe. There are lots of other ways to knit socks, and I have tried out a number of them, but I still struggle to get the foot length on toe-up socks right and for my money the flap and gusset heel gives the most comfortable fit. I'm not sure I've ever knittedB a completely plain pair myself, but I've done lots of pairs where the basic style was enlivened by a fairly simple stitch pattern - for instance, the spiral socks I knitted earlier this year. (The spiral pattern is just a k5,p1 rib shifted one stitch to the left every time, so after the first round, whenever you come to a purl stitch on the row below you purl the next stitch.)
Anyway, to knit a pair of socks you will need 100g/400m of sock yarn (the sort with nylon in tends to be the most hardwearing) and 2.5mm needles, either one long circular for magic loop, two shorter circulars, or a set of double-pointed needles. Personally, I prefer magic loop, but the basic pattern is the same.
Cast on 60 stitches.
I normally cast on 60 stitches for socks for me on 2.5mm needles - my gauge is 8 stitches per inch, and the ball of my foot measures 8.5 inches, so what I actually end up with is a sock that's about 10% smaller than the diameter of my foot. This negative ease means that the sock will fit snugly and not slide around on your foot when you're wearing it. If your gauge or foot size are significantly different to mine, just multiply your foot meausurement by your gauge and then multiply the result by O.9 to get the number of stitches you should cast on. I find that when it comes to the heel and toe it's best if you have an even number of stitches for the sole and instep, so I'd suggest you round down to the nearest number that's divisible by 4.
Divide the stitches evenly between needles. Join to work in the round, being careful not to twist.
As I said, I normally use magic loop so I'll have 30 stitches on each half of the loop. For the two-circulars method, you'd have 30 on each needle. If you're using double-pointed needles, then depending on how many are in your set you could have 20 stitches on each of three needles or 15 on four (though that might make the next step a little bit more complicated) 'Being careful not to twist' is obvious, but still worth checking and double-checking, because if you have twisted the cast-on you're never going to be able to fix it without unravelling everything and starting again.
Work in k1, p1 rib for 12 rows.
Or k2, p2, or k2, p1, or whatever you fancy, really. And you could knit more than 12 rows if you like - I wouldn't suggest less; 12 rows is about an inch and much less isn't going to be enough to stop your socks from falling down. Some people use a smaller needle for the ribbing than for the rest of the sock, but I find that for a plain stocking-stitch sock the ribbing pulls in enough by itself; where you do need a smaller needle is for socks knitted in a stitch pattern that pulls the fabric in a lot, for instance if there's a lot of cabling, because otherwise the rib ends up looking wider than the rest of the leg.
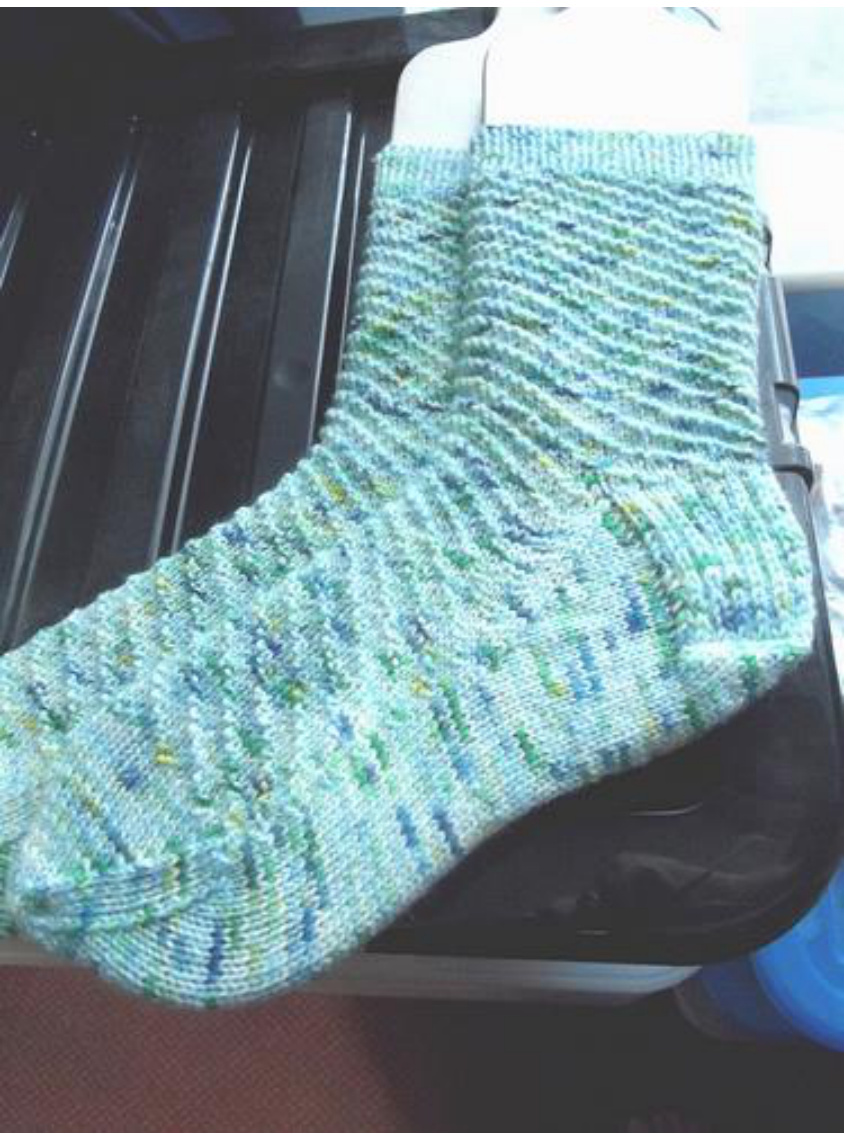
Change to stocking stitch and knit until leg is desired length.
I recommend trying it on as you go, which also has the advantage of meaning you're not going to get to the toe before realising your sock won't quite squeeze over your heel. You probably want the leg of an ordinary sock to be about 6 inches long.
The heel flap is worked back and forth across half the stitches.
If you are using double-pointed needles, you'll want to rearrange your stitches now so that you have half the total number of stitches on one needle and the other half on another one. If you're using magic loop or two circs, your stitches will already be divided this way. You're going to work across the first needle; you'll come back to the stitches on the other needle, which will form the instep of the sock, after you've done the heel. If your instep stitches are on a dpn you might want to put point protectors on so you don't accidentally lose any while you're working the heel.
R1: \*sl1, k1\*; repeat from \* to end of needle (30 stitches). Turn. R2: sl1, p29. Turn.
In my example, there will be 30 stitches in the heel flap, but if you have a different number of stitches for your sock you will have more or fewer stitches. This is where it helps to have even numbers of stitches for the sole and instep, as if you have an odd number the sl1, k1 pattern won't work properly. You don't have to do this, but the slipped stitches give you a double-layered heel fabric which is softer and more hardwearing than a single layer. If you have an interestingly variegated yarn you could try an Eye of Partridge heel, which just means offsetting the slipped stitches in every other right-side row, so instead of being the same as the first row on rows 3, 7 and so on you'd work sl1, k1, \*k1, sl1\* to last 2 stitches, k2.
Repeat these two rows 14 times (30 rows in total).
There should normally be the same number of rows in the heel flap as there are stitches, so again, if you have more or fewer stitches you should work more or fewer rows to match. R1: sl1, k16, ssk, k1. Turn. R2: sll, p5, p2tog, pl. Turn. R3: sl1, k6, ssk, k1. Turn. R4: sl1, p7, p2tog, p1. Turn. Repeat last two rows, working one more stitch before the decrease each time, until all stitches have been worked. This is a 'French heel', and gives a nicely rounded shape which I find suits my feet well. For more or fewer stitches, what you need to remember is that on the first row you should work to two stitches past the centre of the heel flap before decreasing - my heel flap has 30 stitches, so there are 15 stitches to the centre and slipping one then knitting 16 takes me 17 stitches across. If your sock is on 68 stitches and you have 34 stitches in your heel flap, you'd slip one and then knit 18 stitches. The rest of the heel turn is worked in exactly the same way, however many stitches you have - if you have more, there will simply be a few more rows. If you want a rounder heel you could start by knitting to three stitches past the centre, before decreasing, then purl seven on the next row. For a pointier heel, knit to the centre stitch, and start by purling just one stitch.
Knit across heel flap. Turn and pick up and knit 15 stitches along the side of the flap (one stitch in each slipped stitch). Knit across held instep stitches, then pick up and knit 15 stitches along the other side of the heel flap.
This takes you back to working in the round for the foot. To pick up and knit the stitches, I just insert the tip of my right needle from front to back underneath both bars of the slipped stitch, wrap the yarn around it and pull it through to make the stitch. You'll need to pick up one stitch for each pair of rows in the heel flap, but I also normally pick up one or two stitches in the gap between the heel flap and the instep to prevent holes there - it doesn't really matter how many stitches you pick up, as most of these form the gusset which will be decreased back to the original number for the sock anyway. When it comes to arranging the stitches on the needles, I normally prefer to have the instep stitches on one half of the needle and the sole and gusset stitches on the other, though this does mean there are a lot of stitches on the sole-and-gusset needle to start with. If you're using dpns you'll probably want to divide the sole and gusset stitches between two needles and have the instep stitches either on a third or split between a third and fourth. R1: Knit to 3 stitches before instep, k2tog, k1. K across instep stitches. R2: K1, ssk, k across remaining gusset and sole stitches. K across instep stitches. Repeat these two rows, decreasing one stitch on either side of the gusset every other row, until 30 stitches remain on the sole needle (60 stitches in total). Having a gusset provides more room for the upper instep; you decrease gradually at either side so that the front of the foot has the same number of stitches as the leg did. In order to prevent loose stitches where you picked up for the gusset stitches, you might want to knit the picked-up stitches through the back loop on the first round. Knit until the foot is 2 inches shorter than desired length. I usually try on as I go and start the toe when the foot of the sock just reaches the bottom of my big toe. Starting on the instep stitches: R1: k1, ssk, k to 3 stitches before end of instep, k2tog, k2, ssk, k to 3 stitches before end of sole, k2tog, k1. R2: k all stitches Repeat these two rows until there are 20 stitches left. If you prefer a pointier or a broader toe, you could leave more or fewer stitches. Arrange the stitches evenly on two needles, with the working yarn at the right-hand side of the back needle. Cut the yarn, leaving a fairly long tail. Thread this tail through the eye of a darning needle, and graft the stitches together as follows: 1. Pass the needle and yarn through the first stitch on the front needle purlwise (from right to left). Draw the yarn right through, but don't pull too tight. 2. Pass the needle and yarn through the first stitch on the back needle knitwise (from left to right). Draw the yarn right through, but don't pull too tight. 3. Insert the needle in the first stitch on the front needle as if you were going to knit it, and slip the stitch off the needle. Pass the needle and yarn through the next stitch on the front needle purlwise. 4. Insert the needle in the first stitch on the back needle as if you were going to purl it, and slip the stitch off the needle. Pass the needle and yarn through the next stitch on the back needle knitwise. Repeat steps 3 and 4 until all the stitches have been worked (on the last two there will obviously not be any other stitches to pass the yarn through). Draw the yarn through to the inside of the sock and weave in securely. This is called Kitchener stitch, and it really is named after Lord Kitchener (I always used to think that it should but couldn't possibly really be) who invented the technique so that soldiers at the front in WW1 didn't end up with chafing from the toe seams of their socks (sadly I doubt it did much for trenchfoot, shellshock or indeed being blown to smithereens, but you can't have everything).
Weave in the cast-on tail and make the second sock.
"Second Sock Syndrome", where you knit the first sock and then can't motivate yourself to knit the second, is a recognised phenomenon among knitters. My tip for avoiding it is to cast the second sock on as soon as the first is finished, although wearing random combinations of single socks is an equally valid strategy.
Enjoy your socks!
Personally, I think there's nothing like handknitted socks, and although I generally wear tights for work when I do wear socks they're always handknitted.


