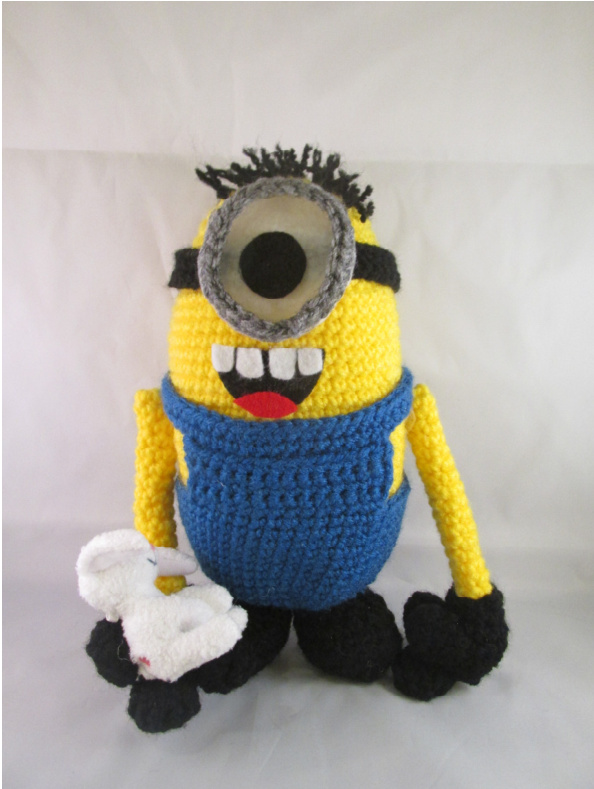
interchangeable Minions from Despicable Me
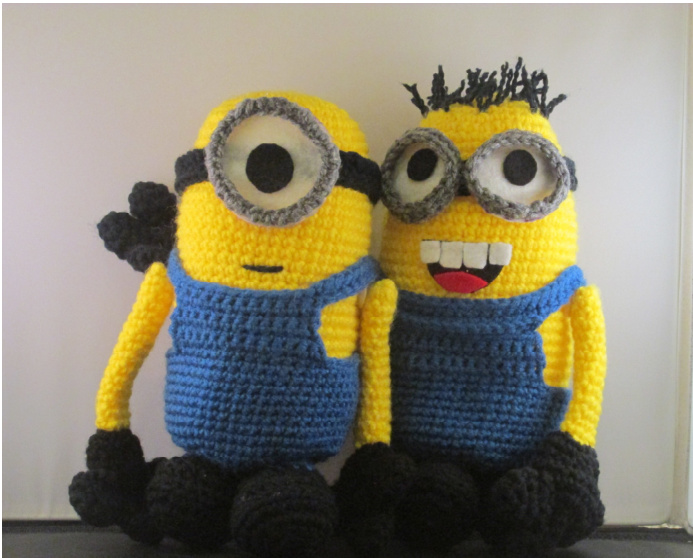
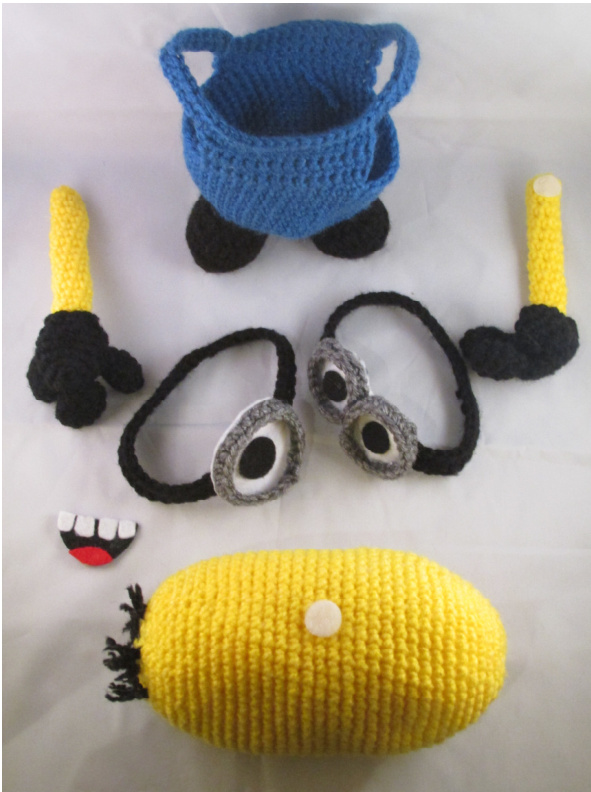
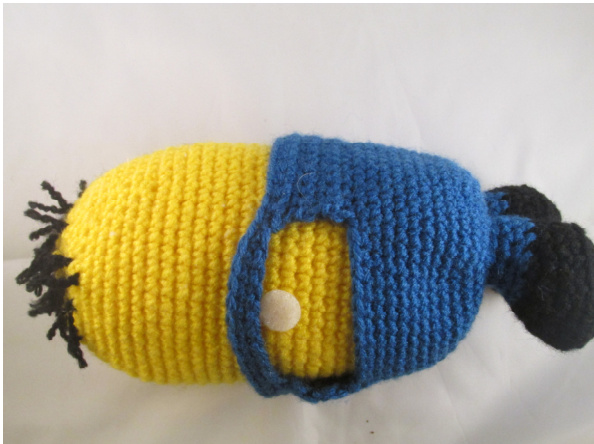
by Teresa white de Roulet for Mes Amis—My Friends Finish as You G0 These versatile minions are the same shape top and bottom, so they can have different hairstyles, depending on which end is up and which end is stuffed into the overalls. The arms are attached with Velcro at the midpoint, and can be turned around as needed. The mouths are also attached by Velcro, so can be changed as desired. The goggles, and therefore the eyes, can also be switched easily, to make endless combinations.
With my first minions, I'd made the bottom of the overalls a little flatter because that's how they look in the movie, but since the body isn't quite the same shape, it made them a less sturdy support for the shoes, to help them stand up. These minions are better, but still a little unsteady on their feet, and may need to lean against a wall to stay standing. Caution: Toys made for children 3 years or younger must not have parts that can be pulled or chewed off—-no button eyes, felt add-ons, etc. Substitutions can be made with embroidery that has been securely knotted on the wrong side of the fabric. Also, please be aware that a toy given to an older child could still end up in the hands of a toddler. The parts could certainly be sewn on to make them safe, and the arms don't need to have pipe cleaners inside. Finally, the minions from Despicable Me are copyright of Universal Pictures and Illumination Entertainment. This pattern is copyright of Teresa de Roulet (March 2013). Please do not claim this pattern as your own.lf you wish to share this pattern, you may link to this pattern but please do not reprint it on your site. You may keep a copy for your own personal use, but you may not sell or distribute it, or sell items made from this pattern. v. 2. Copyright 2013 Teresa White de Roulet. Not for commercial or retail use, other than as a donation to charity. It is my hope that at some time the producers will hold a contest/allow submissions for knitted and crocheted versions of minions, so that we can have authorized patterns. As someone whose love for the minions is nearly boundless, I'd love to offer mine.
Finished size
About 10" high
Difficulty
Intermediate, but a beginner with a little patience can make them, too.
Gauge
4 stitches to 1" in single crochet
Materials
Yarn is heavy worsted weight, Red Heart Super Saver in Yellow for skin and in Blue Suede for overalls, 3.5 oz./100 g. Use the darkest gray that you can find for the goggles; I used Red Heart Super Saver Gray Heather, 5 oz./141 g, 244 yd./223 m. Caron's Perfect Match in Black is for the hair, gloves, and boots (could also be used for "elastic" for goggles), 7 oz./198 g., 355 yd./325 m. Polyester fiberfill stuffing Velcro in small circles, black and white, 4 pieces of each 1/2" black elastic, optional Glue gun, or black, gray, and white sewing thread with needle 2 yellow pipe cleaners, 6" each Felt in white and black for eyes; white, black, and red for mouths 4 black buttons, about 1/2" across, optional Size G crochet hook Tapestry needle
Abbreviations
beg beginning ch chain dec decrease (single crochet), either by the traditional or the invisible dec. Traditional is drawing up a loop in the first and second stitches, yarning over, and pulling through both. These figures were made with the traditional dec, but could also be improved, especially in the shoes, by using the invisible decrease; i.e., insert hook into through the front loop only of the first and second stitches, yarn over and pull through two loops on the hook, yarn over and pull through the remaining two loops on the hook, making two stitches into one. inc increase, by working 2 single crochet stitches into one stitch. FO finish off, usually by cutting the yarn 3" long and running it through the final loop, pulling snugly and weaving the ends in on the wrong side. r or rd row or round rep repeat SC single crochet sl st slip stitch st stitch Special stitches (1) “Ultimate finish." When there are only 6-7 sts left in rd after series of decs, FO, leaving sufficient yarn tail to thread through tapestry needle. Insert needle through each remaining st by going from center of circle to outside of circle, catching the outer loop of each st, then pull yarn tautly. See tutorial information below, if needed. (2) Sl st join.
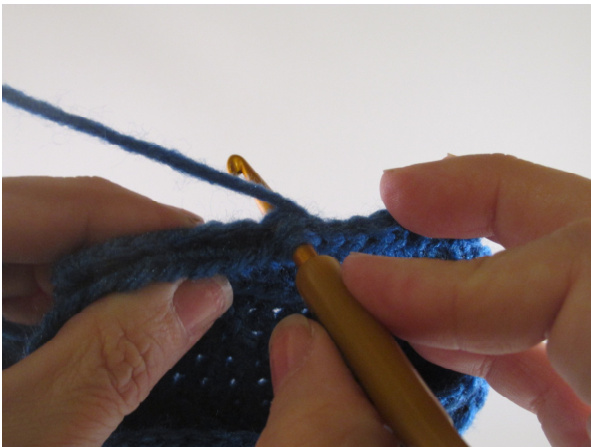
This can be done different ways. Do not work tightly. For this project, line up the edges of two pieces of crochet on top of one another, like the edges of pages of a book, last live st on the right side (if working right-handed). Pick up the first stitch's back loop on the front piece, and front loop on the back piece, yarn over, and pull through. Repeat across the edges of the fabric, and then FO. I want to express my appreciation for June Gilbank's blog, www.planetjune.com, for her tutorials that brought me up to date on ways to finesse amigurumi. Although I'd used the magic circle before for knitting, I wasn't convinced as to its usefulness until I saw her tutorial. 1 also use her method of invisible decreasing and her "ultimate finish." Her tutorials are excellent, excellent.
Instructions
Head and Body
Beg at the top (well, could also be the bottom, as it doesn't actually matter), start with magic circle, which I prefer, or the traditional ch 2 if you wish, then sc 7. Place marker to mark beg of rds--7 sts. R2: Inc in each st around—14 sts. R3: \*Sc 1, inc 1, rep from \* 7 times— 21 sts. R4: \*Sc 2, inc 1, rep from \* 7 times— 28 sts. R5: \*Sc 3, inc 1, rep from \* around—35 sts. R6:Sc 11, inc 1, sc 10, inc 1, sc 11,inc 1—38 sts. R 7: Sc 11, inc 1, rep from \* 3 times, sc 2—41 sts. R8:Sc 15, inc 1, sc 20, inc 1, sc 4—43sts. R9: Sc 10, inc 1, sc 14, inc 1, sc 13, inc 1, sc 3-46 sts. R 10: Sc 25, inc 1, sc 20—47 sts. R 11: Sc 10, inc 1, sc 36—48 sts. R 12-27: Work even for 16 rds. At this point, body can be stuffed partially, not too firmly. R 28: Sc 36, dec 1, sc 10—47 sts. R 29: Sc 20, dec 1, sc 25—46 sts. R 30: Sc 3, dec 1, sc 13, dec 1, sc 14, dec 1, sc 10-43 sts. R 31: Sc 4, dec 1, sc 20, dec 1, sc 15— 41 sts. R 32: Sc 2, dec 1, sc 8, dec 1, sc 8, dec 1, sec 8, dec 1, sc 7—37 sts. R 33: Sc 5, dec 1, sc 7, dec 1, sc 7, dec 1, sc 7, dec 1, sc 3—33 sts. R 34: Sc 3, dec 1, sc 5, dec 1, sc 4, dec 1, sc 5, dec 1, sc 4, dec 1, sc 2— 28 sts. R 35: Sc 2, dec, 1, rep around—21sts. R 36: Sc 1 dec 1, rep around—14 sts. R 37: Dec around—7 sts. FO. Do ultimate finish.
Arms—Make 2
Beg at the top of arm, start with magic circle, sc 7 (or ch 2, sc 7 sts in second ch from hook). Place marker to mark beg of rd—7 sts. R2-15: Sc around. FO, leaving tail long enough to close up arm with ultimate finish after inserting pipe cleaner.
Hands (3-Fingered Gloves)—Make 2
Beg at the base of palm of hand, start with magic circle, sc 5. Place marker to mark beg of rd—-5 sts. R 2: Inc in each st around—10 sts. R 3: \*Sc 1, inc 1, rep from \* around—15 sts. R 4-5: Sc around. R 6: \*Sc 1, dec 1, rep from \* around—10 sts. R7: Sc around. Sl st, FO, leaving a long enough tail for sewing to arm.
Fingers (3-Fingered Gloves)- Make 6
Beg at the base of finger, start with magic circle, sc 5. Place marker to mark beg of rd—-6 sts. R2: Inc around—10 sts. R3: Sc around. R 4: Dec around. Sl st, FO leaving a long enough tail for sewing to palm.
Legs and Boots-Make 2
Beg at the bottom, ch 7 (magic loop not recommended). R1: Sc in second ch from hook, sc 6, turn work around, and sc back up the other side of the chain, place marker to mark beg of rd—-12 sts. R2: Sc around. R3: Inc in each st around—24 sts. R4: Sc around. R5: Sc around in back loops. R6: The beg of the rd has gradually shifted, so this rd adjusts for this. The decs will form the toe of the boot. Sc 10, dec 4 sts, sc 6——20sts. R7: Sc 8, dec 4, sc 4—16 sts. R8: Change to Blue Suede yarn, leaving a long enough tail of blue yarn to weave around the border between blue and black, to fill in any gaps that may expose filling. You can do the same with the black tail. Sc 6, dec 4, sc 4—12 sts. R9-10: Sc around. Sl st, FO, leaving a long enough tail to sew to overalls. Stuff firmly.
Overalls
Adjust pattern to be round and same size as minion. Beg at the bottom of the bottom, start with magic circle, sc 7. Place marker to mark beg of rd--7 sts. R2: Inc in each st around—14 sts. R 3: \*Sc 1, inc 1, rep from \* 7 times21 sts. R 4: \*Sc 2, inc 1, rep from \* 7 times28 sts. R5: \*Sc 3, inc 1, rep from \* around—35 sts. R 6: Sc 3, inc 1, sc 10, inc 1, sc 11, inc 1—38 sts. R7: Sc 11, inc 1, rep from \* 3 times, sc 2—41 sts. R8:Sc 15, inc 1, sc 20, inc 1, sc 4—43sts. R9: Sc 10, inc 1, sc 14, inc 1, sc 13, inc 1, sc 3-46 sts. R 10: Sc 25, inc 1, sc 20—47 sts. R 11: Sc 10, inc 1, sc 36—48 sts. R 8-15: Sc around. R 16: Start front bib. Sl st 5 sts, SC 14, ch1, turn. R 17-21: Sc 14, ch 1, turn, except on last r, don't turn. You wil be facing the wrong side. R 22: Ch 40, join around the back to other side of front bib without twisting, then ch 1, turn. R 23: Sc around the chain to the other side of the bib, continue to end of bib. R 24: Sc around again to beg of bib, sl st 1, FO. R 16: Go back to start back bib. On back waist, that is, 11 sts past the left edge of the front bib, pick up a loop, ch 1—counts as a sc on next row— sc 13 sts, ch 1, turn. R 17-21: Sc 14, ch 1, turn. Place a marker 11 sts from edge of strap where it joins bib. Use the joining sl st method to join strap and back of bib. The right side of the bib is facing you, with the strap behind it, lined up, not twisted(if you need to, turn the project upsidedown for a minute, matching the strap to the bib). Goggle Strap—Make 1 for each one- or two-eyed goggle below. For strap, with Black, ch 42, join with sl st, avoiding twisting the ch. Ch 1. R 1-2: Sc around. At end of rd, sl st together, ch 1. FO.
Two-Eyed Goggles—Make 2
With Gray, ch 20, join to beg with sl st. Ch 1. Sc around to beg again, sl st 1, FO. Turn inside out. For the black pupils, trace around a dime on the felt, and cut out neatly. I traced around a 1 3/4" wide jar for the whites of the two-eyed minions, but it may be easier to make them slightly larger and trim as needed after gluing/fastening. The advantage of using a jar, is that I could use it to “mold" the goggle to keep it perfectly round while the glue dried, then trimmed any excess white.
One-Eyed Goggle
With Gray, ch 26, join to beg with sl st. Ch 1. Sc around to beg again, sl st 1, FO. Turn inside out. I traced around a quarter for the pupil. For the white of the eye, I cut a 2 12" wide white circle. See instructions on twoeyed goggles above for tips.
Mouths
A mouth can be made from felt or embroidered. Sewing in outline st with 1/2 the plies of the black yarn is useful for making simple mouths—mouths can be a small or large straight line, a small or large semicircle, or short and straight across with a little curve up on one side. For the mouth used in the pictures, I used a 1 3/4" wide circle of black felt cut in half. I oriented it with the flat side as the top of the mouth, and trimmed about 1/4" across of the bottom. I cut four 1/2" wide rectangles of white for the teeth, eyeballing the shape. For the tongue, I used about a %2" wide oval, trimming the ends to points, and trimming to fit the bottom edge of the black mouth felt. These were glued together, and Velcro attached to both the back of the mouth and to the minion. Different mouths could be substituted one for another.
Hair
See the descriptions below for ways to style minion hair. Cut 6" lengths of black yarn, then split the plies so that there are two pieces each. Fold one piece in half, and thread through a tapestry needle. Choose the location that the hair will be located, push the needle under a strand of yarn on the head and out the other side, pull the hair part of the way through, and release the tapestry needle. There should be a loop coming out on one side, and two tails on the other. Pull the tails through the loop, and tug snugly. Once the hairs are all in place, trim. Rub some glue or apply Fray Check on the ends, so they won't unravel. Hairspray can be used to make the hair more stiff, if the figure will be used just by those over three years of age. You can even lay the hair over a brush, pulled somewhat firmly, and spray to obtain a curve. These notes on hair and eyes are all from the first movie, and are my best guess for each. Kevin is greeted by Gru before Gru makes an announcement, and Kevin is also shrunken temporarily later. At least, when the minion suddenly returns to normal size and his buddy hugs and kisses him, it sounds like he calls him, "Kevin," and that minion has one eye and hair parted in the center. In one shot, it looked to me like Kevin had a buzz cut. Dave has several hairs parted in the middle. He is the one who shoots the rocket that hits some of the minions in the crowd during Gru's talk. Tim is the first one called when Gru calls,"Tim, Bart, Phil," but they may not come down in order. He has hair parted in the middle and has two eyes, and is likely the mother in the “family" that goes shopping at the toy store for the unicorn. On the Universal Studios Orlando pin, he has a spike of hair on top instead. Bart appears to be a tall, slightly thinner minion with a tuft of spiky hair in the center of his head. He plays the father in the shopping scene. Phil has one eye and hair parted in the middle. He plays the baby on the shopping trip. Jerry seems to have 2 eyes and buzz cut hair. I think that he is the one who says, "Whaaat?" when the girls blame the minions for playing wildly late at night. Jerry and Stuart are supposed to be watching the girls. Stuart has one eye, and has either thin short hair scattered on head, or no hair. Jorge is hairless. He has scattered hairs on the Universal Studios Orlando plush figure. Minions come in all combinations. There's a one-eyed one with scattered hair that drinks the solution that makes him float. There are also a few chubby minions, and some tall minions.
Assembly and Finishing
Weave in any loose ends. When sewing fingers to glove, start with the central finger. Attach it to tip of glove palm, whipstitching the finger on. The other two fingers are arranged to either side of the central finger, curving up along sides of glove base. The fingers are folded slightly together towards the inside of the body when attached. One of the black Velcro circles can be applied to the palm of the hand (use the soft, fuzzy one) so that the minion can hold hands with another minion, or hold props (see below). Stitch hands to arms. For the arms, fold the last 12" end of a pipe cleaner into a hairpin shape (narrow "u"), insert into the arm and hand, trim with about 1/2" still protruding from the top of the arm. Pull the pipe cleaner out, fold the remaining 12" end into a hairpin shape. Reinsert into the arm.
Apply white Velcro to the “armpits" of the minion, that is, half-way down the side of the minion, on each side. The fuzzy side of the Velcro is preferred for the body. Attach the corresponding circle of Velcro to the inner side of the upper arm. See the pictures for guidance. The arm is attached to the hand with the fingers positioned folded towards the body, so the Velcro needs to be on the same side as the “palm." The arm can be separated by the Velcro from the body and oriented towards the other end of the body, and the fingers will still be pointing the right way. When sewing boots to overalls, sew firmly, catching the top two threads of boots to the bottom of the overalls for greater stability. They should be stuffed quite firmly before the final sts are sewn. Sew them next to each other, lined up with center of bottom of overalls. For eyes, goggles are sewn or glued to felt. The foundation chain of each goggle is attached to the felt. As for the straps, they are attached to the back of the eyes with glue. In at least one example I've seen in the film, the black pupils aren't centered in the eyes, they are oriented so that they will be closer together. The eyes have brown irises, but usually read as big black pupils. When their eyes are drooping, their eyelids are bright yellow. Pupils can also both be oriented towards one side, or down (or up, if you make eyes looking up and put goggles on upside down).
Care
Can be machine washed, preferably by placing inside a pillowcase first. Dry on gentle heat.
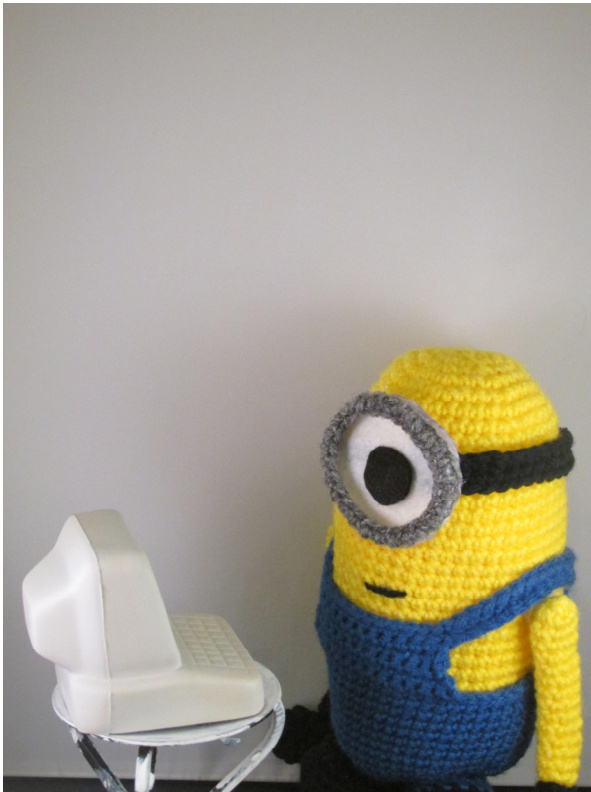
Props
Bananas, pointy rockets of various types, stuffed animals are all possibilities. A coffee cup would be fun. There are many patterns for small amigurumi bananas and cups online. Making the outfits for the outing to the toy store would be hilarious. In conclusion, a quote from an interview on www.youtube.com called, “Despicable Me - Meet the Minions,” “"We had a sense from day one that these were characters that were slowly going to try to take over the movie, because they are irresistible in their combination of innocence and naughtiness." Please feel free to send me a message through www.ravelry.com if you have any questions or comments. I am happy to help, but please be aware that it may take me a few days to get back to you.