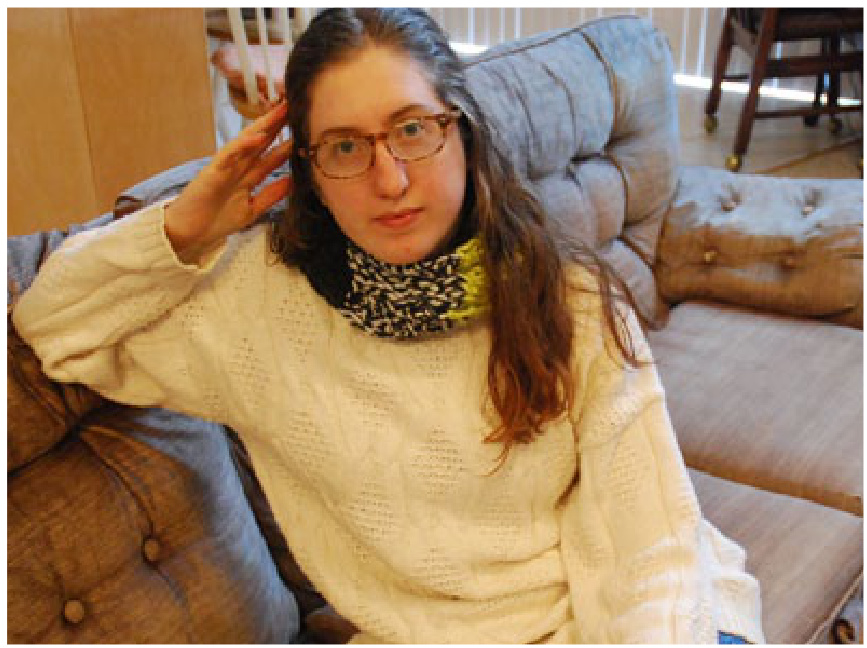
Chunky Cabled Cowt
By: Carolynn Markey Kitty-ears.com moonofsilver@ gmail.com
gnstuctions
Welcome to the Chunky Cowl tutorial! Are you ready to cable? Knit- Knit stitch Purl- Purl stitch Cable 3 back (C3B)- slide the next three stitches to your cable needle and hold to back. \*\*You can make this pattern as long or as short as you want. Mine used all the yardage listed below, and can be easily looped twice around my neck.\*\*
You will need:
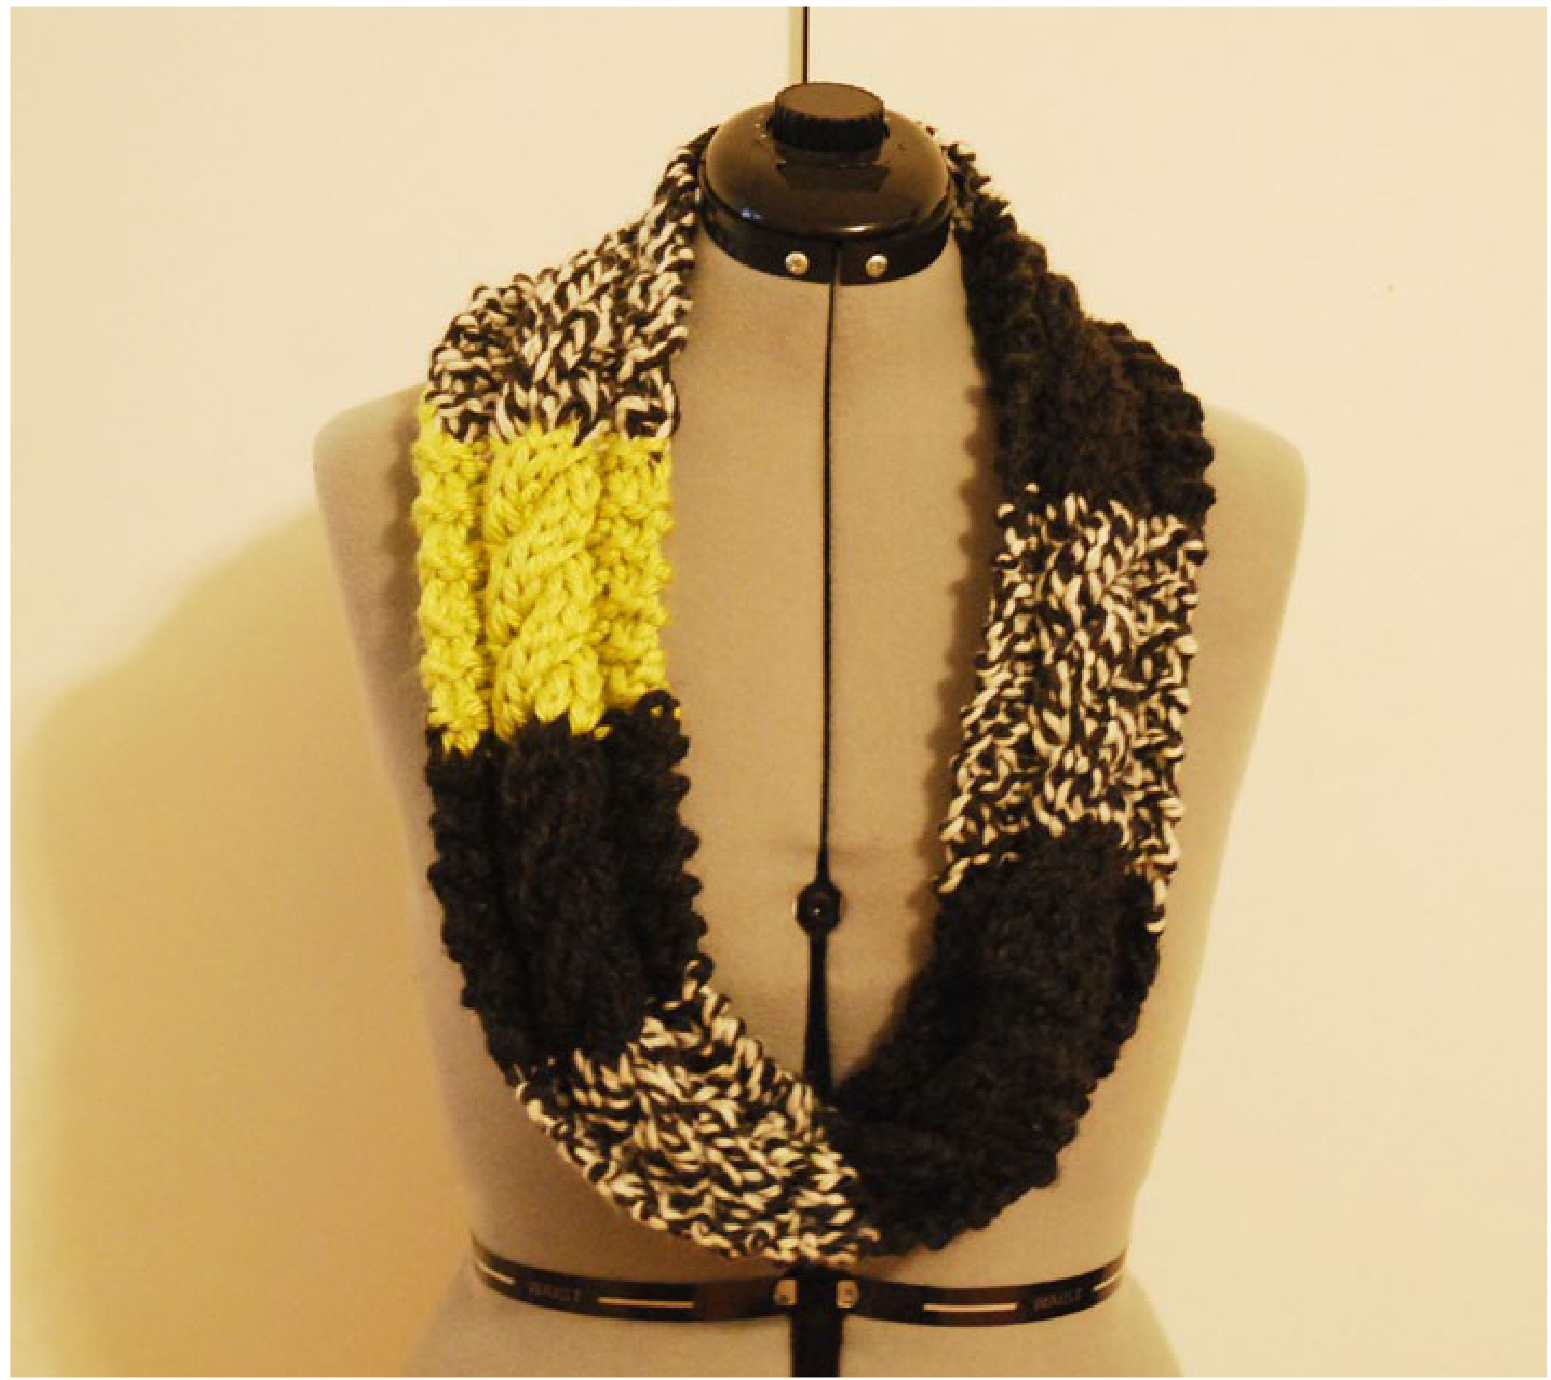
90 yards of super bulky yarn, plus 20 yards in a different color if you want to add the color block (showr in yellow on my knit). Size 14 straight knitting needles. A large (and I mean large cable needle OR a size 14 double point needle. Large yarn needle to weave in ends (or crochet hook/ however you do it)
Pattern
1) Cast on 14 stitches on size 14 needles using long tail or cable cast. 2) Set up rows: R1: K2, P2, K6, P2, K2 R2: K4, P6,K4 Now we will repeat these next 4 rows until scarf is as long as desired
3) Cable pattern
R1: K2, P2, slide next three stitches to cable needle like you are purling (C3B) and hold in back of work, K3, then K3 from cable needle making sure not to twist stitches, P2, K2 R2: K4, P6, K4 R3: K2, P2, K6, P2, K2 R4: K4, P6, K4 Repeat from row 1 until scarf is as long as desired. I also added in a bold color, repeating the pattern with this color four times before switching back to my original yarn. All together, including yellow color, I repeated 28 times. 4) Finish on a row 4. Then: R1: K2, P2, K6, P2,K2 R2: K4, P6, K4 R3: Bind Off Now, and use the tail to sew the end together, creating a circle.
Casting On The Crochet Cast-On
1) Start off with a slip knot and a normal stitch on your needle (A). 2) Put your second needle in between the stitches (B) The needle should be against the other needle, with the yarn below it. 3) (C) Yarn over with your working yarn (NOT the tail)
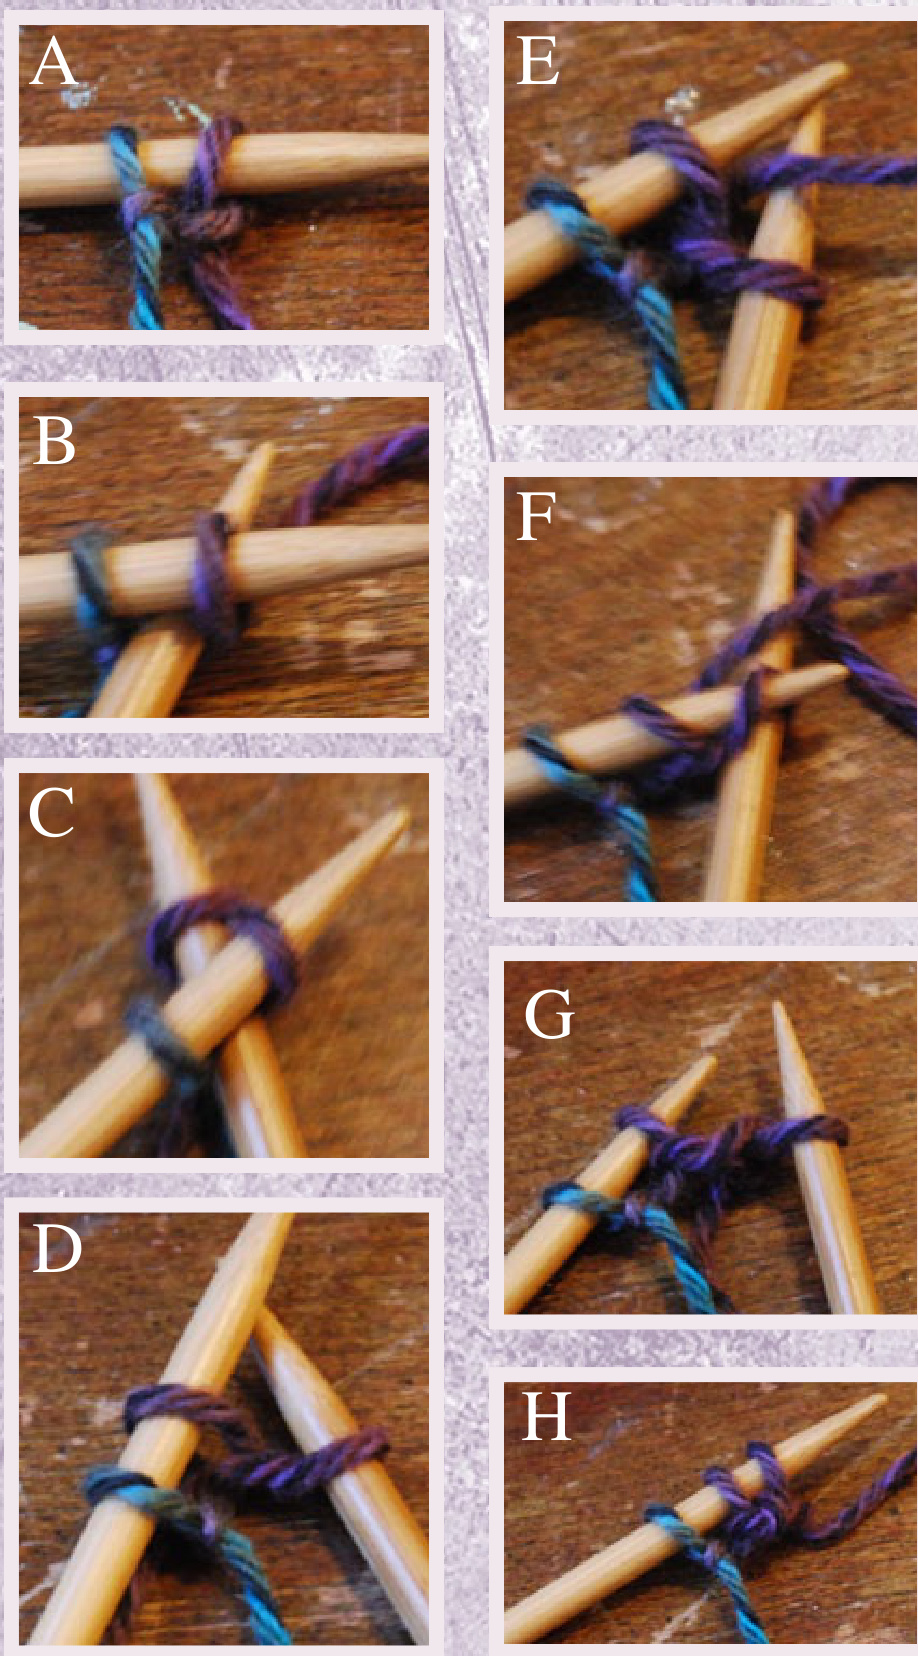
4) Pull this yarn over through the two stitches. (D) 5) Yarn over on your second needle (NOT using tail) (E) 6) Now slip your first needle under the stitch on your second needle (F) and pull it over the yarn over that is also on your second needle, leaving the yarn over on the second needle (G) 7) You have now formed that third stitch. Slip it on to your left needle (H) and repeat from step 2 (B) to form more stitches. \*many use a crochet hook to do this, but I don't.
The Skinny
You can sell any product made from this pattern. However, you may not alter or distribute this pattern in any way! Have any questions? Feel free to e-mail me at Moonofsilver@ gmail.com or chat with me on twitter @ moonofsilver if you wish. Thank you so much for downloading this pattern, and I hope you love the item you create from it, and that it furthers your fiber art journey. Namaste!
Okitty-ears.com


