IVY & VINES Design by Amy E. Anderson @
IVY & VINES C
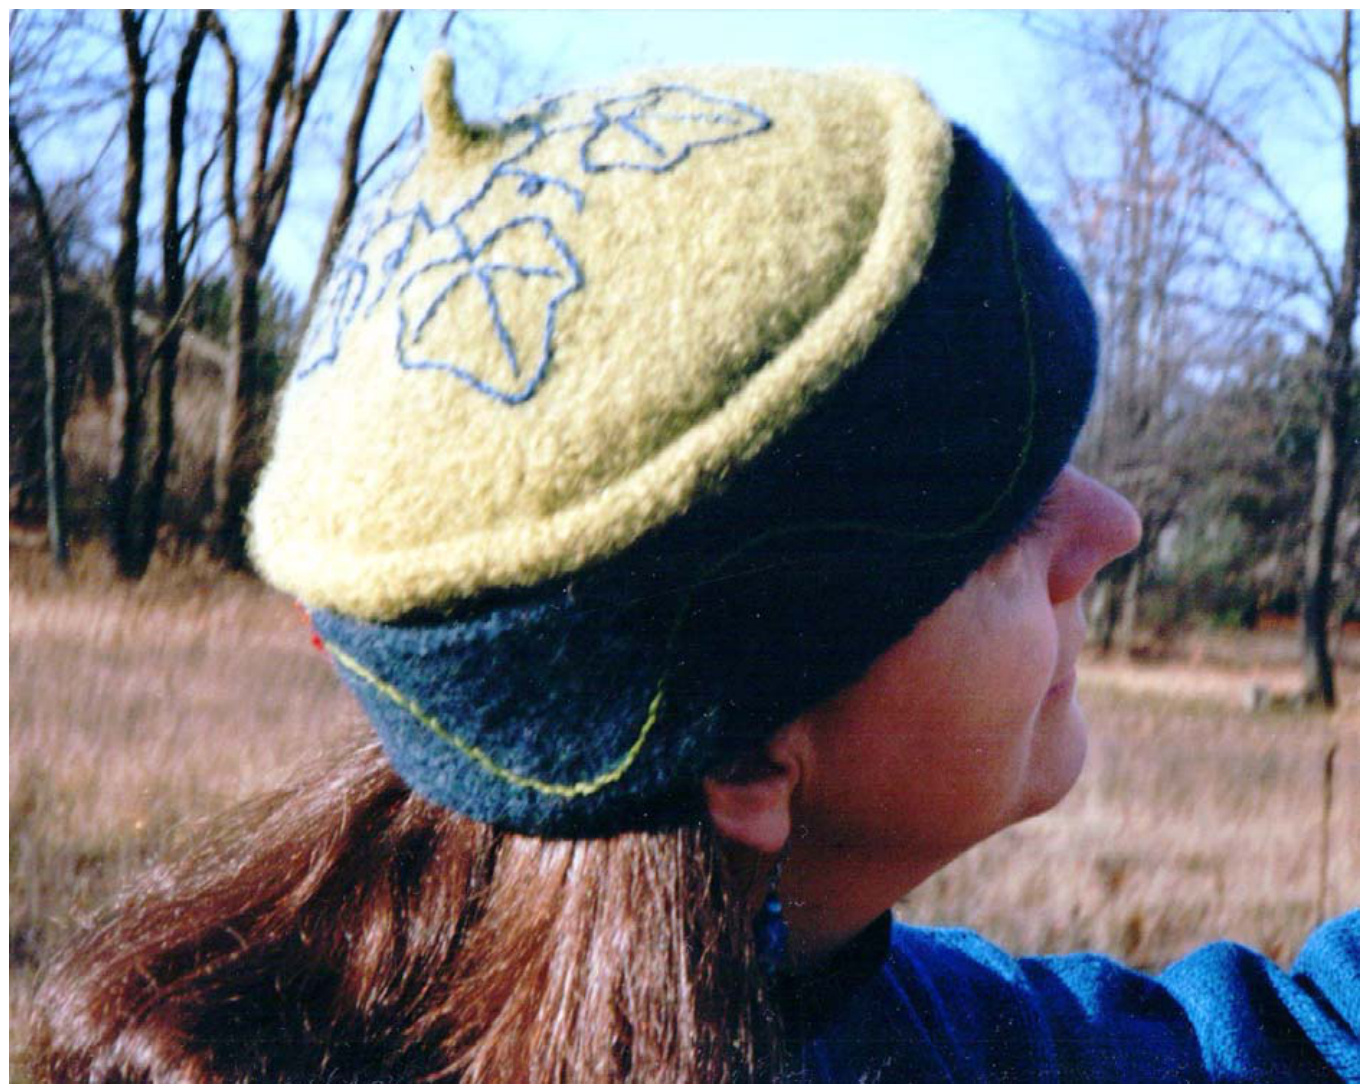
design by Amy E. Anderson Winter is coming and you'd better have a hat. Felt is an ideal material for hats because it is windproof and water repellant. The double brim on Ivy & Vines will keep your ears toasty warm in the coldest weather. Materials: Galway or Cascade 220, worsted weight wool. 1 skein each of Main Color (MC) and Contrast Color (CC) Needles: Size 5, 16" circular and double-pointed, or size needed to obtain gauge Gauge: 11 sts $=2"$ in stockinette Directions: With MC and 16" circular needle, cast on 132 sts. Join and knit 4 rds. Next rd: Inc 6 sts evenly spaced by knitting into the front and back of every 22nd st. Knit 4 rds even. Next rd: Inc 6 sts evenly spaced by knitting into the front and back of every 23rd st. (144 sts total.) Knit even until hat measures 9 1/2". Next rd: Switch to CC and knit 1 rd. Purl 8 rds. (These 8 rounds of reverse stockinette will form the rolled piping at the edge where the body of the hat joins the crown...see instructions for Finishing.) Begin working crown, as follows: Knit 2 rds even. Begin crown decreases as follows: 1st decrease rd: \*K10, K2tog\*, repeat \*\*. Knit 2 rds even. 2nd decrease rd: \*K9, K2tog\*, repeat \*\*. Knit 2 rds even. 3rd decrease rd: \*K8, K2tog\*, repeat \*\*. Continue working decreases every 3rd round, with one less stitch between the decreases (K2tog) each time. When you have gotten down to about 72 sts total, transfer your work to double-pointed needles and continue as above, until 12 sts remain. Knit 2 rds even. Next rd: K2tog, repeat to end of rd. Knit 2 rds even. Next rd: K2tog, repeat to end of rd. Slip the remaining 3 sts onto 1 needle and work 6 rows of l-cord (see instructions for I-cord below.) Draw yarn through the remaining 3 sts and draw tight. How to Make I-cord: Knit the 3 sts on the needle. Abbreviations: $\kappa=\mathsf{K n i t}$ $\mathsf{P}=\mathsf{P}\mathsf{u n}$ K2tog $=$ Knit 2 together Rd(s) = round(s) st = stitch sts $=$ stitches MC $=$ Main Color $\mathsf{c c}=$ Contrast Color Inc $=$ increase Every row: Slide the 3 sts to the opposite end of the needle and make this the left needle. Knit the 3 sts again.
Weave in loose ends. Cut a piece of yarn in CC, about $40"$ long. Thread the yarn onto a darning needle. Turn your hat inside out. You will see the groove where you worked the 8 rows of reverse stockinette. You want to sew this groove shut (making it into a tube) so that it will form a rolled piping around the crown of your hat. To sew it shut, I grabbed the purl bump from the first row of CC and the purl bump from the first row of the crown and drew them together. Continue sewing in this manner, all the way around the crown.
Felting:
Turn hat inside out and wash in hot water on long cycle, with a few drops of soap. You may need to wash the hat as many as 3-5 times. Wool is felted when you can no longer see the individual stitches. Felt will shrink twice as much in the length as the width. When your hat has reached the proper size, you can begin blocking it. Don't be discouraged if it doesn't have exactly the shape you expected. Wool felt is like clay; while wet it can be molded and shaped, using your hands or a steam iron. Put the wet hat on your head and stretch or shape it with your hands. Fold the brim up to the desired length. If your hat is a litte snug, you can stretch it over a mixing bowl. Once you have formed your hat into the shape you like, set it on a towel to dry. It may take 2-3 days to dry thoroughly.
Embroidery:
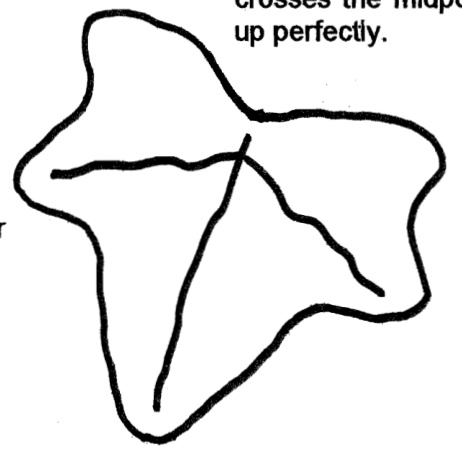
I prefer to use needlepoint yarn for embroidering hats. If you prefer to use embroidery floss, use all six strands. When embroidering on felt, you do not need to knot the end of your strands; simply weave them through the middle of the felt for about an inch. To embroider the ivy leaves, trace the leaf onto a piece of paper and cut it out. Pin the paper onto the crown of the hat and embroider around it, then add a few veins and a stem. When embroidering the vines around the brim of the hat, I found it very helpful to sew some guide lines for myself. With white thread, run basting lines approx. 3/4" from the top edge and the bottom edge of the brim. If desired, you can also run a center line, half way between these 2 lines. It may also be helpful to measure the circumference of the brim and insert pins at 10 equal-distant points. If your vine crosses the midpoint at each of the pins, it will match