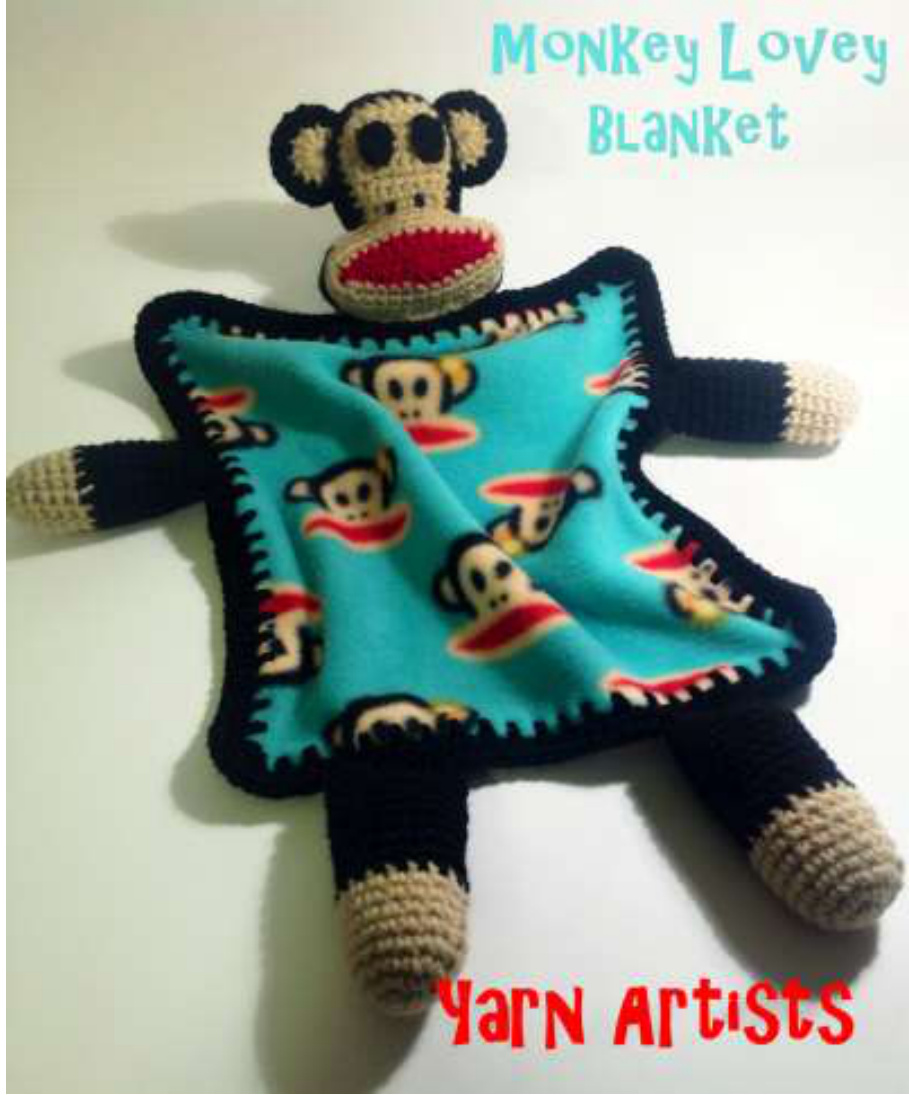
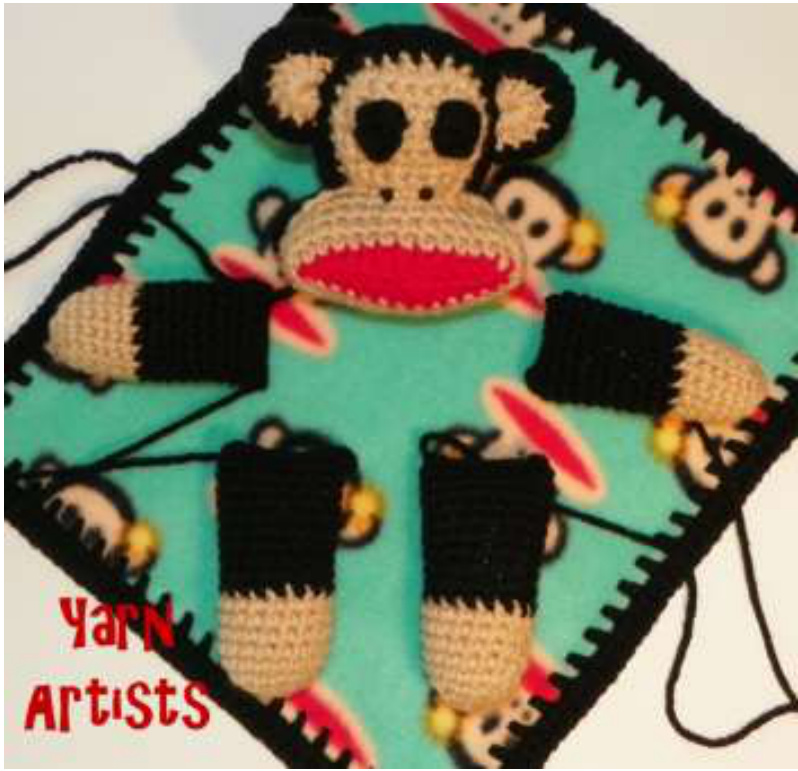
Monkey (Paul Frank Julius Inspired) Lovey Blanket Pattern Yarn Artists Designs
Materials Needed:
1 ball of Red Heart with Love Black Small amount of Red Heart with Love Holly Berry (Red) Small amount of Red Heart Buff (Tan) G Hook 10.5" x 12" of Paul Frank Monkey Fleece from JoAnns Fabrics and Crafts 45mm Rotary Cutter and Skip Stitch Blade for fleece Yarn Needle and Scissors Fiberfill
Abbreviations:
st = stitch sc = single crochet dc = double crochet hdc = half double crochet sts = stitches ch = chain sl st = slip stitch sc dec = sc the next 2 sts together
Let's get started..
First you will need to cut out your fleece. I bought a piece that was 12" wide fabric at JoAnns Fabrics and Crafts and was able to cut out 5 little blankets at 10.5 inches wide. Once they are cut out. You will measure 1/2" from each side. Change to your skip stich blade and score small holes in your fleece. You will run your rotary cutter from one end of your fabric all the way to the other end. Continue to do this for all four sides. Now you will crochet around the edge of your fleece. I used a G hook and black yarn for this. You wil use any hook that allows you to reach from one hole to the next without pulling on the fabric. You will hold the fabric with the front facing you. Begin to single crochet and chain 1 for each hole. When you reach the corners you will work 3 single crochets in the corner and chain 1 after. For the second row around you will Chain 2, and half double crochet in each stitch around. (The chain and sc from round one.) For the 3 sc in the corners, you will work 2 hdc in each of those stitches, for a total of 6 half double crochets. Fasten off and weave in your end. Here is a great instructional video on how to do this... ( I know the video says to measure %" in from the sides, but I find that %" is plenty.) http://www.youtube.com/watch?v=SO3Jye7Hlr8&feature=youtu.be Now that your blanket is finished, we will move on to the monkey @ It was fun, right?
Monkey Head with G Hook
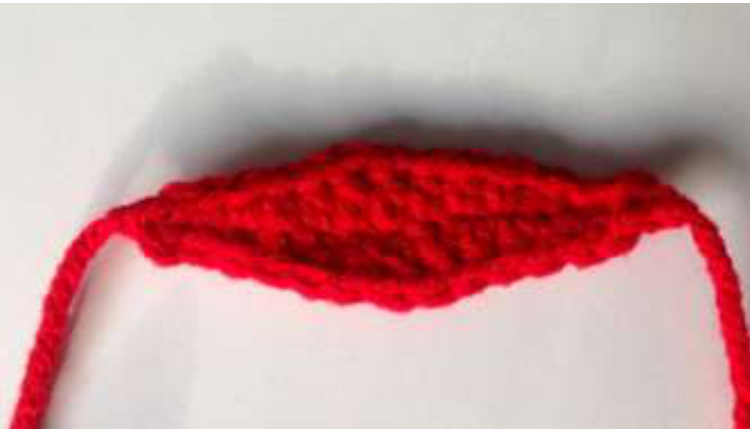
With Red Yarn we'll start the mouth Foundation Chain 15 Round 1: Sl st in the 2nd chain from hook, continue to work each chain as follows.. sl st, sc, sc, hdc, hdc, dc, dc, hdc, hdc, sc, sc, sl st, sl st. Turn and work the bottom of the foundation chain as follows... sl st, sl st, sc, sc, hdc, hdc, dc, dc, hdc, hdc, sc, sc, sl st, sl st. (28) Fasten off, you can weave in ends if you would like, but they will be hidden inside the head.
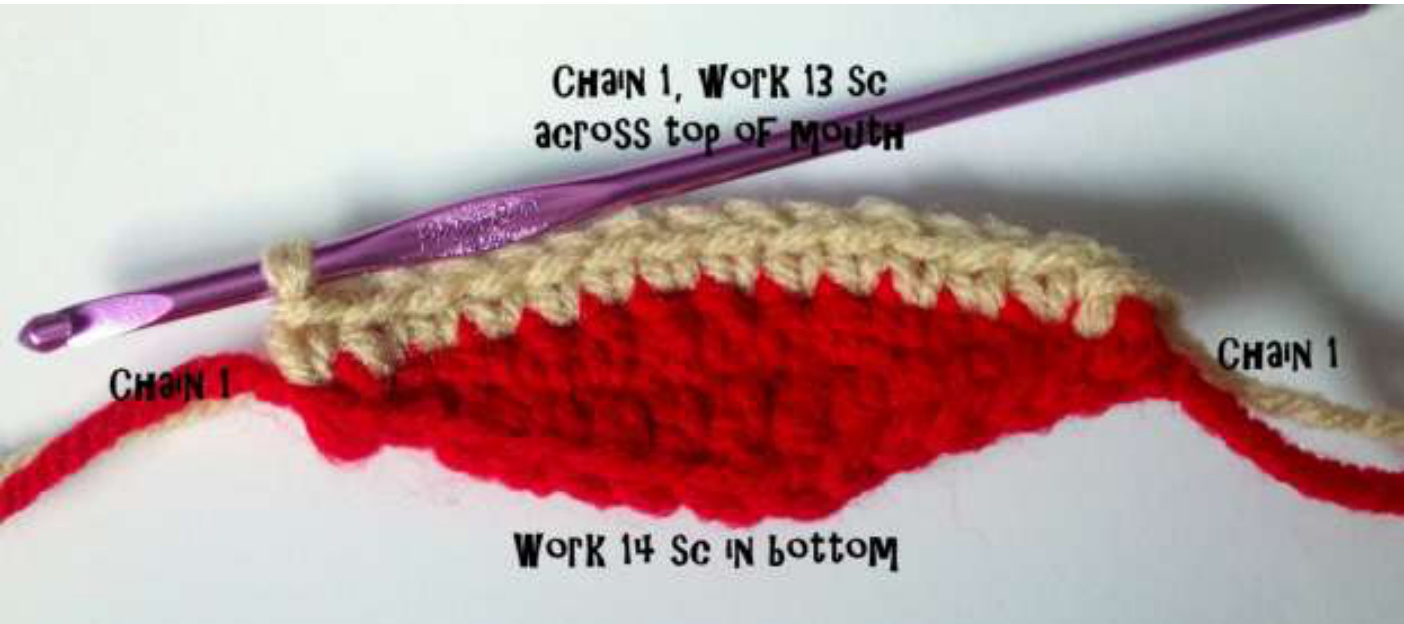
With Buff Yarn we will continue working around the mouth
Round 2: Sl st into the top of the mouth in the first sl st made from round 1. Ch 1(counts as sc), sc in next 13 sts, ch 1, turn and work the bottom, sc in next 14 sts, ch 1, sl st to first st. (28)
Round 3: Ch 1 (counts as sc), sc in same st, sc around mouth working 2 hdc in the chain 1 on each end of mouth, end row with a sl st into first stitch (30) Round 4: Ch 1 (counts as sc) , sc in each stitch around, sl st to ch 1 (30) Round 5: Repeat round 4 (30)
rn. You will begin working the face of the monkey. The face will be worked in row
Row 1: I'm hoping you ended up were I did in round 5. Basically we are centering 5 sts on the top of the mouth for this row....to do this... SI st in the next 4 sts, ch 1(doesn't count as sc), sc in same st, sc in next 4 sts (5) Row 2: Ch 1 (doesn't count as sc) turn, 2 sc in the first st, sc in next 3 sts, 2 sc in last st (7) Row 3: Ch 1, turn, sc in the next 7 sts (7) Row 4: Ch 1, turn, 2 sc in first st, sc in next 5 sts, 2 sc in last st (9) Row 5: Ch 1, turn, sc in next 9 sts (9) Row 6: Repeat row 5 (9) Row 7: Ch 1, turn, sc dec, sc in next 5 sts, sc dec (7) Row 8: Ch 1, turn, sc dec, sc in next 3 sts, sc dec (5) Cut yarn and fast off, weave in end.
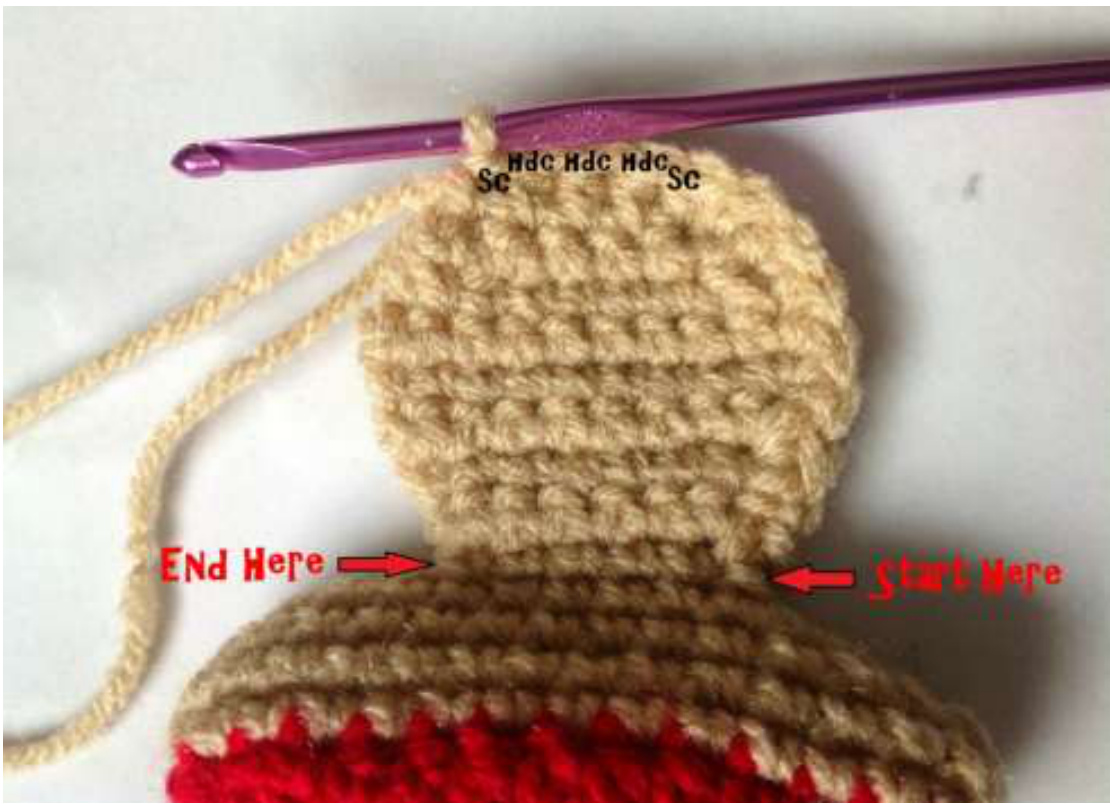
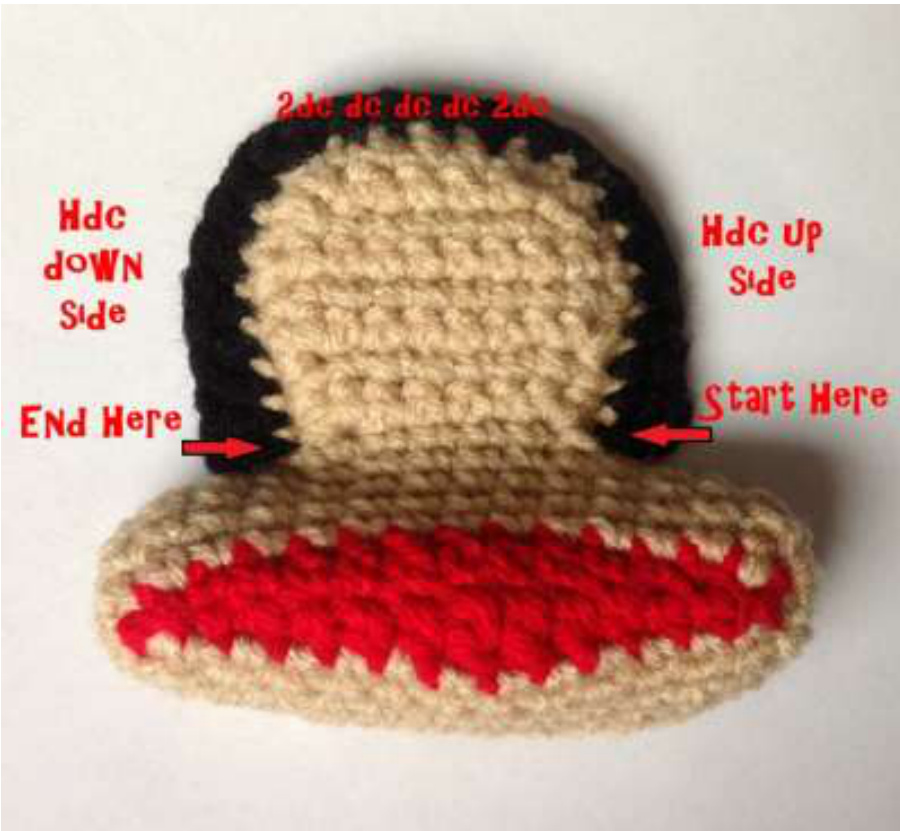
With Buff yarn you will work around the rows you just made. (See picture above for starting point) Sl st in first st from row 1, sc along the side of the rows, when you reach the top of the face you will sc, hdc, hdc, hdc, sc, then sc down the opposite side to the end point. Cut yarn and fasten off. Weave in ends.
With Black yarn you will work around the head again in the same way as the Buff yarn.
Hdc up the right side of face. On the top of head you will make 2dc, dc, dc, dc, 2dc. Then hdc down the opposite side. Cut yarn and fasten off, Weave in ends.
\*\*Now you will make the back of the head following all instructions above from the mouth to face. You will do all of it in solid black\*\*
Eyes With Black Yarn and G Hook (Make 2)
Chain 3, sl st to form a ring (or make a magic ring) Round 1: Ch 1 (counts as sc), sc, dc, sc, sc, dc in ring (6) Fasten off leaving a long tail to sew to face.
Ears With G Hook (Make 2) Front of Ear
Chain 3, sl st to form a ring (or make a magic ring)
With Buff Yarn:
Row 1: Ch 3 (counts as dc), 8 dc in ring (9)
Join Black Yarn:
Row 2: Ch 1, (counts as sc), turn, sc in same st, 2sc in the next 7 sts (16) Cut yarn and fasten off, weave in ends.
Ears With G Hook (Make 2) Back of Ear
With Black Yarn:
Chain 3, sl st to form a ring (or make a magic ring) Row 1: Ch 3 (counts as dc), 8 dc in ring (9) Row 2: Ch 1, (counts as sc), turn, sc in same st, 2sc in the next 7 sts (16) Fasten off. Leave an 18" tail for
sewing the front of the ear to the back of the ear. Also enough yarn to sew onto the side of the monkey's head.
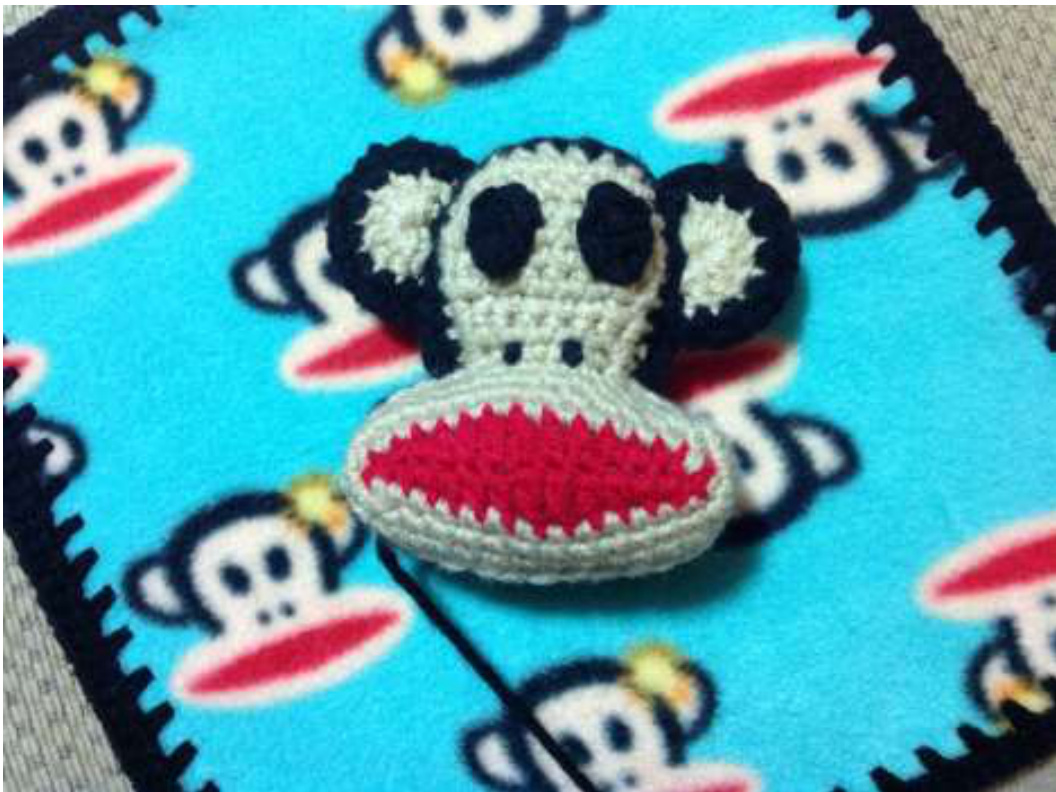
Nostrils with Yarn Needle and Black Yarn
Nostrils will be sewn on by working the yarn from the front to the back over one sc, 5 times for each. 1 spaced my nostrils 2 sc apart. (See picture above.) Once the eyes and nostrils have been attached to the face, you can begin sewing the front and back of the face together with a yarn needle and black yarn. Stuff with fiberfill before completely closing. I attached both ears to the head after it was sewn together. Leave a long tail to sew the head to the crocheted edge of your blanket.
Arms with G Hook (Make 2)
Chain 3, sl st to form a ring (or make a magic ring) With Buff Yarn: Round 1: Ch 1 (counts as sc), 5 sc in ring (6) Round 2: 2 sc in each st around (12) Round 3: \*sc, sc, sc, 2sc\* repeat from \* 2 more times (15) Round 4: sc in each st around (15)
With Black Yarn:
Round 8: Sc in each st around (15) Round 9-16: Repeat round 8 (15) \*You can make these arms as long or as short as you would like\* Stuff the arm, then hold the end closed and slip stitch across the top. Fasten off and leave a long tail for sewing to crocheted edge of blanket.
Legs with G Hook (Make 2)
Chain 3, sl st to form a ring (or make a magic ring)
With Buff Yarn:
Round 2: 2 sc in each st around (12) Round 3: \*2sc, sc, 2sc, sc\* repeat from \* 2 more times (18) Round 4: sc in each st around (18) Round 5-8: Repeat round 4 (18)
With Black Yarn:
Round 9: Sc in each st around (18) Round 10-18: Repeat round 8 (18) \*You can make these legs as long or as short as you would like\* Stuff the leg, then hold the end closed and slip stitch across the top. Fasten off and leave a long tail for sewing to crocheted edge of blanket. @ Copyright Notice: You have permission to sell the finished product locally and online. Please mention Yarn Artists as the designer of the pattern. Rewriting, reselling, distributing, or copying this pattern isn't allowed. Have fun! I would love to see pictures. If you would like you could share them with me on Facebook.


