maize
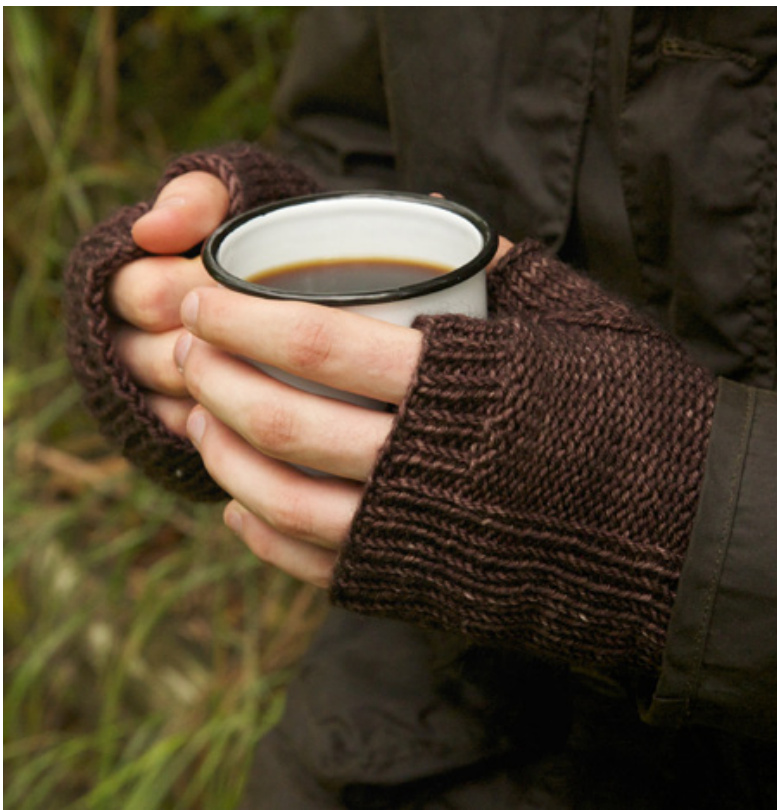
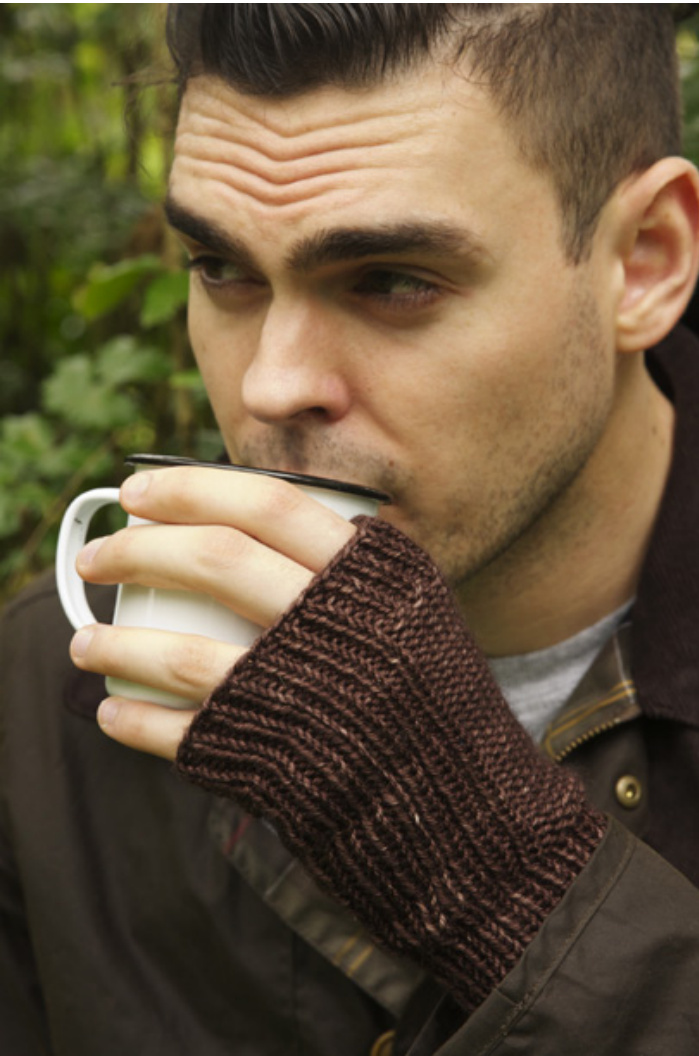
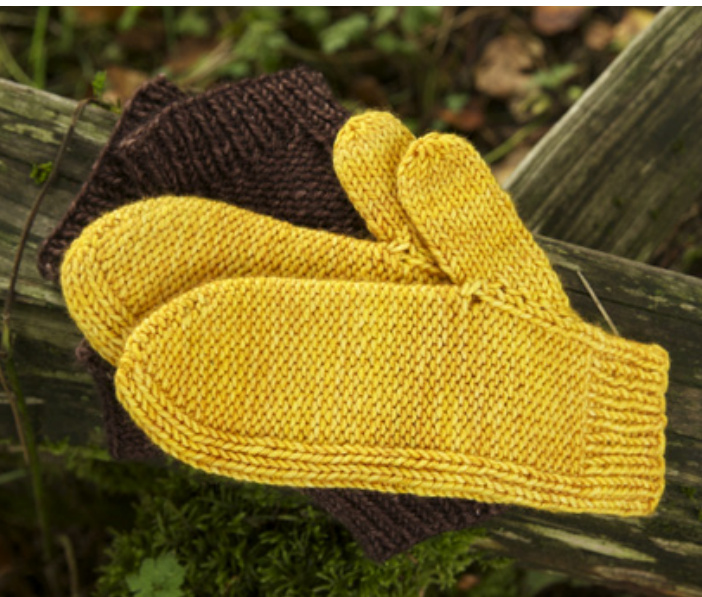
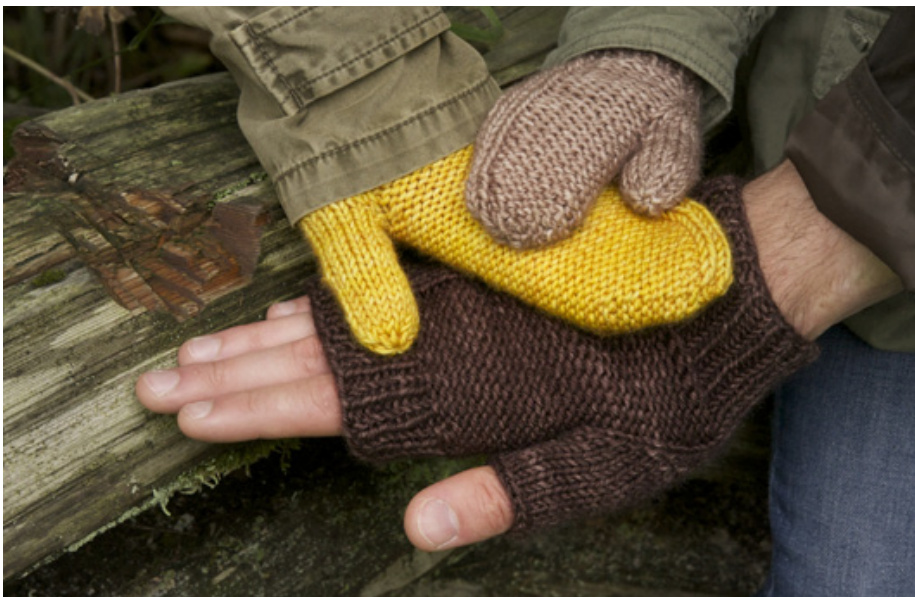
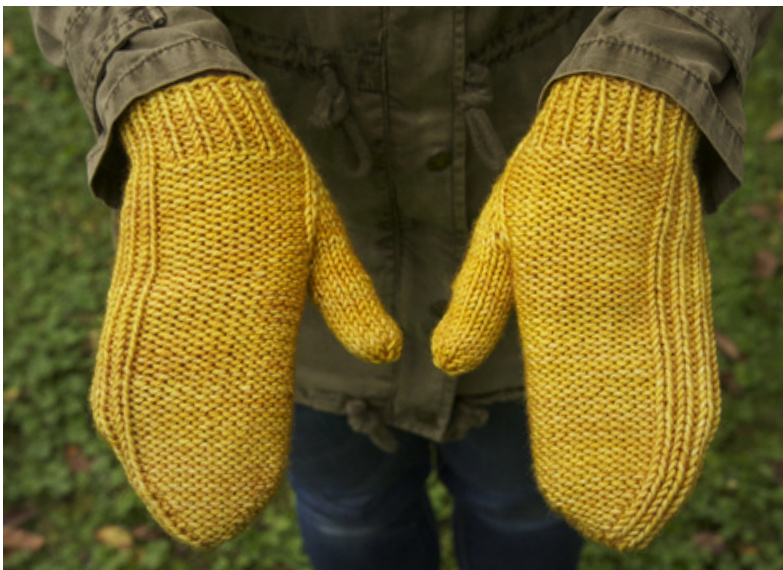
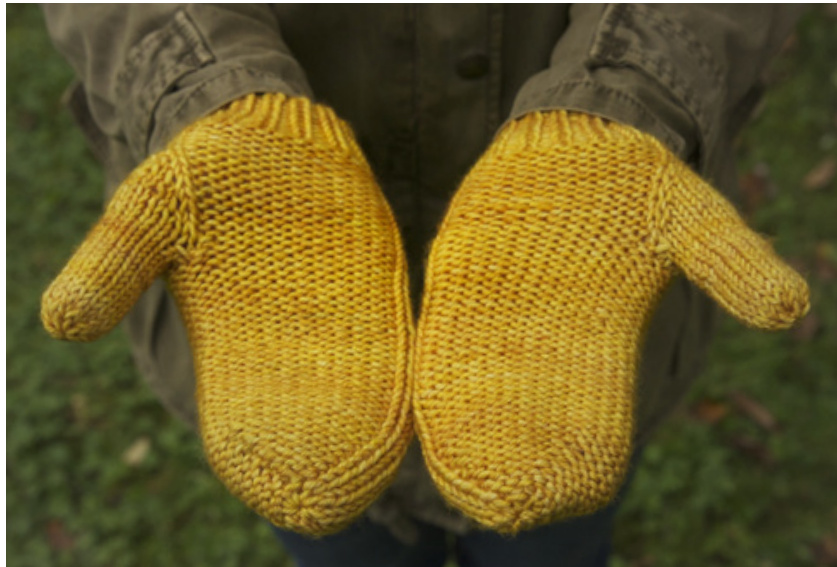
textured unisex mittens by Tin Can Knits
Learn toknit with Alexa and Emily! Maize is thefifth pattern in The Simple Collection - a learn to knit series with8excellentfreepatterns andcleartutorials. From your first hat, to socks and sweaters, learn all you need to know to make modern seamless knits for the entire family. Let's Knit a Mitten together now!
sizing:
Toddler (Child, Adult S, M, L) Fits hand: 6 (6.5, 7, 7.75, 8.5) inches around Mitten length: 7.5 (8, 8.5, 9.5, 10) inches cuff to tip
materials:

Yarn: Worsted / aran weight yarn 70 (80, 120, 150,200) yds for mittens 50 (60, 80, 100, 140) yds for fingerless mitts (Toddler, Adult S, and Adult L samples shown in SweetGeorgia Superwash Worsted in 'tumbled stone' ‘goldmine',and‘bison') 20 sts and 28 rounds / 4" in stockinette st. Gauge: Needles: US #6 / 4mm double pointed needles OR a 40"+ circular needle (for the magic loop method) (or as req'd tomeet gauge) Notions: stitch markers, darning needle, waste yarn
free patterns and tutorials
wheat scarf · malt blanket · barley hat · oats cowl maize mitts · flax pullover · rye socks · harvest cardigan
from the Simple Collection 1
DPNs or Magic Loop? When knitting small tubes (like mittens or sleeves) you can knit in the round using double pointed needles (DPNs) or a single long (40"+) circular needle and the magic loop technique. Try both and use whichever you are most comfortable with!
abbreviations:
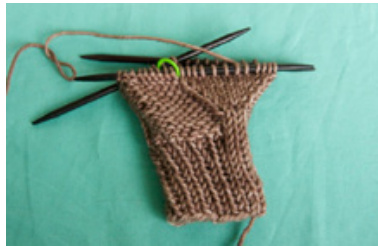
BOR - beginning of round CO - cast on dec - decrease(d) inc - increase(d) k - knit k2tog - knit 2 sts together m1 - make 1 stitch p - purl p2tog - purl 2 sts together PM - place marker st(s) - stitch(es) work in pattern - continue in pattern as established (knit the knits, and purl the purls) pattern: These mitts are knit in the round from cuff to fingertips. Make 2 the same. CO 24 (28, 32, 36, 42) sts, PM (this is the BOR), and join for working in the round, taking care not to twist the cast-on. Note: if you are working on DPN's you won't be able to place a marker at the beginning of a needle. Distribute your stitches so 1/2 are on the first needle. The beginning of the‘full' needle is the BOR. Setup ribbing: p1, k3, (p1, k1) to end Work 11 (11, 13, 15, 17) more rounds in ribbing as set. Setup pattern: p1, k3, PM, purl 7 (9, 11, 11, 14) sts, [k1, p1] 3 (3, 3, 5, 5) times, k1, purl to end Throughout the rest of the mitten or fingerless mitt (until ribbed edge or decreases), you will maintain the reverse stockinette stitch and ribbing pattern at the back of hand and palm as established. The first 3 sts (between the BOR marker and the second marker) will become the thumb gusset. Work 2 (2, 3, 3, 5) more rounds in pattern. thumb gusset: The knit sts between the BOR marker and the 2nd marker will be increased to accomodate the thumb. Round 1: p1, k1, m1, k1, m1, k1, slip marker, work in pattern to end [26 (30, 34, 38, 44) sts] Round 2: p1, knit to marker, work in pattern to end Round 3: p1, k1, m1, knit to 1 st before marker, m1, k1, work in patterm to end [2 sts inc] Round 4: p1, knit to marker, work in pattern to end Repeat rounds 3-4 two (2, 3, 3, 4) more times until there are 12 (12, 14, 14, 16) sts between the BOR and the marker. [32 (36, 42, 46, 54) sts total] Next round: p1, place the next 11 (11, 13, 13, 15) sts on waste yarn (removing 2nd marker), CO 3 sts using backwards loop method, then work around on remaining sts in pattern to end of round. [24 (28, 32, 36, 42) sts] Check out the 'Lets Knit Mitts' tutorial for an in-depth explanation of all the techiques
free patterns and tutorials
wheat scarf·malt blanket·barleyhat·oats cowl maize mitts · flax pullover · rye socks · harvest cardigan
from the Simple Collection 2
a free learn to knit series by Tin Can Knits find it all at www.tincanknits.com
hand:
For fingerless mitts: Work as established in reverse stockinette and ribbing patterm (purl the 3 CO sts at the start of the round) until work measures 0.5 (0.5, 1, 1.25, 1.5) inches from end of gusset. Setup ribbing: (p1, k1) around Work 3 (4, 4, 5, 6) more rounds in ribbing as established, then bind off all sts in patterm. For mittens: Work as established in reverse stockinette stitch and ribbing pattern (purl the 3 CO sts at the start of the round) until work measures 2.5 (3, 3.75, 4, 4.5) inches from end of gusset (or 1 (1, 1.25, 1.5, 1.5) inches short of total desired length). Next: remove BOR marker, purl 2 sts and replace marker. This is the new BOR. Note: if you are using DPN's just purl 2 stitches onto needle 3 from needle 1. Decrease Setup: p1, p2tog, p4 (6, 8, 8, 11), p2tog, PM, work 7 (7, 7, 11, 11) sts in ribbing as set, PM, p2tog, purl to last 2 sts, p2tog [4 sts decreased] [20 (24, 28, 32, 38) sts] Round 1: purl to marker, work in pattern to marker, purl to end Round 2: p1, p2tog, purl to 2 sts before marker, p2tog, work in pattern to marker, p2tog, purl to last 2 sts, p2tog [4 sts dec] Repeat rounds 1-2 zero (1, 2, 2, 3) more time Next round: (p2tog) twice, p1, (k1, k2tog) 3 (3, 3, 5, 5) times, (p2tog) twice. [9 (9, 9, 11, 11) sts] Break yarn, leaving a 6 inch tail. Thread tail through remaining live sts (removing markers) and pull tight to close top of mitten.

free patterns and tutorials
wheat scarf·malt blanket·barleyhat·oats cowl maize mitts · flax pullover · rye socks · harvest cardigan thumb: Place 11 (11, 13, 13, 15) held sts back on needles. Pick up and knit 3 sts in the cast-on sts, then knit around held sts to end of round. PM [14 (14, 16, 16, 18) sts] Knit around to last 5 sts, ssk, k1, k2tog. [12 (12, 14, 14, 16) sts] For fingerless mitts: knit all rounds until thumb measures 0.5 (0.5, 0.75, 1, 1) inches. Bind off. For mittens: knit all rounds until thumb measures 1 (1.5, 1.5, 1.75, 2) inches, or 0.25 inches short of desired length. Decrease round: k2tog around [6 (6, 7, 7,8) sts] Break yarn, leaving 6 inch tail. Thread tail through remaining live sts and pull tight to close thumb. finishing: There will be a small hole at the base of the thumb. Using your tail sew up the hole. Weave in all ends, and block mitts.