VIKING'S RECIPE
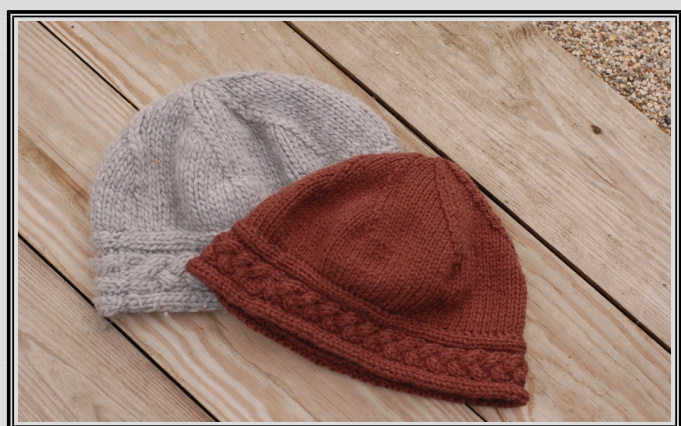
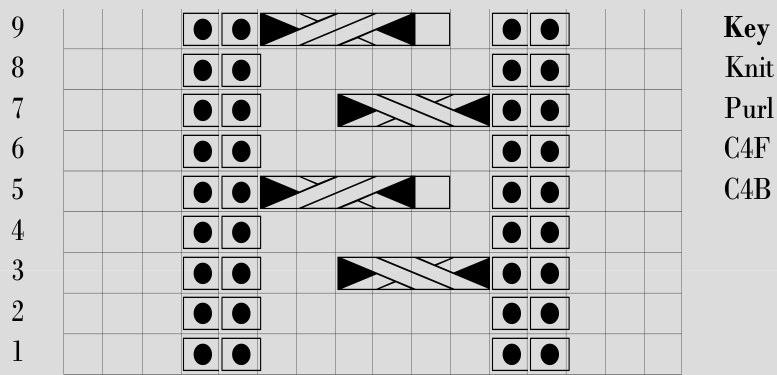
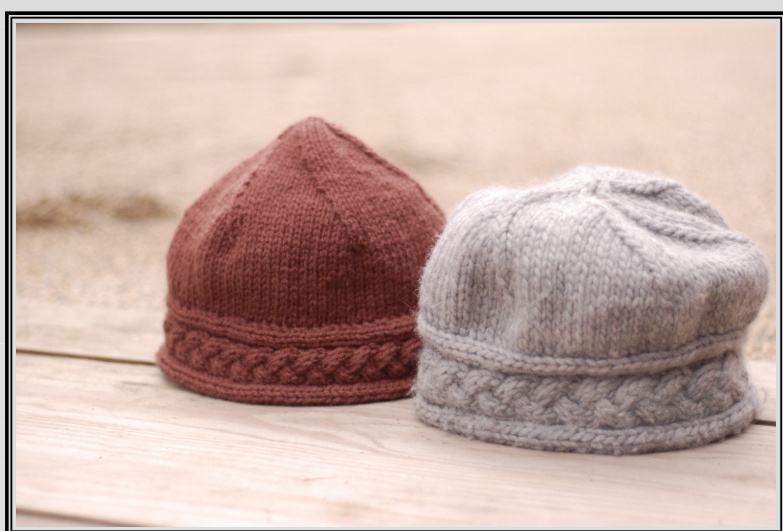
This hat is easy to make, with a pattern created to fit anyone. And the best part? It's unisex! I have a hard time trying to find things to knit for male relatives, and hats are usually my go-to for Christmas and birthdays. They're quick, easy, and useful. Feel free to use any cable pattern you wish, but if you wish to use the one shown I have included a graph for the simple braid used in the sample projects. Enjoy!
Materials
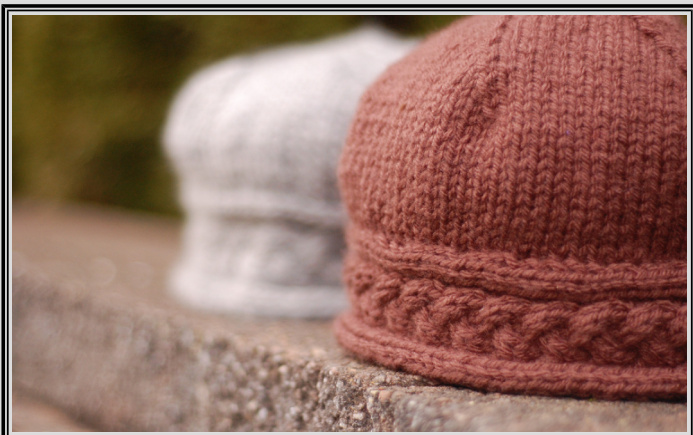
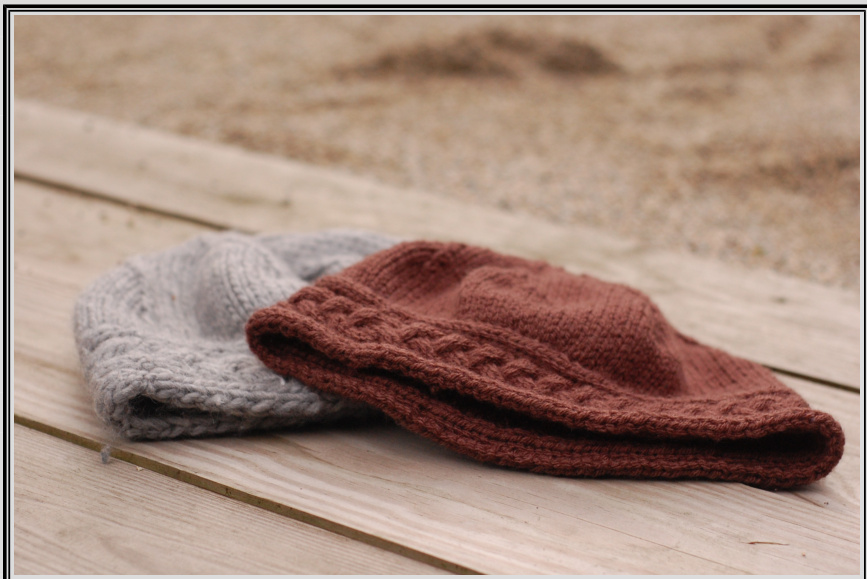
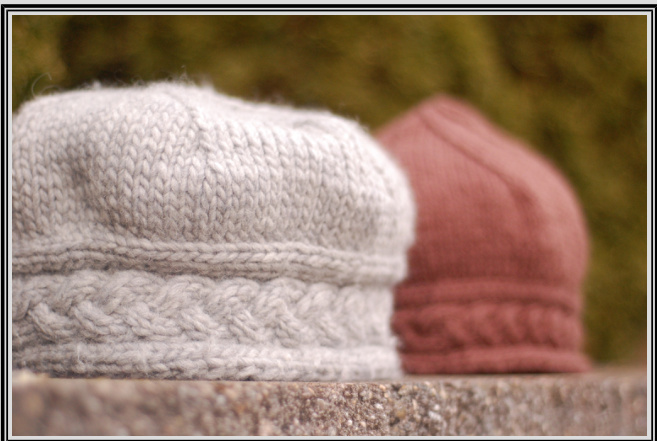
Any weight of yarn (the gray hat is made with bulky yarn, the brown hat with worsted) 16 inch circular knitting needles (size should appropriately match your yarn weight) Double pointed knitting needles (same size as your circulars) Darning needle Cable needle Stitches Used K - Knit P- Purl SSK - Slip Slip Knit
Special stitches:
C2F - Slip two stitches onto cable needle, hold in front. Knit 2, knit 2 from cable needle. C2B - Slip two stitches onto cable needle, hold in back. Knit 2, knit 2 from cable needle.
Techniques Used Knitting flat Knitting in the round Cabling Seaming (I used the Kitchener stitch, though plain seaming will work Picking up stitches
PATTERN
Step One
Measure the circumference of the head of your recipient (or your own head!): write down the number and subtract two inches. This is the length of the cabled band you're going to make. (If you want you could add or subtract another inch, it all depends on how tight you want the hat. An exact match will be a little loose.) For a smaller head I would subtract only one inch or half an inch.
Example:
The circumference of my dad's head was 24 inches, so I knitted 23 inch band. It was a slightly loose, but I think a 22 inch band would have fit nicely.
Step Two
Begin knitting the band. Cast on the number of stitches needed for your cable plus ten. (Six for the rolled borders on each side (three stitches per border) and four for the purl stitches between the border and the cable (two purl stitches per side). For the braided cable in the picture, follow this pattern. Cast on 16. Row 1: K3, P2, K6, P2, K3. Row 2: P3, K2, P6, K2, P3. Row 3: K3, P2, C2F, K2, P2, K3. Row 4: P3, K2, P6, K2, P3. Row 5: K3, P2, K2, C2B, P2, K3. Knit rows 2 through 5 for as long as you want the cable to be. End on row 5.
16151413121110987654321
Step Three
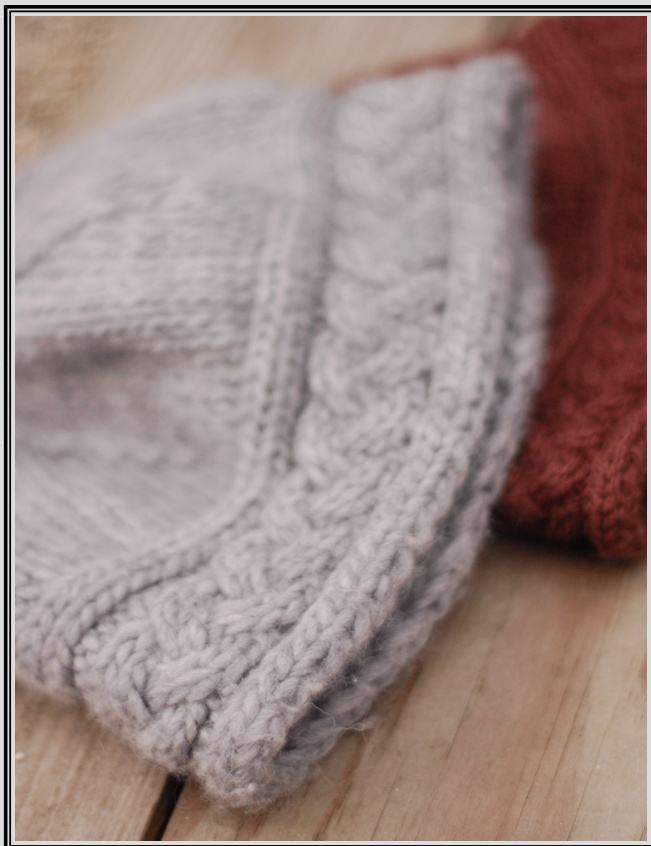
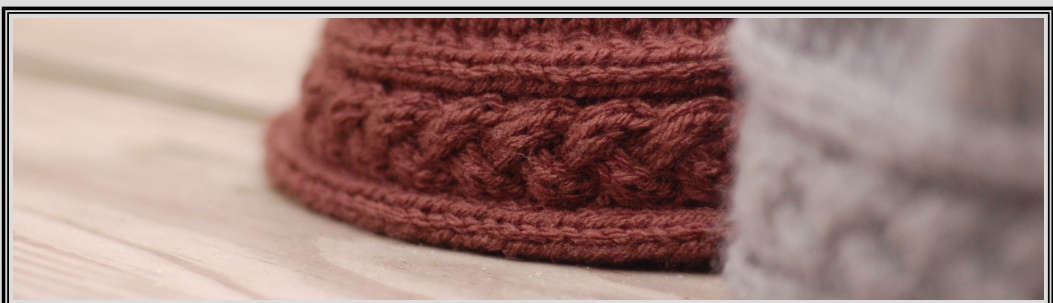
Seam the band ends together. If you want to use the Kitchener stitch for this, rip out the beginning of your cast on and put those stitches on another needle, and proceed to do the stitch. It's a little tricky doing so with a cable, since you have to pay attention to which stitches you want to look like knits and which ones you want to look like purls, but it gets easier with practice. (Personally, I love doing the Kitchener stitch with cables like this. But that could be just the geeky knitter in me.) The grafting won't be perfect, as you can see in this picture, but I still love the smoother effect that grafting has.
nt to use the Kitchener stitch, you could always just sew the en
Step Four
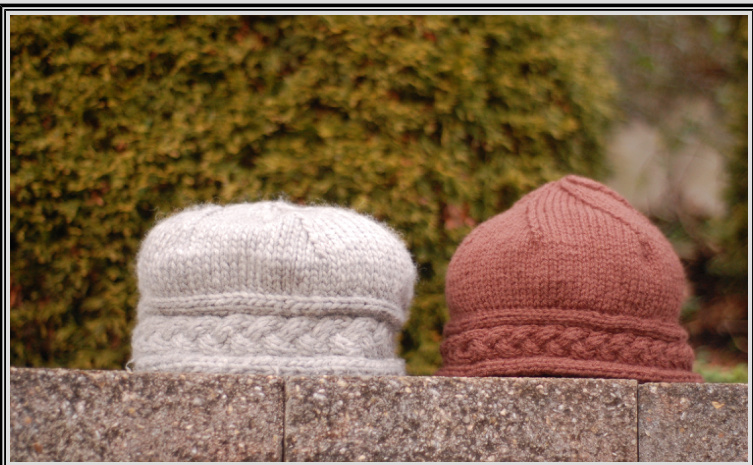
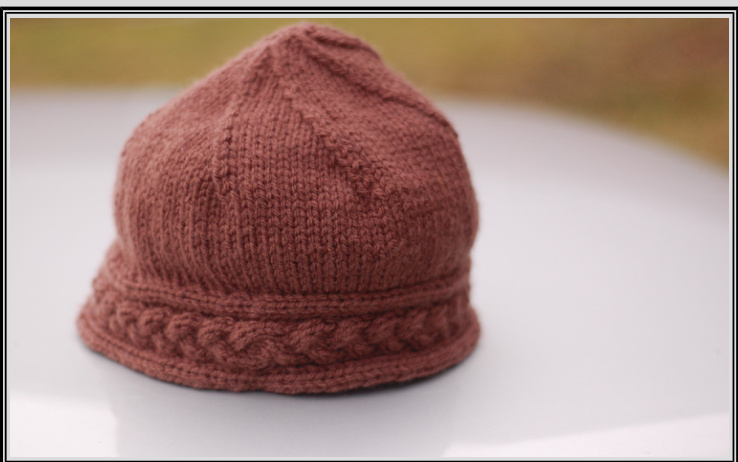
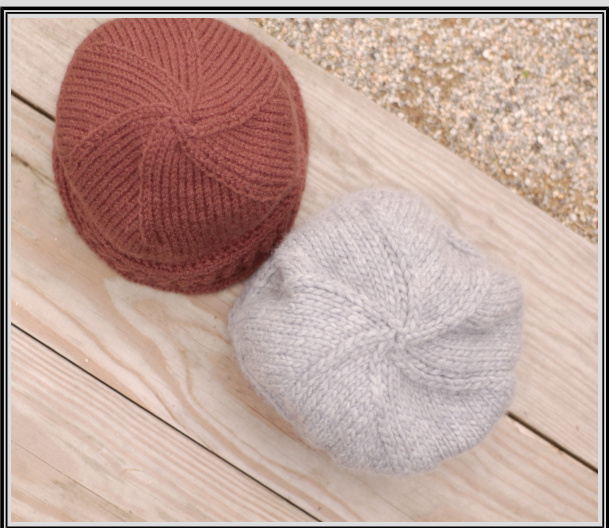
Pick up stitches all around the top of your band. This is the trickiest part for meif you pick up too many you'll end up with a poofy hat (which could be desirable in some cases), but you if you pick up too few stitches you'll end up with a flared brim that will never unflare. To prevent this, measure your gauge, and figure out how many stitches you'll need to pick up to span the length of your brim. Once you have that number, start picking up stitches and check as you go along to make sure you're evenly spacing them so that your hat doesn't turn out lopsided (like the brown one in the above picture).
Example:
If I have a 23 inch brim and my gauge is 4 or 5 stitches per inch, I will want to multiply 23 by 4.5. 23 x 4.5 = 103.5 Round up to the next stitch: 104 stitches. To make it even easier, you could divide your brim into four parts and, using the above example, pick up 26 stitches per quarter of your brim. Anything to space out your stitches evenly!
Step Five
Begin knitting! This is the easiest part, just join your picked up stitches in the round and knit for a few inches. I usually stop when the entire hat measures about five inches long——then I start my decrease
Row l: \*SSK, Kll\* until end of row. Row 2: Knit. Row 3: \*SSK, Kl0\* until end of row. Row 4: Knit. Putting a marker before each decrease makes this step of the pattern wonderfully easy. Keep knitting this way, alternating between rows of decreases and rows of plain knitting. Switch to DPN's when the hat gets too small. Stop when you have only a few stitches left. Then cut your yarn, take the darning needle and thread your tail through the remaining stitches. Pull tight, weave in ends, and voila! A custom made, cabled viking hat.
Hope you enjoyed the pattern!
Step Six
Begin decreasing. You can decrease in any way you want, but I find that starting my decreases every 10 to 13 stitches works pretty well. More decreases will create a flatter top, fewer decreases will create a pointy top. (The gray hat had more decreases, the brown hat had fewer.)
Example:
104 / 12 = 8.66 or 104 / 13 = 8 I will want around 8 decreases in this example hat. Since dividing by 13 came out perfectly, I'll decrease every ll stitches (the decrease takes up two stitches).
Knitter' Symbols fonts used courtesy Knitter's Magazine—Copyright @ 1998 XRX, Inc 2015 ElvishViolinist. All rights reserved.


