PEKAPEKA designstudie
Ode to Pinstriping a knitting pattern by Kelly Brooker
Ode to Pinstriping
a knitting pattern, designed by Kelly Brooker originally for the Red Riding Hood Yarns 2014 Winter Yarn club Men of the 1950's were known for their striking pinstripe suits...so what better way to pay homage to this, than by adding wee pinstriping detail to classic newborn attire. This pattern is written for 8ply/DK weight yarn, and to fit a newborn babe 3-4kg (7-9lb) in weight, with an approximate chest circumference of 37.5cm.
Construction
This pattern has you cast on at the neckline, and work flat utilising raglan increases, and forming a shallow v-neck until you reach the required chest size. From here the arm stitches are put on to waste yarn (or a stitch holder), and the body finished, working the garter stitch button band as you go. Once the body is completed, the sleeve stitches are returned to the needles and worked in the round with detailing reminiscent of pinstripes.
Skills required
knitting small circumferences in the round long tail cast on simpleslip stitch colour work working top down raglan construction If you are not familiar with these techniques you may need to reference a knitting guide book, or view videos on the internet.
Abbreviations
...knit k2tog....knit stitches together (a decrease) kf..knit into the front and back of a stitch (an increase) ... purl sllp...slip I stit.ch as if to purl Ssk..... slip one stitch as if to knit, slip one stitch as ifto purl, then pass both stitches back to the left hand needle and knit both together through the back loop (a decrease) yo...yarn over (an increase; in this case used to create a buttonhole) @2015 Kelly Brooker all rights reserved
Gauge
(in stocking stitch) 22sts/10cm on 4.0mm needles
Materials
4-5x 12mm buttons (dependent upon row gauge) 8ply/dk weight yarn (210-250m/100g) This pattern is suitable for yarn with good elasticity and memory - a wool or wool blend. Suggested yarn: Red Riding Hood Yarns Belle (434m/200g) 0.5 skeinMain colour 0.1 skein Contrast colour
Equipment
80cm 4.0mm circular needles (or needle size required to achieve gauge) 6 stitch markers 2 stitch holders, or small lengths of waste yarn darning needle for sewing in ends Note: ifyou are not working your sleeves via 'Magic Loop' you will not need an 80cm circular needle, however you will need whatever other needles you use to work small circumferences in the round (ieDoublePointedNeedles)
ThePattern
Using main colour, and long tail cast on, cast on 46stitches Rows 1 and 2: sl1p, knit all stitches to end of row Row 3: sl1p, k3, place marker, kfb, k1, kfb (Left front), place marker, kfb, k6, kfb (sleeve), place marker, kfb, k14, kfb (back), place marker, kfb, k6, kfb (sleeve), place marker, kfb, k1, kfb, place marker, k4 (Right front) Row 4: sl1p, knit all stitches to end of row
Part B: Chest
Row 1 and 3 (RS): sl1p, k3, slip marker, knit to 1 stitch before marker, kfb, slip marker, (kfb, knit to 1 stitch before marker, kfb, slip marker)x3, kfb, knit to marker, slip marker, k4 Row 2 and 4 (WS): sl1p, k3, purl all stitches to last marker,k4 Row 5 (RS): sl1p, k3, slip marker, (kfb, knit to 1 stitch before marker, kfb, slip marker)x4, kfb, knit to 2 stitches before marker, kfb, k1, slip marker, k4 Row 6 (WS): sl1p, k3, purl all stitches to last marker,k4 Row 7 and 9 (RS): sl1p, k3, slip marker, knit to 1 stitch before marker, kfb, slip marker, (kfb, knit to 1 stitch before marker, kfb, slip marker)x3, kfb, knit to marker, slip marker, k4 Row 8 and 10 (WS): sl1p, k3, purl all stitches to lastmarker,k4 Row 11 (RS): sl1p, k3, slip marker, (kfb, knit to 1 stitch before marker, kfb, slip marker)x4, kfb, knit to 2 stitches before marker, kfb, k1, slip marker, k4 Row 12 (WS): sl1p, k3, purl all stitches to last marker,k4 You now have 108 stitches, broken down as follows: 4/13/22/30/22/13/4 Row 13 - buttonhole row (RS): sl1p, k1, yo, k2tog, slip marker, knit to 1 stitch before marker, kfb, slip marker, (kfb, knit to 1 stitch before marker, kfb, slip marker)x3, kfb, knit to marker, slip marker, k4 Row 14 (WS): sl1p, k3, purl all stitches to last marker,k4 Row 15 (RS): sl1p, k3, slip marker, knit to 1 stitch before marker, kfb, slip marker, (kfb, knit to 1 stitch before marker, kfb, slip marker)x3, kfb, knit to marker, slip marker, k4 PartB:Chestcontinued Repeat Chest Rows 14 and 15 until you have 164 stitches, broken down as follows: 4/20/36/44/36/20/4. Finish having just worked a Row 15 (RS row). NOTE: Buttonholes are worked on Chest Row 13, then evenly spaced every 4-5cm throughout the chest and body on a RS row. Substitute the "sl1p, k3"at the start of each of these rows with "sl1p, k1, yo, k2tog" then work remainder of row as normal (chest Row 13 has been written in this manner to serve as an example). Sleeve separation row (Ws): sl1p, k3, purl to next marker (front), remove marker, place stitches between this marker and next marker onto waste yarn (sleeve), remove marker, purl to next marker (back), remove marker, place stitches between this marker and next marker onto waste yarn (sleeve), remove marker, purl to next marker, slip marker, knit to end of row (front). After working sleeve separation row, you will have 92sts on the needles as follows: 4 stitches, stitch marker, 84 stitches, stitch marker, 4 stitches. You will have 36sts on each piece of waste yarn.
Part C: Body
Row 1 (RS): sl1p, knit to end of row, slipping markers asyou pass them Row 2 (WS): sl1p, k3, slip marker, purl to marker, slipmarker,k4 NOTE: Do not forget buttonholes evenly spaced every 4-5cm throughout the chest and body on a RS row. Substitute the“sl1p, k3"at the start ofeach ofthese RS rows with "sl1p, k1, yo, k2tog" then work remainder of row as normal. Continue alternating Body Rows 1 and 2, and working buttonholes as directed above, until your work measures approximately 12-13cm from the underarm. Part D: Body edging Edging Row: sl1p, knit to end of row. Repeat Edging Row untilyou have a 1.5-2cm edging.
Part E: Sleeves
Return stitches from one piece of waste yarn to your needle, and pick up 4sts under each arm, placing a marker in the centre of these 4sts just picked up (40sts). You will be working sleeve in the round. The marker sits under the arm and marks thestart/finishofround. Rounds 1 and 2: Knit in stocking stitch (knit all stitches, every round)Part E: Sleeves continued Round 3 (decrease round): ssk, knit until 2 stitches from the end of the round, k2tog Repeat Rounds 1, 2, and 3, until you have a stitch countof30sts
Transition Round: purl all stitches
Pinstriping Round 1: (with main colour yarn in back, slip one stitch purlwise, then with contrast colour, knit one stitch) repeat stitches within brackets to the end of the round Pinstriping Round 2: with main colour, knit all stitches Repeat Pinstriping Rounds 1 and 2 until the sleeve measures approximately 10cm from underarm Change to main colour Work 4 rounds of garter stitch (knit one round, purl one round). Cast off Repeat for second sleeve
Finishing
Sewinall ends Wash in a gentle wool wash, then lay flat and in shape, to dry Securely sew on buttons to garter stitch button band, corresponding with the buttonholes

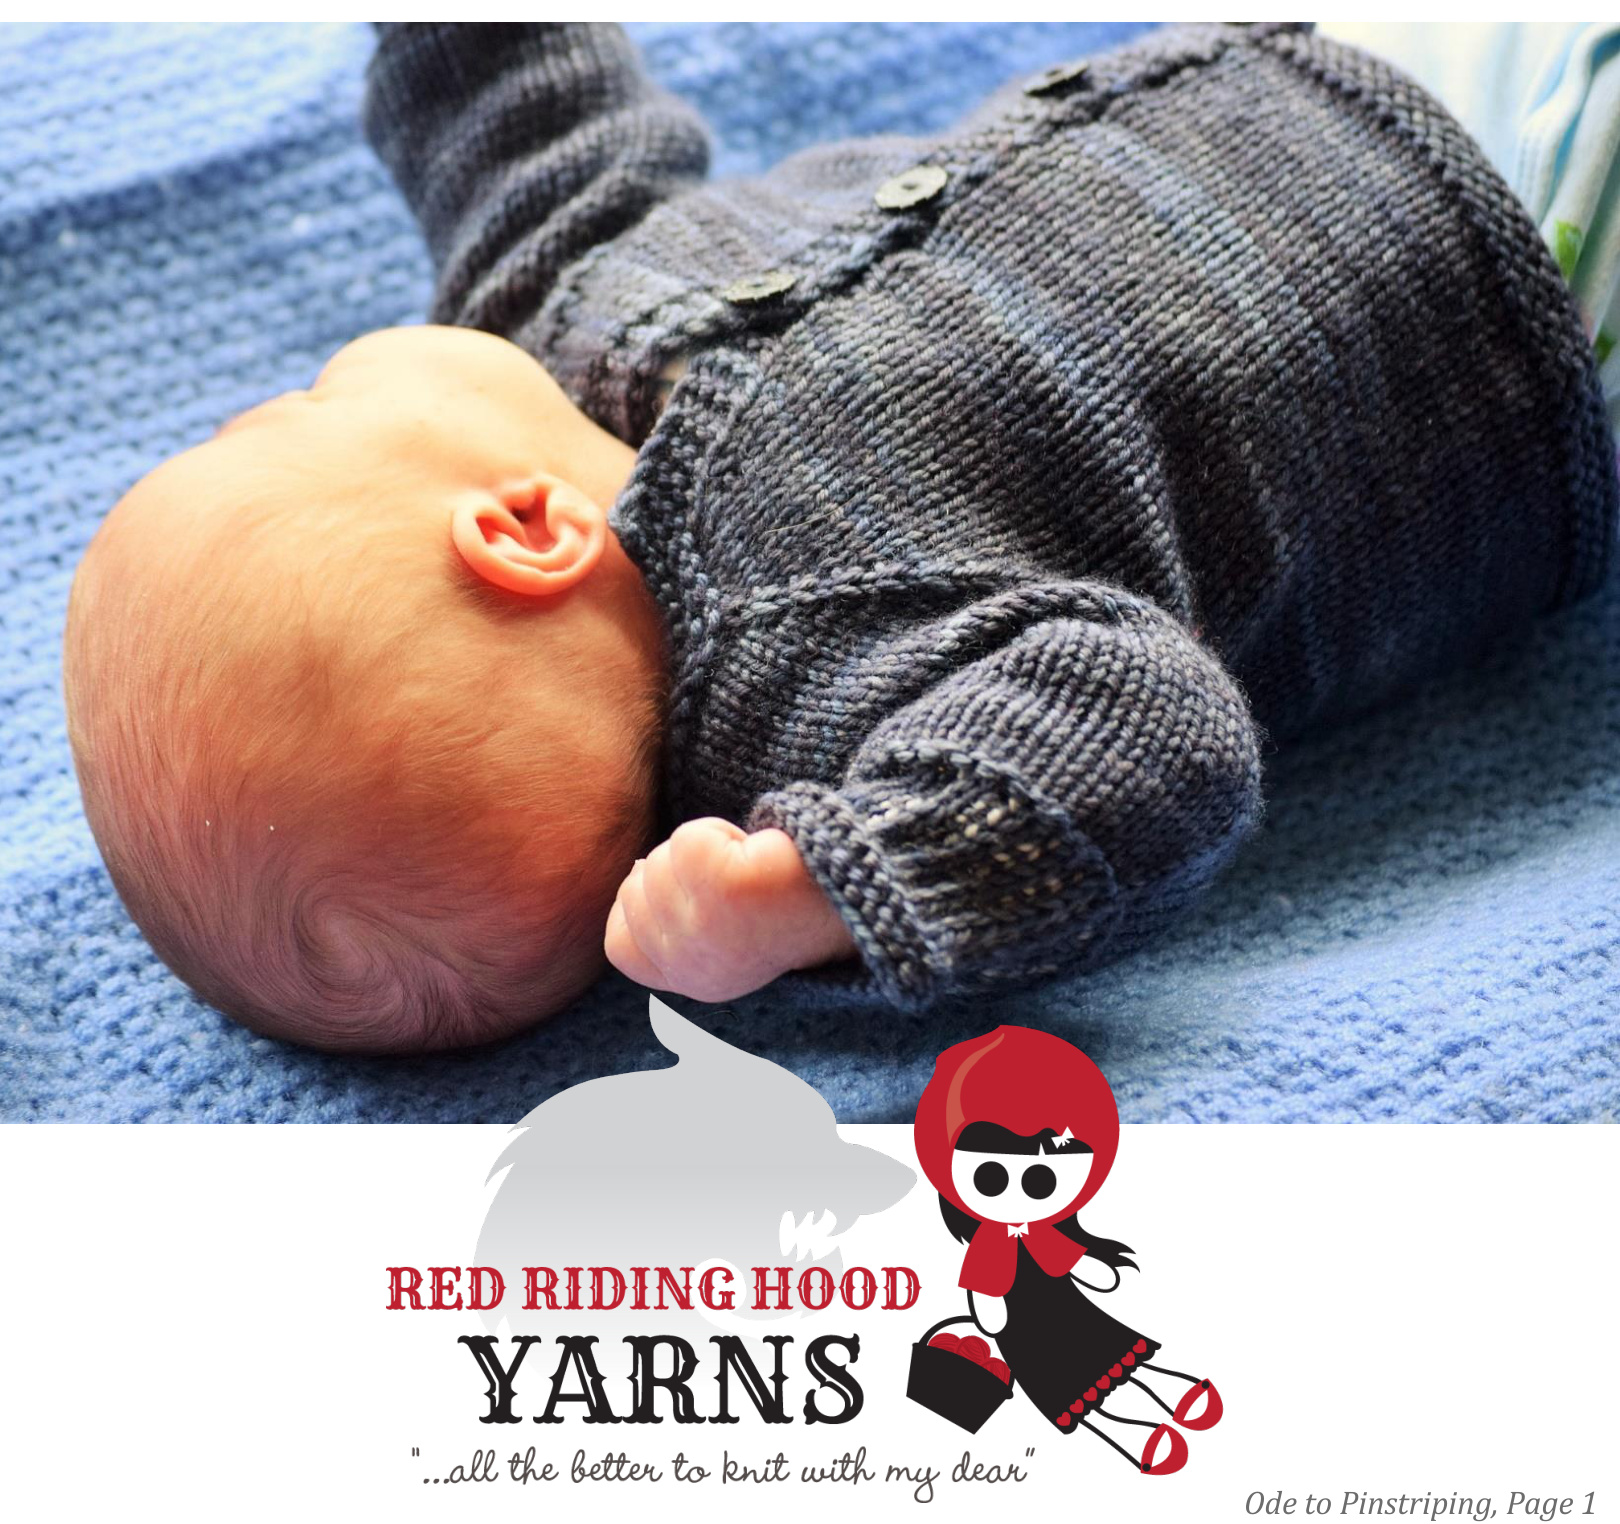
2 week old baby wearing cardigan in club colourways
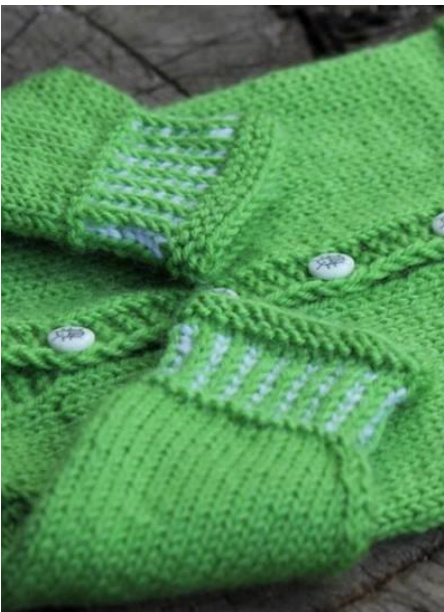
close up of sleeve pinstriping detailing
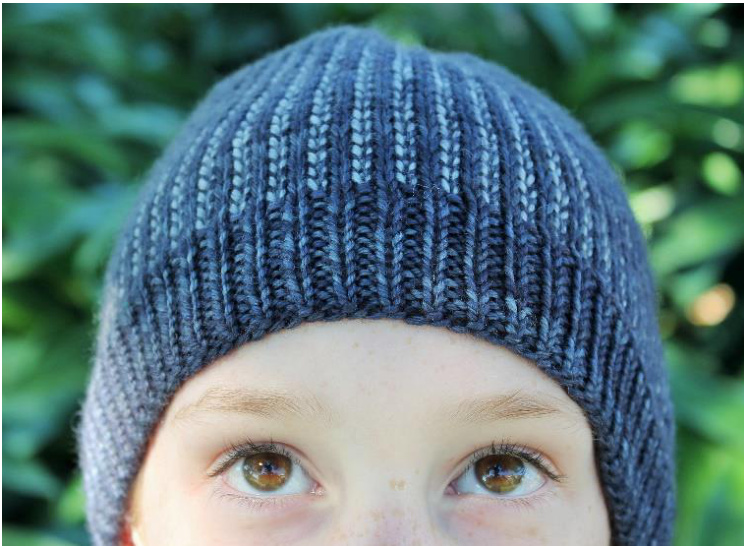
'Pinstriping Peter' - the hat which Ode to Pinstriping was designed to complement. Ode to Pinstriping, by Kelly Brooker, of PEKAPEKA design studio - for Red Riding Hood Yarns 2014 Winter Yarn club ?2015KellyBrooker all rights reserved I give my blessing for you to knit and sell as many items using this pattern as you wish! Need pattern support?Visit http://www.ravelry.com/groups/pekapeka-design-studio


