How to Knit Basic Socks for Charity
byMaryHenze/LaylaKnits for AT&T Fiber to theWorld Yarn Clubl and Wool-Aid2 A detailed plain English guide for new knitters.
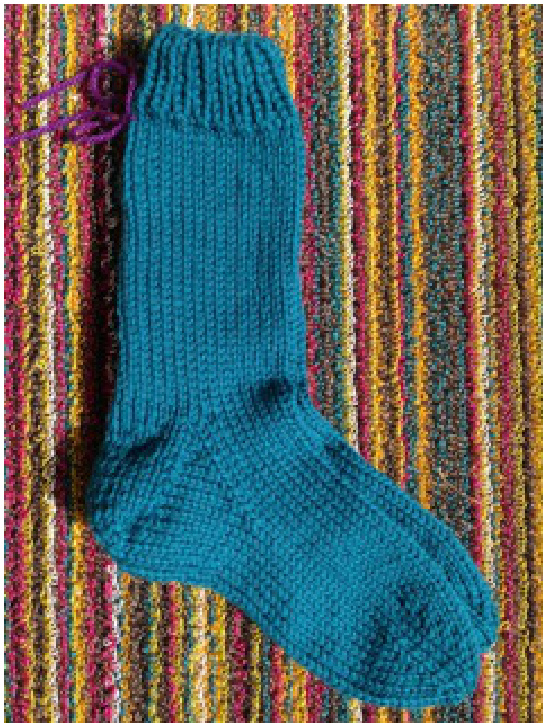
This pattern describes how to make a simple, warm pair of socks out of worsted weight wool using double pointed needles. Following the pattern will result in a pair of socks to fit a 6- to 8-year-old. Once you are comfortable with the basic sock process, try the pattern “Double Yarn Socks for Charity” for making socks in larger sizes and with additional features (available free from Wool-Aid: http://www.woolaid.org/patterns.html) This pattern breaks down the sock-knitting process into six steps that will be described in detail: 1) casting on and making the cuff, 2) knitting the leg, 3) making the heel flap, 4) making the “heel cup" or "turning" the heel, 5) starting the foot by knitting the gussets and instep, and 6) knitting the foot and toe. Each step is written in typical knitting language and followed by an indented “translation" of that step. Take your time and follow the directions. After you have finished the first sock, immediately cast on for the second sock of the pair, and start knitting it exactly the same way.
Materials:
Yarn: About 200 yards of worsted weight wool. Pick a multi-ply wool yarn (or a blend of wool and other animal fiber, such as alpaca) that feels strong, or that is combined with no more than 20% nylon. Cascade 220 or Paton's Classic Wool are good examples. These yarns will hold up longer to the tough wear a sock gets. A very soft wool, such as 100% merino, or a single-ply, such as Lambs Pride worsted, will not be as strong or long-wearing and should be avoided for socks intended for charity. Also avoid light colors. Needles: One set of #6 or #7 double pointed needles. Using bamboo or wooden needles is recommended if this is your first sock. Metal needles are very slippery, and until you are comfortable with the sockknitting process, it can be easier to work with needles that will “grip'" the stitches a little bit. Abbreviations: k=knit; p=purl; k2tog=knit two together; p2tog=purl two together
STEP 1: Casting on & Making the Cuff
Cast on 32 stitches. Using one double pointed needle and whatever method you are comfortable with, cast on 32 stitches. Row 1: _ \*K1 p1, repeat from \* across all stitches. Using a second double pointed needle, work across all the stitches, alternating knit 1 then purl 1, as if you were using straight needles. This will create 1 row of single ribbing on one of the double pointed needles. Row 2: a. Work 10 stitches in k1 p1 pattern onto first needle. b. Work 10 stitches in k1 p1 pattern onto second needle. c. Work 12 stitches in k1 p1 pattern onto third needle. These are the steps you use to divide your stitches evenly onto three of the four double pointed needles so you can knit in the round. First, knit 10 stitches in the k1 p1 ribbing pattern onto a second needle. Drop the second needle, which now has 2 rows of ribbing on it, and pick up another needle. Using this third needle, knit the next stitch from your original needle and continue in ribbing until there are 10 stitches on the third needle as well. Drop the third needle (so you now have two needles dangling), pick up another needle, and knit the last 12 stitches from your original needle, keeping the k1 p1 ribbing pattern. When you have finished these 12 stitches, you will have 2 rows of single (k1 p1) ribbing on three loosely connected needles. Ind 1: Join to knit in the round, continue \*k1 p1, repeat from \* aroun Now you should have three needles (loosely connected by the stitches on them) and one empty needle. The next— and very important — step is to connect, or "join,”" the stitches on the first and last needles of your three needles, so that you can begin to knit continuously around them in the same direction, rather than back and forth. You may feel that you are all thumbs the first several times you do this. It will get easier with every sock. Start your join by arranging the three needles in your hand in the shape of a triangle. Hold the triangle so that a) the triangle corner that is “open" (no stitch is connecting the two needles) is pointed toward you, b) the working yarn is attached to the needle to the right of the opening, and c) the two rows of knitting you have already completed are hanging down, below the needles. Make sure that your two rows of knitting are all arranged, hanging down, in the same direction and are not twisted around the needles in any way. Now pick up your working yarn from the needle to the right of the open corner, and move it to the back side of your work by moving it under the needle and into the inside of the triangle. Next, take the empty needle and place it, as to knit, in the first stitch on the needle that is to the left of the "open” corner, and knit it with the working yarn onto the empty needle. The working yarn from the right side of the open corner and the stitch from the left side of the open corner are now joined together and thus “join" all your stitches into a circle. The tail left over from your cast-on can serve as your "beginning of round" marker, or you can place a marker at this point if you prefer. For convenience, we will now assign numbers to the needles so they are easier to refer to. The needle to theleft of the cast-on tail will be Needle #l, the next needle as you knit around clockwise will be Needle #2, and the last needle (the one to the right of the “beginning of round" or the formerly open corner), will be Needle #3. Continue to k1 pl across all the stitches on Needle #1. When you are done with those stitches, you will once again have an “empty” needle. Use this empty needle to knit the stitches on Needle #2, and so on around your triangle. Each time you finish working the stitches from one needle, you create another empty or “working" needle to begin your knitting on the next needle. Rounds 2-8: \*K1 p1, until cuff is desired length. Continue to knit in the k1 p1 single ribbing pattern for about 8 “"rounds" around your triangle. This will create a stretchy ribbed cuff about inch long. If you want a longer cuff, simple knit more rounds before moving on to Step 2.
STEP 2: Knit the Leg
All rounds: Knit every stitch. After completing your cuff, stop the k1 p1 ribbing pattern and begin knitting every stitch. Because you are “knitting in the round" this will automatically create stockinette stitch, which will create the smooth leg of your sock. Just keep on knitting around and around until the cuff and leg of your sock together measure at least 6 or 7 inches.
STEP 3: Making the Heel Flap
Place 16 stitches on the first needle and 8 stitches on the other two needles. To create the flap of material that goes down the back of the heel you will briefly stop knitting in theround,and knitbackandforthwith twoneedles overjusthalfofyour stitches.To do this, you first have to get 16 stitches onto one needle. This is done by carefully sliding (not knitting) stitches from one needle to another. For example, if you now have 10 stitches on Needle #1, 12 stitches on Needle #2, and 10 stitches on Needle #3, you will slide six stitches from Needle #2 onto to the left end of Needle #1. Now you have 16 stitches on Needle #1 but only 6 stitches left on Needle #2. So you also need to move 2 stitches from Needle #3 onto Needle #2 so that they both have 8 stitches on them. Note that the stitches for the flap (16) are half the number of stitches you cast on (32), while the stitches on the other two needles (8) are each half the number you used for the flap. This is not an accident, and it is a ratio that stays the same no matter what size sock you make. Work the 16 stitches as follows: Row 1: Slip 1, knit across the row. Row2: Slip 1 as if to purl, then purl across all stitches. Repeat Rows 1 and 2 until the heel flap forms a square. End with a knit row. For the heel flap, when knitting a “knit row" (for example, Row 1), slip the first stitch as if to kni when knitting a “purl row" (for example, Row 2), slip the first stitch as if to purl. For this size sock your heel flap will probably be about 14 to 18 rows, but the number of rows is less important than the shape of the flap. A square heel flap helps the sock fit snugly around the ankle. After you've knit a few rows, start checking the shape of your flap (making sure to roll out the edges when you do so) so that you can judge how many more rows to knit.
STEP 4: Making the “Heel Cup"or “Turning" the Heel
Take a look at what you have knit so far with the cuff edge up. It is essentially a tube and a flap designed to fit a vertical human leg. Now we have to change direction, literally, and start knitting horizontally to fit a human foot. Thefirst step in this transition from vertical to horizontal is to create a small curved "cup"on the heel flap that the back of a heel will fit into. This is known as “turning the heel." It takes just afew rows of knitting but introduces a new technique known as a “short row."A “short row" is just what it sounds like. You start knitting or purling across a row of stitches, and then you stop“short" before you have worked all the stitches in the row, and you turn around and purl or knit back in the other direction. So for every row of the instructions below (except the last two), there will be one or more stitches left on your needle when you turn and start working in the other direction. continuing to work back and forth on the 16 stitches of your heel flap. Start with the purl side (inside of sock) facing you. Row 1: Purl across until 6 stitches remain on left needle, p2tog, p1, turn (3 stitches remain on needle). Purl across your heel flap for 10 stitches, then purl the next 2 stitches together. Purl 1 more stitch. There will still be 3 stitches remaining on your left needle but leave them alone for now. Now, turn your entire work around in your hands so that the knit side of the heel flap is facing you. Your working yarn will now be at the back, but attached to a stitch that is on the needle that is now on your left. This feels odd, but we will fix it on the next row. Row 2: Slip 1, knit across until 6 stitches remain on left needle, k2tog, k1, turn (3 stitches remain on needle). The knit side of your heel flap is now facing you, and your working yarn is attached to the very first stitch on your left needle. Move or “slip" this stitch, without knitting it, from your left needle to your right needle. Now your working yarn is on the right needle, where it is supposed to be. Knit across until 6 stitches remain on your left needle, knit the next 2 stitches together, and then knit 1 more stitch. There will still be 3 stitches remaining on your left needle. (Note that this is the same number of stitches you left behind on Row 1.) Now, turn your entire work around in your hands so that the purl side of the heel flap is facing you again. Your working yarn will now be at the front, but attached to a stitch that is on the needle that is now on your left. Row 3: Slip 1, purl to 1 stitch before last turn (visible by small gap), p2tog, p1, turn (1 stitch remains). Before you start this row, take a look at the stitches on your needle and see if you can locate the little “gap" toward the left end where you purled 2 stitches together on Row 1. If you spread the stitches out a little on your needle, it should be obvious. Now go back to the right end of your needle and start the row by moving or “slipping” the first stitch on your left needle (and the working yarn) to your right needle. Purl across the row until you get to the stitch before that little gap. Then “"p2tog" by purling together the stitch before the gap and after the gap (You can think of this as “bridging the gap"). Purl 1 more stitch, then turn your work around. There should have been just 1 stitch remaining on your left needle when you turned. Row 4: Slip 1, knit to 1 stitch before last turn (visible by small gap), k2tog, k1, turn (1 stitch remains). Again, locate the little gap toward the left before you start this row. Then slip the first stitch, knit across to the stitch before the gap, knit the stitches on either side of the gap together, knit 1 more stitch, and turn your work. Row 5: Repeat Row 3, ending with p2tog. There will be no stitches remaining on your left needle when you finish this row and turn. Row 6: Repeat Row 4, ending with k2tog. There will be no stitches remaining on your left needle when you finish this row. You should now have 10 stitches on your needle (but don't worry if you have 9 or 11.) It is more important that you have created a small “cup" for the heel and that the direction of your knitting is now heading, more or less, horizontally, ready to form the bottom of the sock foot.
STEP 5: Starting the Foot or "Heel Gusset & Instep"
Again, take a look at your knitting so far and at your own foot. You should have: a) two needles with 8 stitches on them that you left alone whileyou knitted the heel flap and cup(these 16 stitches will form the "instep" of your sock which is the section that covers the top of your foot), and b) a third needle holding the 10 stitches of your heel cup. If you hold your sock up to your foot, you can see that these heel cup stitches will naturally form the bottom of your sock. What is missing is the sides— the part of the sock that would cover your ankle bones and join up with the instep to form the foot of the sock. This missing section is called the “heel gusset," and you have to create or “pick up" some new stitches to get it started. ons refer to “left' and “right’ assuming the back of the leg and heel flap is facing you
Pick up and knit 9 stitches along the left edge of the heel flap.
Your working yarn should be on the left edge of the heel cup/flap after completing Row 8 of Step 4. Before you begin this next step, take a look at the edge of the heel flap, and you will see that the last stitch on each row forms a neat “chain" of stitches along the edge (this results from slipping the first stitch of each row as you knit the heel flap). There are several ways to “pick up and knit" stitches. Two are described here. (If the process is still not clear, search the Internet for “pick up and knit'’ and you will find helpful videos.) Option 1: Using your empty needle, insert the tip from the front to the back of the first “chain link" closest to the heel cup. Holding your yarn in your left hand, move the needle up underneath the yarn and around the top to “hook" it and pull it through the chain. You will now have one “picked up” stitch on your formerly empty needle. Repeat this process for each “link" along the edge until you have about 9 stitches on your needle (or one stitch for each link). Option 2: Instead of using a double pointed needle to grab the new stitches, you can use a crochet hook. Holding your yarn in your left hand, insert the crochet hook from the front to the back of the chain link, hook the yarn and pull a loop through the link. Place this loop either on an empty needle or Needle #1. (If the latter, you can skip the next step.) Repeat until you have “picked up" 9 new stitches. Move the picked up stitches to Needle #1. Simply slip the stitches from your fourth needle onto the same needle that holds the stitches for the heel cup. This is Needle #1, which now holds the heel cup stitches and the newly created, or picked-up, left gusset stitches. Knit across the 16 instep stitches. Using your empty needle, knit the 8 stitches from the next two needles onto a single needle. This now becomes needle #2 and holds all the stitches that will form the instep, or top, of your sock. The number of stitches on Needle #2 should always be half the number of stitches you cast-on at the beginning. Pick up and knit 9 stitches along the right edge of the heel flap AND then knit 5 stitches from the heel cup. Using the same method as you used to pick up stitches on the left side, pick up and knit 9 stitches along the right edge of the heel flap (or the same number that you picked up along the left edge for the left gusset). These stitches form the right gusset on what is now your Needle #3. Continuing with the same needle, knit 5 of the existing heel cup stitches off of needle #1. You now have stitches on three needles that form a triangle: Needle #1 holds 5 stitches from the heel cup and 9 stitches that you picked up for the left gusset: 14 stitches total. Needle #2 holds the 16 stitches of the instep. Needle #3 holds 9 stitches of the right gusset and 5 stitches from the heel cup: 14 stitches total. The beginning ofyour round is now at the middle ofthe heel cup (between Needles #1 and #3). Note that you have quite a few more stitches on your needles than when you cast on for the leg. Needles #l and #3 should have the same number of stitches, but it's not a big deal if they are one stitch different. In the following steps, you will decrease the gussets so that your sock gradually tapers down to fit the foot. Round 1: Knit all stitches. Now you return to knitting in the round just as you did for the sock leg. The stitches that you picked up along the heel flap may feel tight as you knit them on this first round. This is because they may be “twisted." You can just knit them as is or knit them “"through the back loop" to turn them around. Round 2: a. Needle #1: Knit to within 3 stitches of the end of needle #1, k2tog, k1. b. Needle #2: Knit all stitches (the instep stitches). c. Needle #3: K1, k2tog, knit the rest of the stitches. Repeat Rounds 1 and 2 until there are 8 stitches on needle #1 and 8 stitches on needle #3. The stitch count on Needle #2 should remain unchanged at 16. Note that after you have completed the repeats to decrease the gusset, you once again have the same number of stitches that you cast on: 32. Half are on Needles #1 and #3 (combined), and the other half are on Needle #2.
STEP 6: The Foot and Toe
Knit all rounds until foot is desired length. Continue to knit around the 32 stitches now on your needles until the foot measures about 6 to 7 inches (or 1.5 inches less than your desired finished sock length). A good rule of thumb for socks for charity is to make the length of the foot the same as the length of the leg of the sock. Decrease for toe shaping as follows: Round 1: a. Needle #1: Knit to last 3 stitches, k2tog, k1. b. Needle #2: K1, k2tog, knit to last 3 stitches, k2tog, k1. c. Needle #3: K1, k2tog, knit to end (center of heel). Round 2: Knit. Repeat Rounds 1 and 2 until there are 8 to 10 stitches left in total. Close toe and weave in ends. Cut yarn, leaving about 5 inches. Thread the yarn-end onto a large tapestry needle and insert it through the remaining stitches, removing the knitting needles as you go. When all 8-10 stitches are threaded onto the yarn-end, draw the yarn tight to close the toe. Insert the needle into the toe to pull the yarn to the inside of the toe, weave in the end of the yarn securely, and trim the yarn. Weave in cast-on tail. When weaving in the cast-on tail at the cuff, close the small gap that remains from knitting one row before joining to knit in the round.
Immediately cast on for the second sock of the pair.
To help make the second sock the same size as the first, count and match the number of rounds in the leg before beginning the heel flap and in the foot before beginning the toe.


