Charlie Brown Amigurumi Pattern
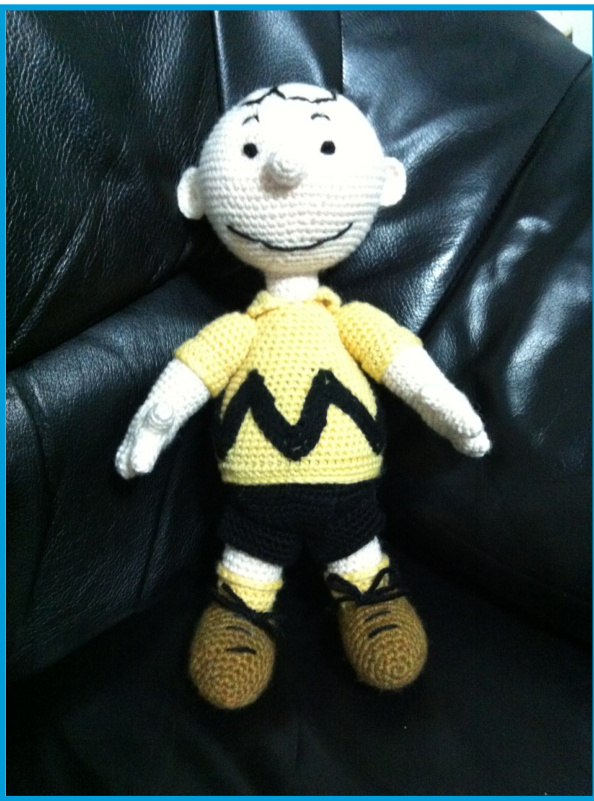
My co-worker wanted me to make him Charlie Brown after seeing my other creations. It was a bit challenging to make this character since I grew up watching Peanuts and wanted to make Charlie Brown perfect. I must have reworked this little doll 20 times before he was right. Unless otherwise stated, work in continuous rounds. Also, I assume that you have basic knowledge in crotchet. If not there are many tutorials on YouTube. Good luck!
Materials Required:
Brown, black, yellow and flesh tone coloured yarn Fibrefill Black felt 3.5mm (E) hook Yarn needle Sewing needle and thread Felting needle
Charlie Brown Amigurumi Pattern
Head: Using Flesh Tone Rnd 1: 6 sc into magic circle (6) Rnd 2: 6inc (12) Rnd 3: \*sc, inc\* x6 (18) Rnd 4: \*2sc, inc\* x6 (24) Rnd 5: \*3sc, inc\* x 6 (30) Rnd 6: \*4sc, inc\* x 6 (36) Rnd 7: \*5sc, inc\* x 6 (42) Rnd 8: \*6sc, inc\* x 6 (48) Rnd 9: 48sc Begin stuffing the head. Continue stuffing as you work on the piece. Rnd 10: \*7sc, inc\* x 6 (54) Rnd 11: 54sc Rnd 12: \*8sc, inc\* x 6 (60) Rnd 13: 60sc Rnd 14: \*9sc, inc\* x 6 (66) Rnd 15: 66sc Rnd 16: \*10sc, inc\* x 6 (72) Rnd 17-18: 72sc Rnd 19: \*10sc, dec\* x 6 (66) Rnd 20: 66sc Rnd 21: \*9sc, dec\* x 6 (60) Rnd 22: 60sc Rnd 23: \*8sc, dec\* x 6 (54) Rnd 24: 54sc Rnd 25: \*7sc, dec\* x 6 (48) Rnd 26: 48sd
Charlie Brown Amigurumi Pattern
Rnd 27: \*6sc, dec\* x 6 (42) Rnd 28: \*5sc, dec\* x 6 (36) Rnd 29: \*4sc, dec\* x 6 (30) Rnd 30: \*3sc, dec\* x 6 (24) Rnd 31: \*2sc, dec\* x 6 (18) F/O and leave a long tail for attaching the head to the body. Shoe: (Make 2) Using Brown Rnd 1: 6sc in magic circle Rnd 2: 6inc (12) Rnd 3: 12sc Rnd 4: \*sc, inc\* x6 (18) Rnd 5: 18sc Rnd 6: \*2sc, inc\* x 6 (24) Begin stuffing the piece. Continue stuffing as the piece is worked. Rnd 7-15: 24sC Rnd 16: \*2sc, dec\* x 6 (18) Rnd 17: 18sc Rnd 18: \*sc, dec\* x 6 Rnd 19: 12sc Rnd 20: 6dec (6) F/O and leave a long enough tail to sew the 6st opening ci
Charlie Brown Amigurumi Pattern
Leg: (Make 2) Using Yellow and working in rounds. Rnd 1: ch18, join to 1st ch to create a loop. Leave a long enough tail at the beginning to attach pieces together. Rnd 2: ch1, sc into the joining ch, 17sc, sl st into 1st sc, ch1 (18) Rnd 3: sc into same st, 17sc, sl st into 1st sc, ch1 (18) Rnd 4a: In front loops only sc into same st, 17sc, sl st into 1st sc (18) F/O and weave in tail. Attach flesh tone yarn to back loop of Rnd 4. Rnd 4b: in back loops only, sc into same st, 17sc, sl st into 1st sc, ch1 (18) Rnd 5 - 10: sc into same st, 17sc, sl st into 1st sc, ch1 (18) Rnd 11sc into same st, 17sc, sl st into 1st sc F/O and leave a long enough tail to attach pieces.
Shorts Legs: (Make 2)
UsingBlack Rnd 1: ch20, join to 1st ch to create a loop. Rnd 2: ch1, sc into the joining ch, 19sc, sl st into 1st sc, ch1 (20) Rnd 3: sc into same st, 19sc, sl st into 1st sc, ch1 (20) Rnd 4: sc into same st, 19sc, sl st into 1st sc (20) F/O and leave a long enough tail to attach pieces.
Charlie Brown Amigurumi Pattern
Body:
Using Black Rnd 1: 6 sc into magic circle (6) Rnd 2: 6inc (12) Rnd 3: \*sc, inc\* x 6 (18) Rnd 4: \*2sc, inc\* x 6 (24) Rnd 5: \*3sc, inc\* x 6 (30) Rnd 6: \*4sc, inc\* x 6 (36) Rnd 7: \*5sc, inc\* x6 (42) Rnd 8: \*6sc, inc\* x 6 (48) Rnd 9: \*7sc, inc\* x 6 (54) Rnd 10: \*8sc, inc\* x 6 (60) Rnd 11: 60sc in back loops only Rnd 12-13: 60sc Switch to Yellow Rnd 14:60sc Rnd 15: 60sc in back loops only Rnd 16-17: 60sc Rnd 18: \*8sc, dec\* x6 (54) Rnd 19-22: 54sc Rnd 23: \*7sc, dec\* x 6 (48) Rnd 24-25: 48sc Rnd 26: \*6sc, dec\* x 6 (42) Rnd 27-28: 42sc Rnd 29: \*5sc, dec x 6 (36) Rnd 30-31: 36sc Rnd 32: \*4sc, dec\* x 6 (30) Rnd 33: 30sc Rnd 34: \*3sc, dec\* x 6 (24)
Charlie Brown Amigurumi Pattern
Rnd 35: 24sC Rnd 36: \*2sc, dec\* x 6 (18) Rnd 37: 18sc Start working in rows to form the collar. Row 1: ch1, turn, 18sc in front loops only, ch1, turn Row 2-4: 18sc, ch1, turn Row 5: 18sc F/O and weave in tail. Attach flesh tone yarn to the back loops of Rnd 36 to form the neck. Rnd 1: 18sc in back loop only. Rnd 2-5: 18sc F/O and weave in tail. Attach yellow yarn to the front loop of Rnd 15 to create the bottom of the shirt. Rnd 1: 60sc in front loops only. Rnd 2: 6sc Rnd 3: 60ss F/O and weave in tail. Hand/Arm: (Make 2) Fingers: (Make 5) Using Flesh Tone Rnd 1: 4sc in magic circle Rnd 2: \*sc, inc\* x 2 (6) Rnd 3-5: 6sc F/O four of the 5 fingers and leave a long enough tail to attach pieces. Leave the yarn attached to the fifth finger. Page 6
Charlie Brown Amigurumi Pattern
For the hand, sew 3 of the fingers together by taking the yarn tail from the first finger and weaving it through 2 stitches on both first and second finger. Ensure that the yarn tail of the second finger is on the opposite side of this. Take the yarn tail of the second finger and weave it through 2 stitches on both the second and third finger. Ensure that the yarn tail of the third finger is on the opposite side of this. Take the yarn tail of the third finger and weave it through 2 stitches on both the third and fourth finger. Ensure that the point where the yarn is attached is opposite to this. Stuff all four of the fingers firmly. Use the connected yarn to continue forming the hand.
Charlie Brown Amigurumi Pattern
Rnd 1-3: 18sc Rnd 4: 18ss F/O and weave in tail. Nose: (Make 2) UsingFleshTone Rnd 1: 6 sc into magic circle (6) Rnd 2: 6inc (12) Rnd 3-5: 12sC F/O and leave a long tail for attaching the nose to the head. Ear: (Make 2) UsingFleshTone Row 1: 4sc in magic circle, ch1, turn but do not join to 1st st Row 2: 4inc, ch1, turn Row 3: \*sc, inc\* x 4 F/O and leave a long tail for attaching the ears to the head.
Charlie Brown Amigurumi Pattern
Assembly:
1) Attach the head to the body with the tail from the head. 1 just weaved in and out of each piece with the tail. Ensure the neck is in the bottom centre of the head. Firmly stuff the neck before completely sewing openings close to ensure it can support the weight of the head.
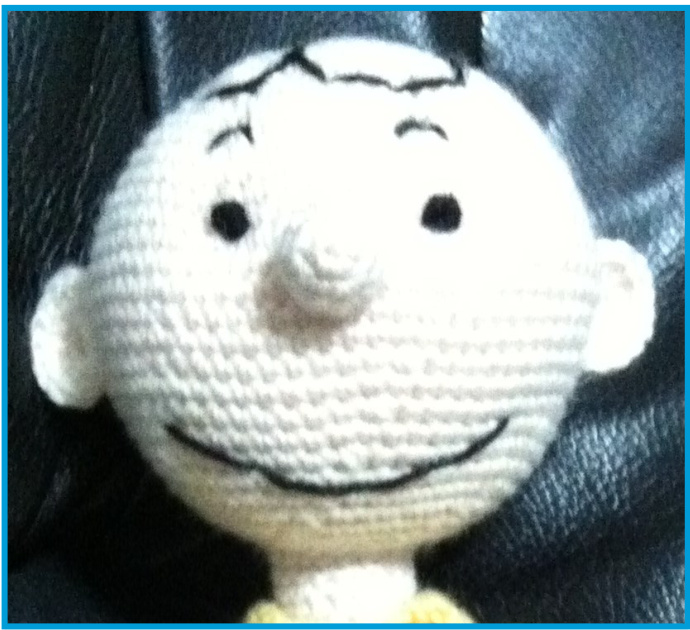
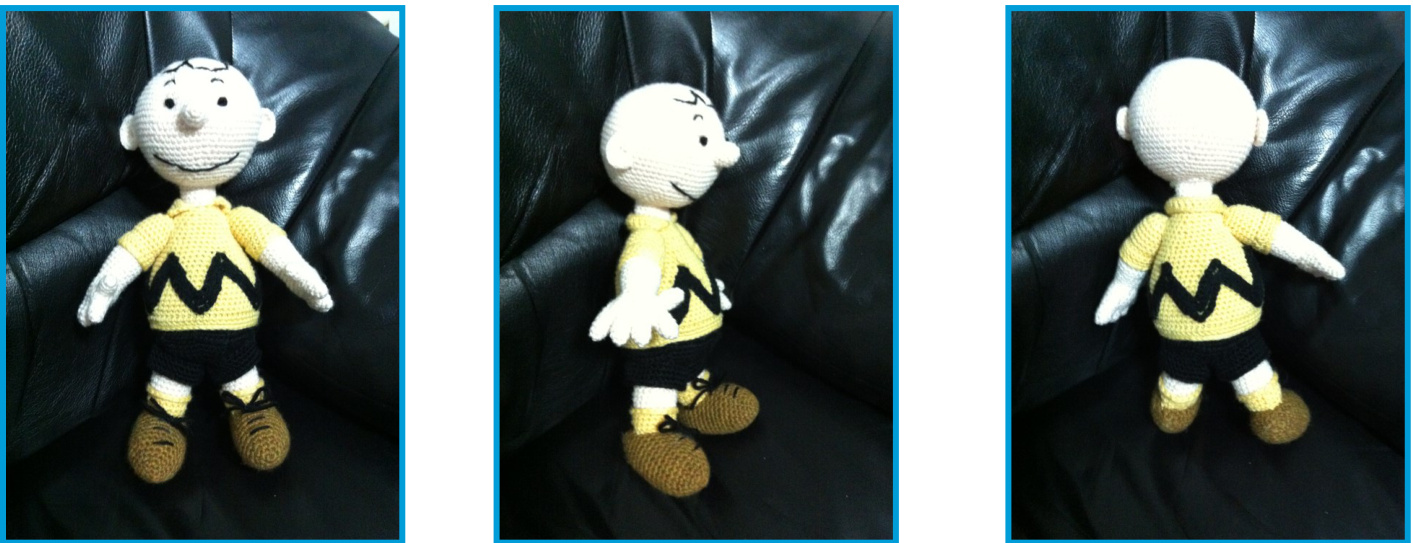
2) Sew the nose and ears with the yarn tails as positioned in the above photo. Ensure that these appendages are centered with the collar. 3) Using black yarn to embroider the eyes, eyebrows mouth and hair.
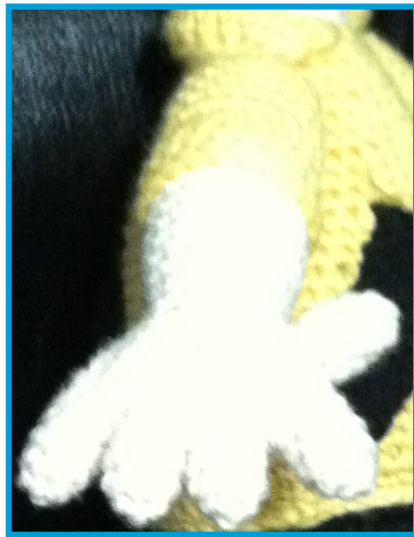
4) Attach the arms to the body with the tails from each piece. I used a whip stitch again. Pin all the limbs in the desired position before attaching. Ensure to squish down the top of the arm to shape the shoulder. 5) Attach the thumb to the hand. Ensure the thumbs are pointing forward in comparison to the body and slightly lower than all the other fingers.
Charlie Brown Amigurumi Pattern
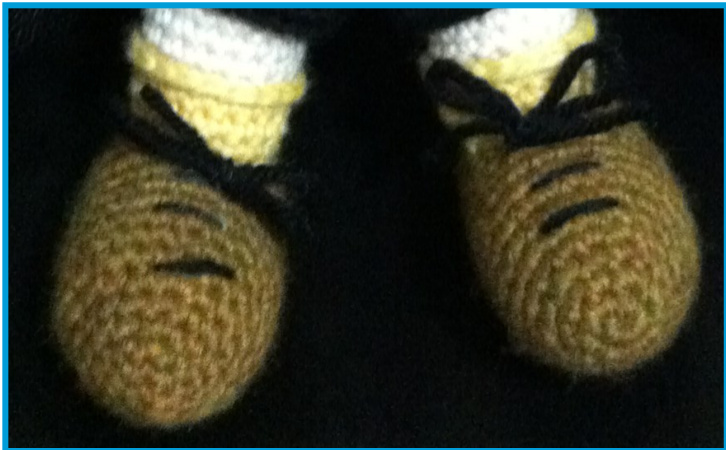
6) Attach the legs of the shorts to the bottom of the body. Use the front loops in Rnd 11 as a guide to position the legs of the shorts so that they cover the entire bottom. 7) Attach the bottom of the legs (i.e. the yellow part) to the shoes with the tail. Using black yarn embroider on the shoelaces. I simply weaved the black yarn through the shoe and tied a bow at the top. Stuff the legs.
8) Attach the top part of the leg (i.e. flesh tone part) to bottom of the body with the tail. Centre the legs in the legs of the shorts. You may need to roll up the legs of the shorts. Ensure to firmly stuff the legs before closing up any openings.
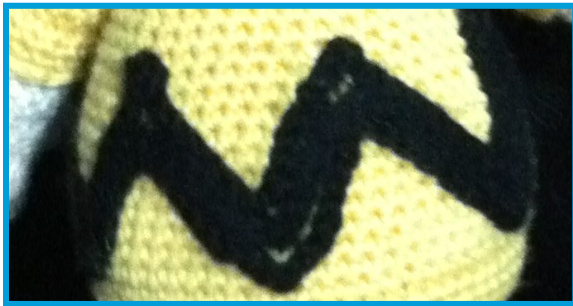
9) Create the zig-zag pattern on the sweater. I accomplished this by chaining on the surface of the body with black yarn to create the outlines for the zig-zag. Basically I made 6 zigzags. The bottom points are 10 stitches apart while the top points are 7 stitches apart. The zig-zag itself is 2 stitches wide. Then I needle felted on black felt to fill in the line. If you don't want to needle felt simply cut a zig-zag out of black felt and sew it to the sweater. old the collar to position it. This may require blocking
Charlie Brown Amigurumi Pattern
Notes: The bottom is not flat. I tried to make a flat bottom by doing the back loop only stitch but instead it helped to create the outline required to attach the shorts. Also, I embroidered the hair directly to the head. You can create a loose loop for the hair similar to how it looks in the comics.
Now it's complete! Hope you enjoyed making this! And just in case for legal reasons.. Charlie Brown is a copyright of the Charles Schultz family. This crochet pattern is an original pattern by Edward Yong (June 2013). Please do not claim this pattern as your own. If you wish to share this pattern, you may link to this pattern but please do not reprint it on your site. You may keep a copy for your own personal use but you may not sell or distribute it, or sell items made from this pattern.


