Trafalgar Law Amigurumi Pattern
by Clare Heesh https://www.etsy.com/shop/53Stitches
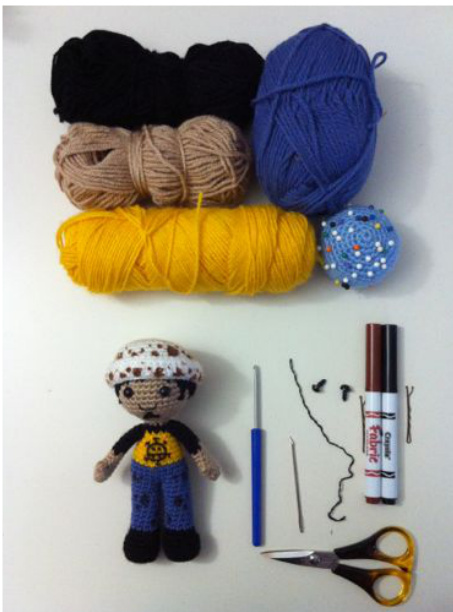
Materials
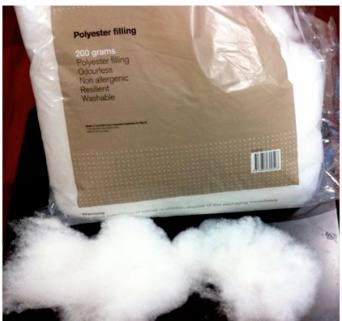
Black yarn Beige yarn Yellow yarn Blue yarn White yarn 2x 7.5mm safety eyes Polyester filling Black thread 3.0mm crochet hook Fabric Markers (Brown & Black)
Techniques and Abbreviations
ch = chain st = stitch/stitches sl st = slip stitch sC = Single Crochet MR = Magic Ring inc = Increase, sc 2 in the same stitch dec = Invisible Decrease 4sc popcorn = Popcorn Stitch with 4 sc worked into it. BLO = Back Loop Only FLO = Front Loop Only [ sc, inc Jx 2 = repeat 2 times => sc, inc, sc, inc
There should be a file available for download with this one that details all of the stitches that I use and other references. If not, it is available for download here: http://53stitches.tumblr.com/post/ 54077987849/amigurumi-technique-reference My patterns are worked in continuous rounds, I recommend using a marker to mark the start of each round. I like to use a bobby pin, since it's easily removed and doesn't fall out or leave fluff as much as a stray piece of yarn does. To finish off each body part, I do a slip stitch for the last stitch of the round, then chain 1 and pull the tail into the next stitch to neaten it off.
BODY PARTS
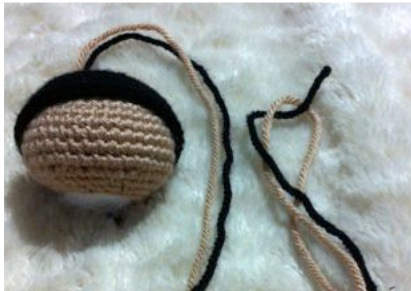
HAIR CAP Black
1. (in Black) MR 6 (6) 2. [ inc ]x 6 (12) 3. [ inc, sc Jx 6 (18) 4. sc, inc, [sc 2, inc ]x 5, sc (24) 5. [ inc, sc 3 Jx 6 (30) 6. sc 2, inc, [ sc 4, inc Jx 5, sc 2 (36) 7-12. sC 36 (36) Leave tail for sewing, finish off
HEAD Beige
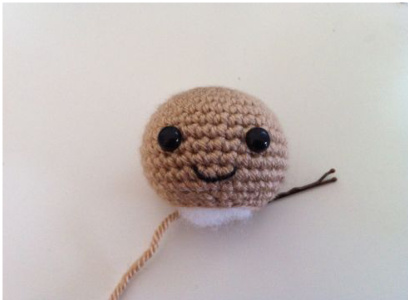
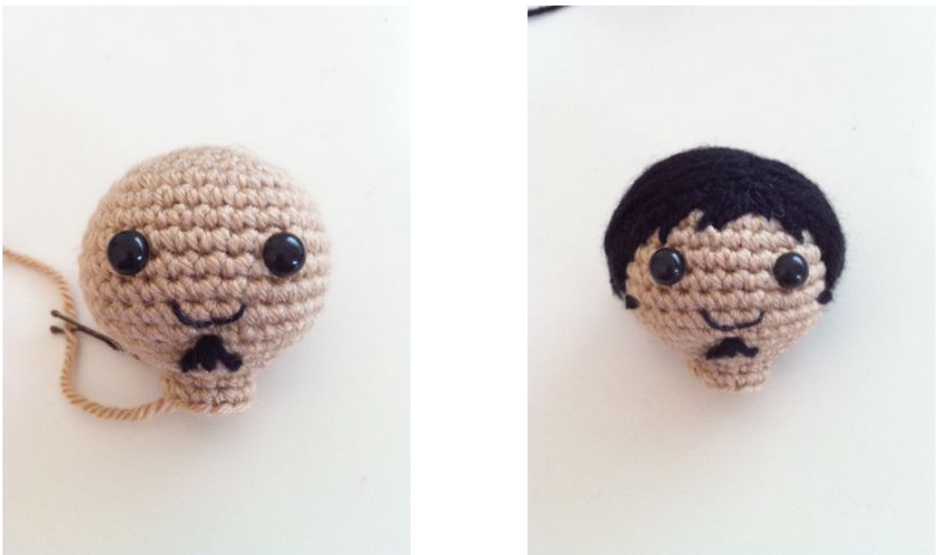
1. (in Beige) MR 6 (6) 2. [ inc ]x 6 (12) 3. [inc, sc ]x 6 (18) 4. sc, inc, [ sc 2, inc Jx 5, sc (24) 5. [inc, sc 3 ]x 6 (30) 6. sc 2, inc, [ sc 4, inc ]x 5, sc 2 (36) 7-12. SC 36 (36) 13. sc 2, dec, [ sc 4, dec ]x 5, sc 2 (30) 14. [ dec, sc 3 Jx 6 (24) 15. sc, dec, [ sc 2, dec ]x 5, sc (18) Insert safety eyes between rows 9 and 10, with approximately 4 stitches between them. Leave tail for sewing, finish off and stuffirmly. Stitch on the mouth using a few threads of black embroidery or cross-stitch thread. Yarn works as well but leaves the mouth a bit thick.
ARM (make 2) Beige & Black
1. (in Beige) MR 6 (6) 2. [inc, sc 2 ]x 2 (8) 3-4. sc 8 (8) 5. 4sc popcorn, sc 7 (8) (Note: it can be easy to lose a stitch here, the 1st stitch in round 6 is NOT thelarge one above the popcorn stitch - that is the 2nd stitch, take note of where your marker is) 6. BLO sc 8 (8) 7-8. sc 8 (8) 9-15. (in Black) sc 8 (8) Leave tail for sewing, finish off. They don't need any stuffing because they're so thin.
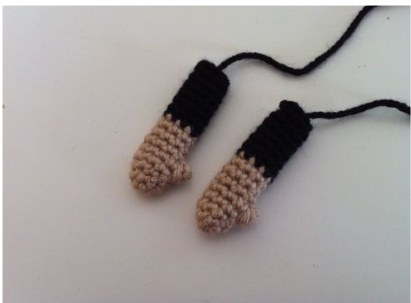
The popcorn stitch in the arm is the thumb, if you prefer straight arms, simply replace the popcorn stitch with a sc.
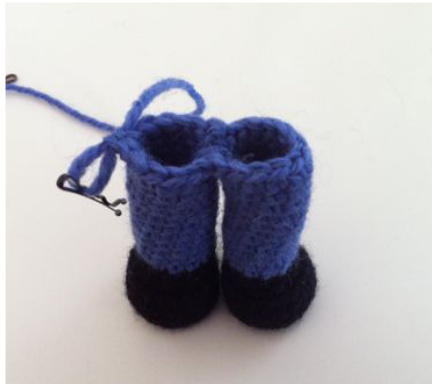
LEG (make 2) Black & Blue
1. (in Black) MR 6 (6) 2. [inc ]x6 (12) 3. [inc, sc Jx 6 (18) 4. BLO sc 18 (18) 5-7. sc 18 (18) 8. sc 2, dec 6, sc 4 (12) (on the second leg, row 8 is: 8. sc 4, dec 6, sc 2 (12) this gives a right and left foot) 9. sc 12 (12) 10. (in Blue) BLO sc 12 (12) 11-19. sc 12 (12) Finish off, no tail is necessary.
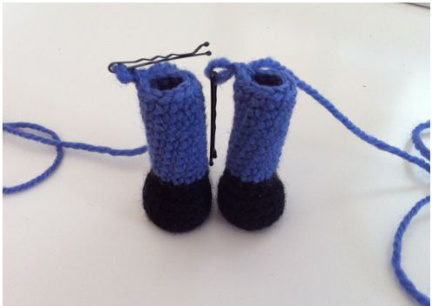
Crocheting one round in the back loop only makes it easier to give the foot shape, as it's easier to make the base flat.
BODY
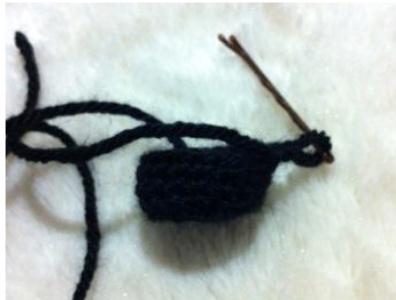
Blue, Yellow, Black & Beige Take the two legs and position them so that the feet are pointing correctly, I like to place two bobby pins in the stitches where the legs will join to make it easier to manage. Make a slip knot, insert hook in the stitch you are going to begin the round with (I suggest at the back of the doll somewhere), put the slip knot on the hook, and pull it through. The next stitch will be a regular single crochet and will begin the round.
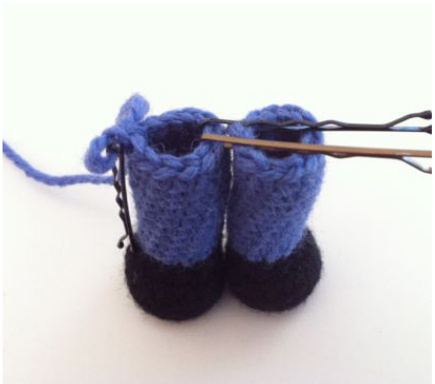

Join with two bobby pins, this is where you'll go from one leg to the other. Make one sc in the right leg in the stitch the bobby pin marks. The next sc will be on the left leg, in the stitch the bobby pin marks Do the same when you reach the opposite bobby pin. This is what it should look like after the first round. 1-4. (in Blue) sc 24 (24) 5. (in Yellow) BLO sc 24 (24) 6-7. SC 24 (24) (at this point stuff the legs) 8. sc 3, dec, [ sc 6, dec Jx 2, sc 3 (21) 9. [ dec, sc 5 ]x 3 (18) 10. sc 2, dec [sc 4, dec ]x 2, sc 2 (15) 11. (in Black) [ dec, Sc 3 Jx 3 (12) 12. (in Beige) BLO sc 12 (12) 13. [ sc, inc ]x 6 (18) Before beginning the decreases stuff the legs. Make sure you don't stuff them so firmly that he can't balance anymore.
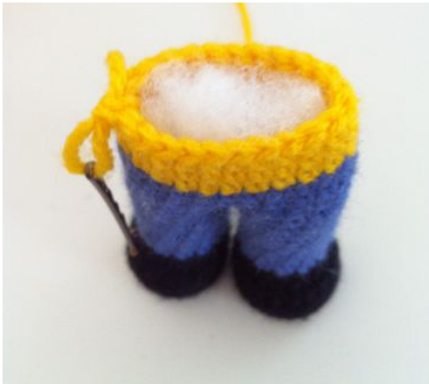
Finish off and stuff firmly. Leave tail for attaching head. Using the black fabric marker, draw on the Heart Pirate symbol. Also using the black fabric marker, draw on the spots on Law's pants. I find it easiest to do this when looking at a reference picture from the internet.


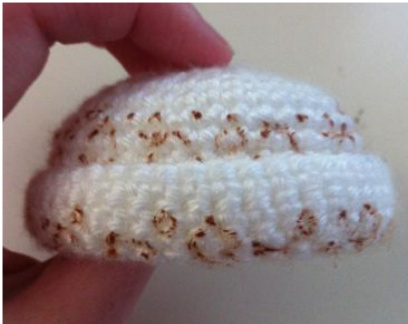
HAT White
1. (in White) MR 6 (6) 2. [ inc ]x 6 (12) 3. [inc, sc Jx 6 (18) 4. sc, inc, [ sc 2, inc Jx 5, sc (24) 5. [ inc, Sc 3 Jx 6 (30) 6. sc 2, inc, [ sc 4, inc ]x 5, sc 2 (36) 7. [ inc, sc 5 ]x 6 (42) 8-11. sC 42 (42) 13-14. sc 42 (42) 15. FLO sC 42 (42) 16. sl st, [ inc, sc Jx (repeat all the way around) () 17-18. sc around ()
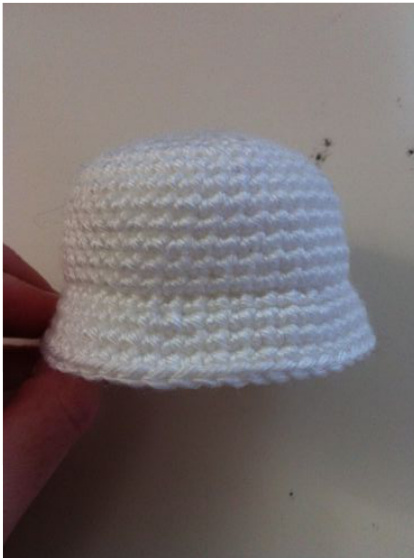
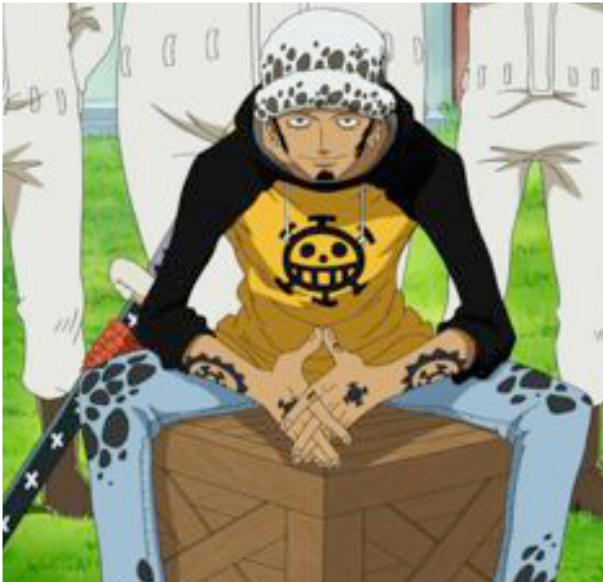
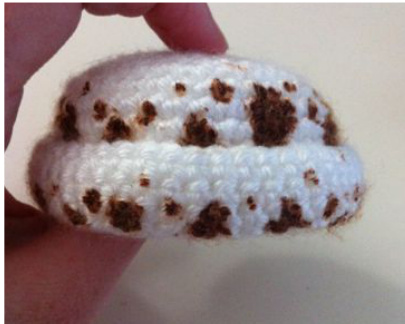
Once the hat is finished being crocheted, roll the bottom up so that it turns into a beanie. Take the brown fabric marker and draw on the pattern of Law's hat. I also use a reference picture to do this. Above is one I got off Google which is what I usually use for the pants, hat and shirt logo. Because his arms are so small it's very difficult to get detailed enough for his arm tattoos to look good, but you can always try if you think you can do it!
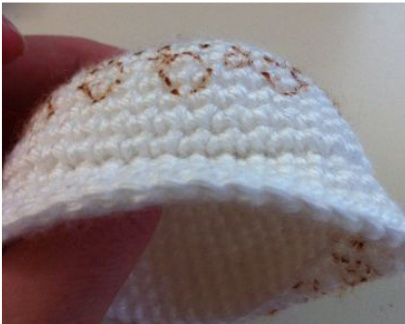
Using the fabric marker I make an outline of what it will look like.
Colour it in and fix any detail you want! You don't need to bother with the part hidden when the hat brim is fliped up.
PUTTINGITALLTOGETHER
ATTACHINGHAIRTOHEAD
I learnt this technique from Owlishly, so I don't want to take any credit for it, or imagine that I can explain it better then her. Here's the link to the tutorial: http://owlishly.typepad.com/owlishly/ 2007/08/amigurumi-hair.html Use the tail of the wig cap to attach it to the head. It only needs to attach at a few places so no need to be overly thorough. I usually pull up another reference picture to see how his hair is done under the hat. He has sideburns, a goatee, and a short fringe. Here are a couple of different dolls I've made and the way I usually try to do his hair. I start with the sideburns.
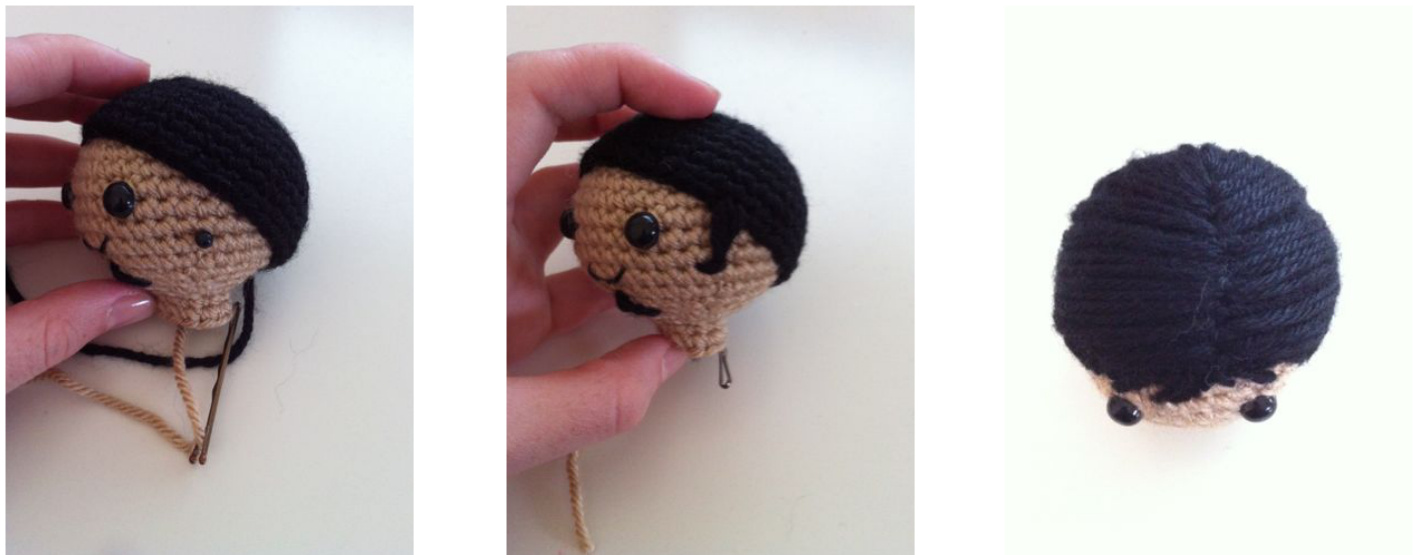
For the rest of the hair I work from the front to the back of the head, from the roots down. Sew on the goatee. It starts one stitch directly below the middle of the mouth, and goes from this point to the stitch two below, two below and one to the left, and two below and one to the right.
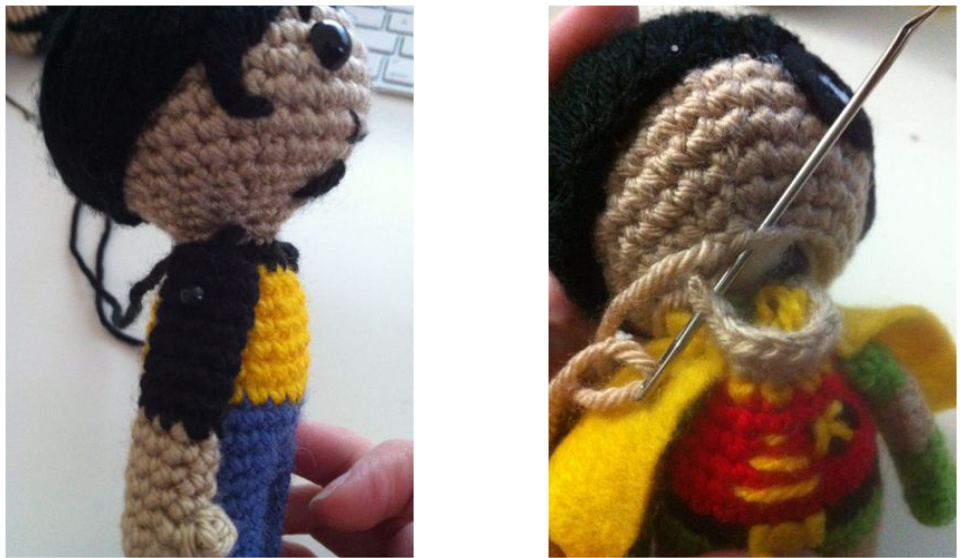
In these photos he has a bit of a neck, ignore that :) I was trying something out that didn't work. I use pins to get a rough idea of the placement of the arms before I sew them on. The arm is pressed flat against the body and stitched there so that it sits against the body instead of popping up. The last thing left to do is attach the head (l forgot to take photos of this, and attached the head before the arms, but it's easier the other way around and the photos of attaching Robin's head demonstrate the same method). Both the base of the head and the top of the body had 18 stitches in their last rounds. That means that each stitch in the head should match a stitch in the body, which gives it a nice neat finish.
Put on his hat and done!
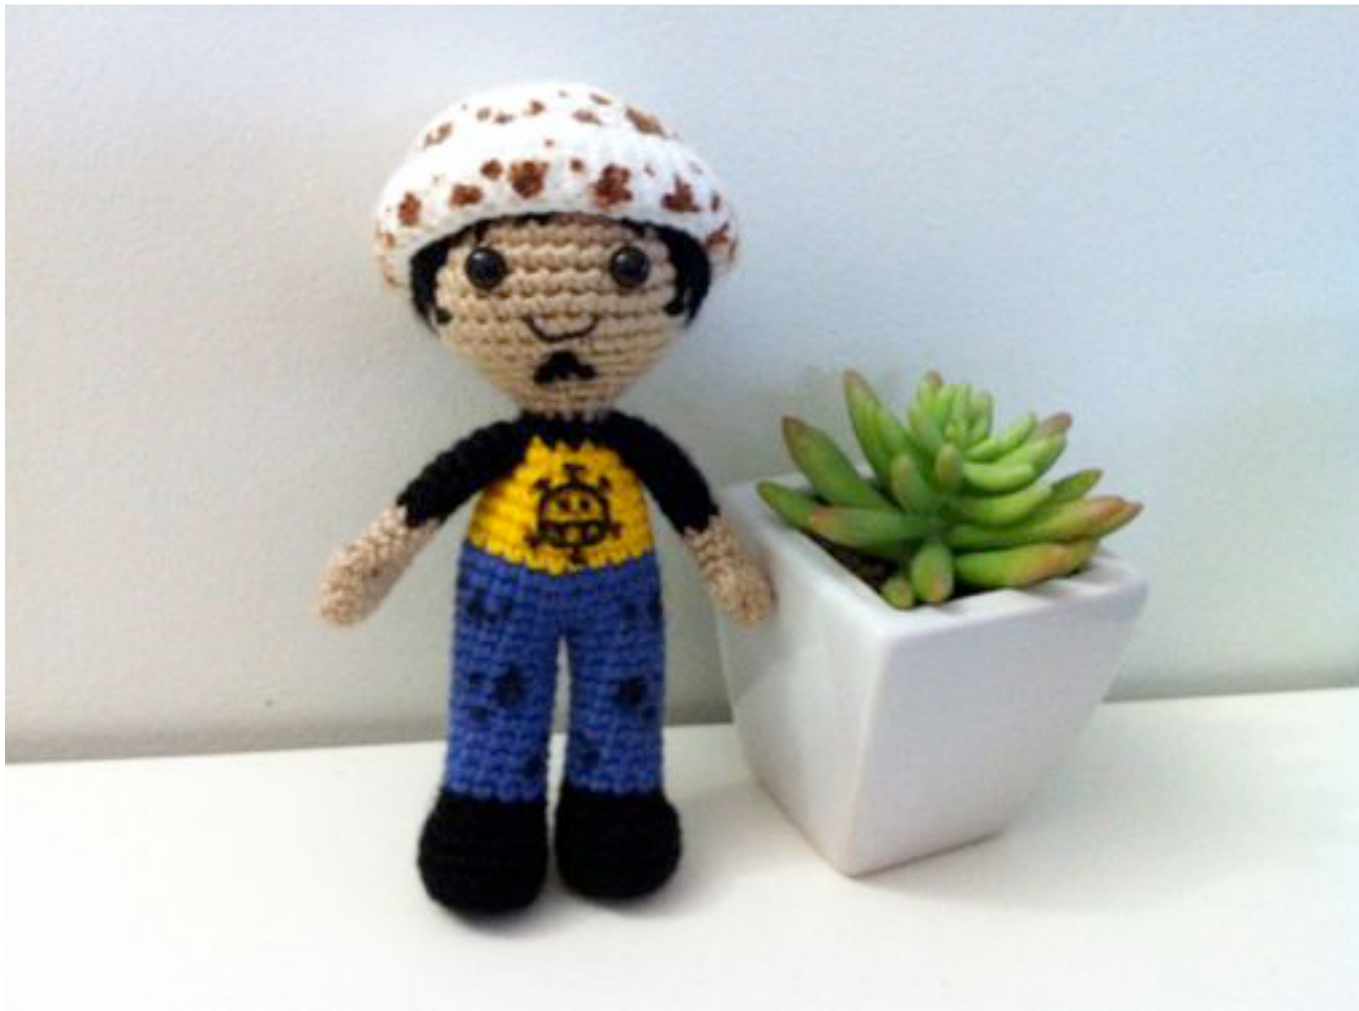
Trafalgar Law Amigurumi Hope you had fun and if there are any questions or problems don't hesitate to contact me through my etsy shop, http://www.etsy.com/shop/53stitches/ or my tumblr http://53stitches.tumblr.com If you have any suggestions or designs you'd like to see in the future, drop a suggestion in my ask and I'll seewhatI cando! Please don't copy or resell this pattern or the dolls made from it, but feel free to make as many as you want and distribute them amongst friends or sell them at markets. Thank-you! :)


