Foldable Basket Reticule
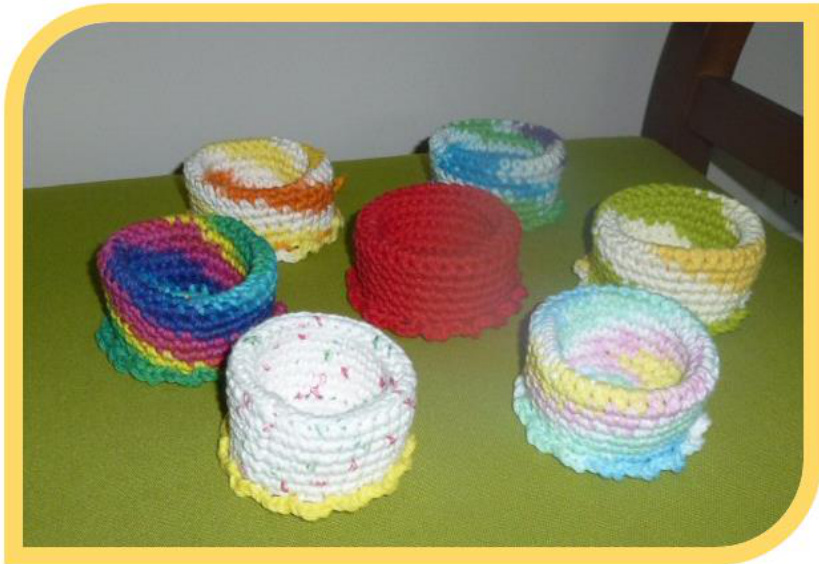
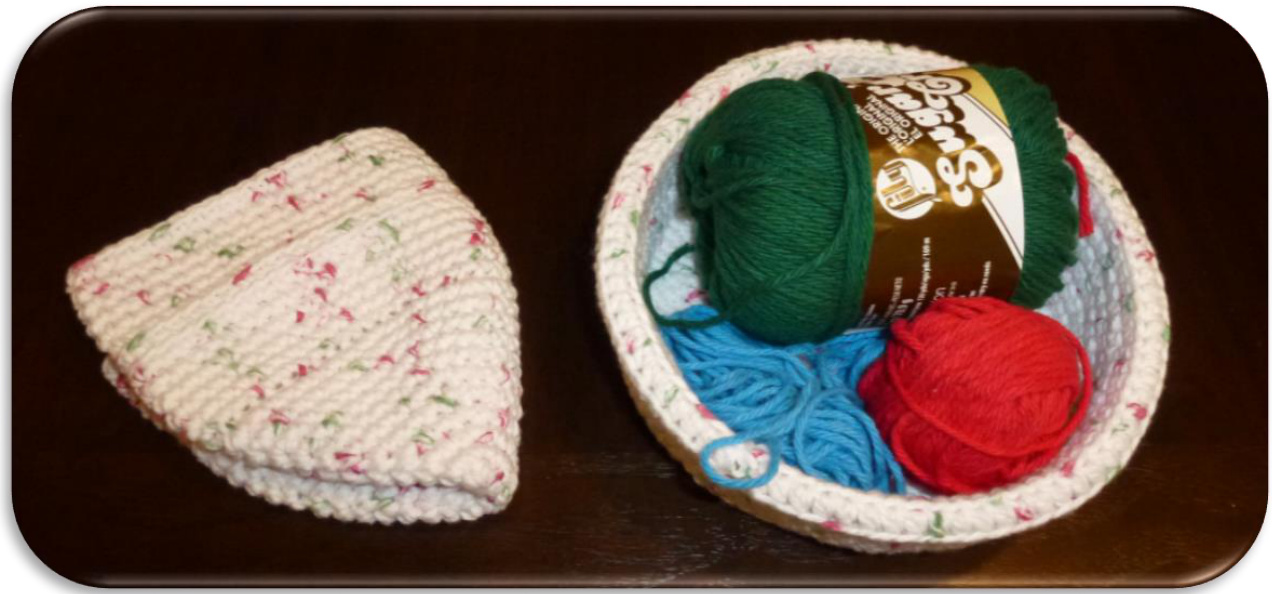
This little basket is perfect for little things: A small present or a special treat. It's also really good for keeping things organized on the desk: Keys, Coins, Paperclips, Etc.
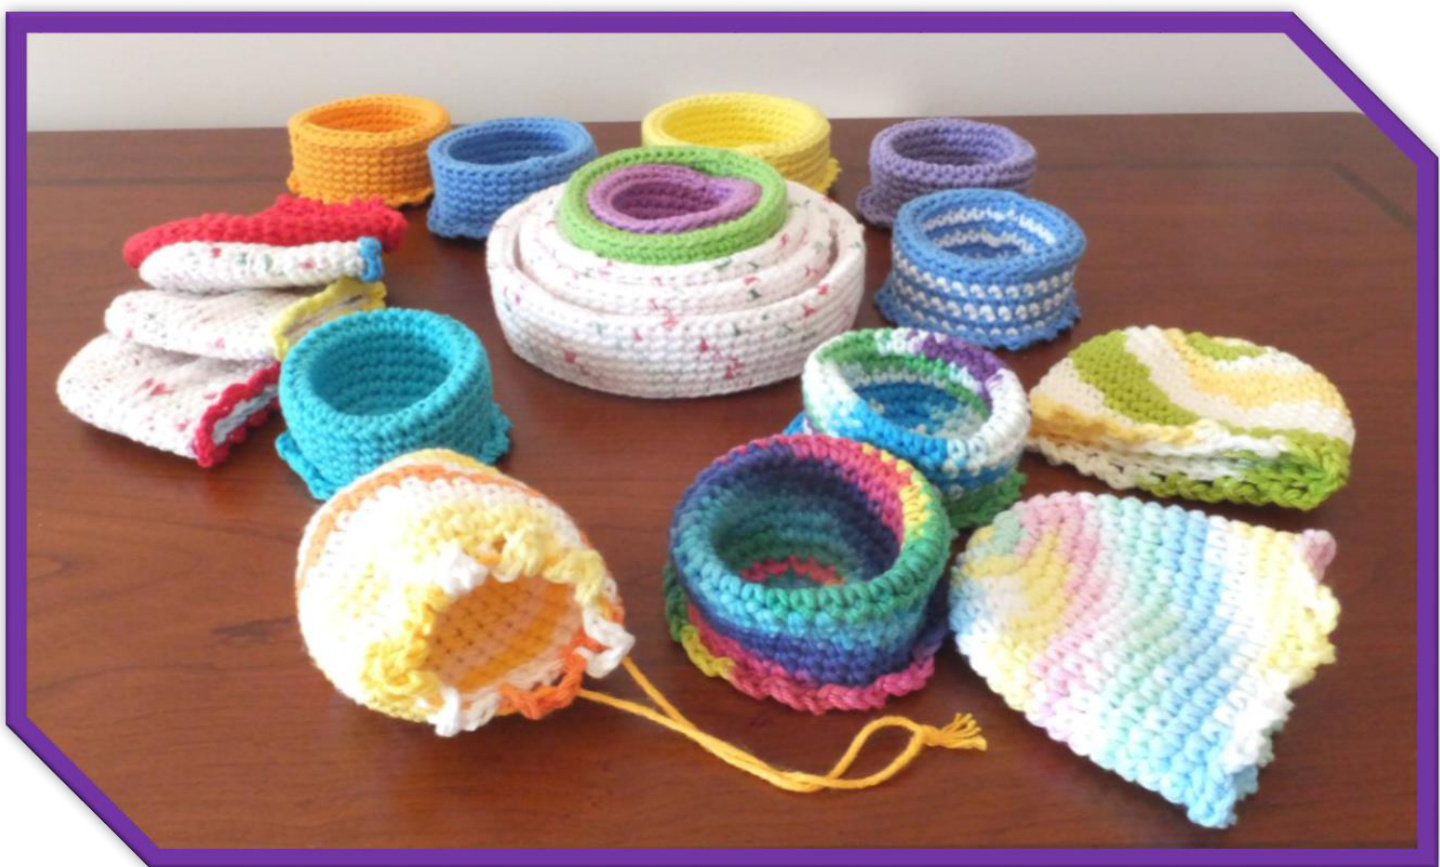
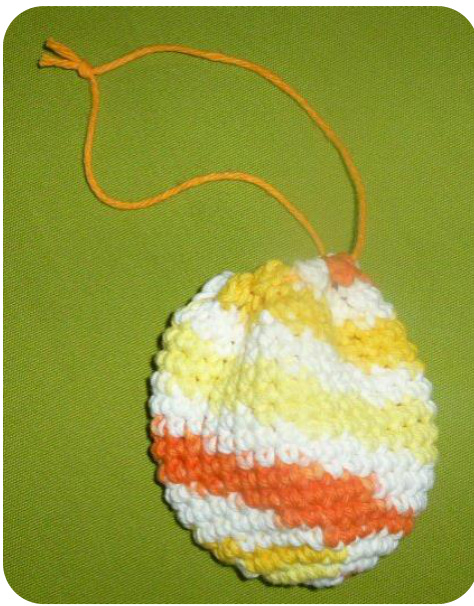
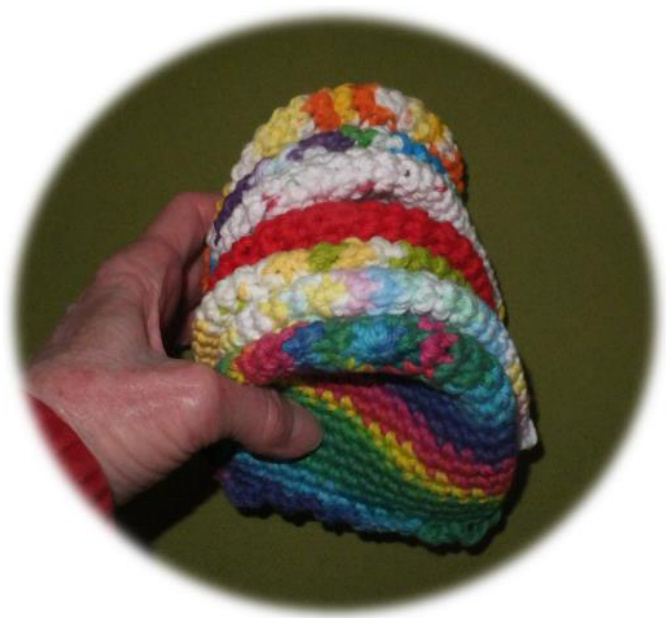
It easily unfolds and collapses for washing and flat storing. And it pops back into shape, when needed. A super easy pattern and really quick to make. It can also be made in a variety of sizes: Baskets, Bowls and Trays. Weave a string or ribbon through the lace edging, And it can be used as a reticule (small pouch). The basket really holds its shape. And is made using only one strand of yarn. It can be finished in less than an hour. A Great Last-Minute Gift! Video: ht+tps://www.youtube.com/watch?v=S8ssvvyjuhk
\*Notes:
Instructions are given for the Party-Cup Size Basket. Guidelines for larger sizes are listed below. Rounds are worked in a spiral. Mark beginning of rounds with a thread or yarn or a stitch marker. Work over the beginning yarn end to eliminate weaving it in later. Be sure to close the center of the Magic Ring. I usually giveit afinal tug after thefirst twoincreases ofround 2. Rounds 6 through 16 make up the inner and outer sides of the Party-Cup size. If you want a taller bowl or shorter tray, you could crochet more orless rounds. You can use solid or variegated color yarn. ? Edging in a contrasting color creates a pretty accent. Reverse single crochet could also be used as an edging. Or a pretty shell stitch might look nice. It also looks fine without any edging at all. The outer-sides can be decorated with appliques. o Sew or glue Hearts, Dots, Snowflakes, Flowers, whatever. You could also surface crochet or embroider a design: OLike Zigzags, Lines, or Dashes. Orback-stitch a short word, name orinitial.
Party-Favor-Size Cup
Bottom:
Rnd 1: MR, Ch 1, 7 Sc in Ring. (7) Rnd 2: INC around. (14) Rnd 3: (Sc, INC) around. (21) Rnd 4: (Sc in 2, INC) around. (28) Note: Piece should be about 2.5" at this point. It yields about a 3" wide bowl.
Materials:
Ww Cotton Various colors (Solid or Verigated) Weight Category: 4 Medium (I used Sugar n Cream) \~ 31 yards for the Party-Cup size (\~ 3" / 7.6 cm wide and \~ 1.75" / 4.4 cm tall) Larger Baskets: Yarn amount depends on the selected size.
4.5 mm / G hook
Gauge is not crucial. Rnds 1 - 4 in pattern measure \~2.5"(\~6.4 cm) Finished Size: Party-Cup size (without edging) is about 3" (7.6 cm) wide and 1.5" (3.8 cm) tall
Skill Level: Easy
Abbreviations
\~= about Ch = chain FO = fasten off INC = single crochet increase MR = magic ring Rnd = round Sc = single crochet Sk = skip Ss = slip stitch
US Terminology
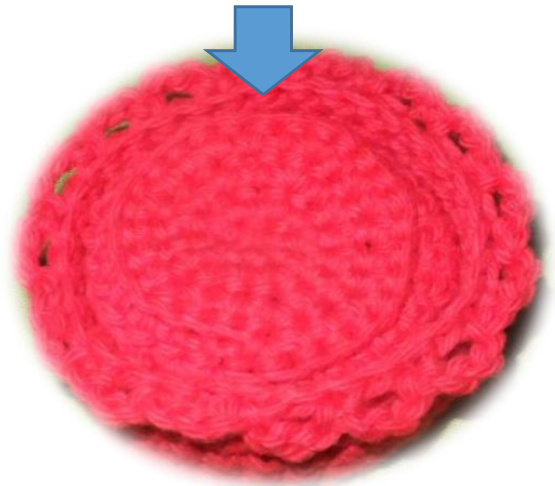
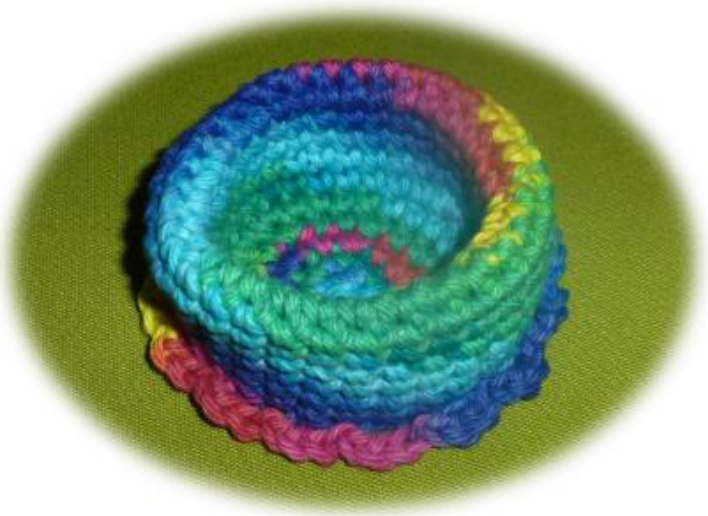
Note: Round 5 can be crocheted around in the front loops for a flatter bottom, but not required. Rnd 5: (Sc in 6, INC) 4xs. (32) Yields \~ 3"wide (Party-cup Size) Rnds 6-16: Sc around. (32) At this point, you can fasten-off OR continue-on to the Edging. Edging: Maintain with working yarn or FO and join a contrasting color in front loop. Rnd 18: Ss in front loop of the first st. (Ch 3, Sk 1, ss in front loop of next) around. FO and weave in. (16 loops) Note: Last ss will be in the same as the first ss. Open the work like an upside-down glass. Push the center four rounds down, and smooth the double sides together. Rounds 10 and 11 should be at the top edge. To turn the Basket into a Reticule (small pouch): Weave a ribbon or string through the loops of the edging. Sew the ends or secure with a knot.
To Shape:
For Larger Sizes:
Crochet, following the rounds below for the Bottom, to the width that you want. Then continue to the appropriate round for Beginning Inner-sides below.
Bottom:
Rnd 1: MR, Ch 1, 7 Sc in Ring. (7) Rnd 2: INC around. (14) Rnd 3: (Sc, INC) around. (21) Rnd 4: (Sc in 2, INC) around. (28) Rnd 5: (Sc in 3, INC) around. (35) Yields \~ 3.5" wide bowl Rnd 6: (Sc in 4, INC) around. (42) Yields \~ 4" widebowl Rnd 7: (Sc in 5, INC) around. (49) Yields \~ 4.5" wide bowl Rnd 8: (Sc in 6, INC) around. (56) Yields \~ 5" wide bowl Rnd 9: (Sc in 7, INC) around. (63) Yields \~ 5.5" wide bowl Rnd 10: (Sc in 8, INC) around. (70) Yields \~ 6" wide bowl Rnd 11: (Sc in 9, INC) around. (77) Yields \~ 6.5" wide bowl Rnd 12: (Sc in 10, INC) around. (84) Yields \~ 7" wide bowl Rnd 13: (Sc in 11, INC) around. (91) Yields \~ 7.5"wide bowl Rnd 14: (Sc in 12, INC) around. (98) Yields \~ 8" wide bowl Beginning Inner-Sides: Note: This round can be crocheted in the front loops for a flatter bottom, but is not required. Continued from Rnd 5 (Total of 35 sts so far): Rnd 6: (Sc in 7, INC) 4xs. Sc in last 3. (39) Continue to Sides below. Continued from Rnd 6 (Total of 42 sts so far): Rnd 7: (Sc in 9, INC) 4xs. (42) Continue to Sides below. Continued from Rnd 7 (Total of 49 sts so far): Rnd 8: (Sc in 11, INC) 4xs. Sc in last 1. (53) Continue to Sides below. Continued from Rnd 8 (Total of 56 sts so far): Rnd 9: (Sc in 13, INC) 4xs. (60) Continue to Sides below. Continued from Rnd 9 (Total of 64 sts so far): Rnd 10: (Sc in 14, INC) 4xs. Sc in last 3. (67) Continue to Sides below. Continued from Rnd 10 (Total of 70 sts so far): Rnd 11: (Sc in 16, INC) 4xs. Sc in last 2. (74) Continue to Sides below. Continued from Rnd 11 (Total of 77 sts so far): Rnd 12: (Sc in 18, INC) 4xs. Sc in last 1. (81) Continue to Sides below. Continued from Rnd 12 (Total of 84 sts so far): Rnd 13: (Sc in 20, INC) 4xs. (88) Continue to Sides below. Continued from Rnd 13 (Total of 91 sts so far): Rnd 14: (Sc in 21, INC) 4xs. Sc in last 3. (95) Continue to Sides below. Continued from Rnd 14 (Total of 98 sts so far): Rnd 15: (Sc in 23, INC) 4xs. Sc in last 2. (102) Continue to Sides below.
Sides:
O Continue to Sc around until you reach the height that you want. O Count the number of rounds that you used for the inner side. [Example: The Party Cup Inner-side was formed from rounds 5 to 10 (Total of 6 rounds). The six Rounds from 11 to 16 created the outer-side.] O Repeat the same number of rounds for the outer side. At this point, you can fasten-off OR continue-on to the Edging (above).


