Plain Jane Creations
Knitted and Felted Handbag #1
@ 2007 by Lisa Ashton Australia hope youjmaingthisrjctandthank youfryouupp.easmertheontentsofthis pat are protetedby copyrht and you must ntreprduceitbyan means, nclding photocopying ormakin and selling the item for personal gain. tomashtobigpond.net.au orviamy blog htp//plainjanereations.blogspot.cm
Knitted and Felted Handbag #1
Designed by Lisa Ashton @2007 Please llow me the rght toamalving from creating andwiting my pattes
Requirements
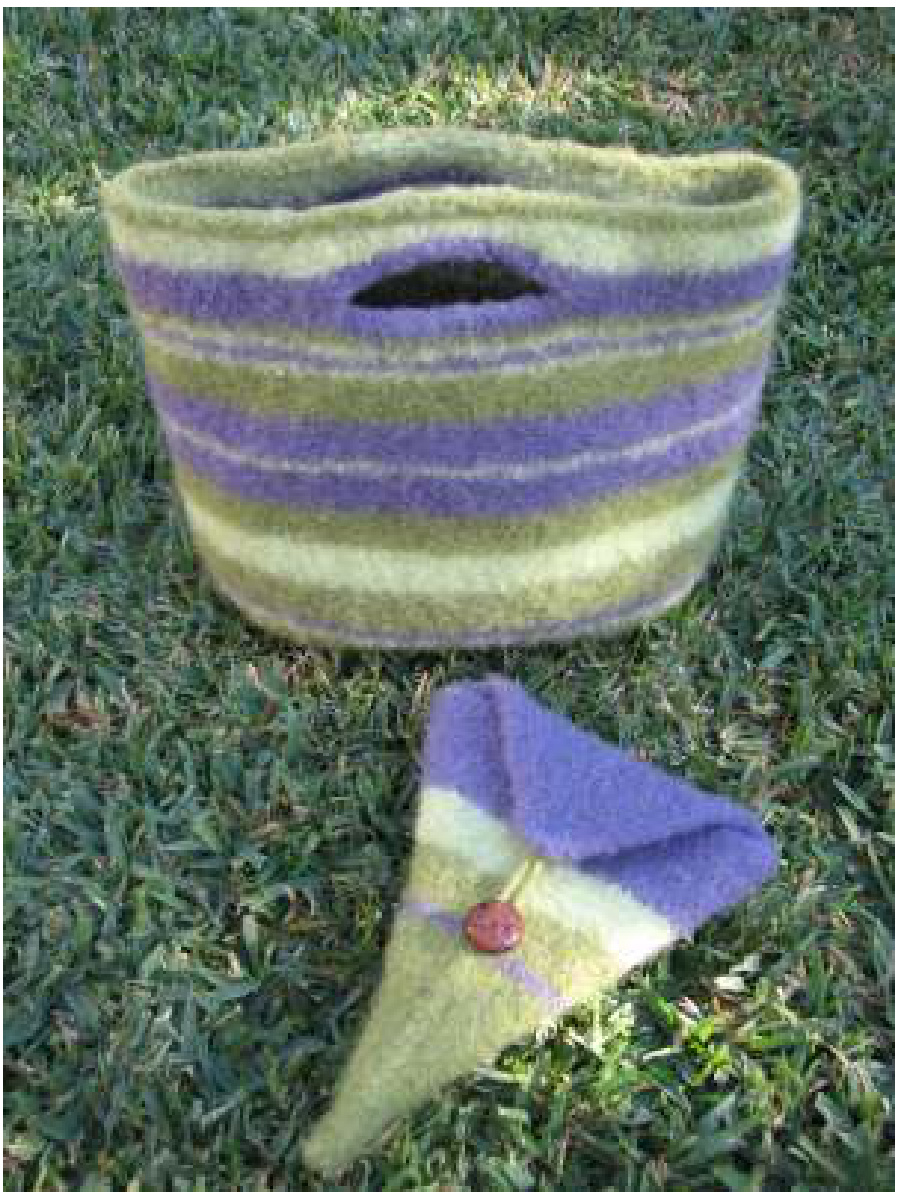
Youwil eed tochoose coloursforyourbag; 2ballsfortheMainColour (MC -dark olive) ballsforContrast One (Ci - lght olve) andi balf Contrast Two (C2 - antique mauve) to make your bag in the same stripe pattern as sample. I recommend Panda 8 ply Woolbale 50og and $\phi\mid\mathfrak{m}$ (double knitting weight) wool as it feits beautiflly. Do not buy superwashed woola i ill not felt. Depending onhow much wol you have leftver you mightlike to make the bonus scissor poke patn. If youwant towork thebagin colourwith nstripingyouwillneed only 4bas of wool.
-80cm long 5.5mm or(lSA size 9 circular knitting needle
-scissors or snips -lead pencil -4 stitch markers (These can be loops of wool or small plastic rings that fit over your needles that are used to mark the 4 corners and are slipped from left needle to right needle each time $y\mathrm{ou}$ come across one) -Large tapestry needle for sewing in threads after knitting is completed.
Tension should be17 stitches and 22 rows to 10cmon $5.5\,\mathsf{m m}$ needles. If you knit lserthan thisyoumay require more wool but your bag willstlfelt beautifuly. To begin cast on 4O stitches using whichever method you choose using the main colour (MC) with the circular needles. Knit37rowsofgarterstithplanknitin npurrows), thisretanlefomsthebaseofthba Next leaving the 40 stitches on your needle place a stitch marker that is different to the others tie on a bit of coloured woolontoone markeroyouwil now thisis thebegining f the rowon yourght neede and thn knitup 35 stitches acros the next short side of the rectangle. \*/knit up the knot on the edge ofeach ridge and then the strand in between these knots, there are 18 knots and 17 gaps so 35 stitchesare easy to pick up. Place nexstitchakthnknit upstithsalonyouastnge, placeext sthmakrandthnknit 35 stithesnthhrt idfretan,aclaststithmarkerandthnkitarossthstitchesthatareny left needle. You wil now have 15 stitcheson your needle and be at thebeginning of your nxt row.The odd stitch marker designates thebegining ofanewrowandtheothermarkershelpyouindthe comersof thebagwhere youwile decreasin to shapc thebag. The rest of the bag is worked in stocking stitch (smooth knittng and because you are working on circular needles every rowwll be knit, notone row knit andone rowpulas you would if you were knitting onapairf nedles, bonus! There are 3 rows that have dereasing worked in them and they are rows 27,57and 87. The decreasing row is as follows.Kt stchs togethrachside of thstithmarkesoyouwillffectivly rmve stches frm th w With each row of decreasing \*Therefore after decreasing I you wilhave 142 stitchs, fter decreasing 2 you will have 1 34 stitches and eventuall after the final decreasing you wil have 126 stitches. For those working in 1 colour keep knitting until you have 26 rows completed, then do the first decrease as discussed below and then again in the $57^{\mathrm{th}}$ row and finaly in the 7th row \* The height of the completed bag is 8 If you are working stripes as | have done with 3 colours you need to follow the chart below, remembering to decrease in rows 27, 57 and 87. MC dark olive C1 light olive antique mauve Your colours
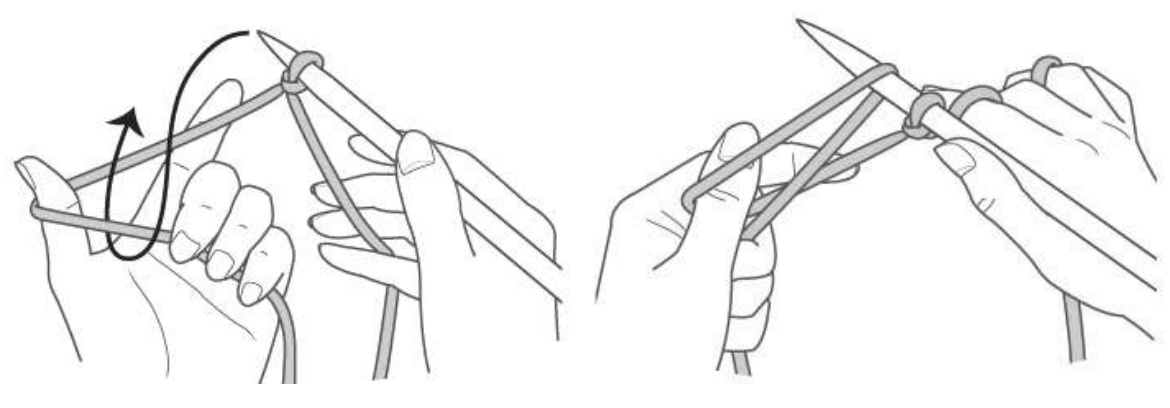
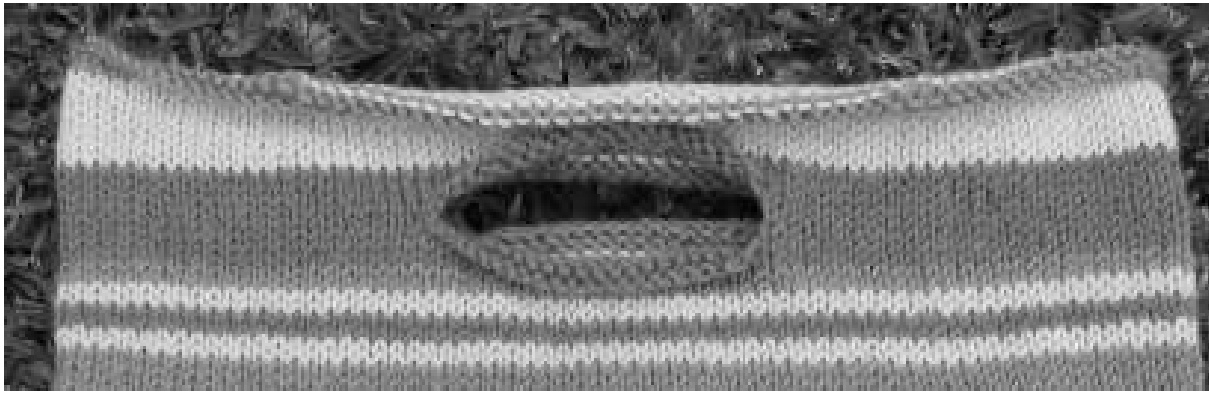
(Row 27 in $7^{\mathrm{th}}$ row of this stripe, this is the first derease row) $(\mathrm{Row}\ 57$ 三 $3^{r d}$ row of this stripe, this is the second decrease row) Contrast colour 2 continues, do not break off as you wll now work handle opening overthe next two rows then complete 3 more rows of C2 before changing colour. _2 Row 74 as follows; \*knit3 1 stitches (short side), (long side or front/back) knit 8 stithesthencastff20 stitches andknithelast7 stithes,repeat from\*to\* nceforthertwo sidesf bag Row 75 as follows; \* knit 31 stitches (short side), (long side or front/back) knit 8 stitches then cast on 20 stitches using the backward loop method shown below (don't make the stitches too tigh, then knit titches,repeat from \* to \* once for other two sides of bags.
Rows 76-78 knit Knit 8 rows C1 MC MC Knit 2 rows (Row 87 in 2nd row of this stripe,this is the third decrease row) Cast off allstitches, not to tight
Bag finishing
Tighten ll eef knots where you changed colours. Dan inal thee ends under the lops of or 7 corresponding coloured stithes.Tie off the final cast offstitchby securingitothefirst castffstitch then da in the end. Trm allong tils ater darmingst
Washing Machine Felting
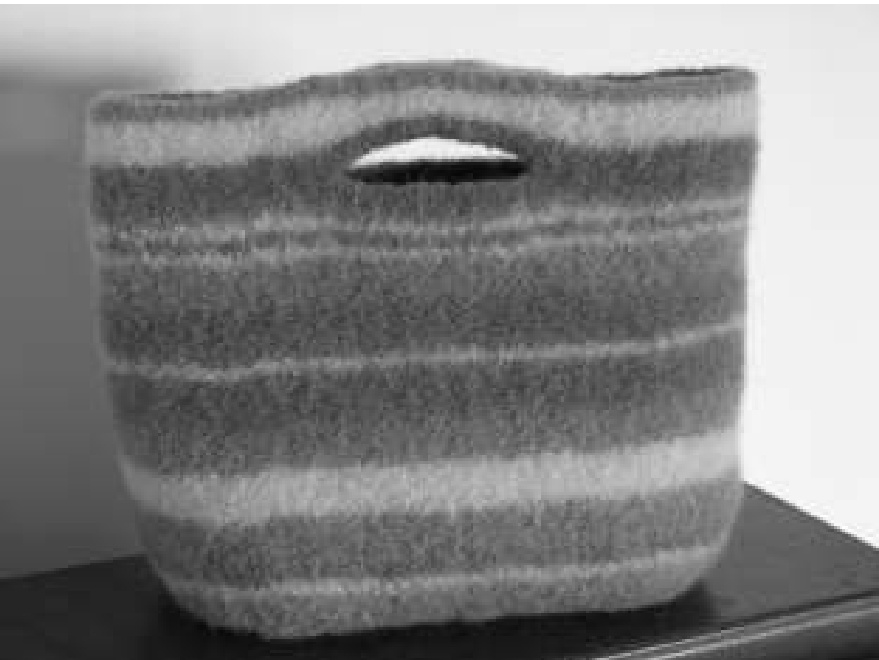
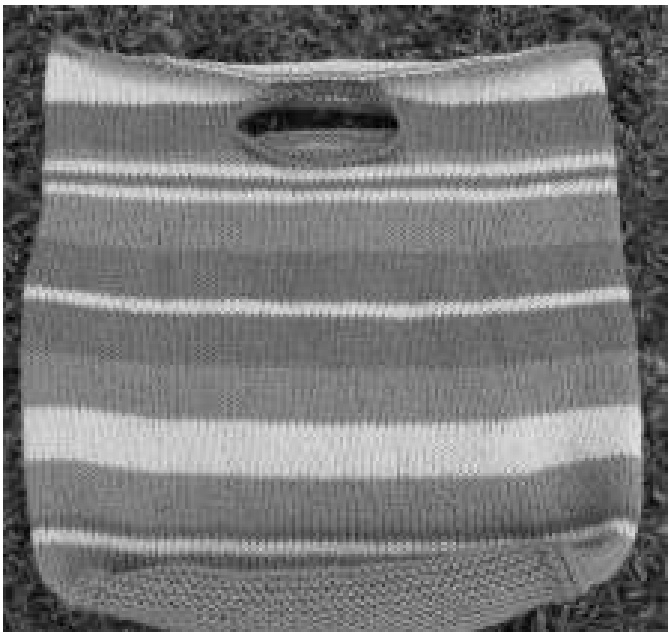
This is how I felt ll $\mathfrak{m}\mathfrak{y}$ knitting. Take a beforec photo now if $y o u$ want or some measurements so you can see how much it changes. My bag before felting measured $1\ 5^{\circ}$ wide and $17\sqrt{2}^{33}\sqrt{2}\sqrt{2}$ and after felting $1\ 1\ \ V/2^{\,\,\,\mathfrak{N}}$ wide by $1\oslash^{\mathfrak{N}}$ high. From this $y\mathrm{ou}$ can se they end up approximately $1/3$ smaller and felt more in length than width. Set your machine on the longest wash it wil do, HOT wash and COLD rinse, on the lowest waterlevel you can, place a pair of jeans or some heavy item of non fluffing lothing and one capful of wool wash Ma's Woolwash or Softly are two that I have used) and your knitted item rght side out. Don't use a lingerie bag to protect your knitted item you wantotreat it very badly wthagitatio, rubbing and hot water so itwillfet beautifuly. Ikeep an eye on the wash cycle, check thatit is felting every 5 minutes or so, when the hot wash is complete wind it back to the start, top u the hot water and let it go again, $\mathrm{b}_{y}$ thec end of the scond hot wash whichisbtween 15-20 minutesIfind thatthfeltingisgood.When youcan see nstithdeinitioand the tefeeslvely andthick wih nice even texture letthe machine carry on and rinse theitem thoroughly in cold water and spin out althe excess water. If you have afront loader and you can't open it during the cycle just do a shorterinitial wash of say 1 minutes in HOT water and then a cold rinse, then you can check it at the end of the whole cycle and you can always do anthertilltisfeltedcomletlReadyourmachinebooktochek onthelngthofthewashing sectionof the cyl and this wilguie you for yourscttings.Remember youare tryin tobe aroughas possible when you are machine felting, don'tuse the wollens gentle cycle! Now get the item out and pullit into shape, don't be too gentlei isvery strong and very pliable now. Place inanicu wam spttrysuisandiouareesprate youcanuethdyeutitan to contro the shape with the dryer. Ifyou want youcangivethe drditmagoodsteam presswith the ironand thenletit standtocompletely dy. Now you canflltwith more knittingoruse itasave orginalhandbaand you willbe the enyfall ourfrinds.
Bonus pattern fora Scissor Poke
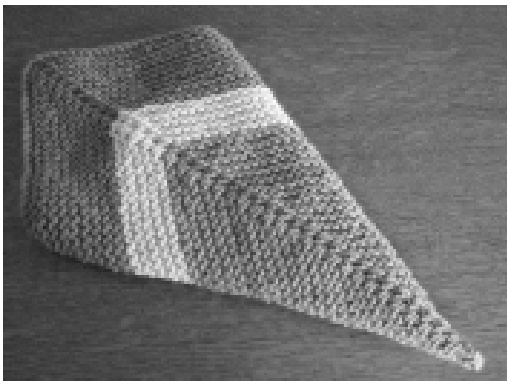
Designed by Lisa Ashton $\copyright$ 2007 Please allow me the right to earn alving from creating and writing my pattens Youwihcrafwleaifyoeuin tagakittiayoum ae protection fora good pair of scissors. These also make a great gift for crafting riends. With $5.5\,\mathsf{m m}$ circular needles and C2 cast of 80 stitches, place a stitch marker in the centre, as this is where you willbe decreasing every second row to form the mited square shaping. very rowis knit but you will have a garter stitch item as you are knitting back and forth rather than in the round. Row 1 Knit till you are two stitches from the stitch marker, knit these together, slip stitch marker across, then knit next two stitches together, knit all remaining stitches. Row 2 Knit
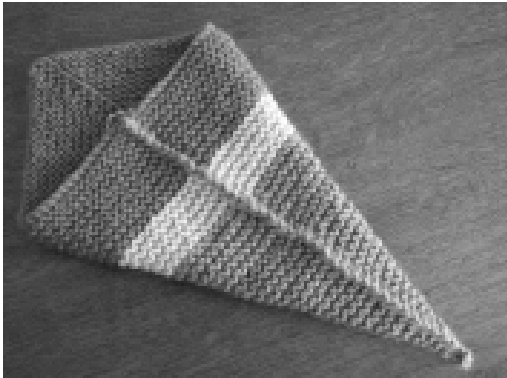
Repeat these two rows until you have two stitches remaining, knit these together and your mitred square is complete. Follow this stripe pattern orjust work yours to suit your scraps.
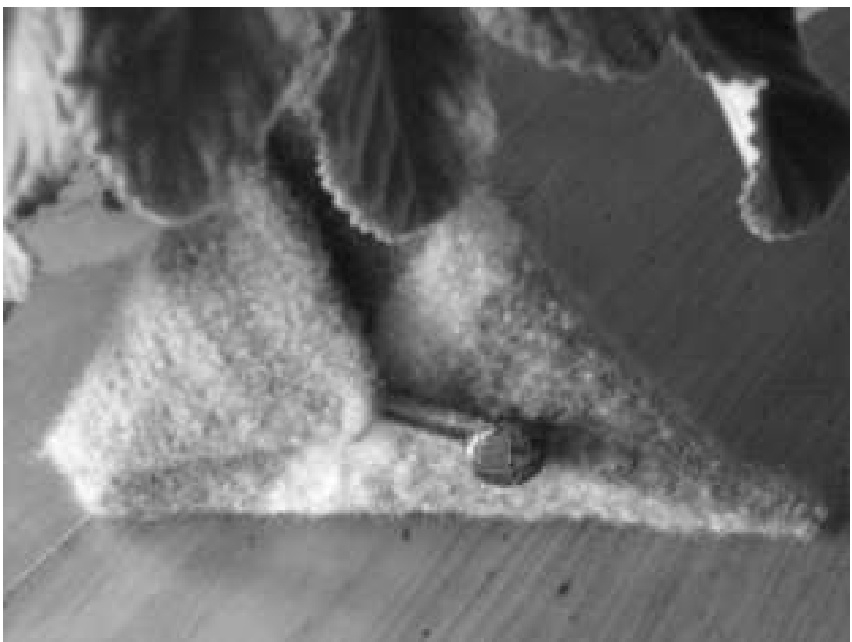
C2 Knit 18 rows C1 Knit 10 rows MC Knit 10 rows C2 Knit 2 rows MC knit 40 rows To make up your scissor poke place two adjacent sides together, not the cast on edges as they make a nice edge for the flap. I crocheted my two edges together with the $\mathsf{M}(\mathsf{\Gamma})$ but you could just sew it up. Darn in allthe ends neatly. Felt it with your bag in the washing machine, pullit into shape, and dry it lying lat in a warm sunny spot.
| made a small crocheted chain stith length and felted it with my fingers soapand hot water and stitched this on to make te bttonlop. Stch on toning buton,popin gour cisor andthe $\cdot y$ wilbe protected and at hand when you need them whle knitig your next felting project.


