Frankie's Knitted Stuff
These pots can be knitted with any yarn, on whatever needles you choose and can be made in any size. The knitting is plain garter stitch, the sewing up is simple and you can use scraps of yarn. What more could you want from a pattern? Actually, it's more of a formula than a pattern as there aren't a set number of stitches or rows to work ... you'll see what I mean as we go along. So, choose some yarn and needles. To give the pots a bit of shape it helps to work to quite a tight tension. I used 3.25 mm / US size 3 needles with DK weight yarn, and 4.5 mm / US size 7 with aran weight. You could also combine yarns, perhaps using several thinner ones held together. The pots are made up of four identical strips. These can be knitted in one colour or each strip can be a different colour. The strips are knitted in three steps; I have used a separate colour for each step in the example illustrated below.
Step One
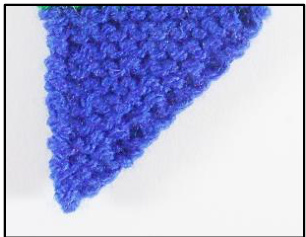
Cast on one stitch and knit into the front and back of it (2 sts). Next row: Next row: Kf&b, K to end. Sl 1 kwise, K to end. Repeat these two rows until the strip is as wide as you want it to be, ending with a second row. This measurement determines the size of the finished pot. The height of the pot will be roughly the same as the width of the strip; the pot's width will be about 112 times this measurement. So a strip 6 cm wide would give you a pot 6 cm tall and 9 cm wide.
Step Two
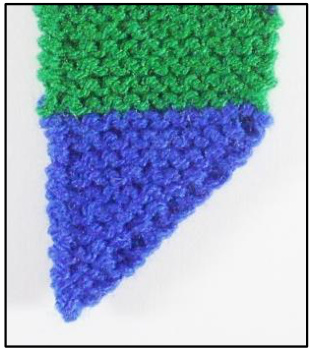
Count your stitches and then knit that number of rows - ten rows for ten stitches, twelve rows for twelve stitches . Slip the first stitch of every row knitwise. Unless you are changing colour here, place a marker at the end of the last row on the longest side of the strip.
Step Three
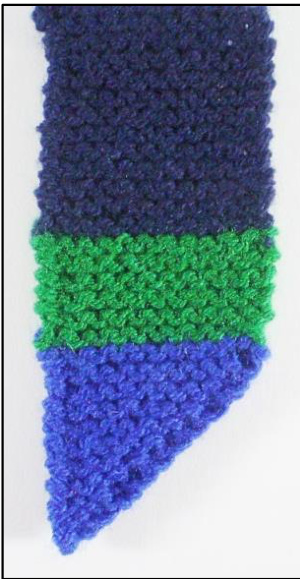
Now knit twice the number of rows that you knitted in the last step, still slipping the first stitch of each row. Cast off loosely, leaving a tail about twice the length of the longest side of the strip. This will be used to sew the strips together; darn in the cast on tail down the long side of the strip. Knit three more strips like this. The first two steps will form the sides of the pot, step three will be the base. For a taller pot, try knitting a few more rows in the middle step.
Sewing the Pot Together
This is where you find out why these pots are called Windmill Pots.
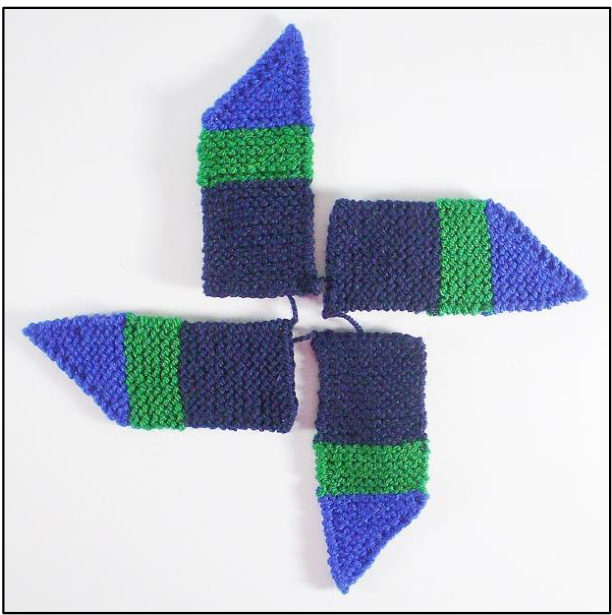
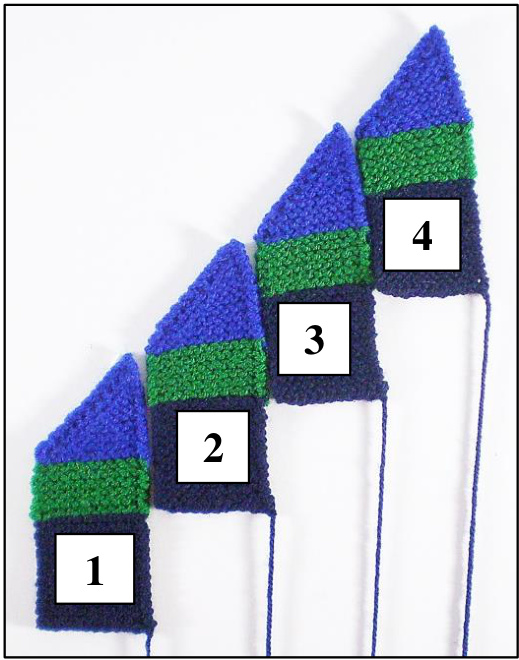
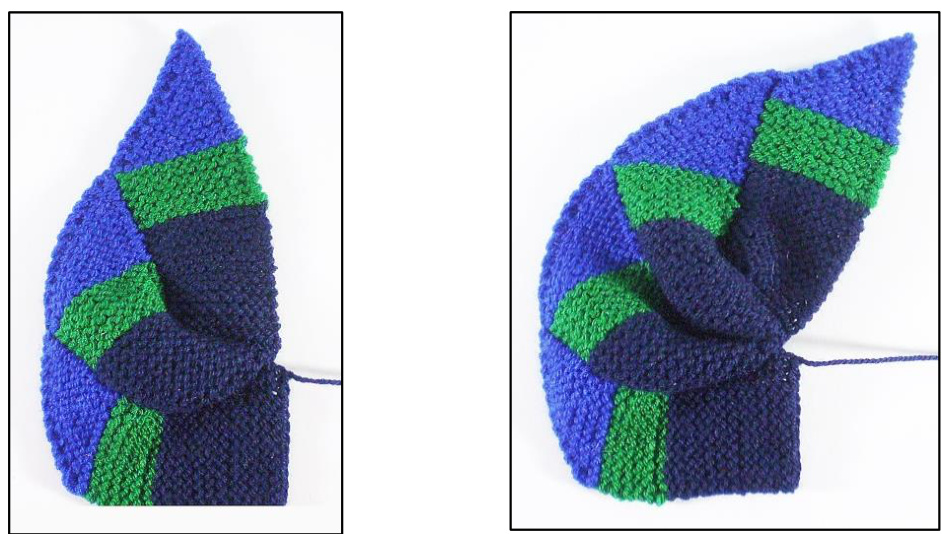
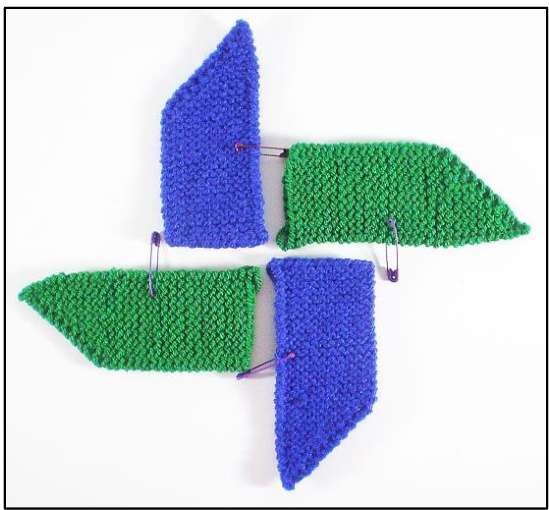
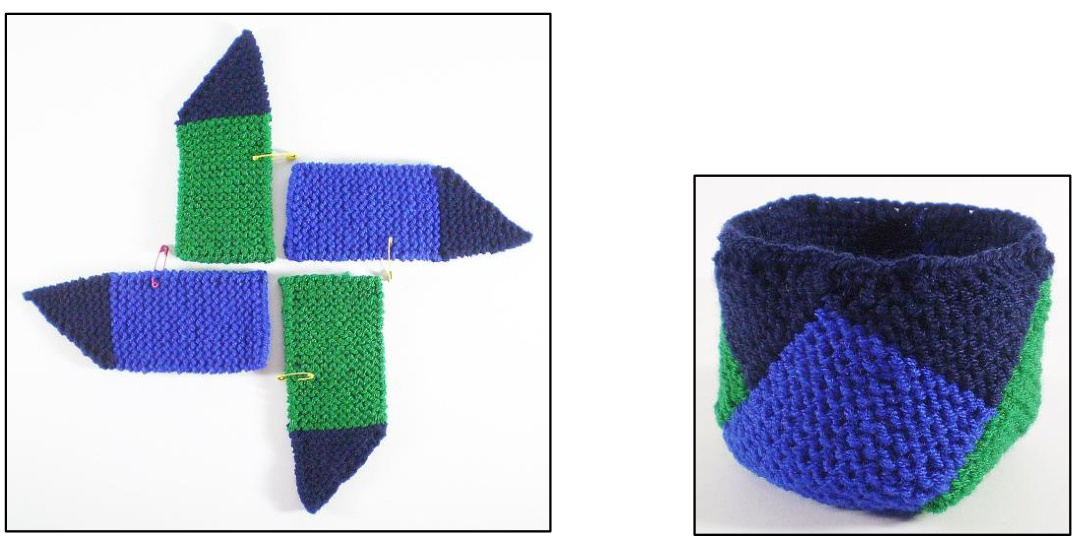
Lay the four strips out like this. All the points should face the same way and the cast off tails of yarn should meet in the middle. As they are sewn together the four end squares (dark blue) will become the base of the pot while the green and blue sections will twist together to form the sides. You can also lay the strips out in a line like this: The cast off edge of strip two will be joined to the side of strip one and then the short side of strip two will be joined to the rest of the long side of strip one. Each of the strips will be added in the same way, strip three to strip two and strip four to strip three. You may find it helpful to refer back to this picture as you sew the pot together.
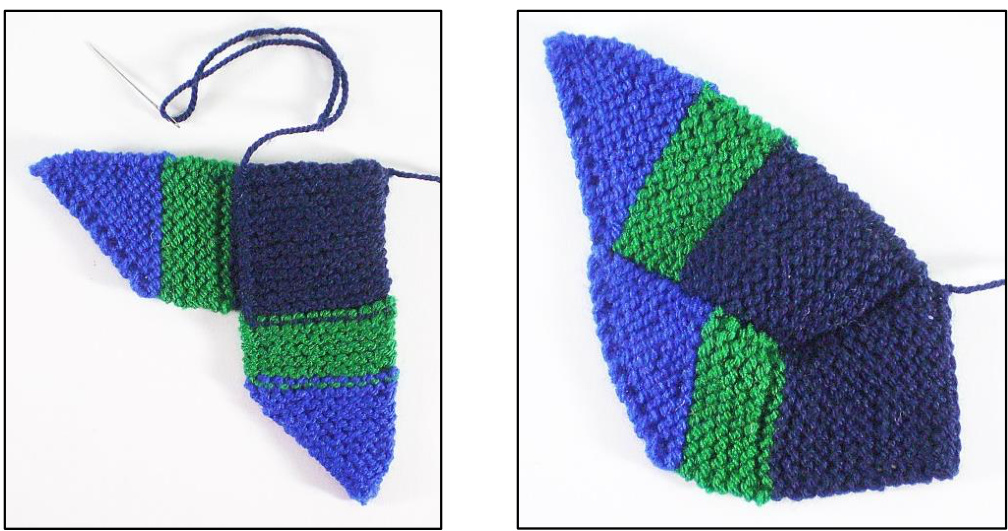
So, begin by sewing the cast off edge of one strip to the long side of another. Oversew or whipstitch the strips together with the right sides facing. Then twist the strips so that the short side of the new strip lies on top of the long side of the original strip and carry on sewing to the end. Make sure that the end of the seam is tidy as this will be the top edge of your pot.
Now add a third strip and then a fourth in the same way.
The length of yarn visible to the right of all these pictures is the tail of yarn on the first strip. Each time you add a strip, you should start sewing at this point. When all four strips are joined, twist the whole thing a bit more so that you can join the first strip to the last with the remaining tail of yarn which will give you ..
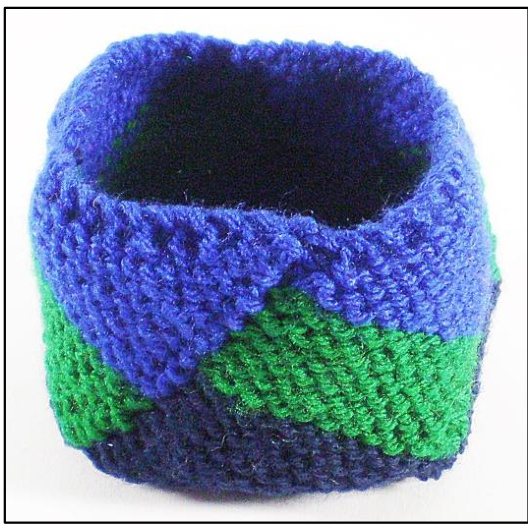
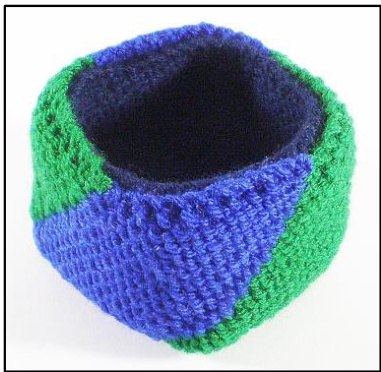
... a Windmill Pot. That's the basic pattern; it can be varied in all sorts of ways. You could knit a plain pot, a striped pot, or a zigzag pot.
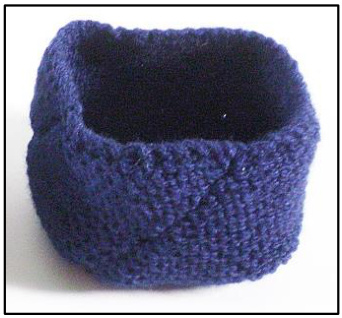
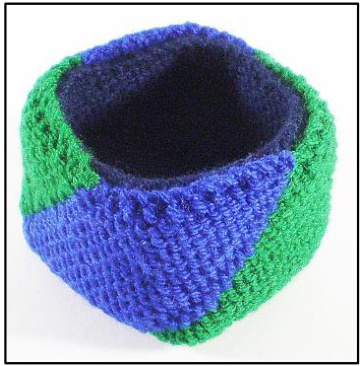
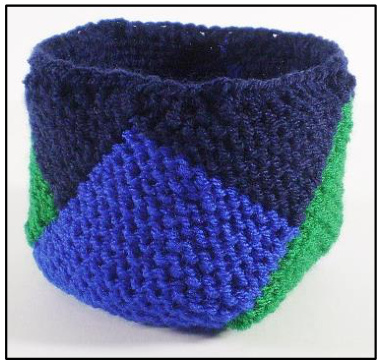
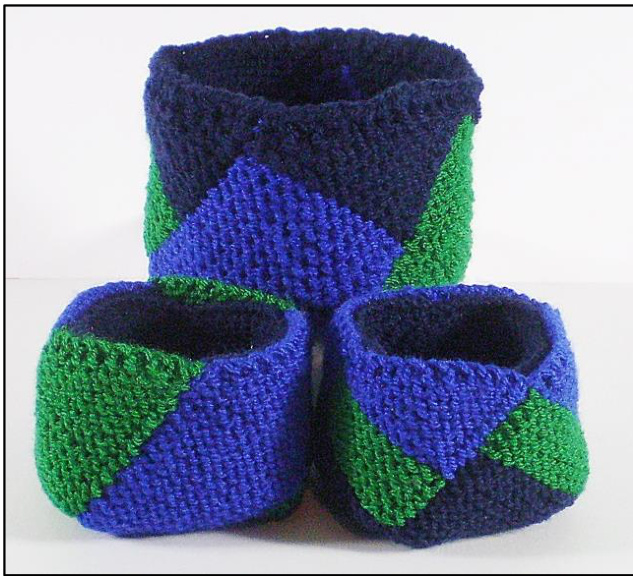
Windmill pictures of these variations are at the end of the pattern. You could also knit different sized pots, either by changing the number of stitches (and therefore rows) worked, or by using thicker yarn. I followed the same pattern for all three of my pots, increasing to 12 stitches in step one and then knitting 12 and 24 rows respectively in steps two and three. For the smaller pots I used DK weight yarn and 3.25 mm needles but I doubled the same yarn up for the bigger pot which I knitted with 4.5 mm needles.
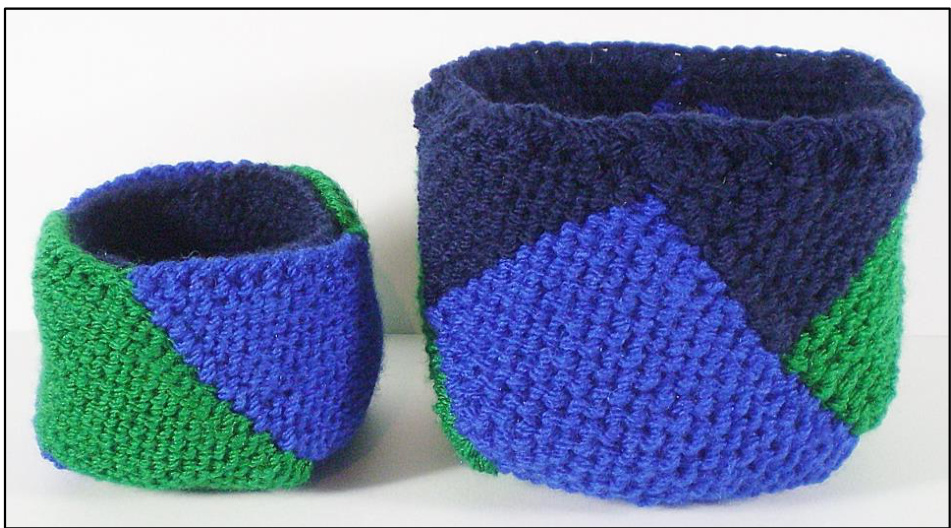
The strips on the small pot were 5 cm / 2" wide, giving me a pot 7.5 cm wide and 5 cm tall (3" x 2"). The strips on the bigger pot were 7.5 cm / 3" wide which meant that this pot was 10 cm wide and 7.5 cm tall (4" x 3"). I felt that the top edge of the bigger pot was a bit ragged so I crocheted round it with DK yarn (one strand) and a 3.5 mm crochet hook. I worked double crochet (US single crochet) all round with longer half treble (US half double) stitches into the places where the strips joined. Another thing you can do, if your pots are not as firm as you would like, is to add a lining. I did this with the smaller pots knitted with DK weight yarn. To do this, use the same yarn and pattern as for the main pot but go down a couple of needle sizes to make the lining pot slightly smaller. In the picture below, note the safety pin on the plain lining strip which marks the end of step two.
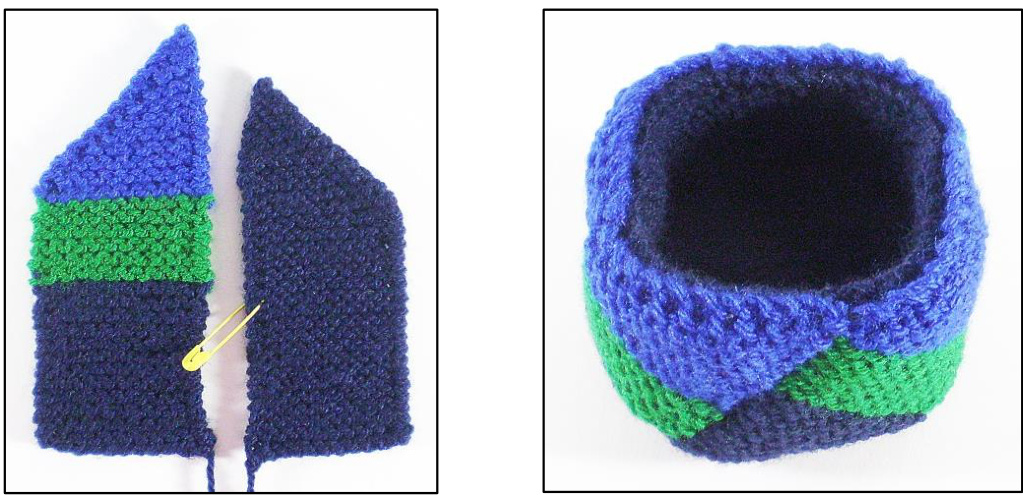
Leave the lining inside out when putting it inside the pot so that the tidiest side will be showing. I didn't sew my lining in but you could do so, using sewing thread and working in running stitch just below the top edge. You could also crochet round the top, working through both pieces to secure the lining. To give you an idea of the amount of yarn needed for these pots, I used 15g of DK all together for the small pot - 25g with the lining added. The bigger pot (knitted with two strands of DK) used 40g of yarn. This is a pattern to play with - what will you make?
Abbreviations
st / sts stitch / stitches K knit P purl kf&b knit into the front and back of the stitch sl 1 kwise slip one stitch knitwise
Windmill Pictures for Colour Variations
Striped Pot
Zigzag Pot
These are just a couple of ideas, I'm sure you can think of lots more. Frankie Brown, 2014.


