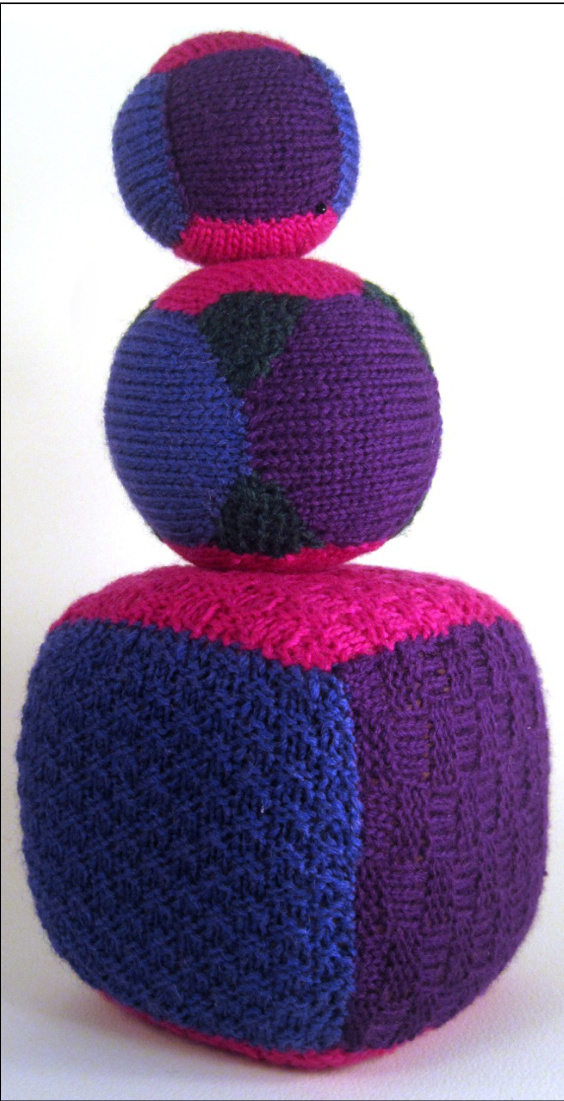
Knitted ball & cubes
V could also add spots to the cube shapes to make dice.
To make a ball or cube, you need:
Needles: 3 1%4 mm (UK 10, US 3) For a large cube: 20g each in three colours of yarn; a cube of furnishing foam, with sides 13cm (5in) long. For a small cube: 10g each in three colours of yarn; polyester toy stuffing. For a four-colour ball: 10g each in four colours of yarn; polyester toy stuffing. Tapestry needle for sewing up Scissors A donation from sales of the ball and cubes knitting patterns is made to the charity Sustain, which runs the Children's Food Campaign to help improve children's health, and their knowledge, understanding and enjoyment of good food, see: www.childrensfoodcampaign.org
How easy is it to make?
Easy! The cubes are each made from six squares of knitting. Choose colours that go well together. You can use the squares of a cube as an opportunity to practice textures of knitting (as shown on the largest cube). Or keep it simple and work only in stocking stitch for a smooth finish (as shown on the smaller cub and the four-colour ball).
How to make a knitted cube or ball
WHAT STITCHES ARE USED?
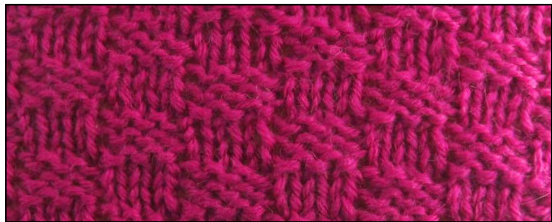
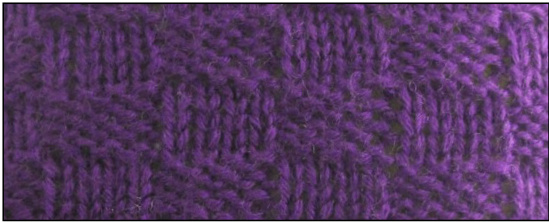
The knitted cubes and ball are patterns designed to be as simple as possible, and can be made using only stocking stitch. Stocking stitch means alternating rows of plain (k) and purl (p). If you prefer working every row in plain (called garter stitch), this makes quite a nice finish for the toys - the surface of your toy will just be a bit more textured. However, if you would like to make textured toys, the surfaces of these geometric shaps are a good place to practice. for the Large Cube pattern (and as shown in the picture), three different basketweave stitches were used on the six sides of the cube.
YARN AND TENSION
Tension and your choice of type of yarn are not critical. If your work is tighter, or your yarn a bit thinner, your toy will be a bit smaller; if your work is looser, or your yarn a bit thicker, your toy will be a bit bigger. As a guide to tension, to make a large cube with sides about 13cm or 5in in length: using double knit yarn and working in stocking stitch, using 3 14 mm (size 10, US 3) needles, work 26 stitches and 34 rows to 10cm (4 inches).
ABBREVIATIONS
k = knit or plain p = purl st(s) = stitch(es) tog = together (a decrease stitch) inc = increase (an increase stitch) numbers in (brackets) give the total stitches you should have at the end of that row
Large cube
LARGE CUBE SIDE
You can work the large cube in simple stocking stitch. Or for a textured cube, choose from one or more of the options below. The large cube in the picture was made by working two sides in each of the three different basketweave stitches described below (A, B and C).
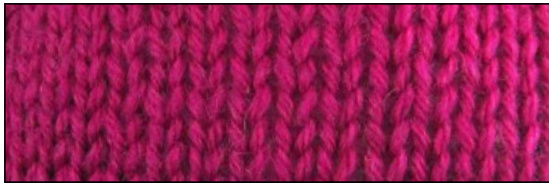
Simple stocking stitch
For a simple stocking stitch cube, make six pieces as follows: Cast on 24 sts. Working in stocking stitch, and starting with a k row, work 30 rows. Cast off.
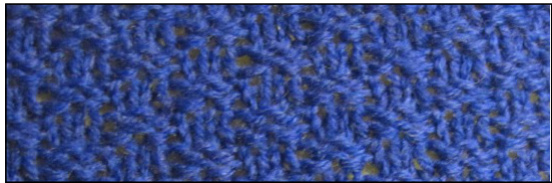
Option A: two-stitch bascketweave
Make a piece as follows: Cast on 24 sts. Rows 1 and 2: \* k2, p2; repeat from \* to end of row. Rows 3 and 4: \* p2, k2; repeat from \* to end of row. Repeat rows 1 to 4 until you have 30 rows in total. Cast off.
Option B: three-stitch bascketweave
Make a piece as follows: Cast on 24 sts. Rows 1, 2 and 3: \* k3, p3; repeat from \* to end of row. Rows 4, 5 and 6: \* p3, k3; repeat from \* to end of row. Repeat rows 1 to 6 until you have 30 rows in total. Cast off.
Making up the cubes
MAKING UP THE LARGE CUBE WITH FOAM STUFFING
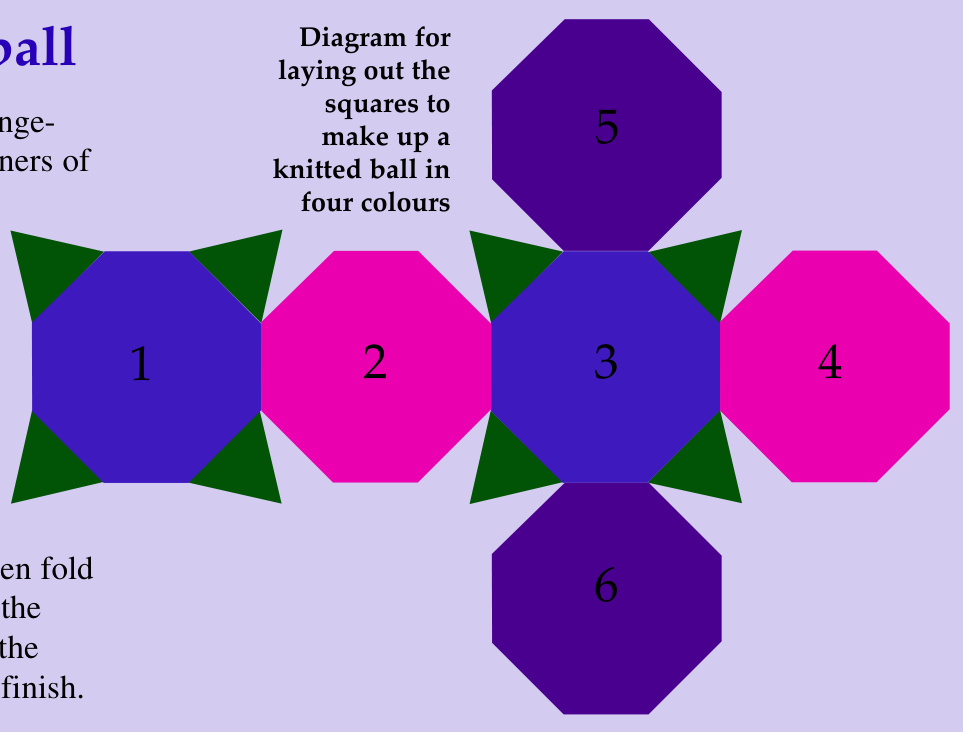
Lay out the six pieces of your cube on a flat surface in the arrangement shown in the diagram. Join the squares together along the seams where they touch. Place the 13cm (5in) cube of foam onto the middle square of the cross (the blue square in the diagram marked 3). Roll the long arm of the cross over the top of the foam, so that the edge of square 1 meets the edge of square 4, and join these seams together. Fold up square 5 to enclose the foam. Join the seams where this square meets squares 1, 2 and 4. Repeat for square 6.
MAKING UP THE SMALL CUBE WITH FOAM STUFFING
Make up the small cube in the same way as above. Before completing the final seam, fill the cube with stuffing then sew shut. The large cube can be stuffed in the same way, but will become bulgy and will not keep its cube shape.
Option C: four-stitch bascketweave Make a piece as follows: Cast on 24 sts. Rows 1, 2, 3 and 4: \* k4, p4; repeat from \* to end of row. Rows 5, 6, 7 and 8: \* p4, k4p repeat from \* to end of row. Repeat rows 1 to 8 until you have 30 rows in total. Cast off.
Small cube
SMALL CUBE SIDE
The small cube in the picture was made by working all sides in simple stocking stitch. However you could make sides using different basketweave stitches, as described above (A, B and C).
Simple stocking stitch
For a simple stocking stitch cube, make six pieces as follows: Cast on 12 sts. Working in stocking stitch, and starting with a k row, work 16 rows. Cast off. Make up the small cube as for the large cube, following the diagram and instructions shown in the panel opposite.
Variations on a theme
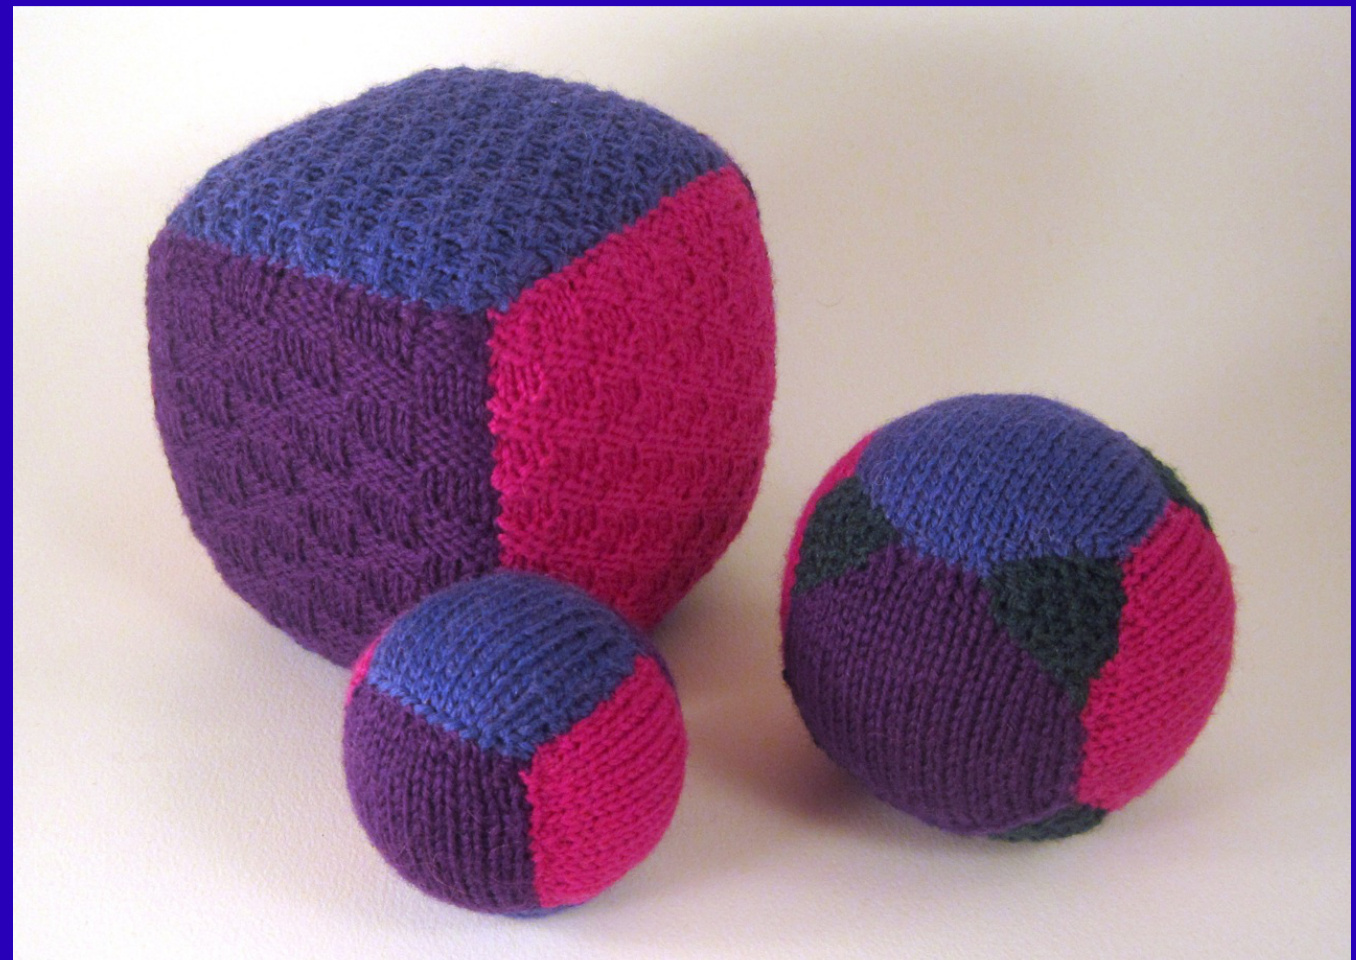
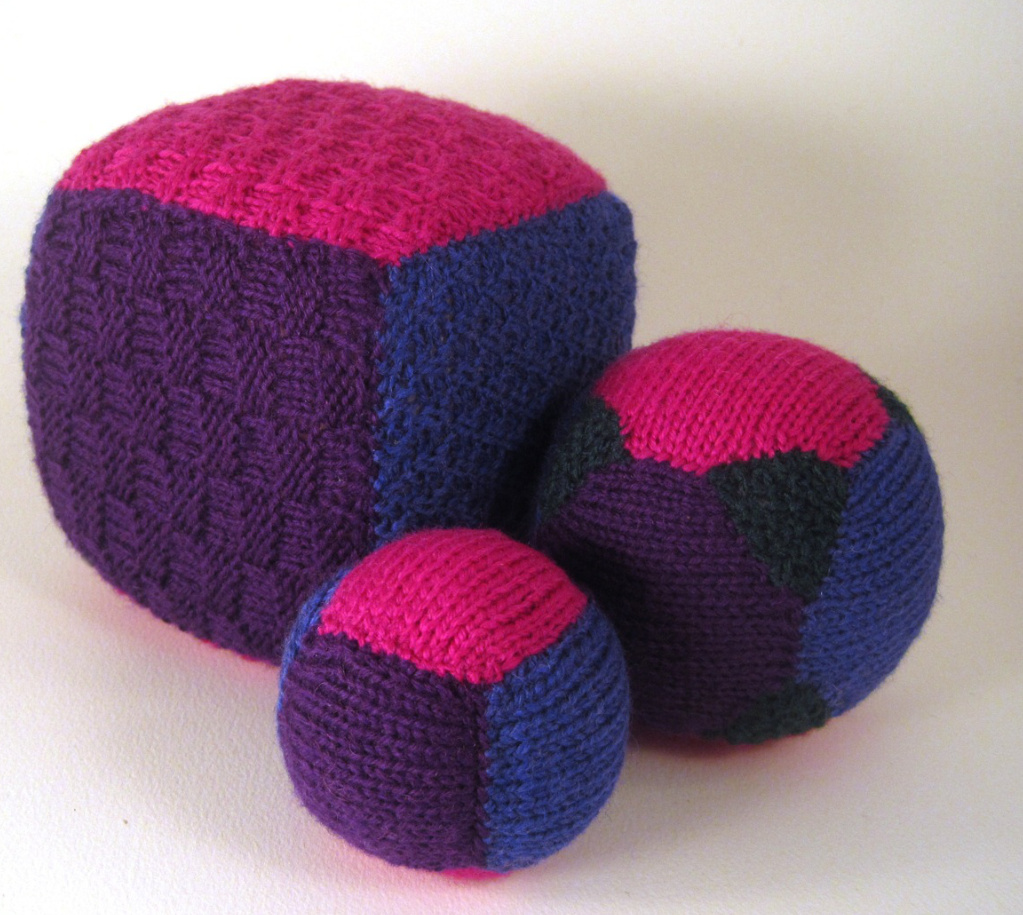
You can make attractive variations to your simple geometric shapes through changes in colour and stitch. The large cube is worked in three colours,two sides in each. It is filled with a pre-cut cube of foam, giving it a firm cube shape. You could sew on felt spots to turn it into a dice. The small cube is worked in three colours, two sides in each. It is filled with polyester toy stuffing, giving it a soft, fat, rounded shape. The ball on the right of the picture has four colours - six octagons joined in a cube-like shape with eight triangles. one at each corner.
Making up the four-colour ball
Lay out the six octagons on a flat surface in the arrangement shown in the diagram, with triangles at the corners of octagons 1 and 3. Join the pieces together along the seams where they touch. Fold up octagon 4 and join the diagonal edges to the adjacent triangles. Fold up octagon 5 and join the diagonal edges to the adjacent triangles, and then to the straight edge of octagon 4. Repeat for octagons 6 and 2. When you have a bowl shape, fill it with stuffing, then fold over octagon 1 with its triangles, like a lid, and join the remaining seams. Before you have completed all of the seams, push more stuffing into the shape fort a firm finish.
Four-colour ball
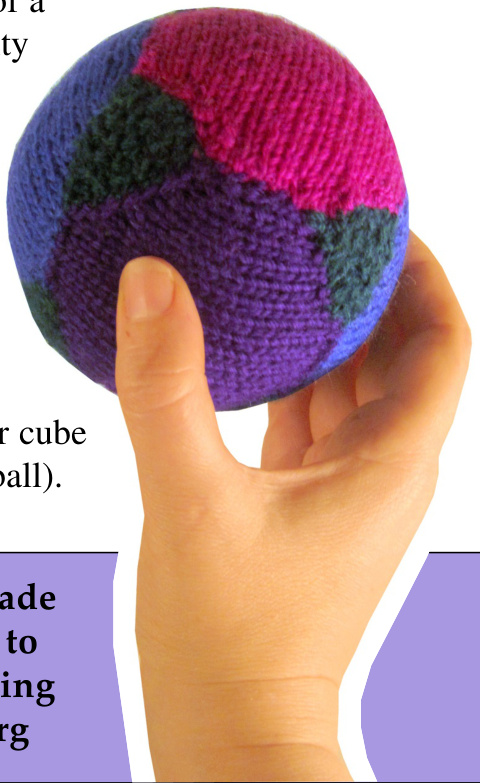
The four-colour ball in the picture was made by working all sides in simple stocking stitch. For a four-colour ball, work two octagons in each of three different colours (six octagons in total), and eight triangles in an additional colour. You can also add a bell or rattle to your toy. Put the bell or some buttons in a small plastic container such as a pill jar, When the toy is half stuffed, and place the plastic container in the middle of your toy and then finish the stuffing and sewing up.
OCTAGON SIDE
Make six, in three different colours Cast on 6 sts. First row: p. Row 2: inc 1 st into first st, k to last st, inc 1 st into last st. Row 3: inc 1 st into first st, p to last st, inc 1 st into last st. Repeat rows 2 and 3 twice more (18 sts and 7 rows total). Working in stocking stitch, starting with a k row, work 8 rows (15 rows total). Row 16: k2 tog, k to last 2 sts, k2 tog. Row 17: p2 tog, p to last 2 sts, p2 tog. Repeat rows 16 and 17 twice more (6 sts remain). Cast off.
TRIANGLE SIDE
Make eight, in an additional colour Cast on 6 sts. First row: p. Next row: k2 tog, k4 (5 sts remain). Next row: p2 tog, p3 (4 sts remain). Next row: k2 tog, k2 (3 sts remain). Next row: p2 tog, p1 (2 sts remain). Next row: k 2 tog. Break off yarn, slip end through remaining stitch and pull tight. Make up the ball using the instructions in the panel on the previous page.
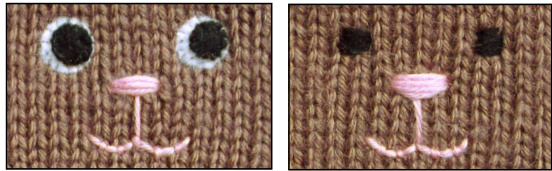
TIP: If making your toy for a small child, you could add an animal face to one or more of the sides. Sew securely to survive hard play.
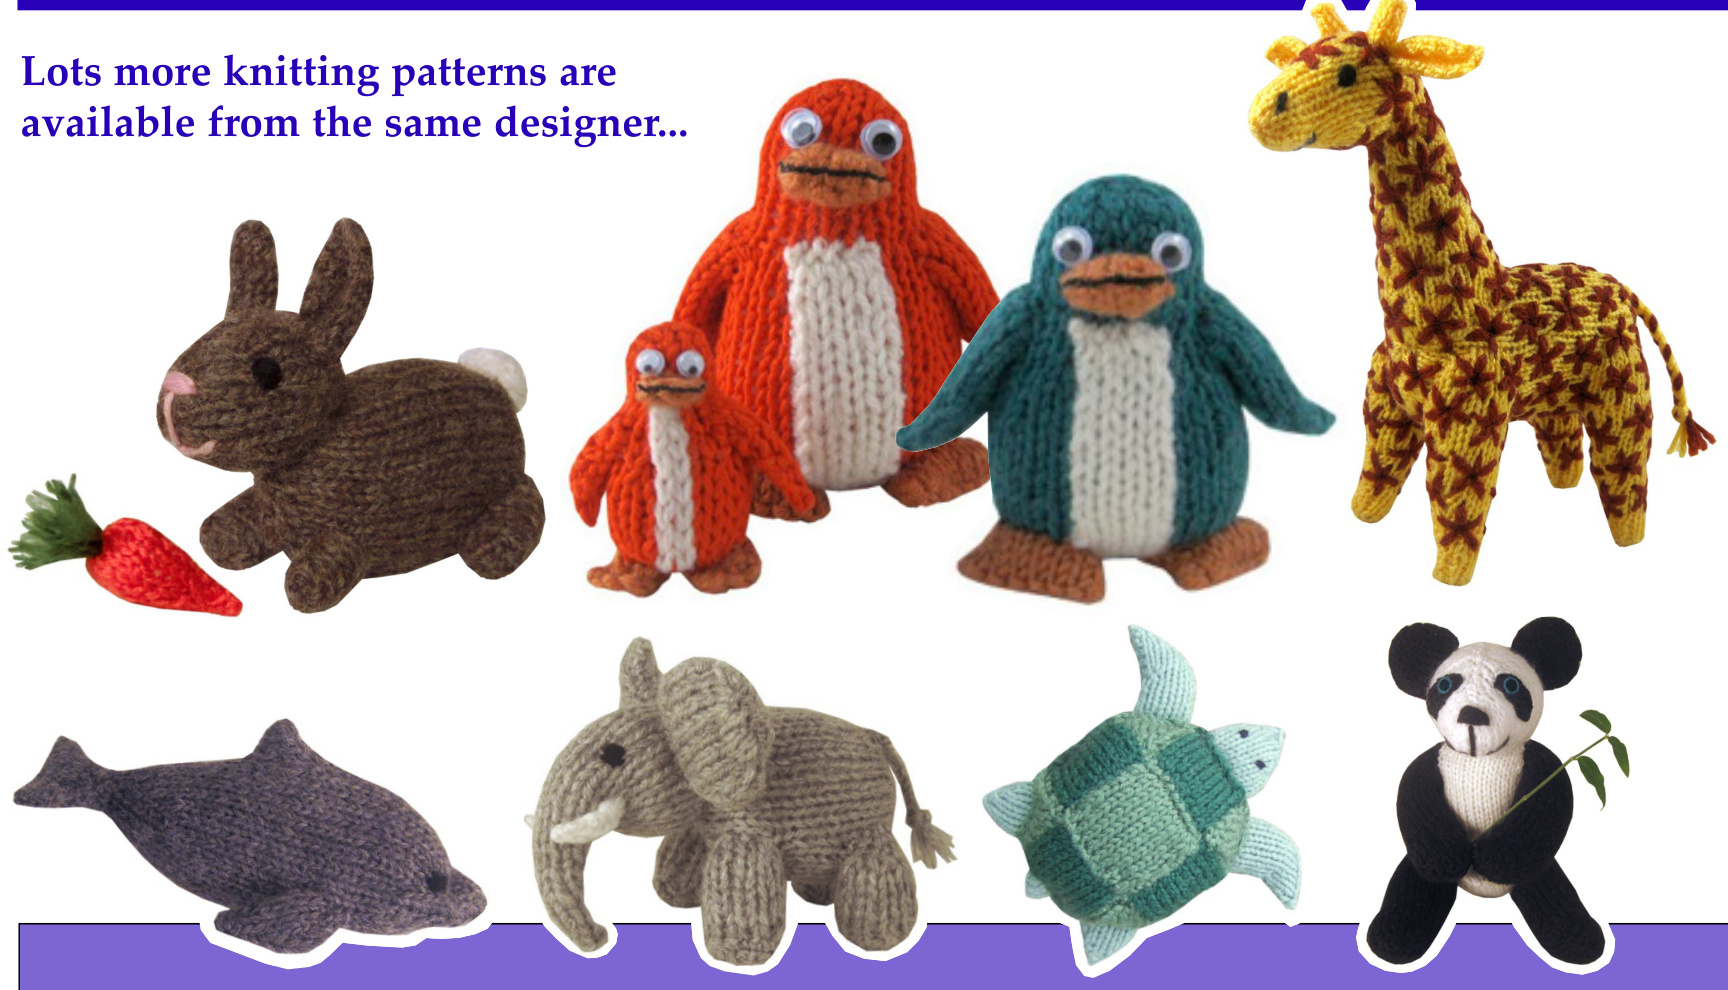
Copyright Kath Dalmeny, 2012. More patterns for toys are in the book Kath Dalmeny's World of Knitted Toys'. Lots of knitting and crochet patterns are also available via the wonderful: www.ravelry.com


