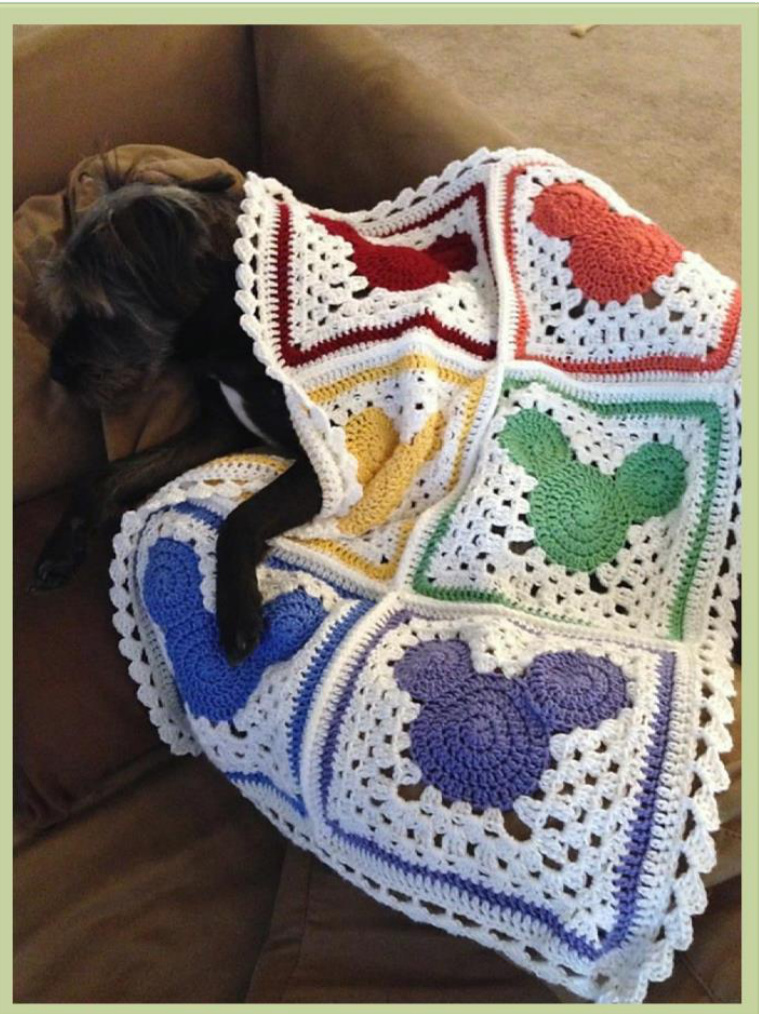
Mickey Head AFgHaN
Materials:
J/10 (6.o0MM) Hook (If you prefer smaller squares, please use a smaller hook) Worsted Weight (Medium 4) Yarn in at least two colors (Will only refer to colors A and B to reference the two colors in a single block) Yarn Needle Stitch Markers
Abbreviations
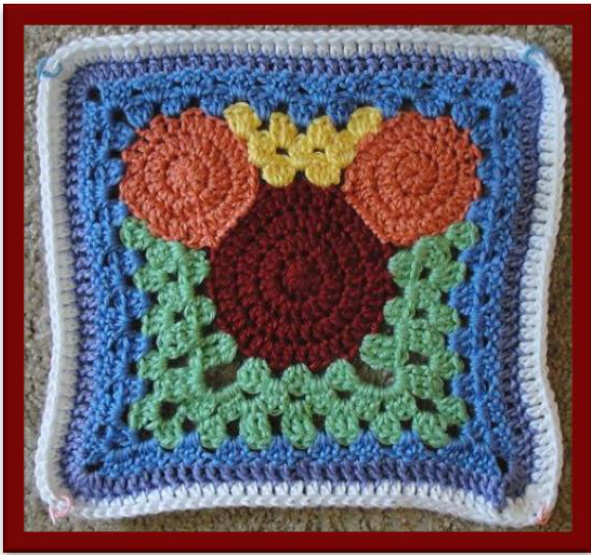
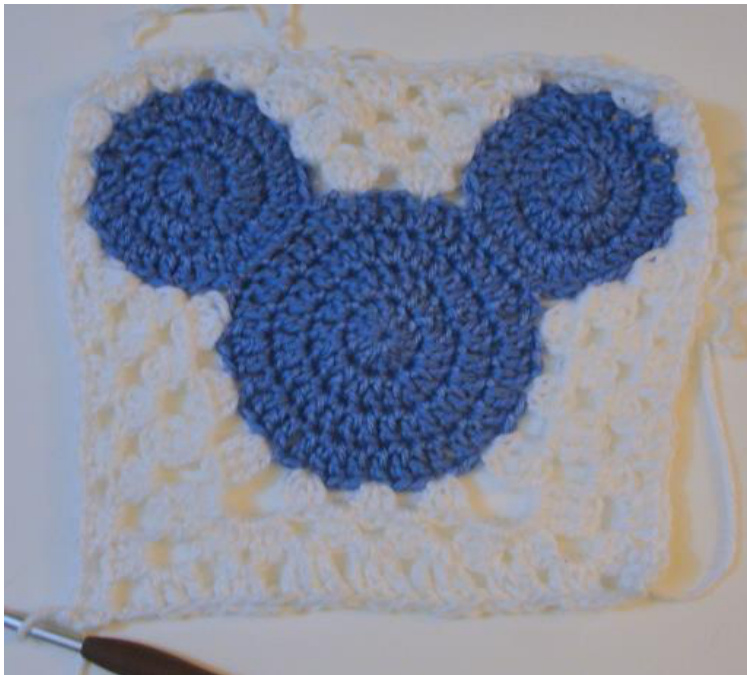
CH-Chain SL ST- Slip Stitch SC- Single Crochet DC- Double Crochet TC- Triple Crochet INC- Increase CLUSTER- 3 Double Crochet in one spot (unless otherwise noted) This pattern requires three separate circles sewn together to create the Mickey head. The square around the head is achieved by attaching, tying off, and reattaching the white yarn in different locations and using a mix of DC and TC clusters. The picture below demonstrates where the sections of yarn are located before being tied off and restarted. (Starting with red, followed by creating and sewing orange, then attaching and crocheting yellow-green-blue-purple-white.) The squares were then slip stitched together and edged with block edging.
Now, onto the pattern.. Start with a Magic Circle (or chain 6 and SL ST to the first chain to create a circle) Work in Rounds
Mickey Head, Large Circle (Make 1): Color A
1) ch 2 (does not count as a DC) and 10 DC into circle. SL ST to first DC (10) 2) ch 2, INC by 2 DC in each stitch. SL ST to first DC (20) 3) ch 2, \*DC in first stitch, INC in next stitch\* Repeat 9 more times. SL ST to first DC (30) 4) ch 2, \*DC in first two stitches, INC in next stitch\* Repeat 9 more times. SL ST to first DC and tie off (40)
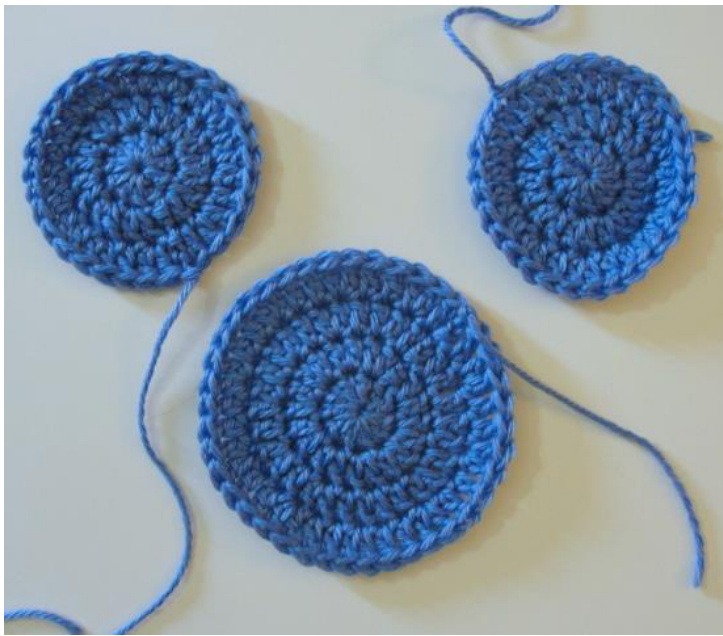
Mickey Ears, Small Circle (Make 2) Color A
Repeat Start and 1-3 of Mickey Head, tie off and leave a long tail for sewin
Sewing the Mickey Head Together
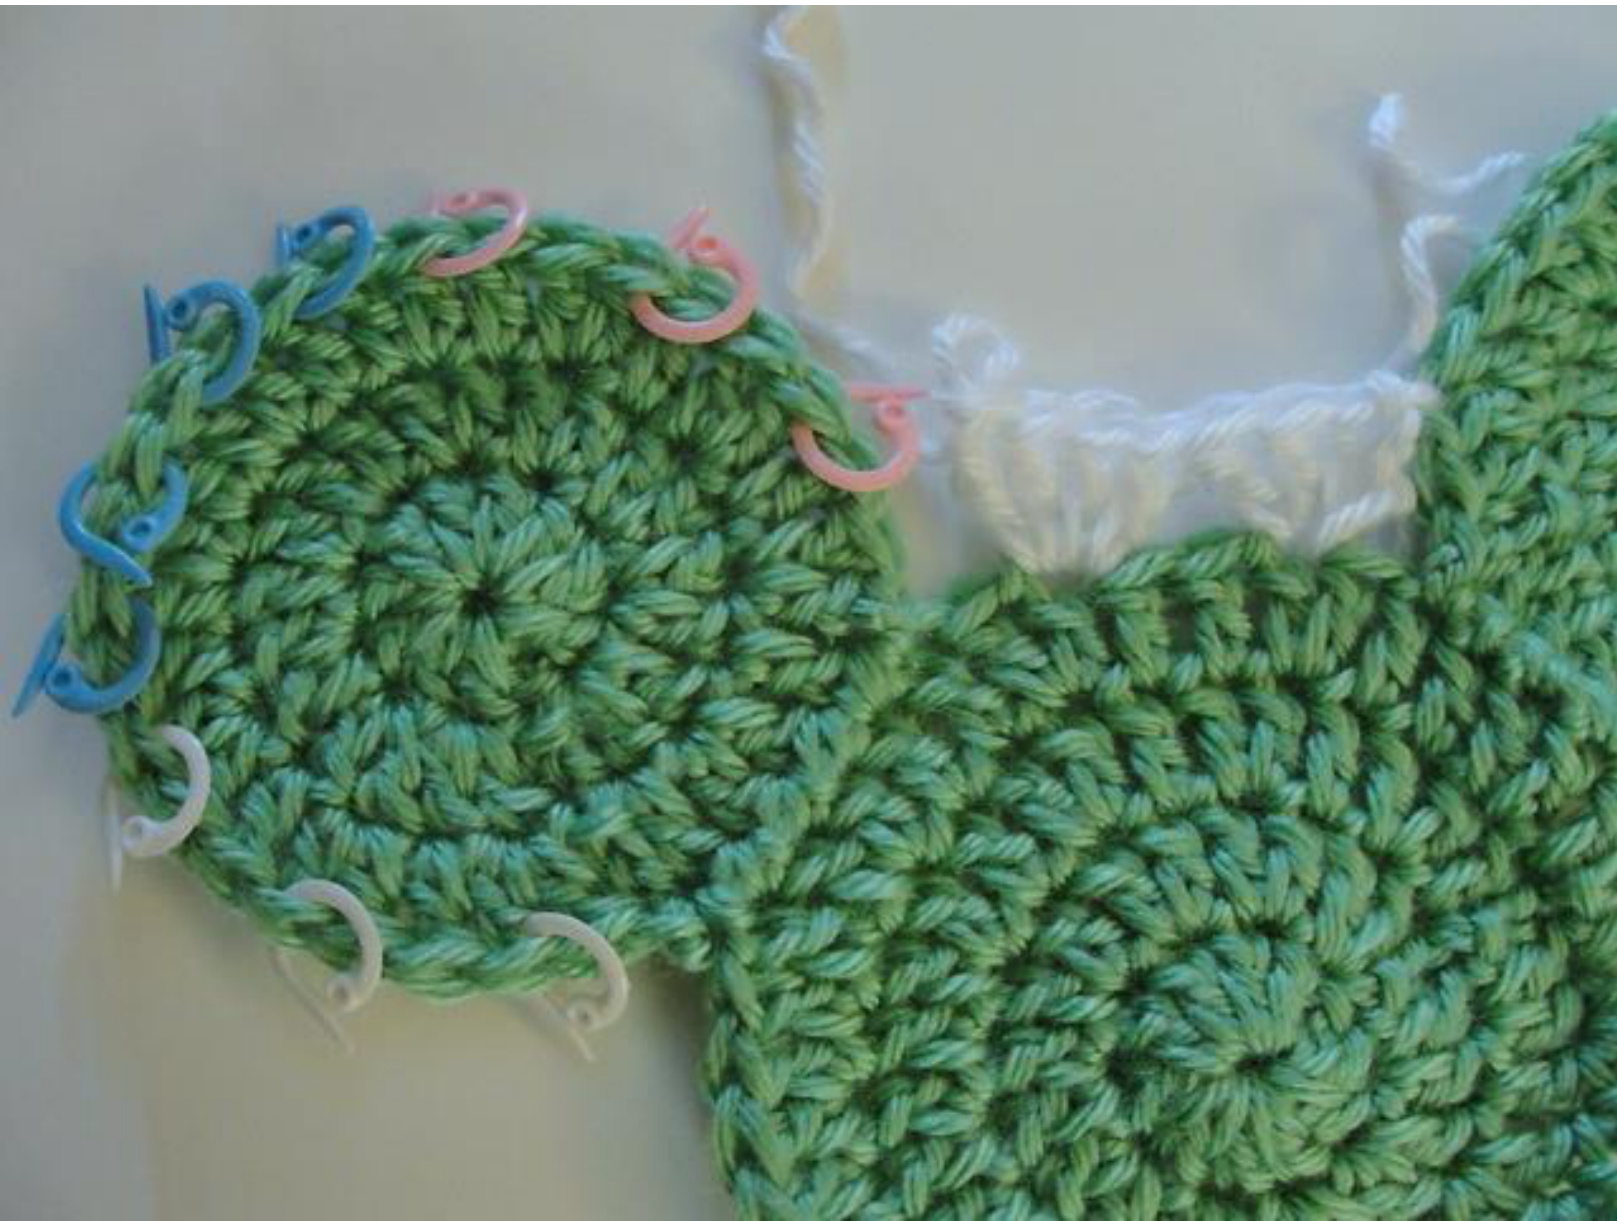
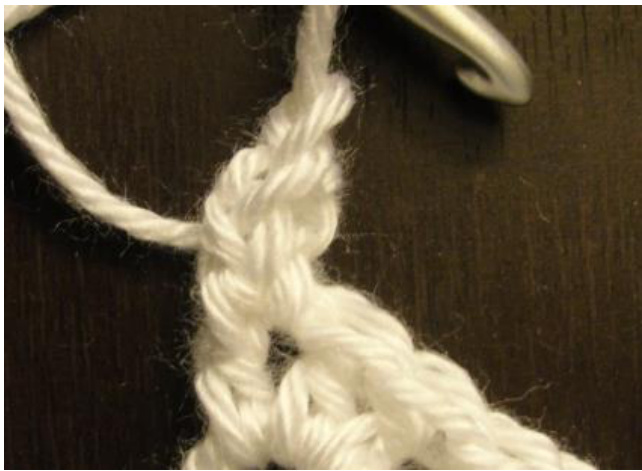
THIS STEP MUST BE DONE BEFORE CONTINUING. Using the yarn tail from the ear, stitch 5 stitches of the ear to 5 stitches of the head (leaving 6 stitches between the two.) I count both the slip stitch and the stitch under it as two separate stitches throughout this pattern; so start with the stitch under the slip stitch to sew these pieces together (see picture for reference.)
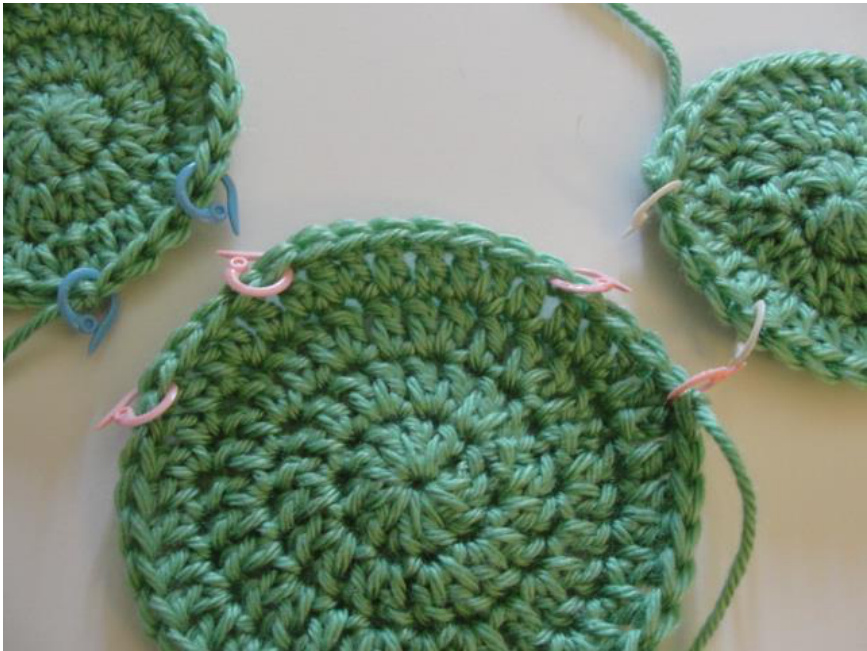
Once your Mickey head is stitched together, I suggest marking the ears where your square will be attached by using stitch markers. The Pink markers represent where the First section will attach; the White markers represent where the Second section will attach; the Blue markers represent where the Third section will attach. Section 1 (Pink): Count three stitches up from the last attached stitch on the Ear, mark this spot (in other words, skip two stitches and mark in the third.) Again, skip two stitches, and mark in the third. Repeat this one more time. Three total markers Section 2 (White): Repeat Section 1. Section 3 (Blue): Skip one stitch from the pink marker, and mark this stitch. Repeat. From the White marker skip one stitch and mark the next. Repeat. This should result in a pattern (between the white and pink markers) of: Skip stitch, blue marker, skip stitch, blue marker, blue marker (this is where your corner will be), skip stitch, blue marker, slip stitch. If you did not count your slip stitch as a stitch, have your corner be in ONEstitch instead of two. CHECK BOTH EARS TO MAKE SURE THE STITCHES WILL BE EVEN ON BOTH SIDES.
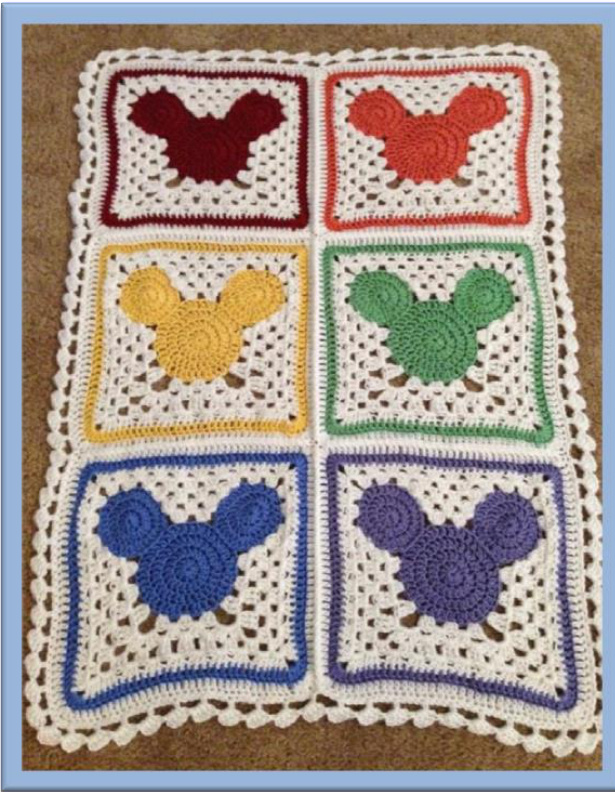
Section 1 [Shown in Yellow in second picture on Page 1] ColorB
Looking at the Mickey Head, right side facing, skip one stitch from the ear to your right and attach 2"d stitch from ear. 1) Chain 3, slip stitch to the third stitch up the ear (first pink stitch marker if you marked the ear.) 3 DC in the same stitch you attached in to create a cluster. Skip two stitches, 4 DC in the next stitch (leaving one stitch between this and the left ear.) Slip stitch to the third stitch up the left ear (first pink stitch marker if you marked this ear.) (2 Clusters) 2) Chain 3, slip stitch to the third stitch up the left ear (second pink stitch marker). Turn. Wrong side facing, Cluster (3 DCs) between the ear and the cluster at the end of row one. Cluster between the two clusters of Row 1. Create a cluster of 4 DC between the first cluster and the right ear, slip stitch to the third stitch up the right ear (second pink stitch marker.) (3 Clusters) 3) Chain 3, slip stitch to the third stitch up the right ear (third and final pink stitch marker). Turn. Wrong side facing, Cluster (3 DCs) between the ear and the cluster at the end of row one. Cluster between the clusters of Row 2. Create a cluster of 4 DC between the first cluster and the left ear, slip stitch to the third stitch up the left ear (third and final pink stitch marker.) Tie off. (4 Clusters) YOUR MICKEY AND SECTION 1 SHOULD LOOK LIKE THIS.
Section 2 [Shown in Green in second picture on Page 1] ColorB
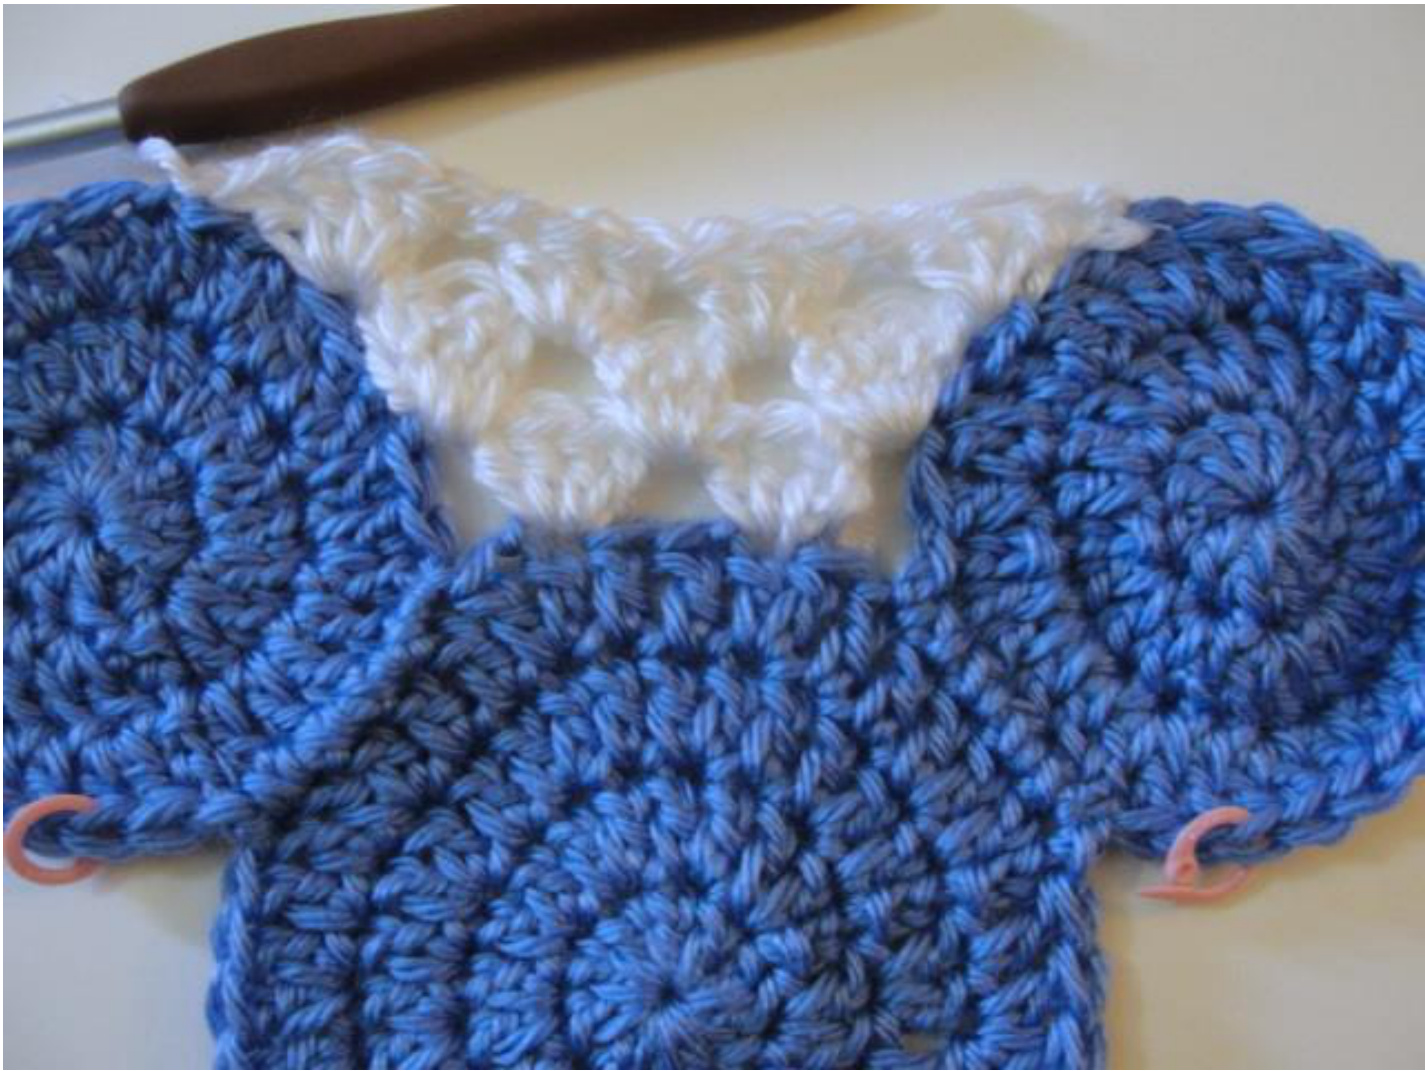
With right side facing, skip one stitch from the left ear and attach yarn to the head. [Will end row 1 on the right side, by the crochet hook in picture to the right] 1) Chain 3, slip stitch to the third stitch up the left ear (first white stitch marker) 3 DC in the same stitch you attached in to create a cluster. \*Skip two stitches, DC cluster in the next stitch\*\* Skip two stitches, 3 TC (TC Cluster) in next stitch. Chain 5, skip one stitch, cluster in next stitch. Repeat \* to \*\* TWICE. Chain 5, skip one, TC Cluster in the next stitch. Repeat \* to \*\* ONCE. Skip two stitches, 4 DC in the next stitch; slip stitch to third stitch up the right here (leaving one stitch between the cluster and the ear.)
[Pattern: 2 DC Clustesr, TC Cluster, 3 DC Clusters, TC Cluster, 2 DC Clustesr]
[Pattern: 3 DC Clusters, 2 TC Clusters, 6 DC Clusters, 2 TC Clusters, 3 DC Clusters]
3) Chain 3, slip stitch to the third stitch up the left ear (third and final white stitch marker). Turn. Right side facing, DC cluster between ear and last cluster of row 1. \*1 DC Cluster between the clusters of row 2\*\* Repeat TWICE. In Chain 5: DC Cluster, chain 3, DC Cluster. DC Cluster in chain 1 space. [TC Cluster between clusters of row 2] Repeat TWICE. DC Cluster in chain 1 space. In Chain 5: DC Cluster, chai
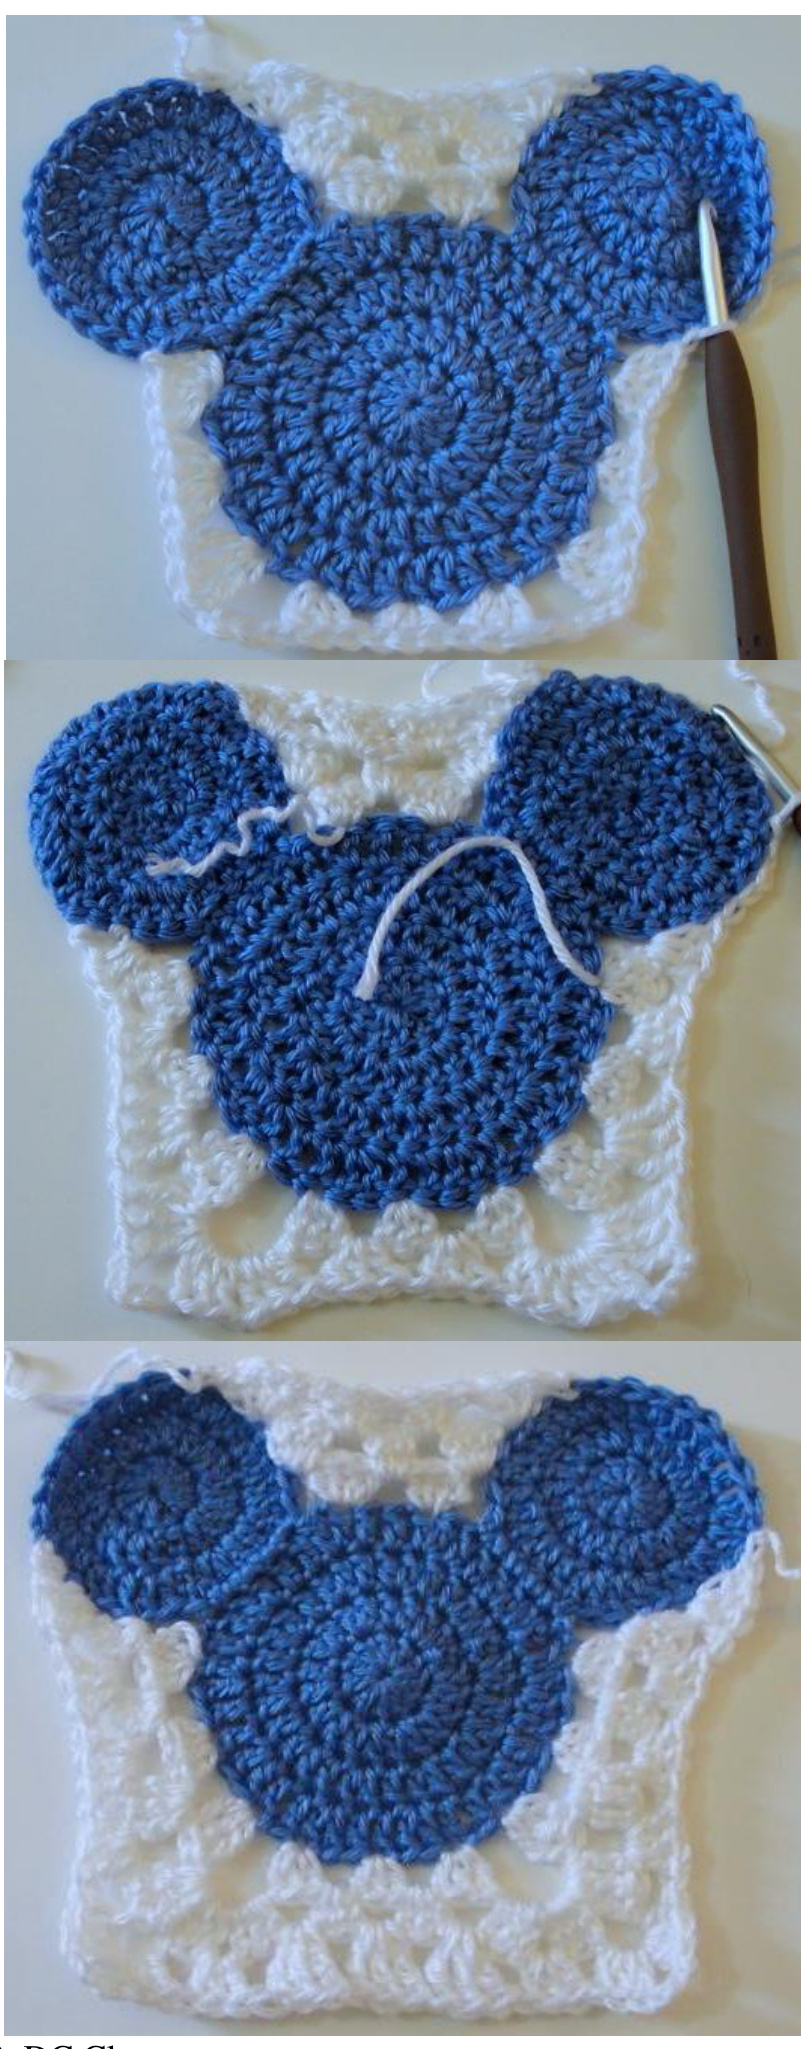
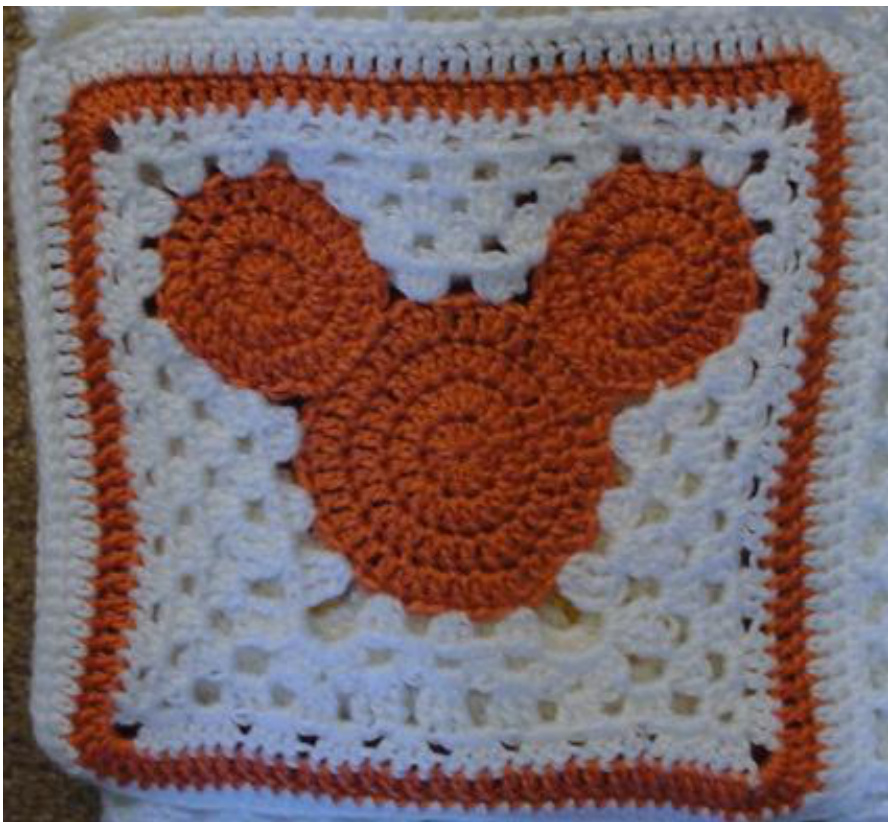
Repeat \* to \*\* THREE times. 4 DC between the first cluster of Row 2 and the ear. Slip stitch to third stitch up the right ear (third and final white stitch marker.) Tie off. [Pattern: 7 DC Clusters, 3 TC Clusters, 7 DC Clusters] YOUR SQUARE SHOULD HAVE THE MICKEY HEAD, THREE ROWS BETWEEN THE EARS, AND THREE ROWS AROUND THE HEAD; AND SHOULD LOOK LIKE THE THIRD PICTURE ON PAGE 5.
Section 3 [Shown in Blue in second picture on Page 1] ColorB
With right side facing, attach yarn to the bottom right chain three corner (from Row 3 of Section 2). (This will have you working up the side, across the top, then down the other side for Row 1.) From here on out all Clusters are3DC. 1) 1 cluster into the chain space. Cluster between each cluster up the side until reaching the ear. Cluster between the ear and the cluster of Row 3 Section 2. On the ear, \*skip one stitch and Cluster in the next\*\* REPEAT ONCE. Chain 3. Cluster in the NEXT stitch to create top corner. Repeat \* to \*\* ONCE. Cluster between the ear and the cluster of Row 3 Section 1. Cluster between each cluster across the top until reaching the next ear. Cluster between the ear and the cluster of Row 3 Section 1. On the ear, \*skip one stitch and Cluster in the next\*\* REPEAT ONCE. Chain 3. Cluster in the NEXT stitch to create top corner. Repeat \* to \*\* ONCE. Cluster between the ear and the cluster of Row 3 Section 2. Cluster between each cluster down the side until reaching the chain three space. Cluster once in this space, chain 2 and turn. 2) Wrong side facing, cluster between the last 2 double crochets of Row 1 (see picture to the right.) Cluster between each cluster up the side until reaching corner (7 clusters.)\* In chain 3: Cluster, chain 3, cluster\*\* Cluster between each cluster across the top (6 clusters); Repeat \* to \*\* Cluster between each cluster down the side (7 clusters); In between the DC and Chain of Row 1: Cluster, chain 3, Cluster. Cluster in the Chain 3 of Row 3 Section 2. Cluster in between each cluster of Row 3 Chain 2. Cluster in the Chain three of Row 3 section 2. (6 clusters across bottom) Cluster in between the same 2 DC that you started this row with, chain three, connect to first DC. Tie off. (Sorry, no picture of this row at this time.)
Section 4 [Shown in Purple in second picture on Page 1] Color A
3) With color A and right side facing, connect to bottom right corner chain 3 again. Chain 2 (does not count as DC) 5 DC in corner chain (mark 3rd DC to find corner easily, if desired; repeat for all corners). DC once in each DC from the clusters up to the top corner (27 DC) 5 DC in chain 3. DC once in each DC from the clusters across the top to next corner (30 DC). 5 DC in chain 3. DC once in each DC from the clusters down to bottom corner (27 DC) 5 DC in chain 3, DC once in each DC from the clusters across the bottom to next corner (30 DC). Slip stitch to first DC. Tie off. (134 Stitches)
Section 5 [Shown in White in second picture on Page 1] Color B
4) With color B and right side facing, connect to bottom right corner stitch (the third DC from the set of 5.) Chain 2 (does not count as a DC) 3 DC in the corner. DC once per stitch up the side and to the corner (31 DC). 3 DC In corner. DC once per stitch across the top to the corner (34 DC). 3 DC in corner. DC once per stitch down the side and to the corner (31 DC). 3 DC In corner. DC once per stitch across the bottom to the corner (34 DC). Slip stitch to the first DC. Tie off.
MAKE SIX BLOcKS (or as many as you desire)
Attaching Your Blocks
To attach your blocks, place them wrong sides facing and slip stitch the two blocks together from corner to corner. For the blanket pictured on Page one I connected Red to Yellow, then Yellow to Blue and separately Orange to Green, then Green to Purple. Once I had the two strips, I slip stitched the two strips together from top to bottom. If you don't like the ridge created by slip stitching on the right side, have the right sides of the blocks facing and slip stitch across/down the wrong sides.
Edging Color B
With right side facing, attach color B in bottom right corner. 1) chain 1, 3 SC in corner (mark center SC to find corner easily, if desired; repeat for all corners.) 103 sC up to the corner, 3 SC in corner, 74SC across top, 3 SC in corner, 103 SC down to the corner, 3 SC in corner, 74SC across bottom, slip stitch to the first sc. 2) S1 st around corner to the first sc up the side (effectively skipping 1 stitch from the corner). Ch 6, DC in 4th ch from hook, DC in next ch, 2 DC in first ch, skip next two stitches, \* 1 DC in next st, Ch 3, 3 DC around the post of the DC, skip next two stitches\*\* Repeat \* to \*\* until just before the next corner (35 blocks up the side.) Skip 1 stitch, DC in corner stitch, Ch 3, 3 DC around the post of the DC. Skip 1. Repeat \* to \*\* except skip THREE stitches between each block across the top. Stop just before next corner (19 blocks across top.) Skip two stitches, DC in corner stitch, Ch 3, 3 DC around the post of the DC. Skip 1. Repeat \* to \*\* (Skipping two stitches between each block again) until just before the next corner. DC in corner stitch, Ch 3, 3 DC around the post of the DC. Skip 1. Repeat \* to \*\* except skip THREE stitches between each block across the top. Stop just before next corner (19 blocks across bottom.) DC in corner stitch, Ch 3, 3 DC around the post of the DC. Sl st into third chain of beg-ch. Tie off.
Finishing your blanket
If you haven't done this as you went, use your yarn needle and tuck your yarn tails. If you've managed to understand all of this madness, CoNgratULatioNS! You've made a Mickey head afghan!