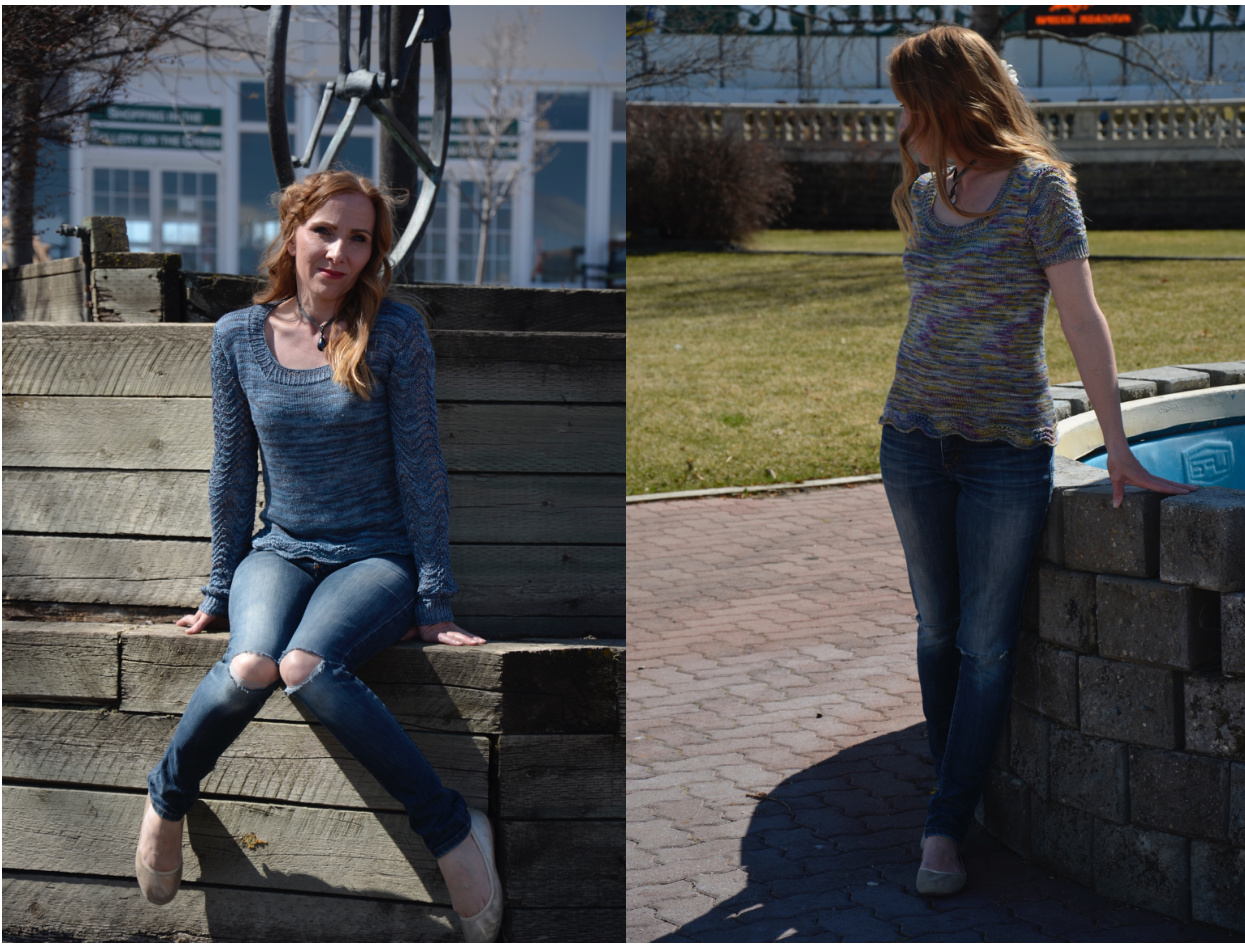
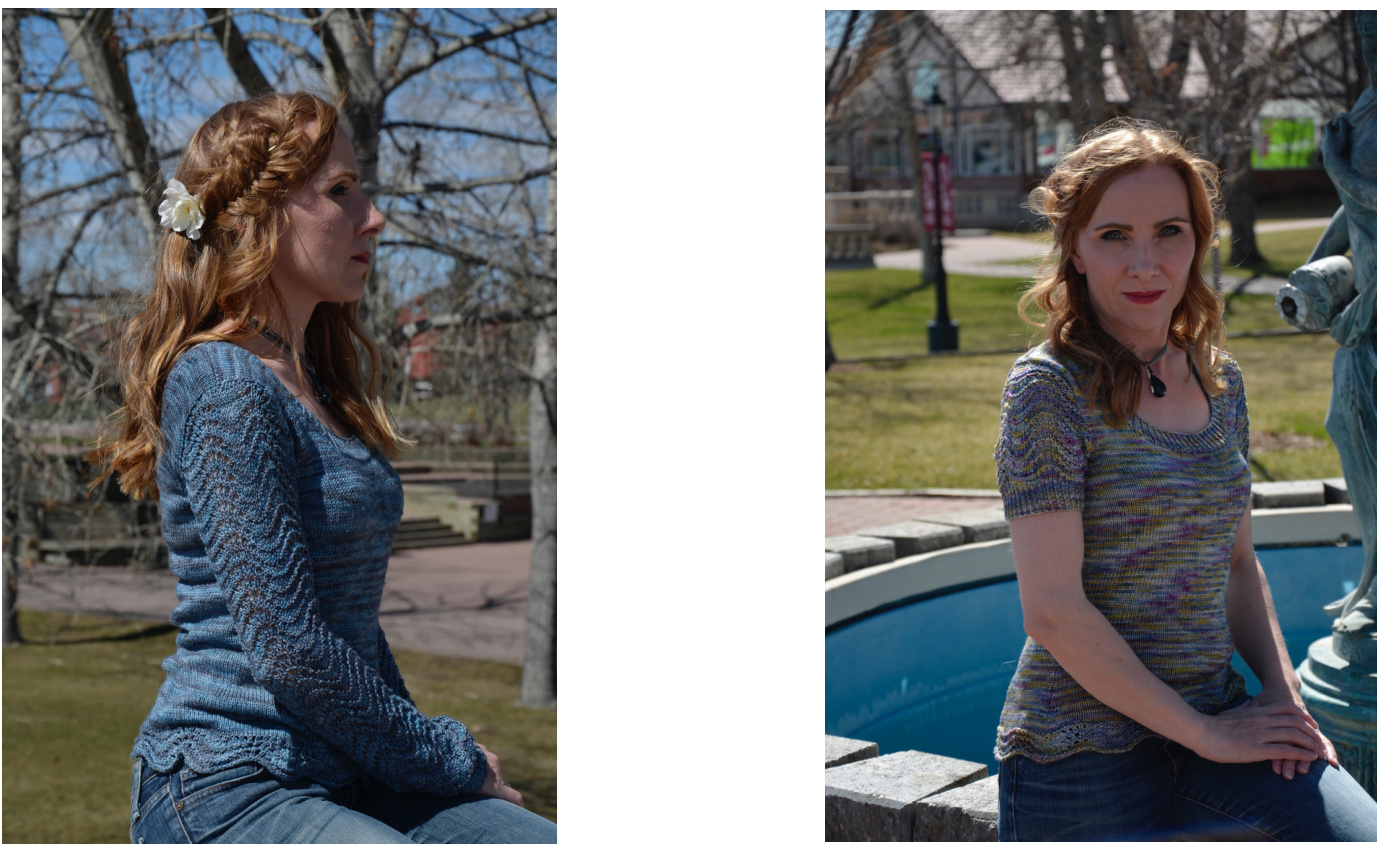
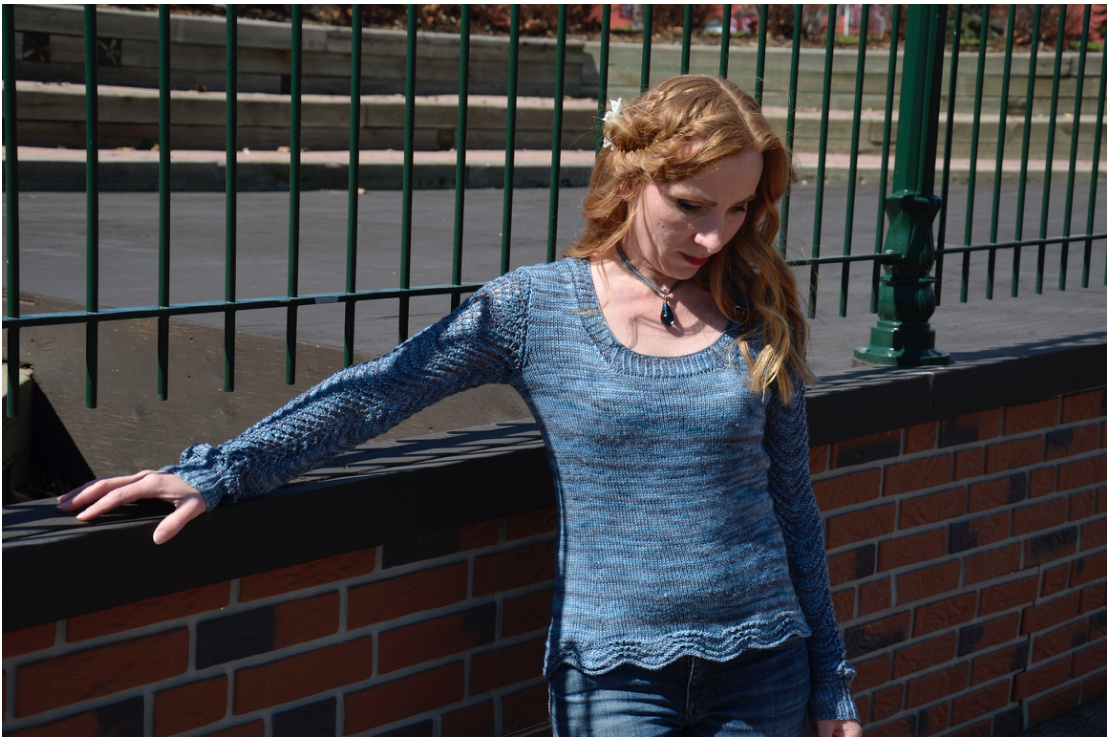
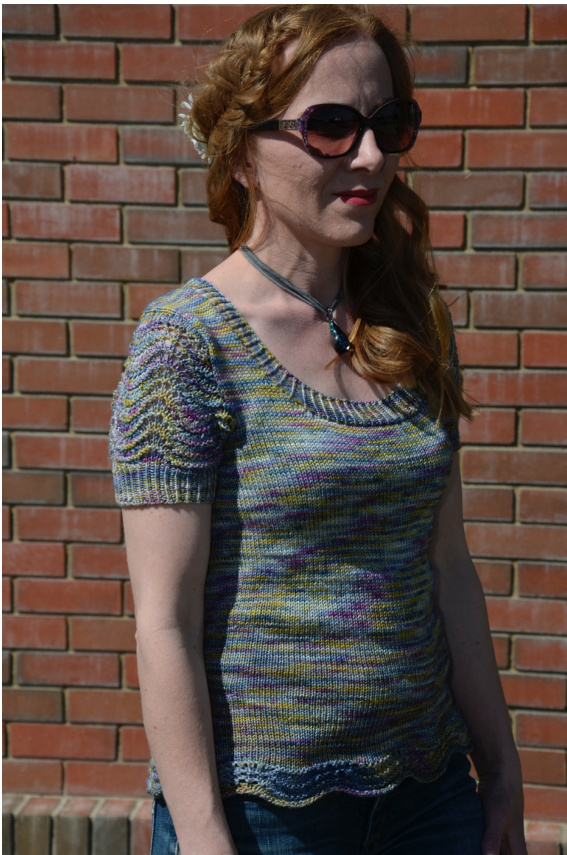
This beautiful, lightweight sweater has two options; a short sleeved and a long sleeved version. Knit in a fingering weight yarn at a loose gauge, this sweater is a perfect fourseason garment; light enough to wear in both the hot sun of summer and under a cozy jacket in the winter.
Sweater Sizes:
71 (81, 91.4, 101.6, 112, 122, 132) cm; 28 (32, 36, 40, 44, 48, 52)" Please choose a size that is within 5cm (2") ofyour bust size (positive or negative).
Materials:
3 (3, 3, 4, 4, 4) skeins of fingering weight Superwash Merino or Merino Silk blend yarn. I used JulieSpins Silky 435 (one skein less if choosing the short sleeve version) 3.5mm (US 4) circular needle (length determined by sweater size, smaller sizes may choose to use a 60cm (24"), larger sizes may choose a 80cm (32") or size needed to obtain gauge 4.0mm (US 6) circular needle (length determined by sweater size, smaller sizes may choose to use a 60cm (24"), larger sizes may choose a 80cm (32")) or size needed to obtain gauge tapestry needle for weaving in ends.
Gauge:
Feather & Fan stitch: 18 sts x 16 rows = 7.5 cm (3") using 4.0 mm needles Stockinette stitch: 22 sts x 28 rows = 10 cm (4") using 3.5 mm needles Please take time to check your gauge.
Pattern Notes:
This pullover is worked in one piece from the hem to the armholes and then each of the front/back pieces are worked separately. The sleeves are worked in the round from the cuff edge and worked flat when the sleeve cap is reached. The cap is then sewn into the armholes and fullness eased along the shoulder. The last page has helpful hints on working the sleeve cap shaping, while maintaining the feather & fan lace pattern.
Stitch Pattern:
Feather & Fan stitch (when knitting in the round)
Round 1: knit Round 2: purl Round 3: (k2tog) 3x, (yo, k1) 6x, (k2tog)3x Round 4: knit
Feather & Fan stitch (when knitting flat)
Round 1: Knit Round 2: purl Round 3: (k2tog) 3x, (yo, k1) 6x, (k2tog)3x Round 4: Knit knit on rs (p on ws) purl on rs (k on ws) yarn over k2tog
| 1 | 4 | |||||||||||||||||
| 0 | 0 | 0 | 0 | 3 | ||||||||||||||
| 2 | ||||||||||||||||||
| 1 | ||||||||||||||||||
| 18 | 17 | 16 | 15 | 14 | 13 | 12 | 11 | 10 | 6 | 8 | 7 | 6 | 5 | 4 | 3 | 2 | 工 |
Abbreviations:
k: knit p: purl sts: stitches CO: cast on BO: bind off tbl: knit/purl stitch through the back loop pm: place marker sm: slip marker sl: slip stitch purlwise unless noted patt: work in established pattern RS: right side of garment WS: wrong Side of garment k2tog: knit two stitches together (decrease one stitch, right slant) ssk: slip 2 stitches knitwise one at a time, then slip both of these stitches back to the left needle and knit them together through the back loops (decrease one stitch, left slant) p2tog: purl two together (right slant on RS) p2togtbl: slip 2 stitches knit wise and then slip these stitches back to the left needle, purl them together through the back loops (left slant on RS) kfb: knit into the front and back of the same stitch (one stitch increased) m1L: make one stitch, left slant. With left needle pick up strand between needles from front to back, knit this stitch through the back loop. m1R: make one stitch, right slant. With the left needle pick up the strand between needles from back to front, knit this stitch. yo: increase stitch by wrapping the right hand needle with yarn before knitting next stitch
Body Instructions:
CO 180 (198, 234, 252, 270, 306, 324) sts, using larger needles, pm and join to knit in round being very careful not to twist . Work 2 rounds of garter stitch: Round 1: K Round 2: P Begin feather & fan stitch Complete rows 1-4 of feather & fan stitch three times (12 rows) Begin stockinette. Switch to smaller needles and decrease 14 (18, 20, 18, 22, 24, 22) sts evenly around. 166 (180, 214, 234, 248, 282, 302)sts. k 83 (90, 107, 117, 124, 141, 151) sts , pm, knit to end of round (you should now have 2 stitch markers to separate the front and back of the sweater). Continue stockinette for 6.3 cm (2.5") from start of stockinette.
Begin waist shaping.
K2tog, k to 2 stitches before next marker, ssk, sm, k2tog, knit to 2 stitches before end of round marker, ssk. Knit 8 rounds even. Repeat last 9 rounds 3 [4,4, 5,5, 5, 5) times more 150 (160, 194, 210, 224, 258, 278) sts Knit even for 7.5 cm (3") Begin increasing K1, m1l, kto 1 st before marker, m1r, k1, sm, k1, m1l, knit to 1 stitch before marker, m1r, k1 Knit 8 rounds even Repeat last 9 rounds 2 (3, 2, 3, 4, 2, 2) times more Continue knitting in stockinette until sweater is 39.4 (38.1, 39.4, 38.1, 39.4, 38.1, 39.4)cm (15.75 (15.25, 15.75, 15.25, 15.75, 15.25, 15.75)") from cast on edge. You will now be dividing the front & back and knitting flat.
Back:
BO 4 (5, 5, 7, 7, 10, 11) sts, knit to side marker, turn (you may place the other half on a stitch holder if you would like) B0 4 (5, 5, 7, 7, 10, 11) sts purl to end. Row 1 (RS): ssk, knit to last 2 sts, k2tog, Row 2 (WS): p2tog, purl to last 2 sts, p2togtbl Next row (sizes 36, 40, 44, 48 and 52; 0NLY): Repeat Row 1 Next row (sizes 44, 48, 52; ONLY): Repeat Row 2 Next row (size 52; ONLY) Repeat Row 1 Continuing in stockinette, decease at each edge (Row 1, above) on the RS only 0 (0, 2, 3, 3, 4, 4) times more. 69 (74, 83, 87, 94, 99, 105) sts. Continue in stockinette until the armhole measures 16 (17, 18.5, 20, 21, 22) cm; 6.3 (6.8, 7.3, 7.8, 8.3, 8.8, 9.3)" ending with ws row. Next row (RS): k 13 (15, 18, 19, 21, 23, 25) sts (you may place these stitches on a holder), B0 43 [44, 47, 49, 52, 53, 55) sts, k t0 end d images copyright 2015: Myrna Batten (mdbatten@ shaw.ca). Pattern is for personal use only Next Row (ws): B0 7 (8, 9, 10, 11, 12, 13) sts, p t0 end Next Row (rs) B0 remaining 6 (7,9, 10, 11, 12, 13) sts Join yarn for other shoulder on the ws (neck edge) and p to end Next Row (rs) B0 7 (8, 9, 10, 11, 12, 13) sts, kto end Next Row (ws): B0 remaining 6 (7, 9, 10, 11, 12, 13) sts
Front: (Please note that the neck shaping may start before the armhole shaping is finished)
Join yarn on RS and B0 4 (5, 5, 7, 7, 10, 11) sts, knit to side marker, turn B0 4 (5, 5, 7, 7, 10, 11) sts purl to end. Row 1 (RS): ssk, knit to last 2 sts, k2tog, Row 2 (WS): p2tog, purl to last 2 sts, p2togtbl Next row (sizes 36, 40, 44, 48 and 52; 0NLY): Repeat Row 1 Next row (sizes 44, 48, 52; ONLY): Repeat Row 2 Next row (size 52; ONLY) Repeat Row 1 Continuing in stockinette, decease at each edge (Row 1, above) on the RS only 0 (0, 2, 3, 3, 4, 4) times more. AT THE SAME TIME when the sWeater measures 40.6 (39.4, 40.6, 39.4, 40.6, 39.4, 40.6)cm (16.25 (15.75, 16.25, 15.75, 16.25, 15.75, 16.25)") BO centre 29 (28, 33, 33, 34, 35, 37) sts (place left front stitches on holder and make a note of where you stopped your armhole shaping so that you may continue it when you rejoin the yarn to complete that side) k to end of row Next instructions are for neck edge shaping, please remember to continue your armholeshaping as required Row 1: p to last 2 sts p2togtbl Row 2: ssk, k to end Row 3: Repeat Row 1 Row 4: (for sizes 36 and larger only) Repeat Row 2 Row 5: (for sizes 48 & 52, only) Repeat Row 1 Continue knitting in stockinette, decreasing at the neck edge on the rs rows ONLY (Row 2) until 13 (15, 18, 19, 21, 23, 25) sts remain. Continue in stockinette until the armhole measures 16 (17, 18.5, 20, 21, 22) cm; 6.3 (6.8, 7.3, 7.8, 8.3, 8.8, 9.3)" ending with rs row. Next Row (ws): B0 7 (8, 9, 10, 11, 12, 13) sts, p to end d images copyright 2015: Myrna Batten (mdbatten@shaw.ca). Pattern is for personal use only Next Row (rs) B0 remaining 6 (7, 9, 10, 11, 12, 13) sts
Left Front:
Next instructions are for neck edge shaping, please remember to continue your armhole shaping as required from your noted stopping point as mentioned above. Join yarn on ws and p to end. Row 1: k to last 2 sts, k2tog Row 2: p2tog, p to end Row 3: Repeat Row 1 Row 4: (for sizes 36 and larger only) Repeat Row 2 Row 5: (for sizes 48 & 52, only) Repeat Row 1 Continue knitting in stockinette, decreasing at the neck edge on the rs rows ONLY (Row 1) until 13 (15, 18, 19, 21, 23, 25) sts remain. Continue in stockinette until the armhole measures 16 (17, 18.5, 20, 21, 22) cm; 6.3 (6.8, 7.3, 7.8, 8.3, 8.8, 9.3)" ending with ws row. Next Row (rs): B0 7 (8, 9, 10, 11, 12, 13) sts, k t0 end Next Row (ws) B0 remaining 6 (7,9, 10, 11, 12, 13) sts
Long Sleeves (make 2):
Using smaller needles, C0 34 (34, 40, 40, 48, 48, 48) sts and join to knit in the round being careful not to twist. Place marker to denote start of round. Round 1: \*k1tbl, p1 repeat from \* to end of round Repeat this round for 20 rounds Switch to larger needles and increase (kfb) every stitch. 68 (68, 80, 80, 96, 96, 96) sts Next row: increase (kfb) 4 (4, 10, 10, 12, 12, 12) sts evenly around. 72 (72, 90, 90, 108, 108, 108)sts Begin Feather and Fan stitch Continue knitting in Feather and Fan stitch until the sleeve measures 47.5 (48.8, 50, 51.3, 52.5, 53.8, 55)cm (19 (19.5, 20, 20.5, 21, 21.5, 22)") from C0 edge, ending with row 4 of the Feather & Fan stitch Continue to Sleeve Cap
Short Sleeves (make 2):
Using smaller needles, C0 64 (70, 76, 84, 92, 98, 102) sts and join to knit in the round being careful not to twist. Place marker to denote start of round Round 1: \*k1tbl, p1 repeat from \* to end of round Repeat this round for 15 rounds. Switch to larger needles and increase (kfb) evenly 8 (2, 14, 6, 16, 10, 6) times. Total 72 (72, 90, 90, 108, 108, 108) sts Begin Feather and Fan stitch Continue knitting Feather and Fan stitch for 4 (4, 5, 5, 5, 6, 6) repeats. Continue to Sleeve Cap. Sleeve Cap: Begin shaping cap (from here you will be knitting the feather and fan flat, please refer to the instructions for knitting flat). Next row (rs): B0 4 (5, 5, 7, 7, 10, 11) patt to end. Next row (ws): B0 4 (5, 5, 7, 7, 10, 11) patt to end Row 1 (rs): ssk, patt to last 2 sts, k2tog Row 2 (ws): p2tog, patt to last 2 sts, p2togtbl Row 3 (rs): ssk, patt to last 2 sts, k2tog Row 4 (ws): p2tog, patt to last 2 sts, p2togtbl Row 5 (rs): ssk, patt to last 2 sts, k2tog Row 6 (ws): p2tog, patt to last 2 sts, p2togtbl Row 7 (rs): ssk, patt to last 2 sts, k2tog Row 8 (ws) (For sizes 36, 44, 48 & 52; 0NLY): p2tog, patt to last 2 sts, p2togtbl Row 9 (rs) (For size 44; ONLY): ssk, patt to last 2 sts, k2tog Continue knitting in pattern, decreasing at each RS row edge (Row 1, above) 8 (7, 9, 9, 11, 10, 10) times.34, (34, 46, 44, 54, 52, 50) sts. BO 3 (3, 4, 4, 6, 5, 5) sts on the next TW0 rows BO 7 (7, 10, 9, 11, 11, 10 sts on the next TW0 rows BO remaining 14 (14, 18, 18, 20, 20, 20) sts.
Finishing:
Sew shoulder seams together and pin the sleeve caps into the armscyes from the armpit to the top on both sides of the cap (any fullness should be at the shoulder). Sew in the caps, easing fullness across the shoulders. Using the smaller needle and starting at the BO edge of the back, pick up and knit all of the BO stitches, pick up and knit 2/3rds of the stitches along the neck edge to the front BO, pick up and knit the front BO, pick up and knit 2/3rds of the remaining edge, ensuring that you have picked up an even number of stitches. Round 1: \*k1tbl, p1 repeat from \* to end of round Repeat round 1, 11 times more. B0 loosely. Weave in ends and block to measurements.
Notes on shaping lace:
When shaping lace on the sleeve caps, you must compensate for the decreases within the lace itself. For example: if you need to decrease at each edge, you will have to eliminate one yarn over, in order for the cap to actually decrease. A sample chart is shown below (as an example only). The red decrease is an example of a decrease in the pattern. The yellow yarn over would be ignored and treated as NO stitch (do not knit 2 stitches instead of a yarn over, just skip it; except at the end repeat where you would knit 2, but not 3, stitches). The middle yarn overs represent the rest of the stitch pattern and are irrelevant to this example. I found it easier to mark between each feather and fan repeat with a stitch marker, so that I could ensure that my decreases were correct.
| / | / | 0 | 0 | 0 | 0 | 0 | 0 | / | / | |||||||||
| 18 | 17 | 16 | 15 | 14 | 13 | 12 | 11 | 10 | 9 | 8 | 7 | 6 | 5 | 4 | 2 | L |
knit on rs (purl on ws) purl on rs (k on ws) yarnover k2tog ssk \*\*Please note that there is waist shaping in this garment (although not indicated on schematic) and that there is 2.5 -5 cm (1-2") positive ease for the hips.
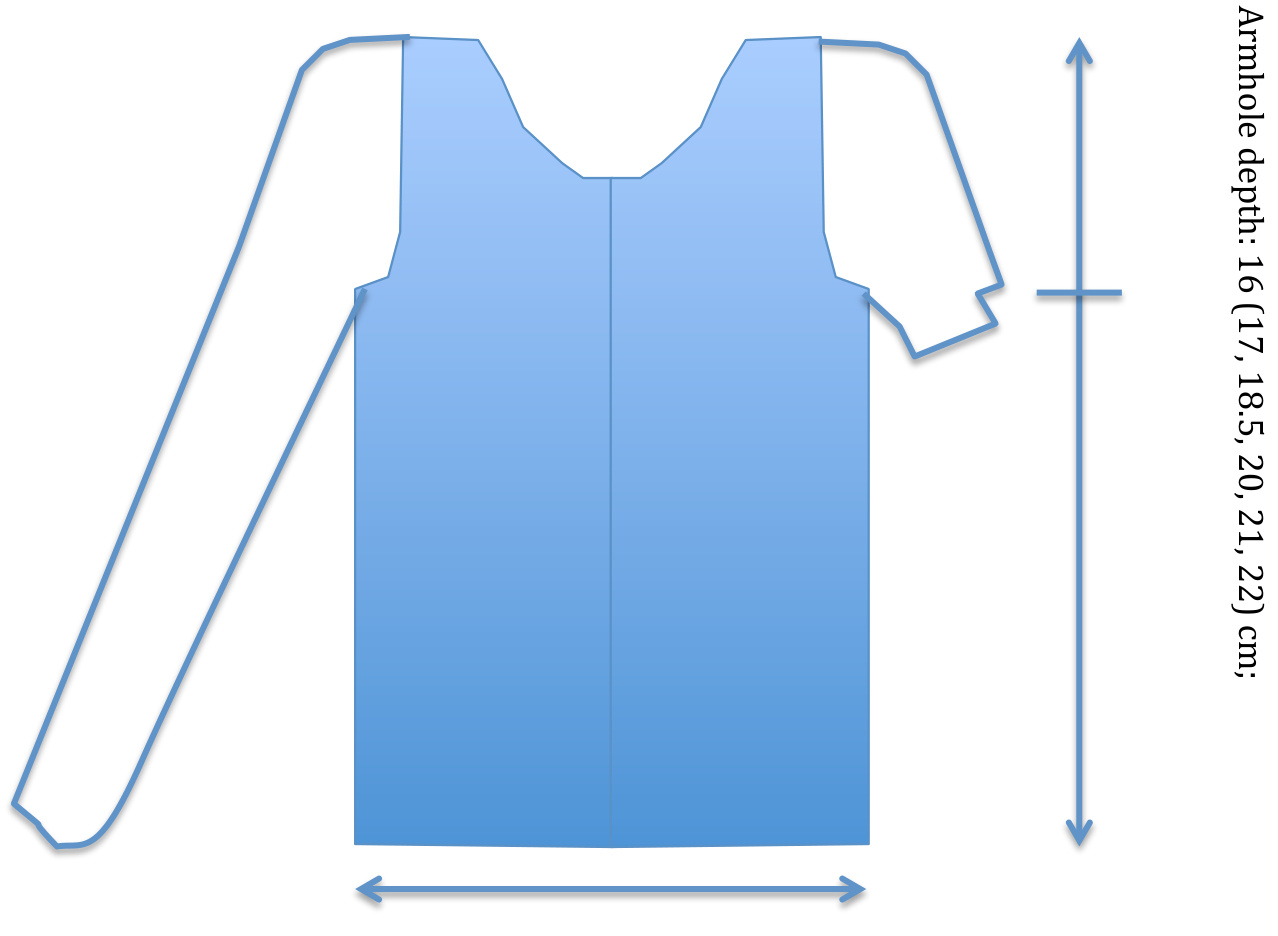
Bust sizes: 71 (81, 91.4, 101.6, 112, 122, 132) cm; 28 (32, 36, 40, 44, 48, 52)"


