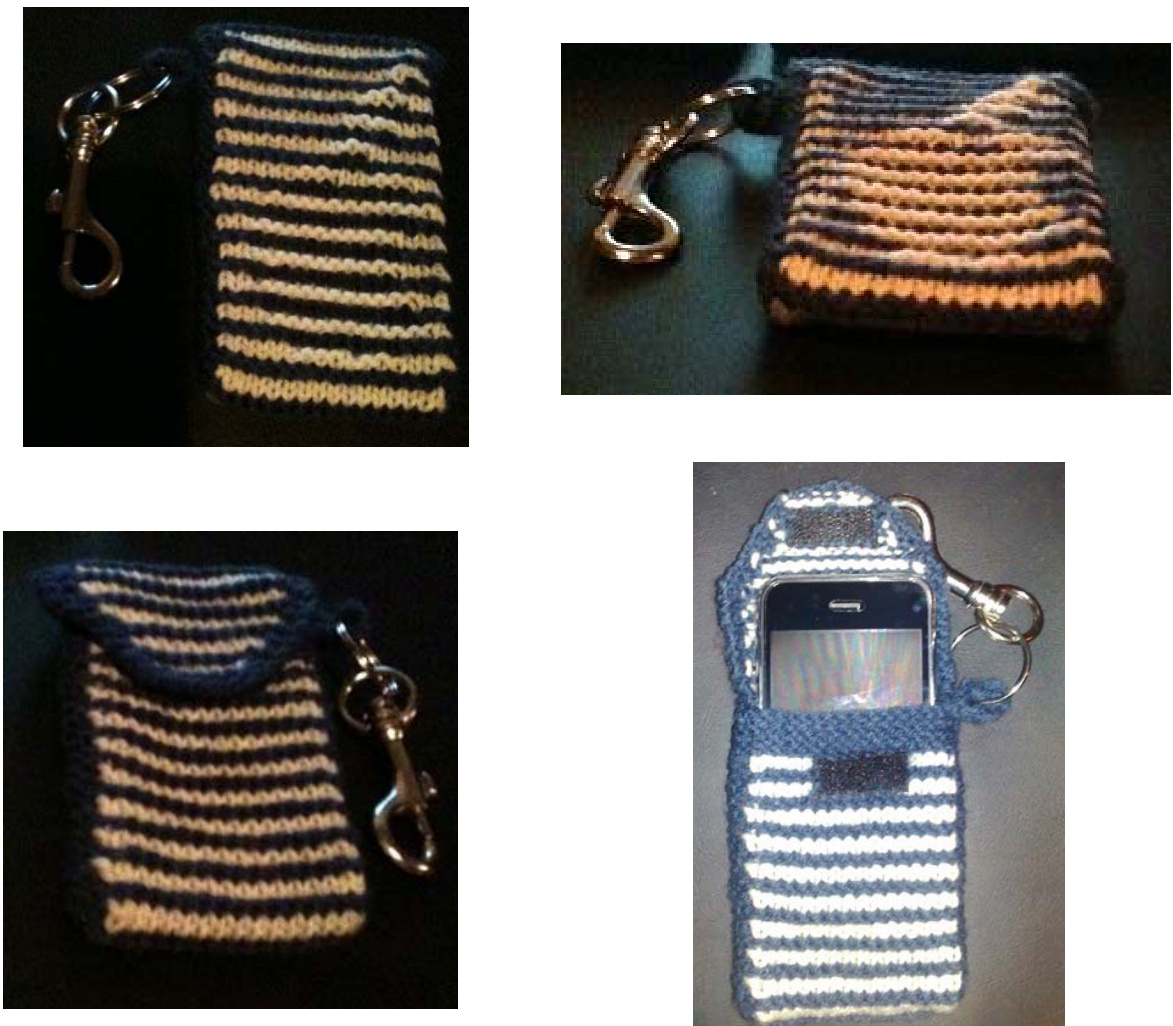
iPhone Illusion Cover
by Shiel Copyright info: This document has been released for your use and you are welcome to share it. You are also welcome to use the pattern for whatever purpose you wish (in other words - if you want to sell items made with this pattern or derivatives of it go right ahead) - however, please do not claim the pattern as your own work or sell this pattern or chart. Any resemblance to the Apple logo is purely coincidental. You are welcome to contact me with questions, comments etc @
Materials Needed:
3mm needles 8 ply acrylic or equivalent in two contrasting colours. The higher the contrast, the better the illusion will be. Small amount of Velcro - I used about an inch of tape, but you could also use circular dots. Knitters needle and sharp sewing needle to sew on Velcro. A clip on keyring (available at variety stores cheap if you look around) A 3.5-4mm crochet hook to attach the ring
Abbreviations
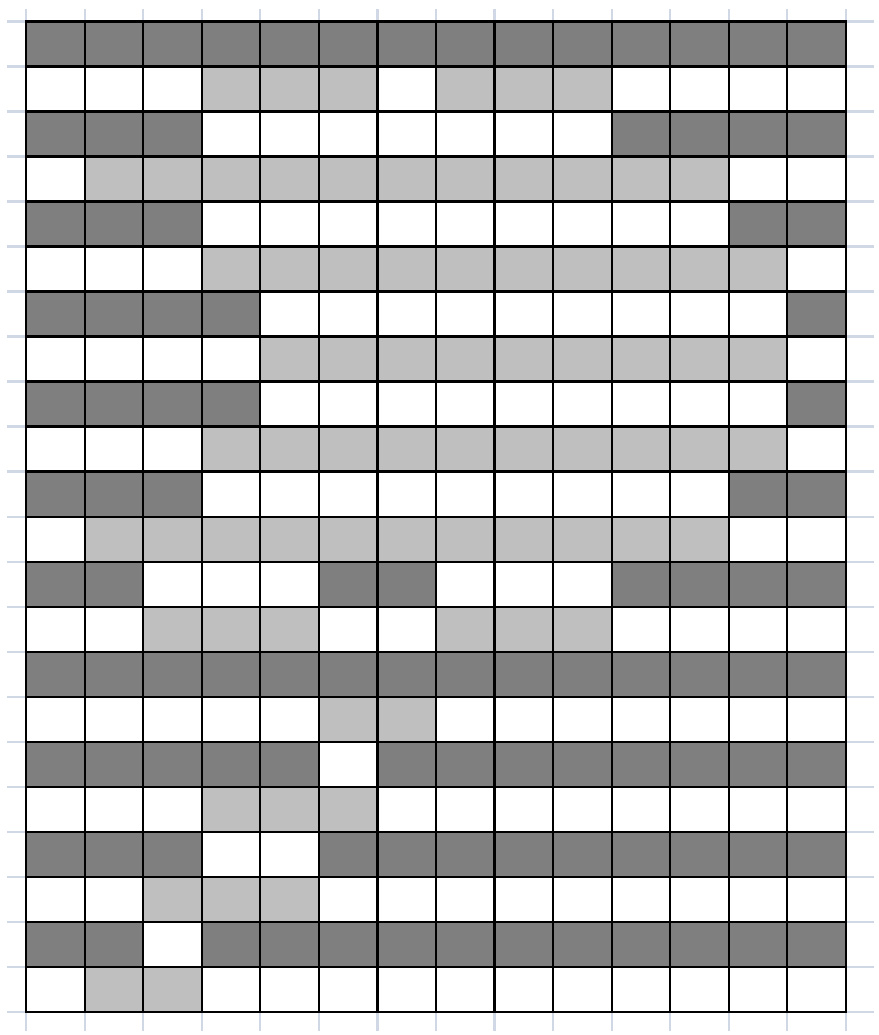
DC = Dark Colour LC = Light Colour Using DC, cast on 8 stitches. Knit one row. Row 2: Increase one stitch, join in LC and knit to last stitch. Join in a second small amount of DC (to work the edge stitches on the LC rows - this is only two stitches every other row so you don't need a huge amount) and increase in last stitch in Dc. (10 sts) Row 3: Knit 2 stitches in DC, twist yarn and switch to LC, purl to last two stitches, twist yarn and switch to DC, K2 in DC. Row 4: Using DC, increase in first stitch, knit to last stitch, increase in last stitch. (12 sts) Row 5: Knit in DC. Row 6: Increase one stitch in DC, twist yarn and switch to LC, knit to last stitch, twist yarn and switch to DC, increase last stitch. (14 sts) Row 7: as per row 3. Repeat Rows 4 and 5 once more (16 sts). Work 5 sets of stripes (light then dark) without increasing but maintaining the border stitches on the light stripes. Don't forget to purl the LC stitches on the wrong side of the work. Start the chart to the right using the rules as below: Chart covers wrong side rows only Right side of both colours is knit Start at bottom left of chart and work to the right. Work up the chart on the wrong side rows. Light grey represents LC Dark grey represents DC ALL WHITE STITCHES ARE PURL regardless of working colour Border stitches in LC are not on the chart. Continue them in established garter stitch pattern.
When you have finished the chart, work in plain stripes, maintaining the border stitches for 10 sets of light then dark stripes. On the last returning row on DC, tie both the second strand of DC and the LC to the working yarn. Work five more rows in DC. Cast Off.
Making up:
·Work in all loose ends. Line up the finishing edge with the first dark stripe after the start of the illusion pattern on the back of the cover. Overlap the two sets of border stitches and oversew the edge on the right side, then turn inside out and do the same on the inside. The overlapped area adds structure to the case so it holds its shape. Do the same with the other side. Sew Velcro into place with the soft side just below the dark band on the case and the hooks on the flap. You could use a button and crochet a loop to hook over it instead if you wish - I chose Velcro because that way the case has no hard projections that could be pushed into the phone in some circumstances. You can buy clip on key rings in discount shops - crochet a chain loop and attach it to the doubled area so it will attach to the key ring if you wish to attach it to belt loops or a lanyard (as in the photos). Ensure you use metal clips rather than plastic - they are more durable.


