Frankie's Knitted Stuff
Ten Stitch Blanket
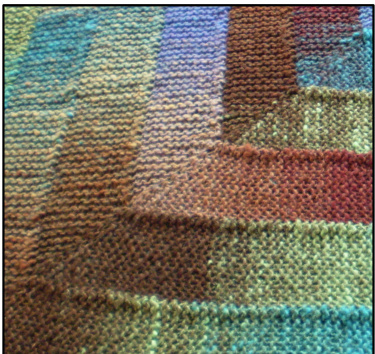
This blanket can be knitted in the yarn and needles of your choice and is a great way of using up odds and ends. My original blanket was knitted in Noro Kureyon on 5.5mm / US size 9 needles. I used 14 balls of wool and the blanket measures about 107 x 122 cm / 42 x 48".
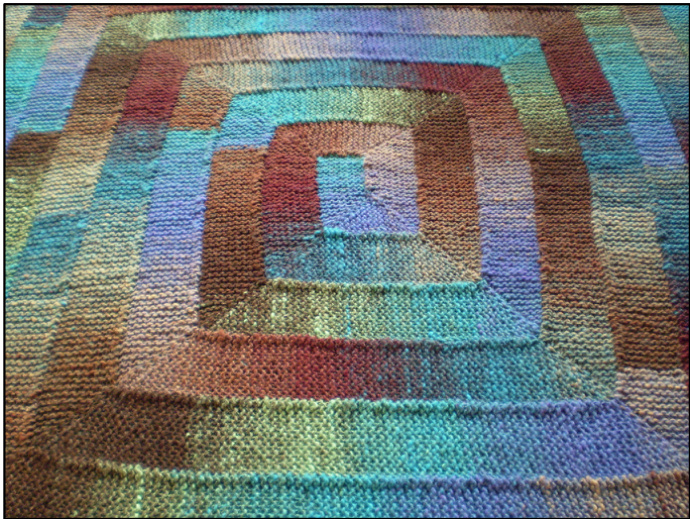
This blanket was inspired by Elizabeth Zimmermann's baby blanket in The Opinionated Knitter which is made up of wide L-shaped strips of garter stitch sewn together. I have used her technique for shaping the corners but have worked one continuous strip, joining it as I go, to avoid the dreaded sewing up. The pattern looks far more complicated written down than it is to knit - honest!
Method
Cast on 10 sts. Slipping all first sts, knit 9 ridges (18 rows). Now work an Open Double Corner: \*Sl 1, K8, yfwd, sl 1 pwise, yb, turn. Sl 1 pwise, yb, K9. Sl 1, K7, yfwd, sl 1 pwise, yb, turn. Sl 1 pwise, yb, K8. Continue as set, working one less st every ridge and wrapping the next st as you turn to avoid holes. When you only have 1 st to work, knit it rather than slipping it. Now reverse the process, working back up to 9 sts, still wrapping the st at each turn.\*\*Work one ridge with all 10 sts then turn another corner from \* to \*\* (When working the 10 st ridge you might like to work sl 1, pick up and knit 1 st, psso at the end of the first row to neaten the join.) That was the hardest part. From now on you only turn the corner once at each corner! Now work back along the side of the original 9 ridges, attaching your strip as you go by following this two row pattern: Row 1: Sl 1, K8, sl 1, pick up and K 1 st from the side of the knitting (there should be a “bump' there ready), psso. Row 2: K 10. When you reach the next corner work a single corner (from \* to \*\*) and carry on along the next side. That's it! Now just keep going until you are bored or run out of wool. Depending on where you decide to stop the finished blanket will be a square, a rectangle or neither of the above with a stickyout bit on one side like mine. This is nice easy knitting with the corners to keep you interested so have fun with it.
Row by Row Instructions for the Corner
These instructions fit between \* and \*\* in the pattern above. Row 1: Sl 1, K8, yfwd, sl 1 pwise, yb, turn. Row 2: Sl 1 pwise, yb, K9. Row 3: Sl 1, K7, yfwd, sl 1 pwise, yb, turn. Row 4: Sl 1 pwise, yb, K8. Row 5: Sl 1, K6, yfwd, sl 1 pwise, yb, turn. Row 6: Sl 1 pwise, yb, K7. Row 7: Sl 1, K5, yfwd, sl 1 pwise, yb, turn. Row 8: Sl 1 pwise, yb, K6. Row 9: Sl 1, K4, yfwd, sl 1 pwise, yb, turn. Row 10: Sl 1 pwise, yb, K5. Row 11: Sl 1, K3, yfwd, sl 1 pwise, yb, turn. Row 12: Sl1 pwise, yb, K4. Row 13: Sl 1, K2, yfwd, sl 1 pwise, yb, turn. Row 14: Sl 1 pwise, yb, K3. Row 15: Sl 1, K1, yfwd, sl 1 pwise, yb, turn. Row 16: Sl 1 pwise, yb, K2. Row 17: K1, yfwd, sl 1 pwise, yb, turn. Row 18: Sl1 pwise, yb, K1. Now reverse the process, working back up to 9sts, still wrapping the st at each turn: Row 1: Sl 1, K1, yfwd, sl 1 pwise, yb, turn. Row 2: Sl 1 pwise, yb, K2. Row 3: S1 1, K2, yfwd, sl 1 pwise, yb, turn. Row 4: Sl 1 pwise, yb, K3. Row 5: Sl 1, K3, yfwd, sl 1 pwise, yb, turn. Row 6: Sl 1 pwise, yb, K4. Row 7: Sl 1, K4, yfwd, sl 1 pwise, yb, turn. Row 8: Sl 1 pwise, yb, K5. Row 9: Sl 1, K5, yfwd, sl 1 pwise, yb, turn. Row 10: Sl 1 pwise, yb, K6. Row 11: Sl 1, K6, yfwd, sl 1 pwise, yb, turn. Row 12: Sl1 pwise, yb, K7. Row 13: Sl 1, K7, yfwd, sl 1 pwise, yb, turn. Row 14: Sl1 pwise, yb, K8. Row 15: Sl 1, K8, yfwd, sl 1 pwise, yb, turn. Row 16: Sl1 pwise, yb, K9. Frankie Brown, 2008. My patterns are for personal use only and should not be used to knit items for sale. Please do not use them for teaching purposes without my permission.
Abbreviations
st stitch yfwd yarn forward, as if to purl sts stitches pwise purlwise Kknit yb yarn back, as if to knit sl slip psso pass slipped stitch over
Frankie Brown, 2008. My patterns are for personal use only and should not be used to knit items for sale. Please do not use them for teaching purposes without my permission.


