Maggie Muggins Mystery Afghan CAL JOIN TUTORIAL FOR:
PART III—JOINING-thisjoining method can be adapted to as many blocks as you have.
Note on prepping blocks: See appendix
Note: although all Cl are 3dcCl, you can alternatively work them with 2dcCl, with a slightly less bulky result. 3dcClwork each of 3 dc to its last step, 4 loops on hook, yo, pull through all 4 loops. 2dcCl-work each of 2 dc to its last step, 3 loops on hook, yo, pull through all 3 loops. Tip 1: Assemble (stack) your blocks on a chair—alternate them, and work on a table. If you choose to work on your lap, you may distort the corners and joins.
Tip 2: Before I begin, I go through ALL the blocks, and recount and make sure they have the correct number of ch-2 sp on each side (16), and a definable ch-3 corner sp. This will save you an incredible amount of grief later... Tip 3: When working clusters out' of a rotate, don't leave any yarn gaps! Make sure you snug your yarn up to the hook, and betweenthe clusters you are making, particularly on the corne rs and edges.
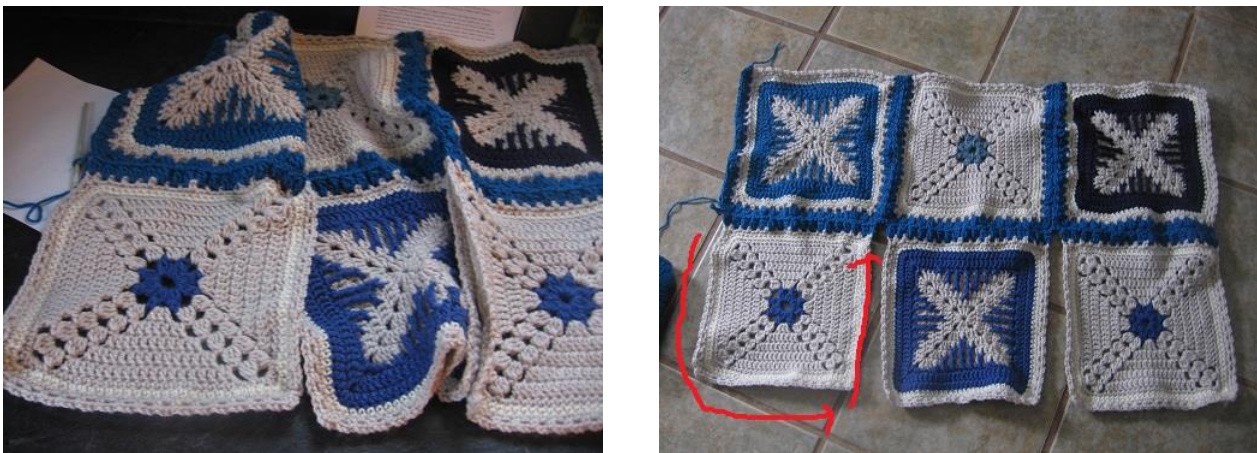
NOTE: You are not going all around the block—leave one side ‘open'. Working on the first block. Sl st back to any corner ch-3 sp. Beg Cl, [(ch 1, sk sc, cl in next ch-2 sp) to next corner ch-3 sp; ch 1, (cl,\* ch 3, Cl) in corner ch3 sp] 2 times, then worka third rep to \* only. (3 sides with Cl and ch-1 sp, 2 corners with 1 Cl, 2 corners with Cl-ch-3-Cl, one side left
open) It doesn't matter how many cl you have-all your blocks will be the same if you equalized them first.
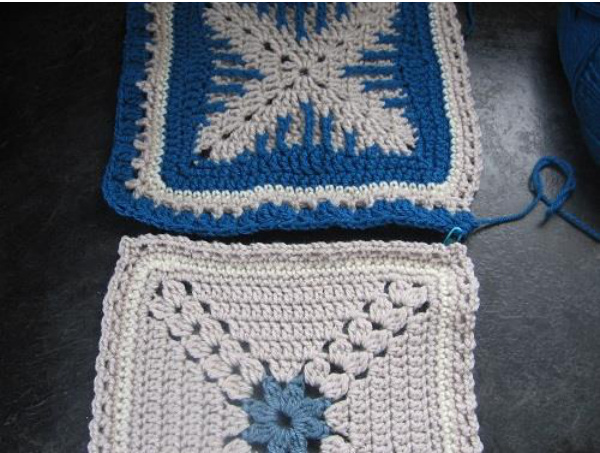
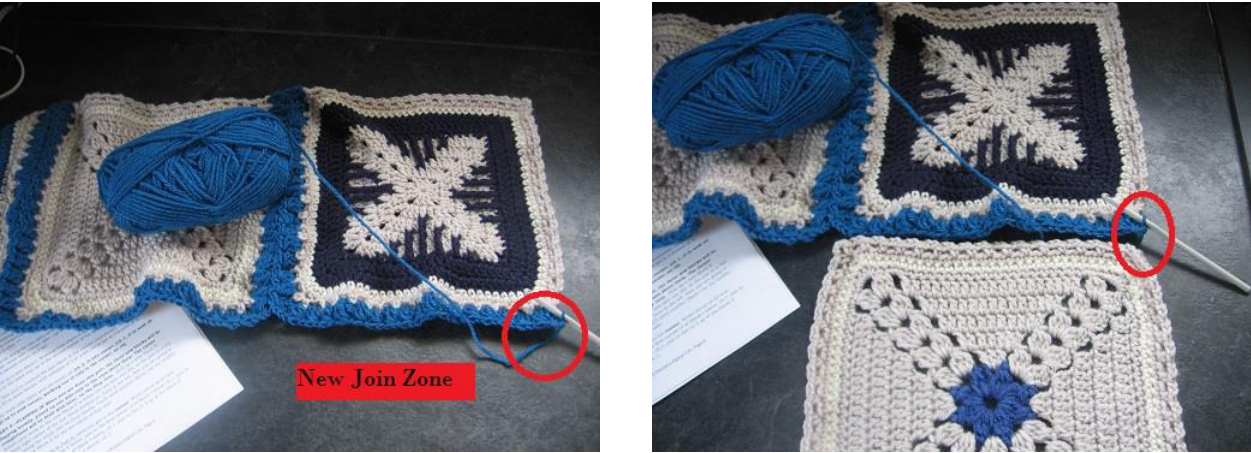
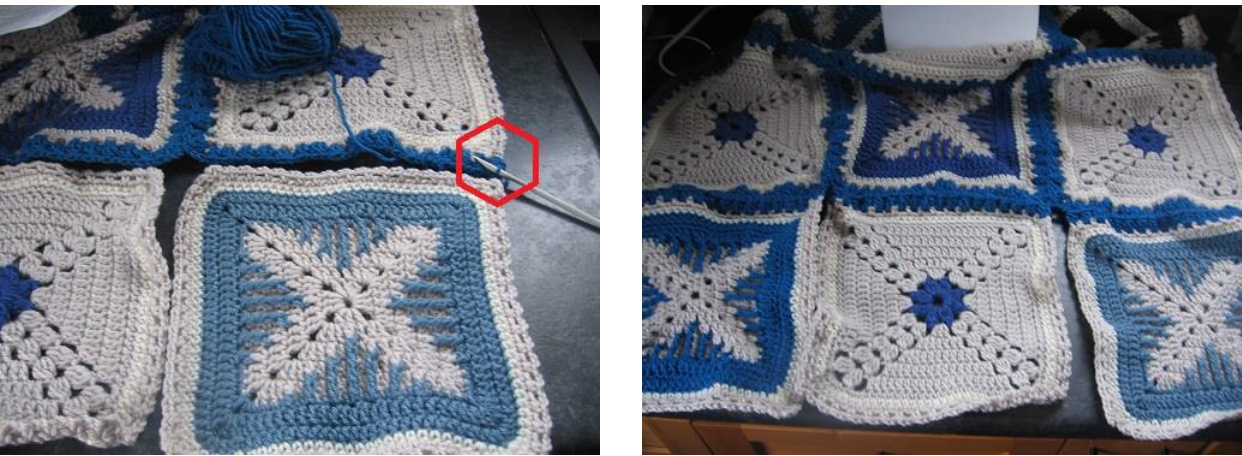
Lay Block I prepped on table, with last cl to bottom right.
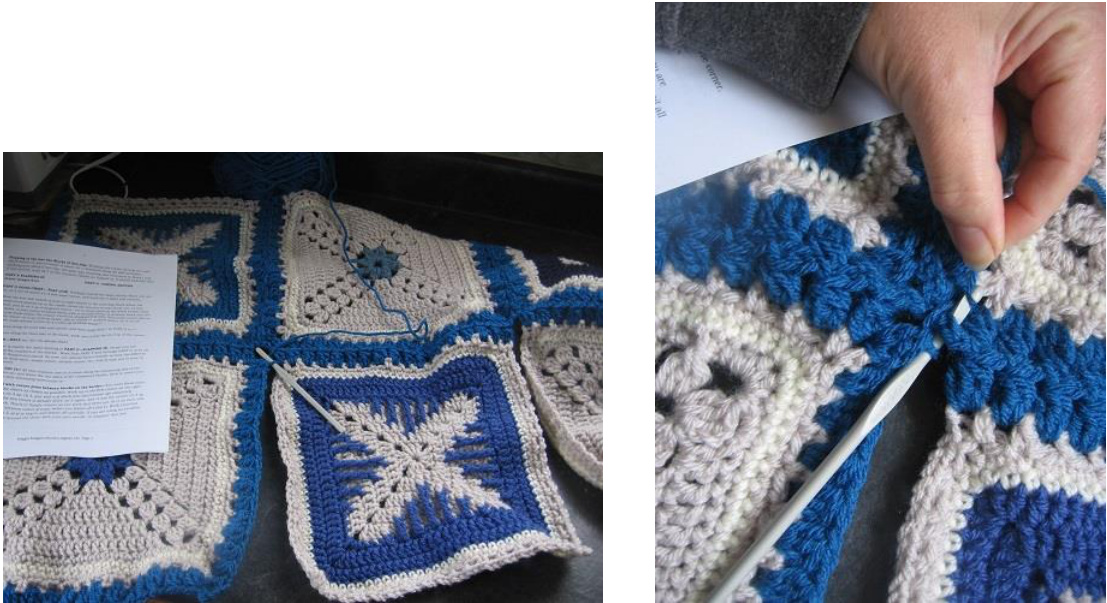
PART B: Pick up Block II. “Position' any corner directly below the last cl from Block I. (underlined only for reference later). Keeping yarn to your left, and above the join area, cl in corner of Block II (see TIP 3), then insertthe hook in the top of the corresponding same corner cluster from Block I, and pull yo from below /slipthrough both the cl top and through the loop on hook, and then yo/ch 1. You will get accustomed to the motion ve ry quickly— dip/scoop, ch.
Then go immediately to first ch-2 sp of Block I1, and make a cl there. Do not chain after it. Your join will act as your chain as it completes.

Poke hook into the top of the first side cluster of Block 1. Yo from below, pull loop through, and yo/ch 1. Cl into next ch-2 space on Block II. Continue along the side, working cl into ch-2 sps of Block II (skipping sc), and slipping/ch 1 into corre sponding cl top in Block I until the corner.
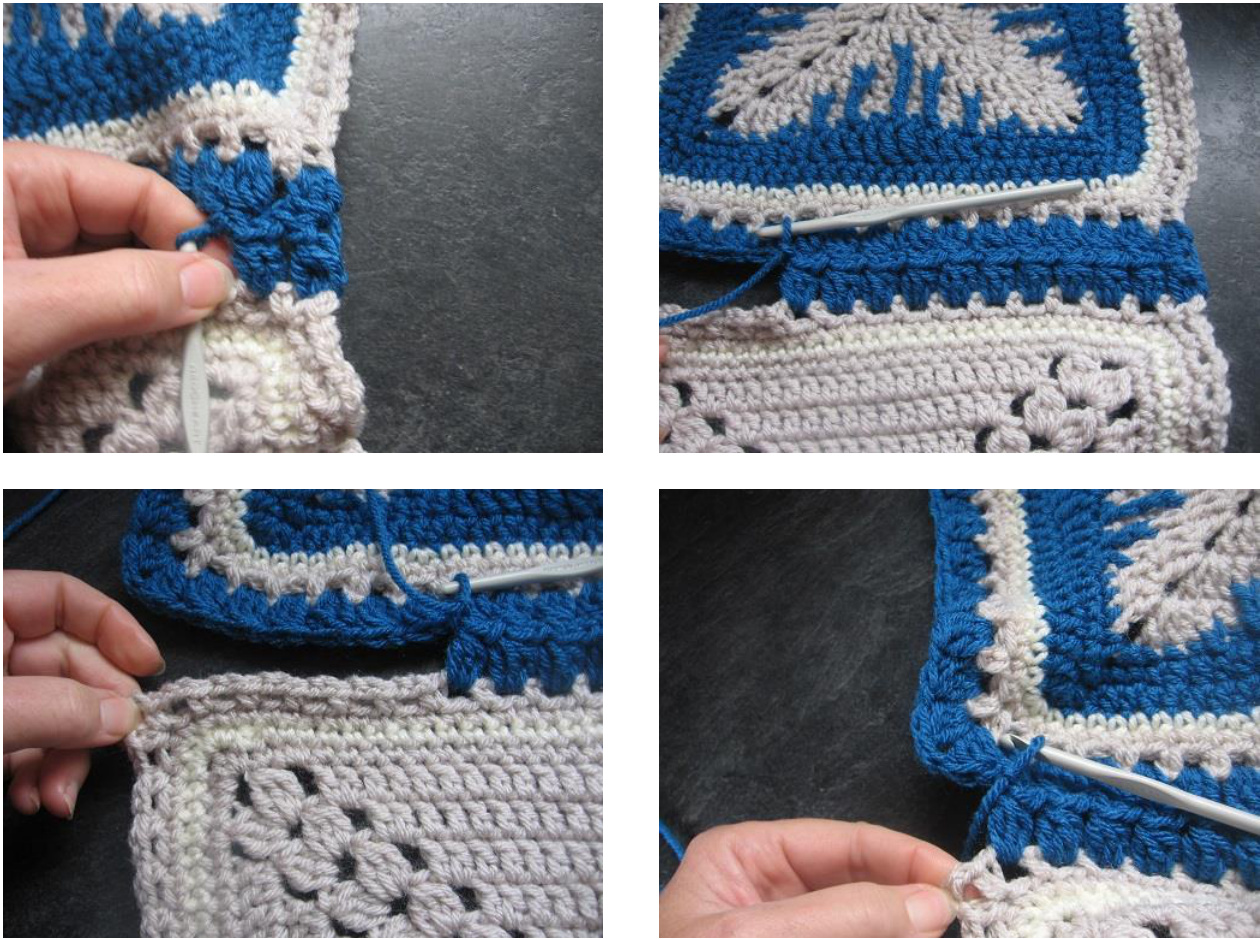
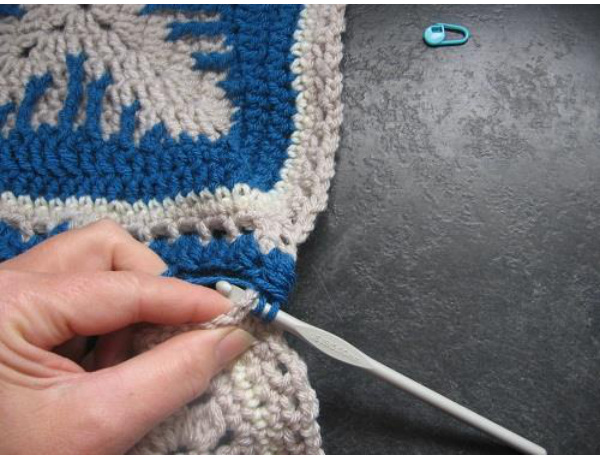
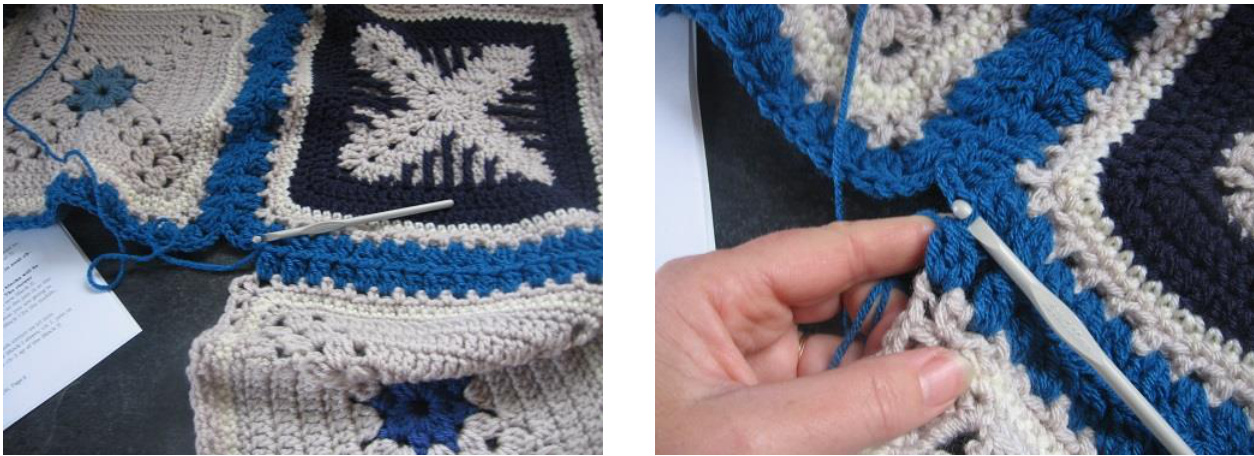
Finish side with the cornersjoining as follows: (cl in corner of Block Il, join to corner cl of Block I) and ch 3 after. ^^ (see photo left below)
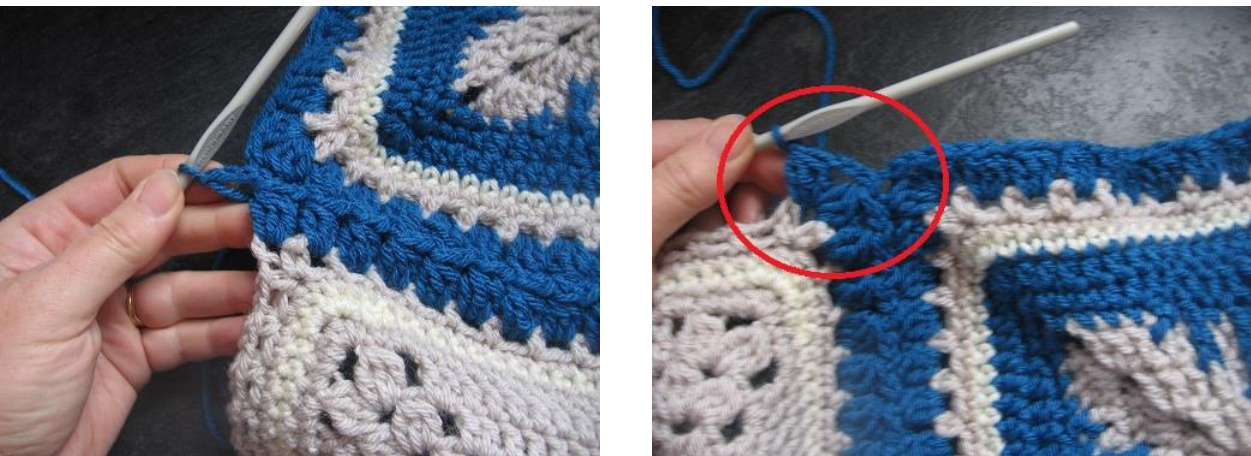
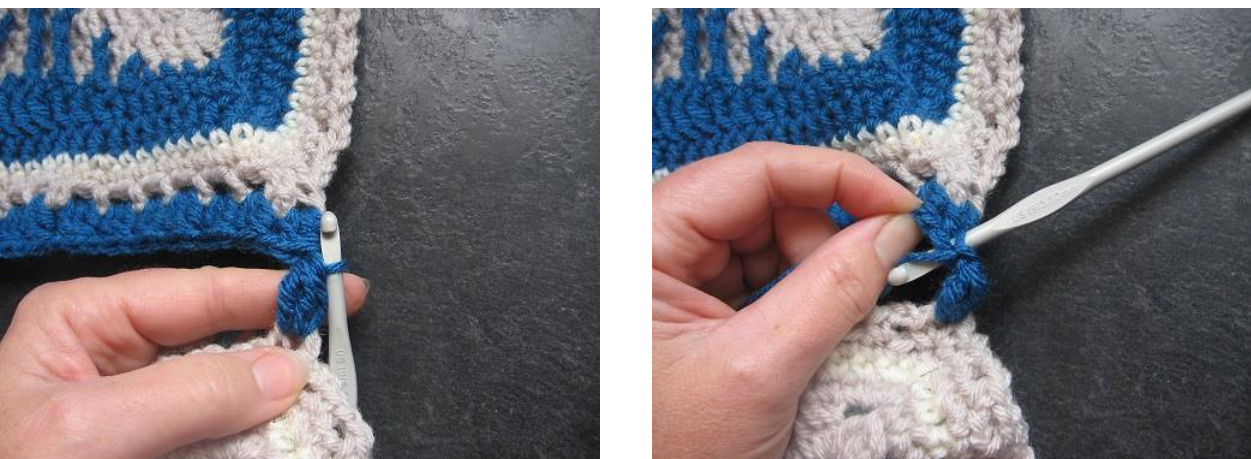
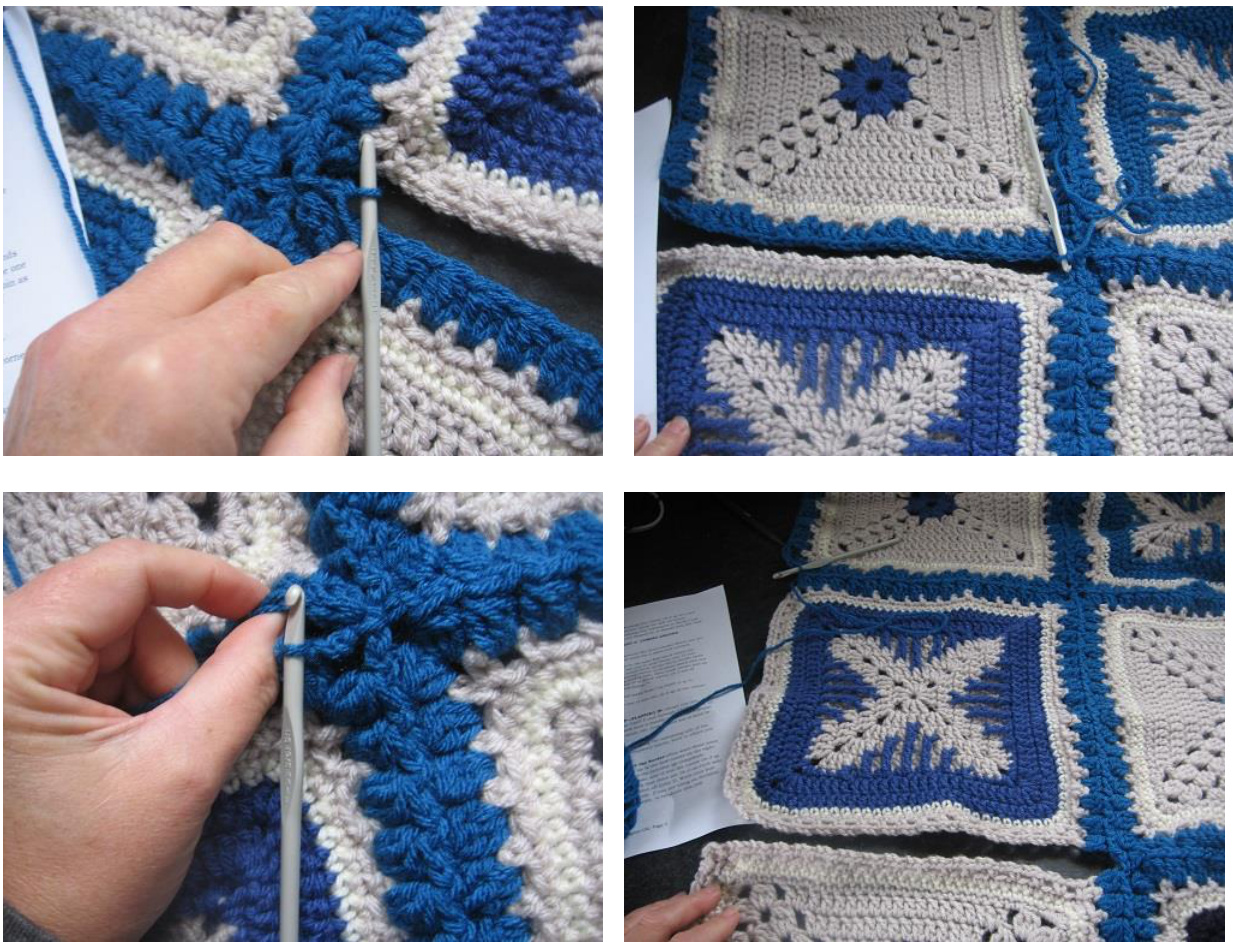
PART C Then work along the sides sides of Block II leaving one side open (start by cl in in the corner sp (photo right above)—work side, corner, side—upto third corner ch-3 sp, working only one cl there. photo left below)
PART D Pick up a new Block I. Working from where it says Position', join new Block I to Block II in the same way up to the second corner ofthe side, to this sign ^^ (long arrow on dark block below)
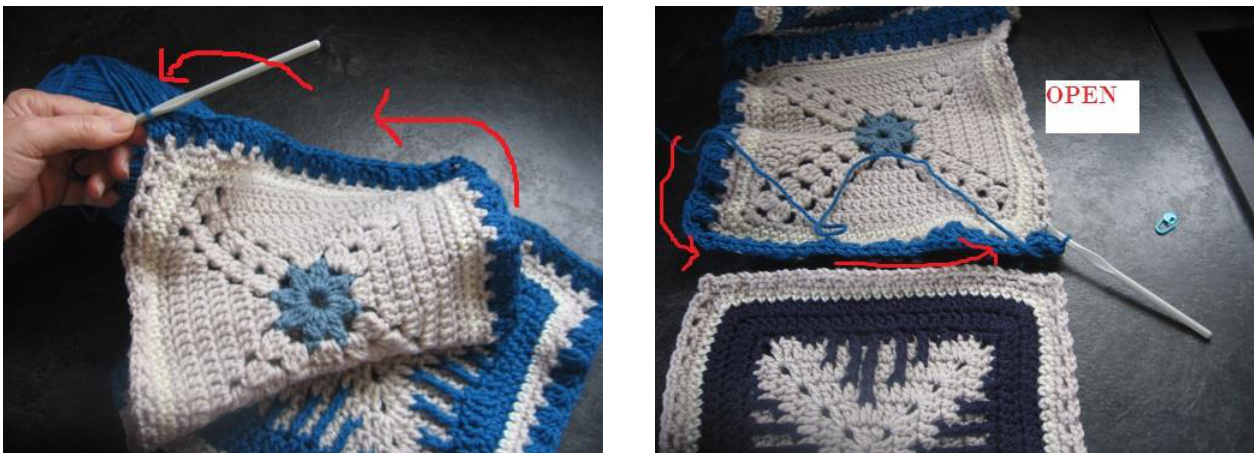
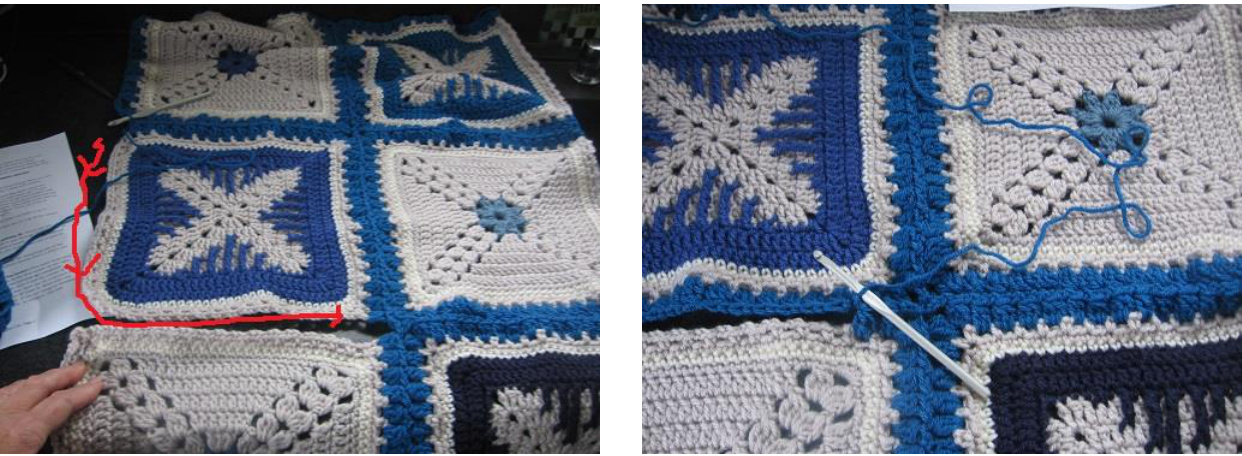
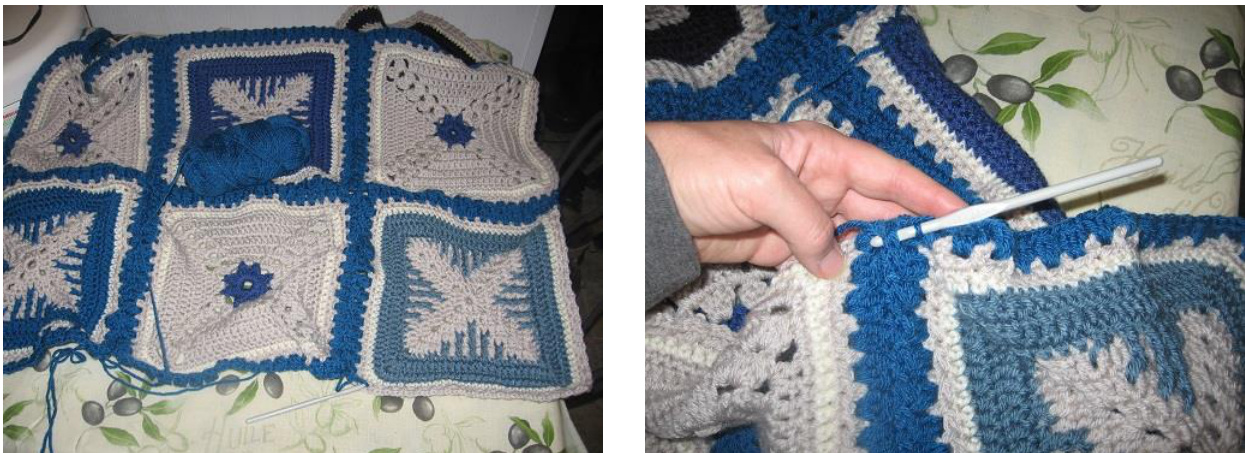
PART E Now you've reached the last Block of the Row (conceivably, you could be joining 25 or more blocks, with Rows of 5 or more; these are in Rows of 3). Simply work ONE SIDE with its corner as: [ch 3, cl into corner, (ch 1, cl in next ch2 sp) up to next corner, working one cl only in the corner, no ch]. (see photo on rightabove) PART FFLAPPING IN W hen you are done this part, the three new blocks will be flapping loosely, joined on one side only to the ones above them. The corner completions will be dealt with later, on the Flap Join. Pick up a new Block II. Rotate your work so the new Block II is below the last side you worked, so the join is
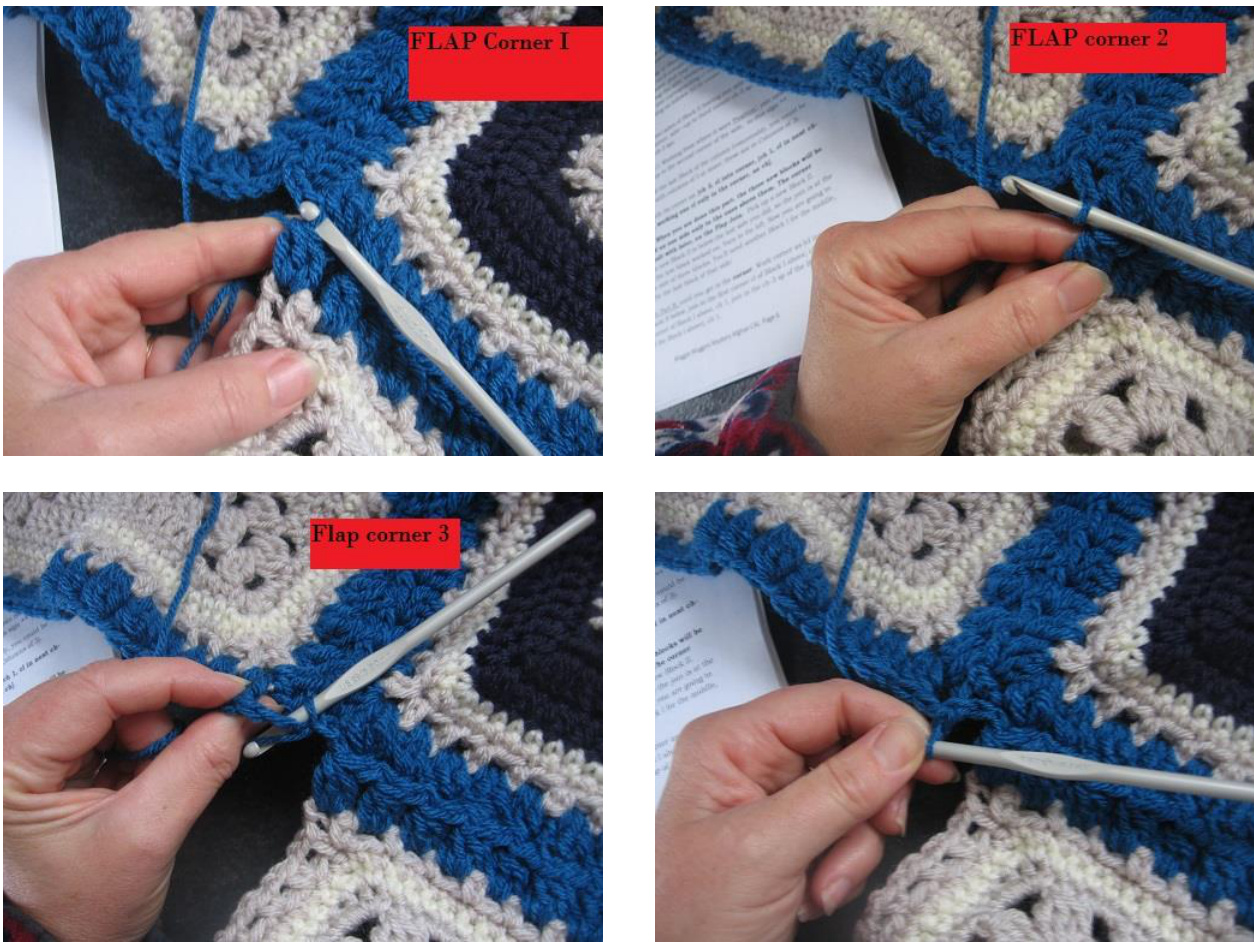
at the bottom right corner of the last block worked on. Yarn to the left. Iflipped the WHOLE THING. You want to position that row so that the new block can be joined below it. ONLY WORK ONE SIDE/corner cl OF THE last row block—that's important. Now you are going to ZOOM along the whole side of three blocks. You'll need another Block I for the middle, and another Block II for the last block of that row: Work from Position in Part B, until you get to the corner. Work corner as (cl into corner ch-3 sp of Block I below, join in the first corner cl of Block I above (image that says FLAP Corner 1), ch 1, join in the ch-3 sp of the cornerof Block I above, ch 1 (image that says FLAP Corner 2),join in the ch-3 sp of the Block II above (to the left of the Block I above), ch 1 (image that says FLAP Corner 3), the ch-1 is last.
Flapping in the last two Blocks of this row: Working into corner ch-3 sp of a new Block below, cl, join to corner cl above, ch 1.
Continue along the row as before, working next Block II into flap, the same way (realizing that references to Block I and II will switch), until all 3 of this row's Blocks are flappe d in. It should look like this:
PART F FLAPPING IN
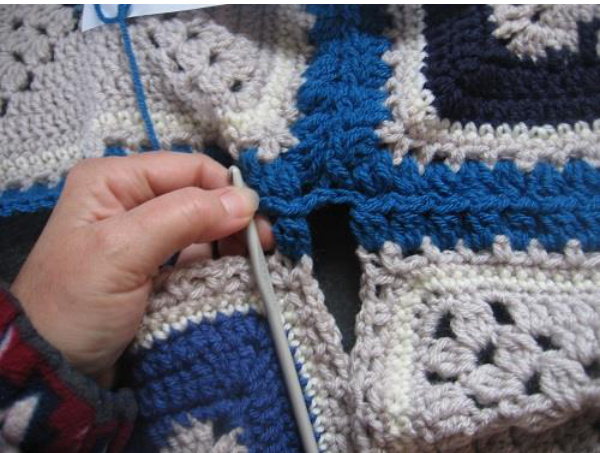
PART G GOOD GRIEF—- FLAP JOIN Working around the final side Block you are on, ch 3 out of corner cl, cl into same corner,and work the 2 sides and corners . (The red arrows above right show the direction of your work.) \*Work the last side (which is next to/right beside to the next flap block where the up pointing arrow is) up to the inside corner (do not join to next block yet). Cl into corner ofthe block you are working on, join in ch-3 sp of diagonal corner, ch 3, rotate work so the block be side ends up below, cl into corner of below block, join to second corner cl of above block (the one you just made before the rotate—-photo below lef.
Continue alongjoining sides, then work corner join as cl into corner ch-3 sp of block below, join to corner cl of block above, ch 3 out of corner, work second cl into ch-3 corner sp of block below.\*\* (photo above right bottom) Continue along the next side and corner, and then work from \* in PART G to \*\*.
g the third side of the block, work one cl into the ch-3 sp of the corne

PART H—HELP me, but I'm almost done! Note the red hexagonis where you should be. Move that so it's like this, and you'll have a whole new row to FLAP IN!! DO IT.
This part is exactly the same starting at PART F-FLAPPING IN, except you are switching the numbers of the blocks. Work from PART F and through PART G until all blocks are flapped and joined. By now, you should have a handle on how the different corners are dealt with-inside corner, outside corner, etc. Just in time not to have to do it anymore!
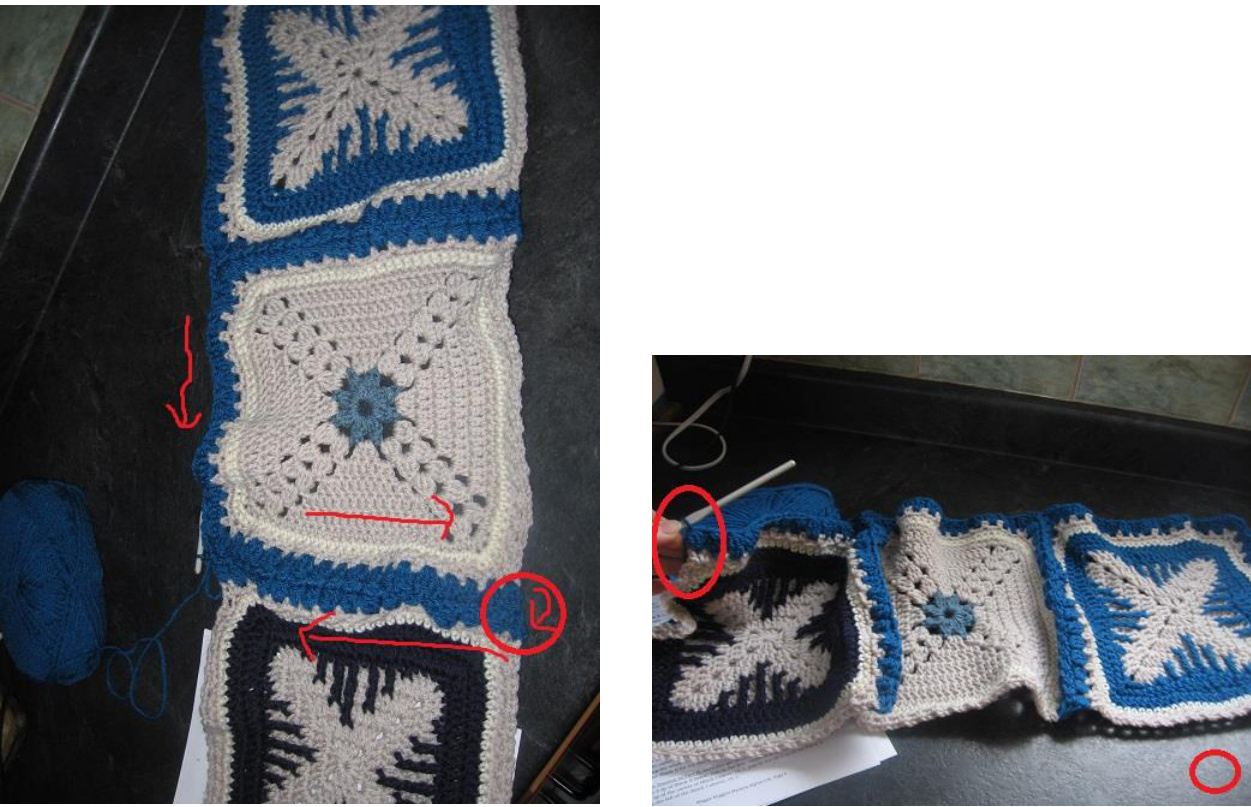
PART II DID IT!! All that remains now is to zoom along the remaining side of the block you are on, and down the two sides of the completed blocks, back to where you started. The only remaining instruction is: How to deal with corner joins between blocks on the borderYou want these joins to resemble the others as closely as possible. Work up to the first corner on the right. Cl into corner ch-3 sp, ch 3, join with a sl stitch into the junction (go completely around it) of the two corner cl already there, ch 3 again, and cl into the corner ch-3 sp on the left block. That's it! Simply ensure as you work that there are 16 cl on each side of every block, between corner groups, before you fasten off Color D. Work your last corner as cl, ch 3, sl st in beg cl, and fasten off carefully. If you are using an Invisible Join, work twice around the chain with your yarn needle, to reinforce this join.
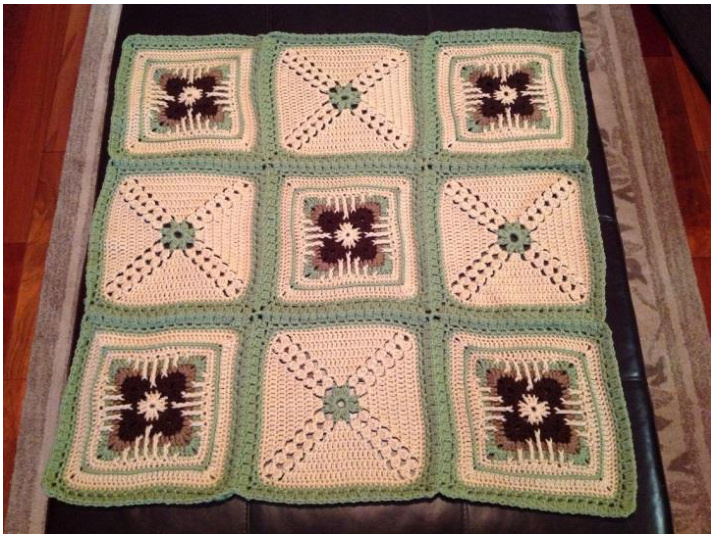
Photo courtesy of Emalahowski
FINISH ROUNDS AFTER JOIN
RND i: NOTE: If you are making the Baby'ghan and have little Color D left, use Color A for this Rnd. This RND is still using 3dccl as cl. Join Color D (Color A for Baby'ghan) with a sl st and Beg Cl (3dccl) in any corner ch-3 sp, (ch 3, cl and ch 1) in same sp, [\*(fpdc over top of next cl, hdc in next ch-1 sp) 17 times, fpdc over top of next cl\*\*, (hdc, dc) in next ch-3 sp, (fptrc over join junction of two ch-3 sps, enclosing them both), (dc, hdc) in next ch-3 sp\*; rep\* to \* one time; then \* to \*\* one time. Corneras (ch 1, cl, ch 3, cl, ch 1) in next ch-3 sp] four times, omitting corner on last rep; ch 1; join with a sl st in top of beg cl. Fasten off Color D (or continue with Color A into RND i if making Baby'ghan) (per side and one corner-2 ch-1 sp, 1 ch-3 sp, 2 cl, 2 fptrc, 4 dc, 54 fpdc, 55 hdc) RND ii: Join Color A with a sl st in any corner ch-3 sp (sl st to ch-3 sp if making Baby'ghan), (ch 3 as dc, 4 dc) in same sp; [fpdc over next cl, dc in next ch-1 sp, (dc in next 115 st), dc in next ch-1 sp, fpdc over next cl, corner as 5 dc in next ch-3 sp] 4 times, omitting corner on last rep. Finish Color A with Invisible Join. (124 x 4 sts) Appendix to prepping blocks: If your blocks are unequal in size, or unequal in side counts, you must first work a round or two or three to equalize them. I have instructionsfor doing this in another tutorial: http://www.ravelry.com/discuss/vannas-choice-fan-club/2139886/1-25#14
For the purposes of this tutorial, you also need to add a chained edging.
You work that as follows:
Step one: Work an equalize system as in the link so you have an even number of stitches per side (including corners). The se blocks have 32 per side (whichincludes 3 in the corner). Any EVEN NUMBER WILL DO. Step two: Start in a corner, andjoin with a sc, ch 3, sc in same st as join, (ch 2, sk st, sc in next st) across the side, untilyou get to the next corner. Ch 2, sk st, sc in corner st, ch 3, sc in corner st again. Continue working all four sides, and work corners with a ch-3. You can work as many ch-2 side spaces as your blocks allow. When you work the join, the original pattern calls for 16 ch-2 spaces on the sides, but as long as you have the same number of ch-2 spaces on all your blocks, you can work with that. Just substitute whateveryou have for “16' when working the side joins.


