(This could also be the warmest hat pattern :-) For yarns, find any combination of 3-4 yarns that you like and that go well together. Pattern is written for (child, adult) sizes. Gauge is pretty immaterial here, since you're going to have a bulky combination of yarns and since the hat will stretch; however, if you shoot for 3 stitches to the inch it will be fine. This is a great hat project because you can jazz it up with anything you like. It only takes a few hours to knit, and it's great for using up oddballs. If each of your strands has approximately 150 yards, you will be able to complete the adult hat with multiple pigtails. If you have 75 yards in each strand, you can make a child's hat with no pigtails.
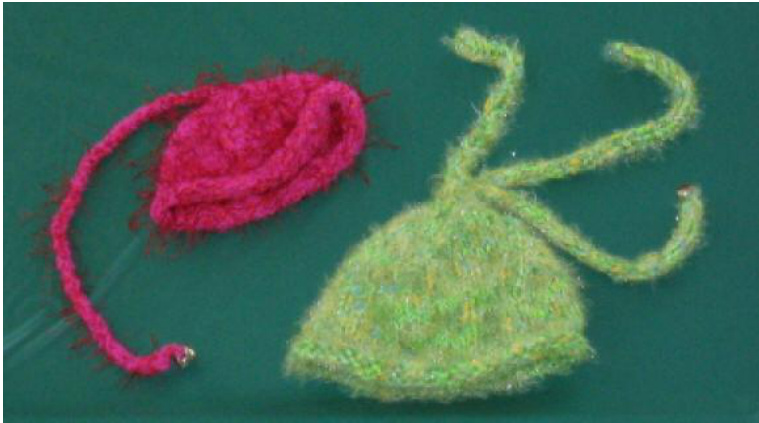
The pink hat (child size) was made with Berroco Plush in hot pink (1 ball), Berroco Zen in hot pink/orange (1 ball), and Trendsetter Eyelash in red. I needed 2 balls of Eyelash for this one. The other hat (adult size) was made with Cashmere Cat Belacane in chartreuse, Anny Blatt Vega in yellow/aqua (2 balls required), and Trendsetter Aura in leaf green. Yes, the pigtails on these hats will hang down when worn. Using size (10, 11) needles (6mm, 8mm), either a short circular needle (16") or a set of double-pointed needles, cast on (56, 64) stitches. Place marker, join. If you like ribbing: work 6 rounds of k2, p2 rib, then knit every round until your hat is (3, 4 %) inches completed. This is a "more or less" measurement but be careful - if you do too much less, the hat willslip backwards off the person's head, and if you do too much more, it will slide down over their eyes. If you don't like ribbing (I don't and none of these hats shown have ribbing): knit every round for (3, 4 %) inches. On the next round: \*knit (14,16) stitches, place marker,\* repeat around. You now have four evenly-spaced markers. Next round and all odd rows: \*k2tog, kto 2 stitches before marker, kthose 2 stitches tog. Slip marker.\* Repeat around row. Next round and all even rounds: knit. Switch to double-points when necessary. /ou have decreased down to 9 stitches, decide whether you want the pigtails or not If not: cut the yarn and draw the long tail through the remaining stitches, tighten, draw tail to inside and weavein. If you want multiple pigtails: put 3 stitches on each dpn. Use each set of 3 stitches to make an i-cord as follows. Knit all three stitches, then slide them back to the other end of the needle and knit them again (do not turn your work). Continue this until the pigtail is the length you want. To finish, cut a long tail of yarn, draw it through the three stitches. Thread these yarns through your seaming needle and run the needle down inside the pigtail, making sure to catch some stitches to keep your pigtail from unraveling. Repeat for all pigtails. If you only want one pigtail: continue your hat decreases until you have only 3 stitches left and proceed with pigtail knitting as above. The pink hat and one pigtail on the yellow hat have little jingle bells attached to the pigtail ends! I had also planned to put a glass button shaped like a leaf onto one of the yellow hat pigtails, but someone broke the button.


