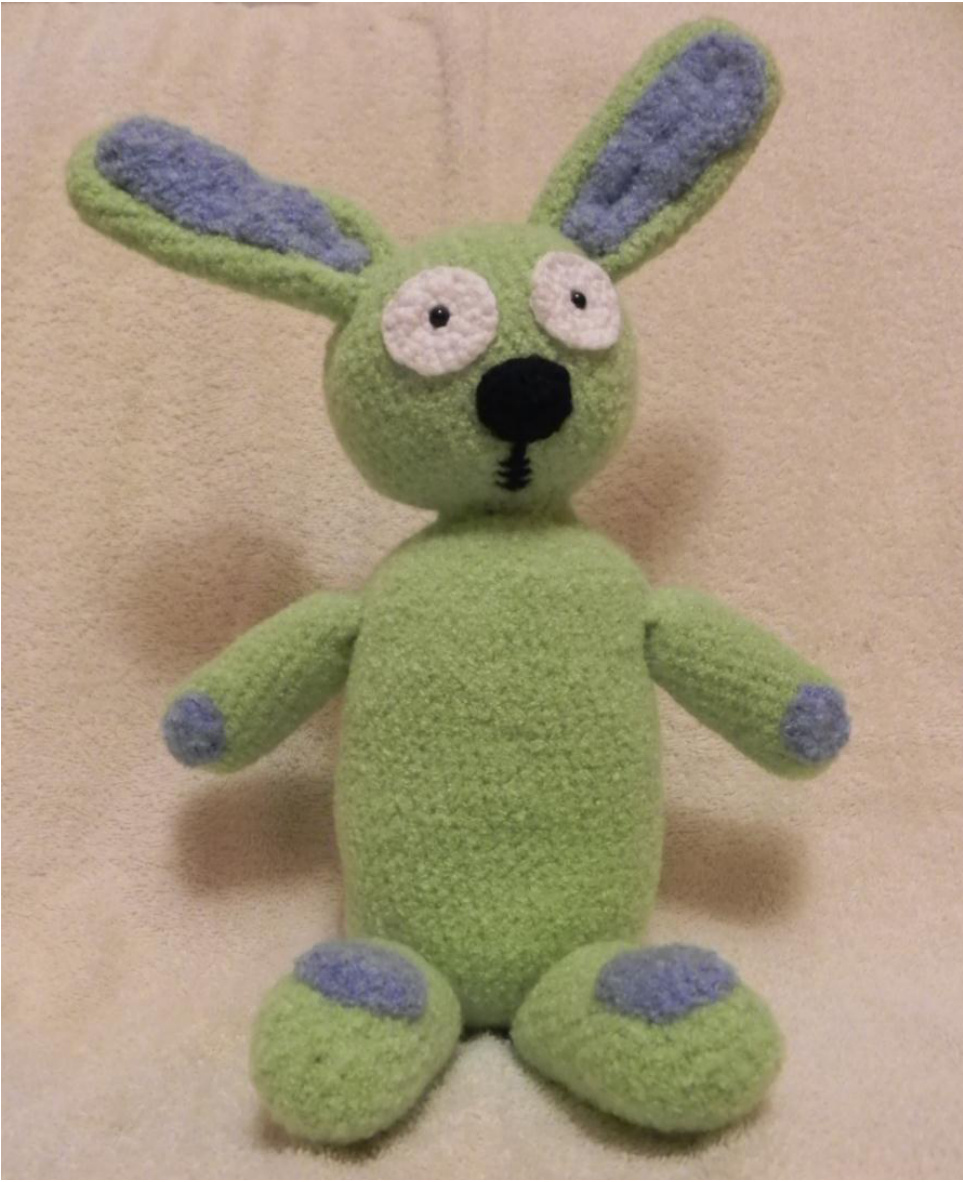
KNUFFLE BUNNY By Dolores Voglesonger
MATERIALS
2 skeins Red Heart Plush Baby in Kiwi (used about 1.25 skeins) 1 skein Red Heart Plush Baby in Blueberry (used less than .25 skein for ears & paw pads) 1 skein / scrap amount of black worsted weight yarn (used for mouth embroidery) Polyester stuffing 4.5mm hook (used with green yarn) G 4mm hook (used with all other yarns) Tapestry needle One set of 6mm black safety eyes (optional) Small amount of white & black worsted weight yarn (if choosing to crochet the eyes & nose) Scrap amounts of black & white felt (if choosing not to crochet the nose & eyes) Nylon hosiery for "stuffing wrangling" (optional)
MATERIALSNOTES:
I was able to get the head, body, outer ears, and one arm done with one skein of green; used up about 1/3 to 1/2 of a second skein to finish the other arm & the two legs. There are a few options as to how to do the finishing touches, so I've listed some optional materials above. I prefer to not mix media, so I went for all yarn/crochet (with the exception of the safety eyes).
\*\*FEEL FREE TO USE THIS PATTERN FOR PERSONAL USE/GIFTS/CHARITY, BUT ITEMS MADE FROM THIS PATTERNMAYNOTBESOLD. \*\*
HEAD (in green)
1: 6sc into magic loop; tighten loop (6) 2: \*2sc in each sc, repeat from \* (12) 3: \*2sc in next sc, 1sc in next sc; repeat from \* (18) 4: \*2sc in next sc, 1sc in each of next 2 sc; repeat from \* (24) 5: \*2sc in next sc, 1sc in each of next 3 sc; repeat from \* (30) 6: \*2sc in next sc, 1sc in each of next 4 sc; repeat from \* (36) 7: \*2sc in next sc, 1sc in each of next 5 sc; repeat from \* (42) 8: \*2sc in next sc, 1sc in each of next 6 sc; repeat from \* (48) 9: \*2sc in next sc, 1sc in each of next 7 sc; repeat from \* (54) 10-19: Work even 56 st 20: \*2sc decrease, 1sc in each of next 7 sc; repeat from \* (48) 21: \*2sc decrease, 1sc in each of next 6 sc; repeat from \* (42) 22: \*2sc decrease, 1sc in each of next 5 sc; repeat from \* (36) 23: \*2sc decrease, 1sc in each of next 4 sc; repeat from \* (30) 24: \*2sc decrease, 1sc in each of next 3 sc; repeat from \* (24) 25-26: Work even (24)
BODY (in green):
1: 6sc into magic loop; tighten loop (6) 2: \*2sc in each sc, repeat from \* (12) 3: \*2sc in each sc, 1 sc in each of next 2 sc; repeat from \* (18) 4: \*2sc in next sc, 1sc in each of next 2 sc; repeat from \* (24) \*12/16/12 5: \*2sc in next sc, 1sc in each of next 3 sc; repeat from \* (30) 6: \*2sc in next sc, 1sc in each of next 4 sc; repeat from \* (36) 7: \*2sc in next sc, 1sc in each of next 5 sc; repeat from \* (42) 8: \*2sc in next sc, 1sc in each of next 6 sc; repeat from \* (48) 9: \*2sc in next sc, 1sc in each of next 7 sc; repeat from \* (54) 10-38:Work even 54 st 39: \*2sc decrease, 1sc in each of next 7 sc; repeat from \* (48) 40: \*2sc decrease, 1sc in each of next 6 sc; repeat from \* (42) 41: \*2sc decrease, 1sc in each of next 5 sc; repeat from \* (36) 42: \*2sc decrease, 1sc in each of next 4 sc; repeat from \* (30) 43: \*2sc decrease, 1sc in each of next 3 sc; repeat from \* (24) 44: Work even (24)
OUTER EARS (make 2 in green)
This part is worked in an open-ended cylinder that is then folded/collapsed to create an ear shape. 1: 6sc into magic loop; tighten loop (6) 2: \*2sc in each sc, repeat from \* (12) 3: \*2sc in next sc, 1sc in next sc; repeat from \* (18) 4: \*2sc in next sc, 1 sc in each of next 8; repeat from \* (20) 5-25: Work even (20) Leave an extra-long tail on each ear - this will be used to sew the finishing touches on the ear shaping & to sew the ear to the head.
INNER EARS (make 2 in blue)
This part is done using a modified paisley pattern. The way the ear is constructed, the outer (green) cylinder is flattened out, the inner (blue) ear is laid inside of it, and the ends of the outer ear are folded over to make a bunny-ear shape. I crochet pretty tightly, so you may have to check the sizing/length of the chain to adjust to fit inside your ear. 12/19/12 1: Chain 17 2: Slip stitch in the first sc from the hook (not the same stitch) 3: 1sc in each of the next 4 sc 4: 1hdc in each of the next 8 5: 1dc in each of next 2 6: 6-10dc in last (may need to increase/decrease this depending on yarn plush/weight/tightness - I wasn't consistent with how tight I was crocheting, so on one ear I ran out of room to turn the corner with 6 while I was able to get 8 comfortably on the other...I know, I know, terrible consistency!) 7: 1dc in each of next 2 8: 1hdc in each of the next 8 9: 1sc in each of the next 4 10: Check size of the inner ear vs. outer ear..l continued around in a mixture of sc & slipstitch to increase the width a smidgen to better fit the look I was going for. If you want a more slender inner ee area, you can stop here.
ARMS (make 2 in green)
1: 6sc into magic loop; tighten loop (6) 12/19/12 2: \*2sc in each sc, repeat from \* (12) 3: \*2sc in next sc, 1sc in next sc; repeat from \* (18) 4-20: Work even (18) 21: \*2sc decrease, 1 sc in each of next 4; repeat from \* (15) 22: \*2sc decrease, 1sc in each of next 3; repeat from \* (12)
LEGS (make 2 in green )
1: 6sc into magic loop; tighten loop (6) 12/19/12 2: \*2sc in each sc, repeat from \* (12) 3: \*2sc in next sc, 1sc in next sc; repeat from \* (18) 4: \*2sc in next sc, 1sc in each of next 5 sc; repeat from \* (21) 5-20: Work even (21) 21: \*2sc decrease, 1 each in next 5; repeat from \* (18) 22: \*2sc decrease, 1 each in next 4; repeat from \* (15) 23: \*2sc decrease, 1 each in next 3; repeat from \* (12)
TAIL (in blue)
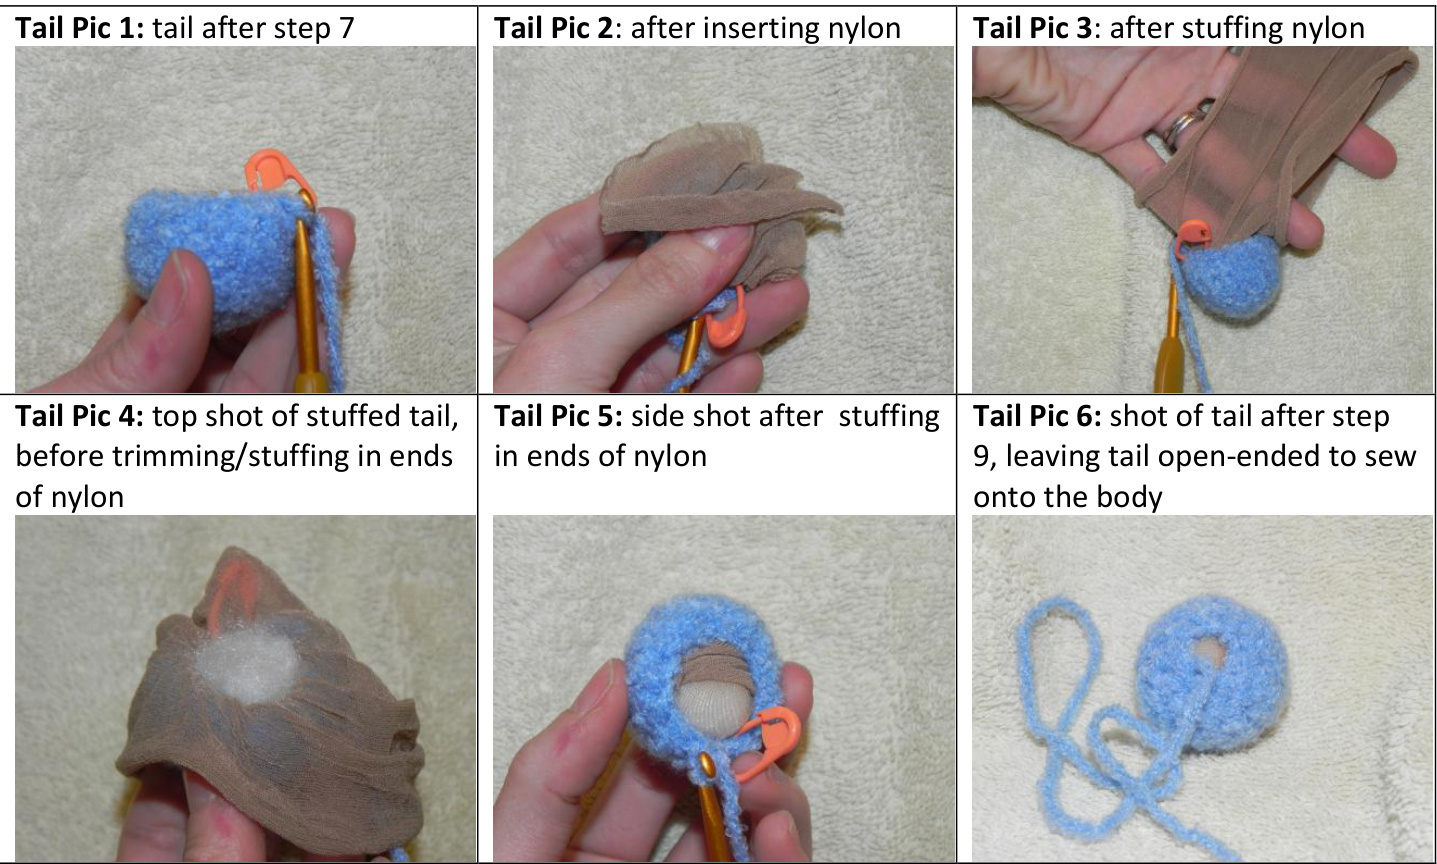
1: 6sc in magic circle; tighten loop 2: \*2sc in each sc; repeat from \* (12) 3: \*2sc in next sc, 1sc in next 2; repeat from \* (18) 4-6: Work even (18) 7: \*2sc decrease, 1 sc in next sc; repeat from \* (12) PAUsE! Time to stuff the tail (See photos below for tips on using the nylon stocking trick for stuffing) 8: \*2sc decrease, 1sc in each of next 2; repeat from \* (6) 9: Tie off & sew shut OR tie off & leave open-ended to sew onto the body
ARM PAW PADS (make 2 in blue)
1; 6sc in magic circle; tighten loop 2: \*2sc in each sc; repeat from \* (12) 3: Slipstitch in next sc & tie off, leaving enough of a tail to sew the paw pads on
LEG PAW PADS (make 2 in blue)
1: 6sc in magic circle; tighten loop 2: \*2sc in each sc; repeat from \* (12) 3: \*2sc in next sc, 1sc in each of next 2; repeat from \* (16)
EYES
You can either use felt for the eyes or you can crochet...l opted to crochet. I used a G 4mm hook and made two in some spare white worsted weight yarn. 1: 6sc in magic circle; tighten loop 2: \*2sc in each sc; repeat from \* (12) 3: \*2sc in next sc, 1sc in next sc; repeat from \* (18) 4: Slipstitch & tie off to finish OPTIONAL: insert the eye/post only of a 6mm safety eye in the center; we'll be putting the backing on later to lock it into place. The center of the magic circle is more than tight enough to hold this puppy in its spot until then.
NOSE
Again, the nose can be constructed from felt, but I preferred to crochet it for the sake of consistency. The nose is simply an oval worked in the round. I recently worked on a spider applique, so I followed the very loose pattern I created for the spider's cylindrical abdomen. I mostly winged this part to get the right size/shape, but here's a general pattern that you can adapt for doing an oval in the round: 1: 6sc in magic circle; tighten loop 2: 1sc + 1hdc in next sc; 2hdc in next sc; 1hdc + 1sc in next 2sc; 1hdc + 1dc in next sc; 1hdc + 1sc in next Sc (12) 3: Check sizing of nose...sc around to increase size if so desired. To keep the nose flat, you'll have to add extra sc's in some of the stitches (1sc in first 2 sc; 2sc in next; 1sc in next 2; 2sc in next; 1sc in next 4; 2sc in next; 1sc in next 2), but the effect of a slightly cupped nose actually works nicely.
ASSEMBLY!
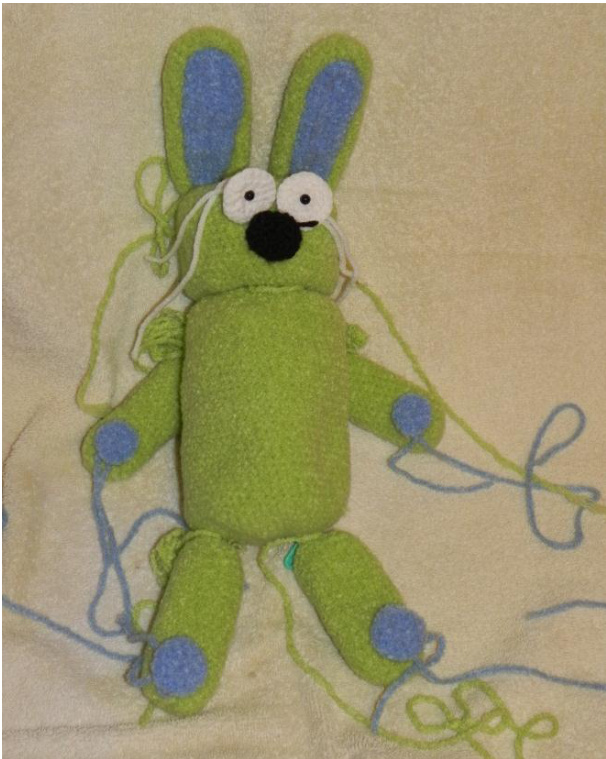
Here's where Knuffle Bunny comes to life! After doing my Hobbes doll and struggling a bit with sewing through an already stuffed piece, I feel like the best general approach for Knuffle Bunny is: Assemble the ears Do a "dry-fit" by positioning & pinning, then sew/embroider facial features & ears Stuff the limbs & close off the limb ends Stuff the head Sew the limbs onto the body Stuff/attach the tail to the body Stuff the body Attach the head to the body. I know a lot of folks out there prefer to stuff & then sew, but since I'm going to be trying the nylon-stuffing approach to keep the stuffing reigned in, I'd prefer to not do too much sewing through the stuffed body.
EAR CONSTRUCTION
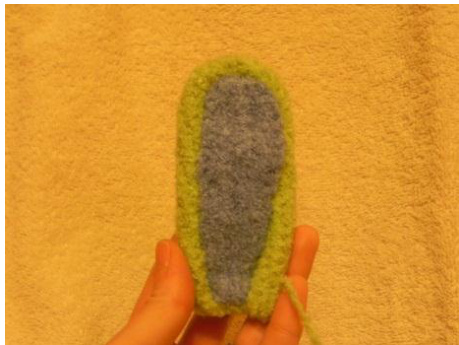
Flatten out the outer (green) ear piece. Lay the inner (blue) ear piece inside of the flattened outer ear & ensure the positioning. The ears should be shaped as pictured at right, folding the sides inward to shape the ear.
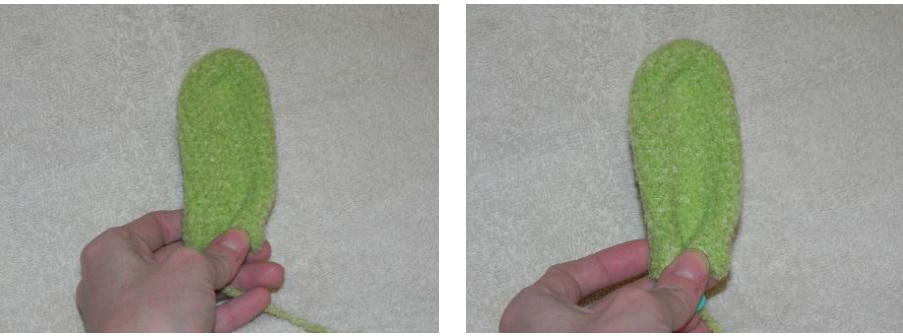
Once you're happy with the inner ear piece position, use the blue yarn to sew it into place being careful to only sew through ONE side of the green ear piece; you don't want the blue yarn showing through on the backside of the ear. (Some artistic license comes into play here - if you prefer to use black yarn instead so that it looks more like a lined drawing, feel free!) With the ear pieces attached to each other, now it's time to do the fold-over at the bottom of the ear (where the ear will be attached to the head). Using the green yarn tail from the outer ear, sew these folded over ends in place. You can either tie off now & leave the remaining yarn tail to attach the ear to the head, OR you can close the ear before attaching it & then tie off. (I chose to sew shut the ear.) Repeat with the other ear.
FACIAL FEATURES
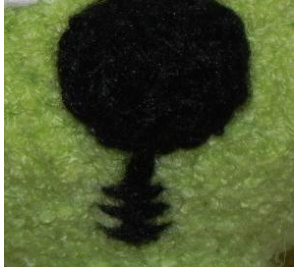
Pin the head (eyes, nose, ears) features in place on the head before attaching. Straight pins work best, but I made do with safety pins & stitch markers. If you're using safety eyes as pupils, use the posts of the safety eyes to help with the positioning. Pop the posts of the safety eyes through the head and then muster up the strength to pop the backs onto the safety eyes. Honestly, this may have been the hardest part of making this bunny! I opted to use white yarn (same worsted weight yarn I used to make the eyes) to sew on the eyes, but you can use black yarn to mimic the outlined eyes in the book drawings a bit better. Using a tapestry needle, simply sewtheeyesintoplace. For the nose, I didn't sew it on flat & instead went for a slight 3D effect, which was helped by the extra SC stitches around the edging..this made it naturally start to go into a cup shape (and there was no need to stuff behind the nose). The same black worsted weight yarn was used to sew on the nose as was used to create the nose. For the mouth, I used some more of the black worsted weight yarn & a tapestry needle to make the main vertical line down & the three short horizontal lines across. (See the picture at the right for reference.)
EARATTACHMENT
Ear placement is a bit tough to mock up before attaching them (here is where those straight pins would have come in awful handy!), but if you're looking at the face of the bunny and imagine it as a clockface, you want to go for about 11 o'clock & 1 o'clock. There are lots of Knuffle Bunny photo references to help with placement. Sew around front & back of the ear to ensure secure attachment.
ARM/LEG ATTACHMENT
Line the arms/legs with nylon stockings & stuff. Either tuck in the ends of the stockings, or sew the stockings shut (I stuffed pretty tightly and just tucked/folded in the ends to make a little stuffing package). I opted to close the ends of the arms & legs first to make the attachment process smoother & easier, but I still sewed around the front/back (or top/bottom) to ensure a snug attachment. This bunny went to my 4 year old niece, so I wanted to be sure it was sturdy & would stand up to lots of love!
TAIL ATTACHMENT
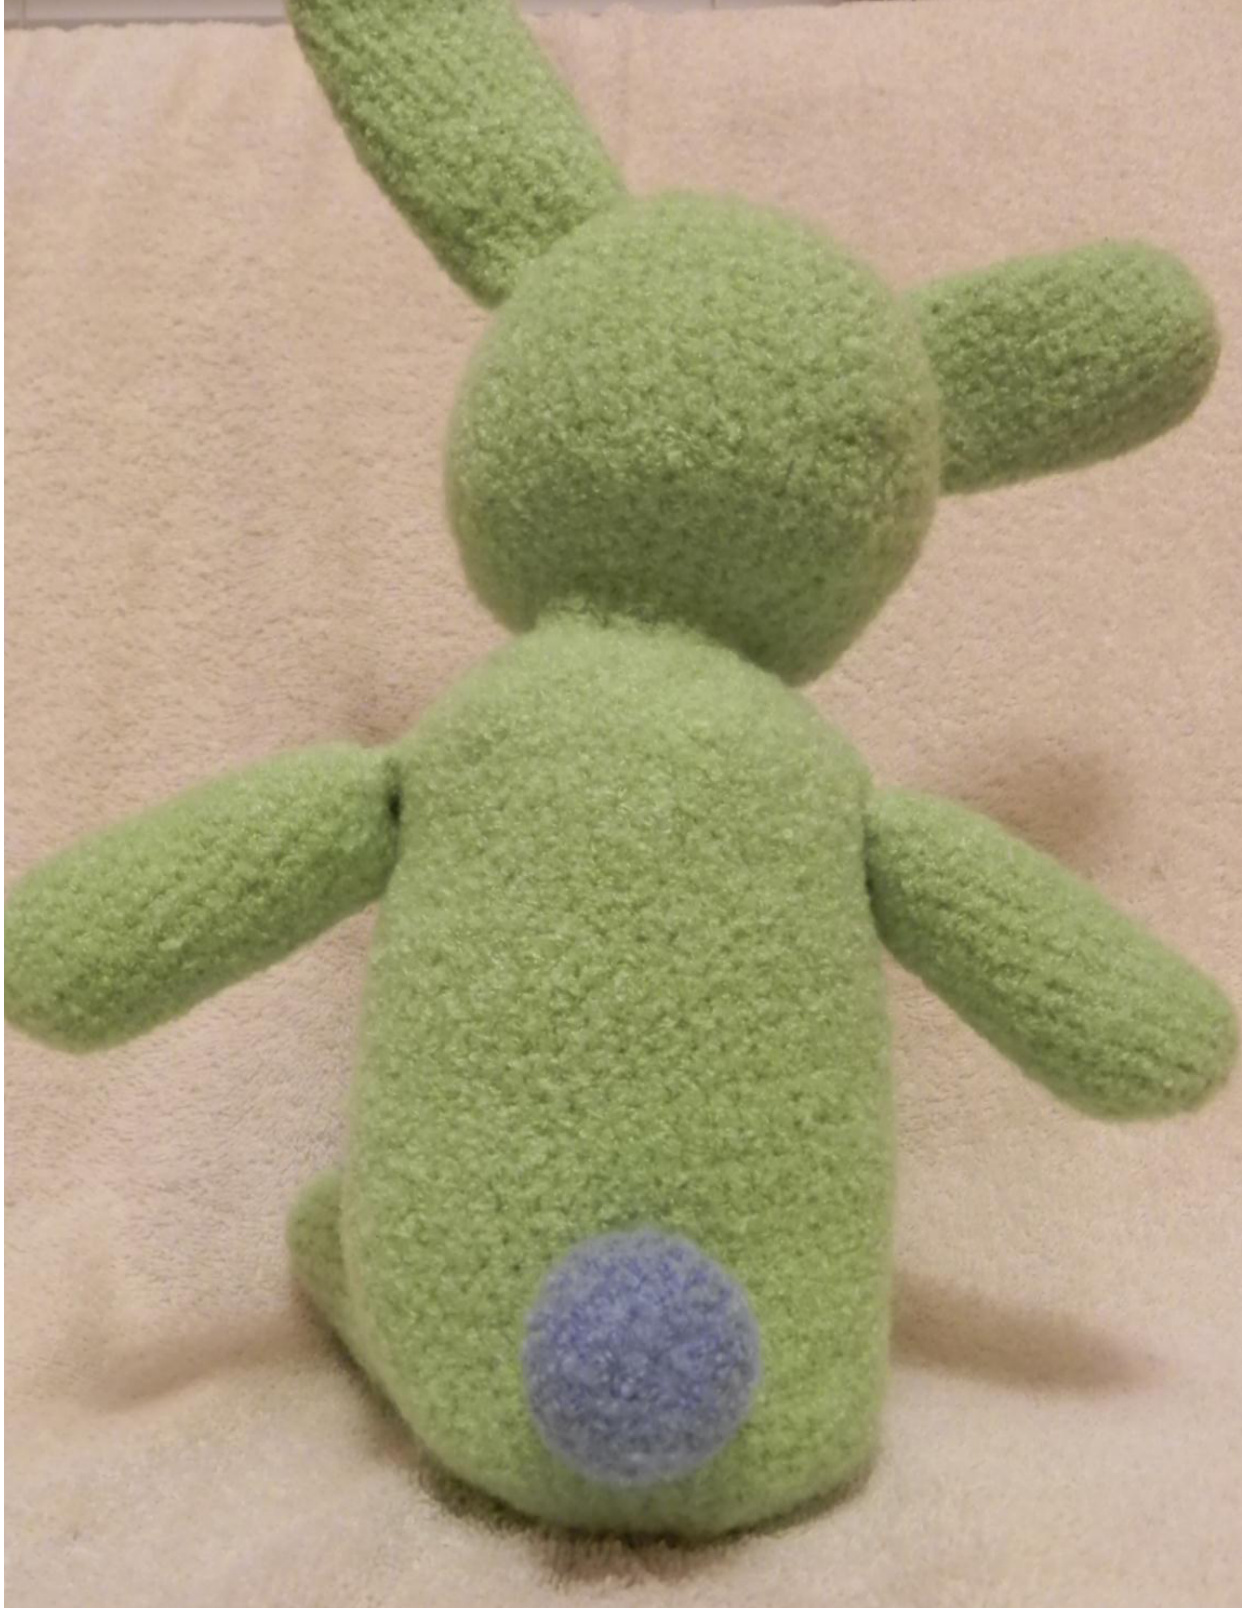
I left the tail open-ended before attaching and, using a tapestry needle & the long yarn tail, I simply stitched around to attach it to the bunny-bum. In terms of proper placement, I sat the bunny down first to make sure that the tail was properly placed.
HEAD ATTACHMENT
Again, use the nylon stocking to line the head & then stuff. Repeat with the body. Don't overstuff, but do be sure to use some extra stuffing to fill in the neck area between the head & body. Here is where the plushy yarn saved the day - the seam at the neck area is nearly invisible! I left a long yarn tail on both the head & neck, but started the sewing process with just the head's yarn tail, sewed over the body's yarn tail (leaving it dangling out), and then also used the body's yarn tail to do a few stitches to make sure it was extra secure. The only detectable part of the attachment is a small knot to tie off the yarn...it's invisible to the naked eye, but if you feel around the back of the neck, you can feel a little bump in the yarn.
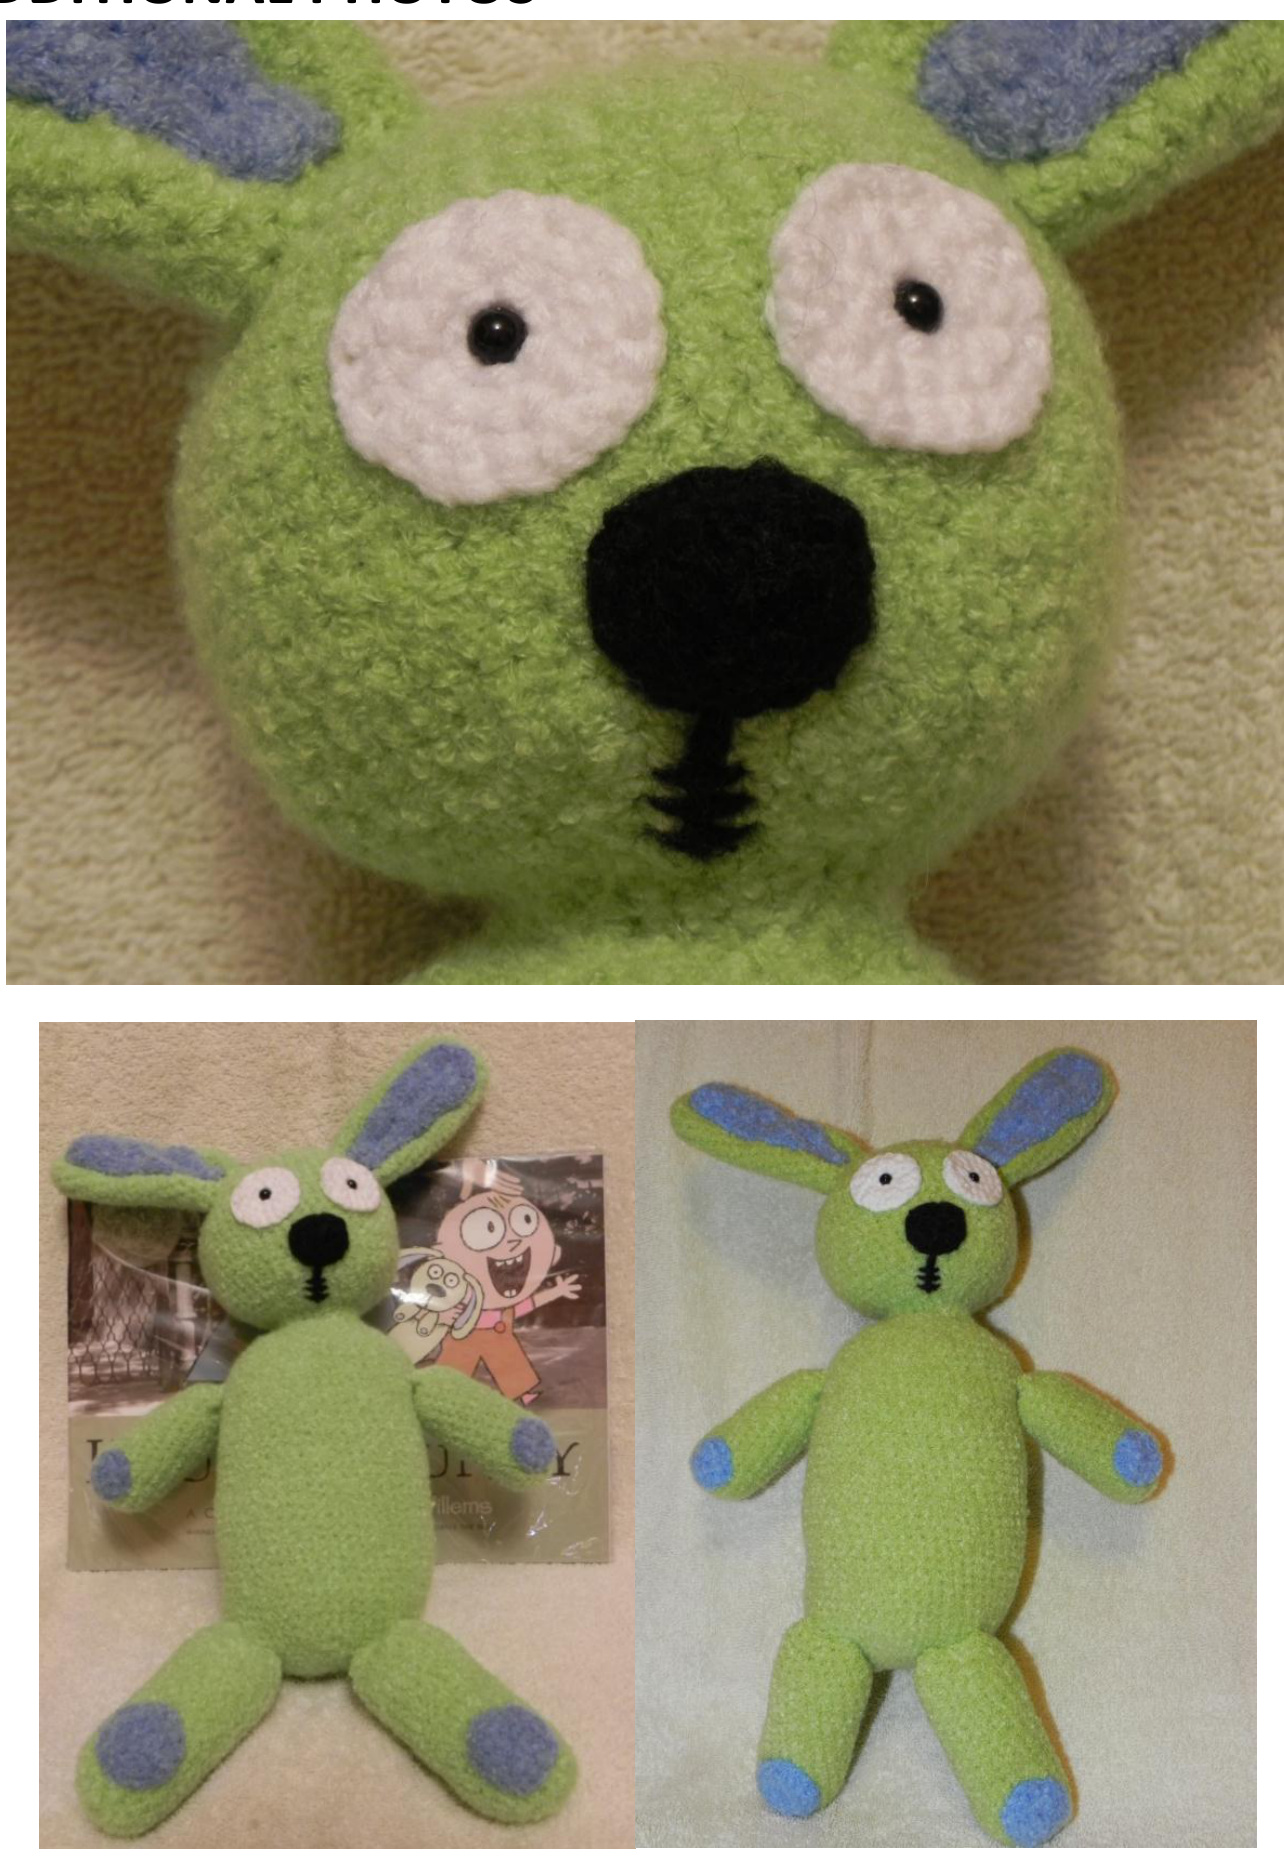
ADDITIONAL PHOTOS
\*\*PATTERN COPYRIGHT DOLORES VOGLESONGER, 2013; ALL RIGHTS RESERVED. THISPATTERN CAN BE USED FOR PERSONAL USE, GIFTS, & CHARITY. THE PATTERN IS FREE TO SHARE, BUT NOT FOR SALE. ITEMS MADE FROM THIS PATTERN ARE NOT TO BE SOLD.\*\*


