Frankie's Knitted Stuff
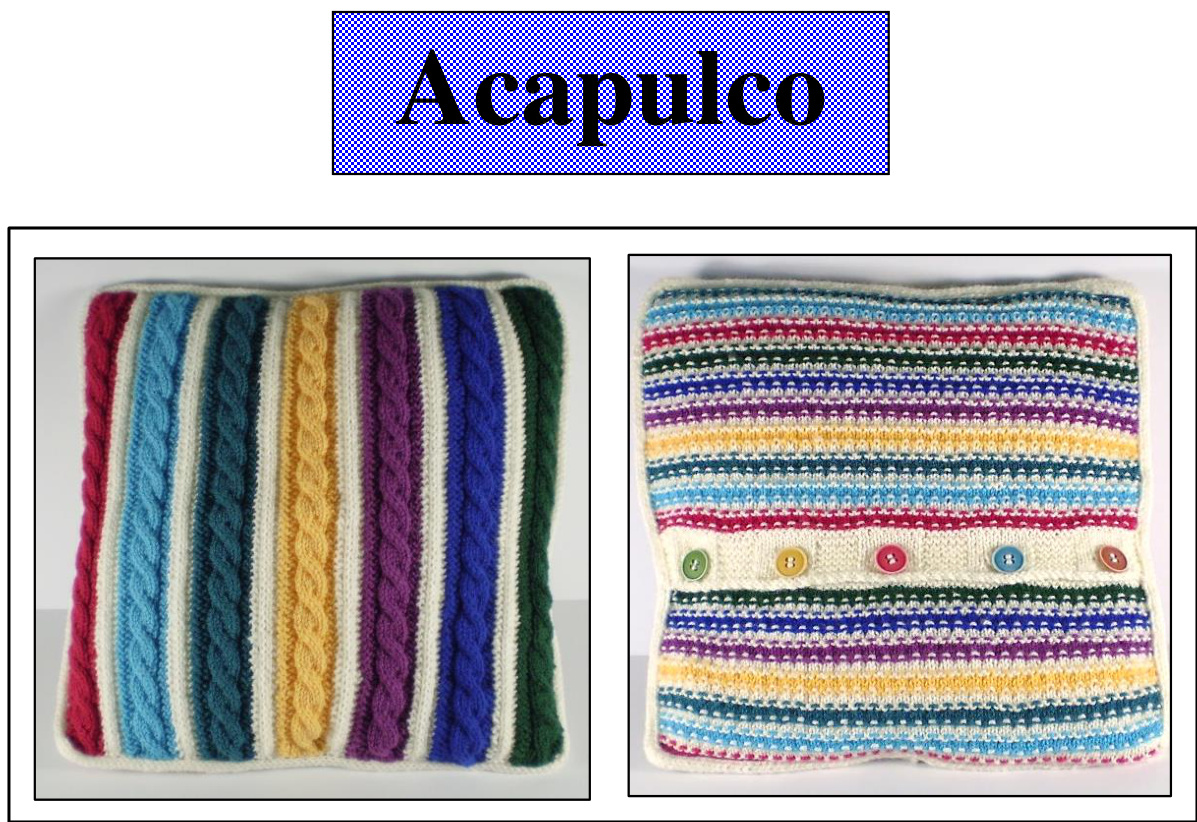
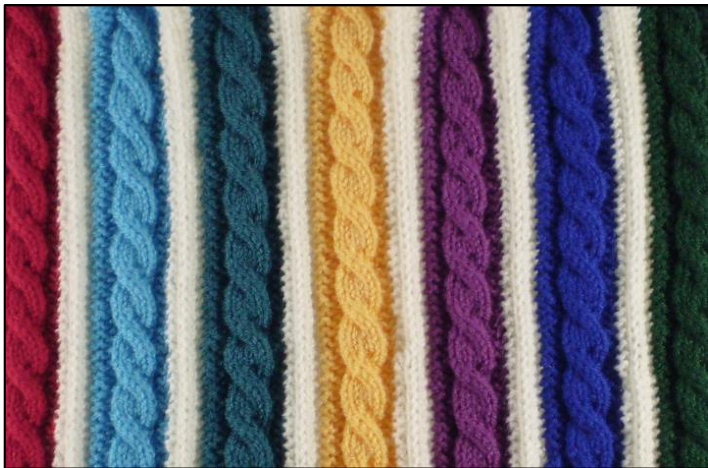
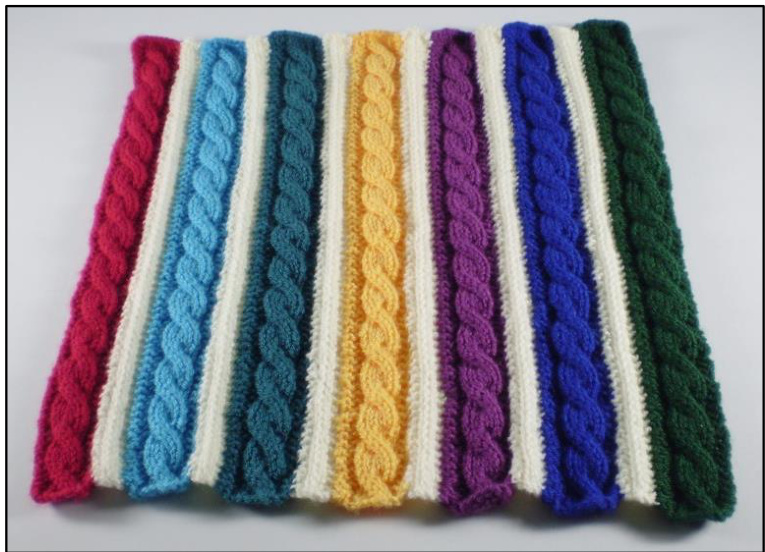
The front of this cushion cover is made up of narrow strips of different colours, each one knitted on to the side of the last one. A slip stitch pattern is used to give twisted cables without the need for a cable needle. The back is knitted in a more conventional slip stitch pattern using the same colours. The cover is finished with an I cord edging. The cable strips could also be used for blankets or scarves, just make them as long as you like and add as many as you need.

I chose bright colours of Stylecraft Special DK (295m / 100g), inspired by my Acapulco cup. The colours I used were Lipstick, Turquoise, Teal, Saffron, Plum, Royal and Bottle. The background colour is cream. Should you not want to knit a cushion cover to match my china you will need 20g each of any seven colours and 100g of cream. I worked to a tension of about 11 stitches and 14 rows to 5cm / 2"2 in stocking stitch on 4mm needles. My cover fits an old flat 16" cushion pad, it would probably also fit a nice new plump 14" pad.
The Front
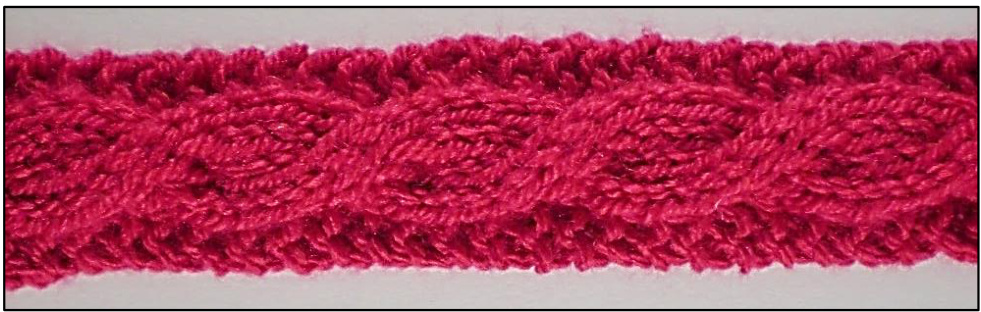
This consists of narrow strips, each joined as you go to the previous one. The wider, cabled strips are knitted with the colours, one at a time. The narrow strips between them, which have a simple slip stitch pattern, are worked in cream. Cable Strip Begin by knitting a cable strip with the first colour. For this you need to use a special stitch - the secret to cables without a cable needle. The stitch is abbreviated as S2L and should be worked like this: Putting your needle behind the stitches, knit through the back of the third stitch, slip the first two stiches purlwise and then drop that third stitch that you've already knitted. Using the cable method (appropriately enough) and 4mm needles cast on eleven stitches. Row 1: K2, P1, K5, P1, K2. Row 2: (and all even numbered rows) K3, P5, K3. Row 3: K2, P1, S2L, K2, P1, K2. Row 5: K2, P1, K1, S2L, K1, P1, K2. Row 7: K2, P1, K2, S2L, P1, K2. Row 9: K2, P1, K5, P1, K2. Row 10:K3, P5, K3. Repeat these ten rows until you have worked them 14 times all together or until your strip is about 15" long. The slipped stitches move to the left across the knitting to form a twisted cable which will appear with the second repeat. Cast off in pattern using a 3.25mm needle.
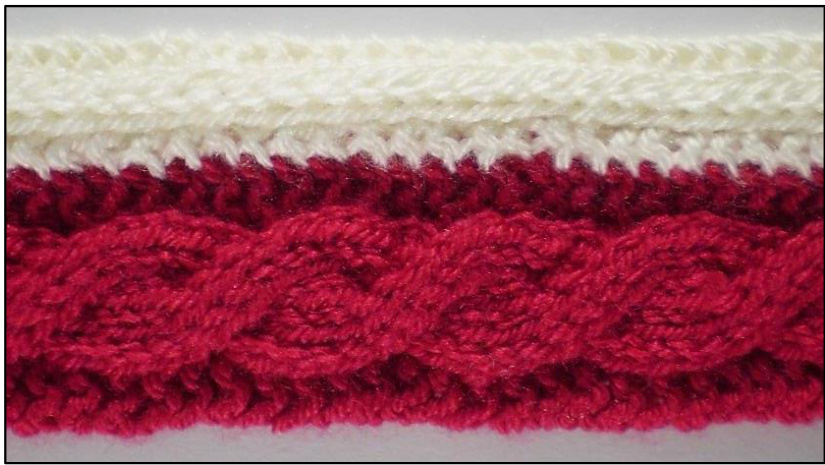
Narrow Strip
From now on each new strip will be joined to the previous one at the end of every right side row. The bumps along the edge of the strips each mark one ridge which is two rows of pattern. You will be joining the new strip to each ridge in turn. Following the instructions for the strip you are knitting, work to the last stitch of the row and then slip that stitch knitwise. Now pick up and knit one stitch from the edge of the ridge you are joining to and pass the slipped stitch over. Join the first row of the new strip to the cast on edge of the previous strip and then join to each ridge in turn all the way up to the top. The instructions for the narrow strip do not include this join; just join at the end of the knit rows as described above. Using cream yarn cast on five stitches. Row 1: Knit. Row 2: K1, sl 1 pwise wyif, P1, K2. Repeat these two rows until it is as long as the cable strip to which it is joined. Make sure that you have worked 70 ridges to match the cable strip. Cast off. Use the cast on and cast off ends to close any gap between the strips.
Carry on like this adding cable strips and narrow strips until you have used all your seven colours. You should now have something that roughly resembles a square. It's just as well knitting stretches.
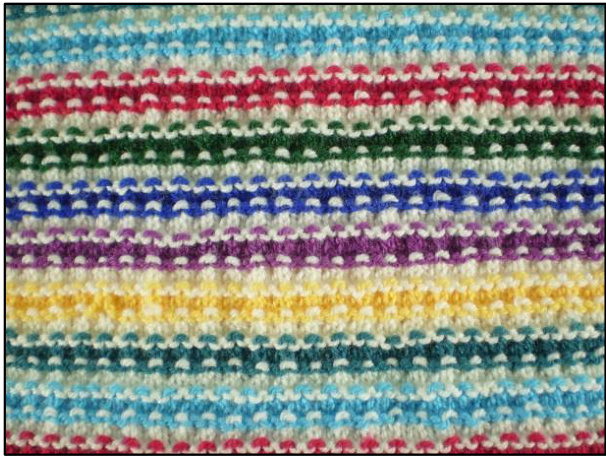
The Back
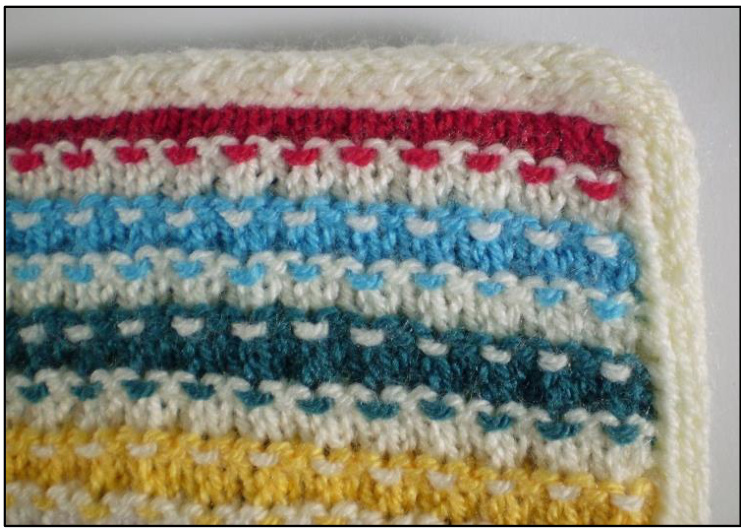
This is worked in a more conventional manner, all in one piece (well two, to allow for the buttons). I have to confess here that I wasn't that pleased with how my button bands turned out. They were rather prone to gaping. I shall give you the pattern I used but you might like to substitute plain garter stitch bands, or even miss out the buttons all together if you never get round to washing cushion covers ... The four row slip stitch pattern is knitted in each of the colours in turn, with cream again used between each colour. Carry the cream yarn up the side of the work. Using the cable method and the first colour, cast on 75 stitches and work two rows in stocking stitch. Change to cream and begin working in pattern: Row 1: K1, \*sl 1 pwise wyib, K1, repeat from \* to end. Now work the pattern in the second colour, then in cream again and so on until you have used all seven colours.
Change to 3.25mm needles and work the button band in cream. Knit two rows. Now work in stocking stich, keeping the two edge stitches in garter stitch: Row 1: Knit. Row 2: K2, P to last 2 sts, K2. Repeat these two rows four more times (ten rows in all) Knit three rows and cast off knitwise. Using cream and 3.25mm needles cast on 75 stitches for the buttonhole band. Row 1: Knit. Row 2: Knit. Row 3: K3, P9, (K6, P9) four times, K3. Row 4: Knit. Row 5: K3, P9, (K6, P9) four times, K3. Row 6: K6, (cast off 3 sts, K12) four times, cast off 3 sts, K6. After casting off, the stitches to knit include the one already on the needle. Row 7: K3, (P3, cast on 4 sts, P3, K6) four times, P3, cast on 4 sts, P3, K3. Row 8: K9, K2tog, (K12, K2tog) four times, K5. Row 9: K3, P9, (K6, P9) four times, K3. Row 10: Knit. Row 11: K3, P9, (K6, P9) four times, K3. Row 12: Knit. Row 13: Knit. Change back to 4mm needles and continue in the slip stitch pattern, beginning with the first colour. Row 1: K1, \*sl 1 pwise wyib, K1, repeat from \* to end. Row 2: Knit. Row 3: Knit. Row 4: Purl. Work 19 repeats all together and then cast off. Overlap the buttonhole and button bands and oversew them together at the sides. Sew five 1" buttons to the button band, near to the patterned section to allow for pulling. This is worked all round the back of the cover and is knitted in I cord with cream yarn. Using 4mm double pointed needles and the long tail method cast on five stitches. Work in attached I cord: Knit every row but don't turn the work at the end of rows, just pull the yarn round from behind the stitches and carry on. To attach the cord slip the last of the five stitches, picking up and knitting a stitch from the body of the work and passing the slipped stitch over this. Work one row of I cord for every two rows along the sides of the back and one row for every stitch along the top and bottom. At the corners work into the corner then knit three rows of I cord without joining it and then join the next row into the corner again.
Pin the front of the cover to the back (I turned mine so that the stripes went different ways) and then sew them together with cream yarn. Sew the edge of the front to the bottom of the I cord edging. To make a different size cushion cover I would suggest knitting the first cable strip about 1" longer than your pad (or 1" shorter if you're using a bigger flat pad). Then add enough strips to make the front roughly square. For the back you will have to work out how many stitches to cast on. Try about five stitches for every inch and then match it up with the front. The joined cable strips (with or without the narrow strips) could also be a way of using up small amounts or yarn to make an interesting, colourful fabric for anything you want to knit.
Abbreviations
st / sts stitch / stitches Kknit Ppurl S2L slip two stitches to the left (explained in pattern) sl 1 pwise slip one stitch purlwise wyif with yarn held in the front wyib with yarn held at the back Frankie Brown, 2013. My patterns are for personal use only and should not be used to knit items for sale. Please do not use them for teaching purposes without my permission.