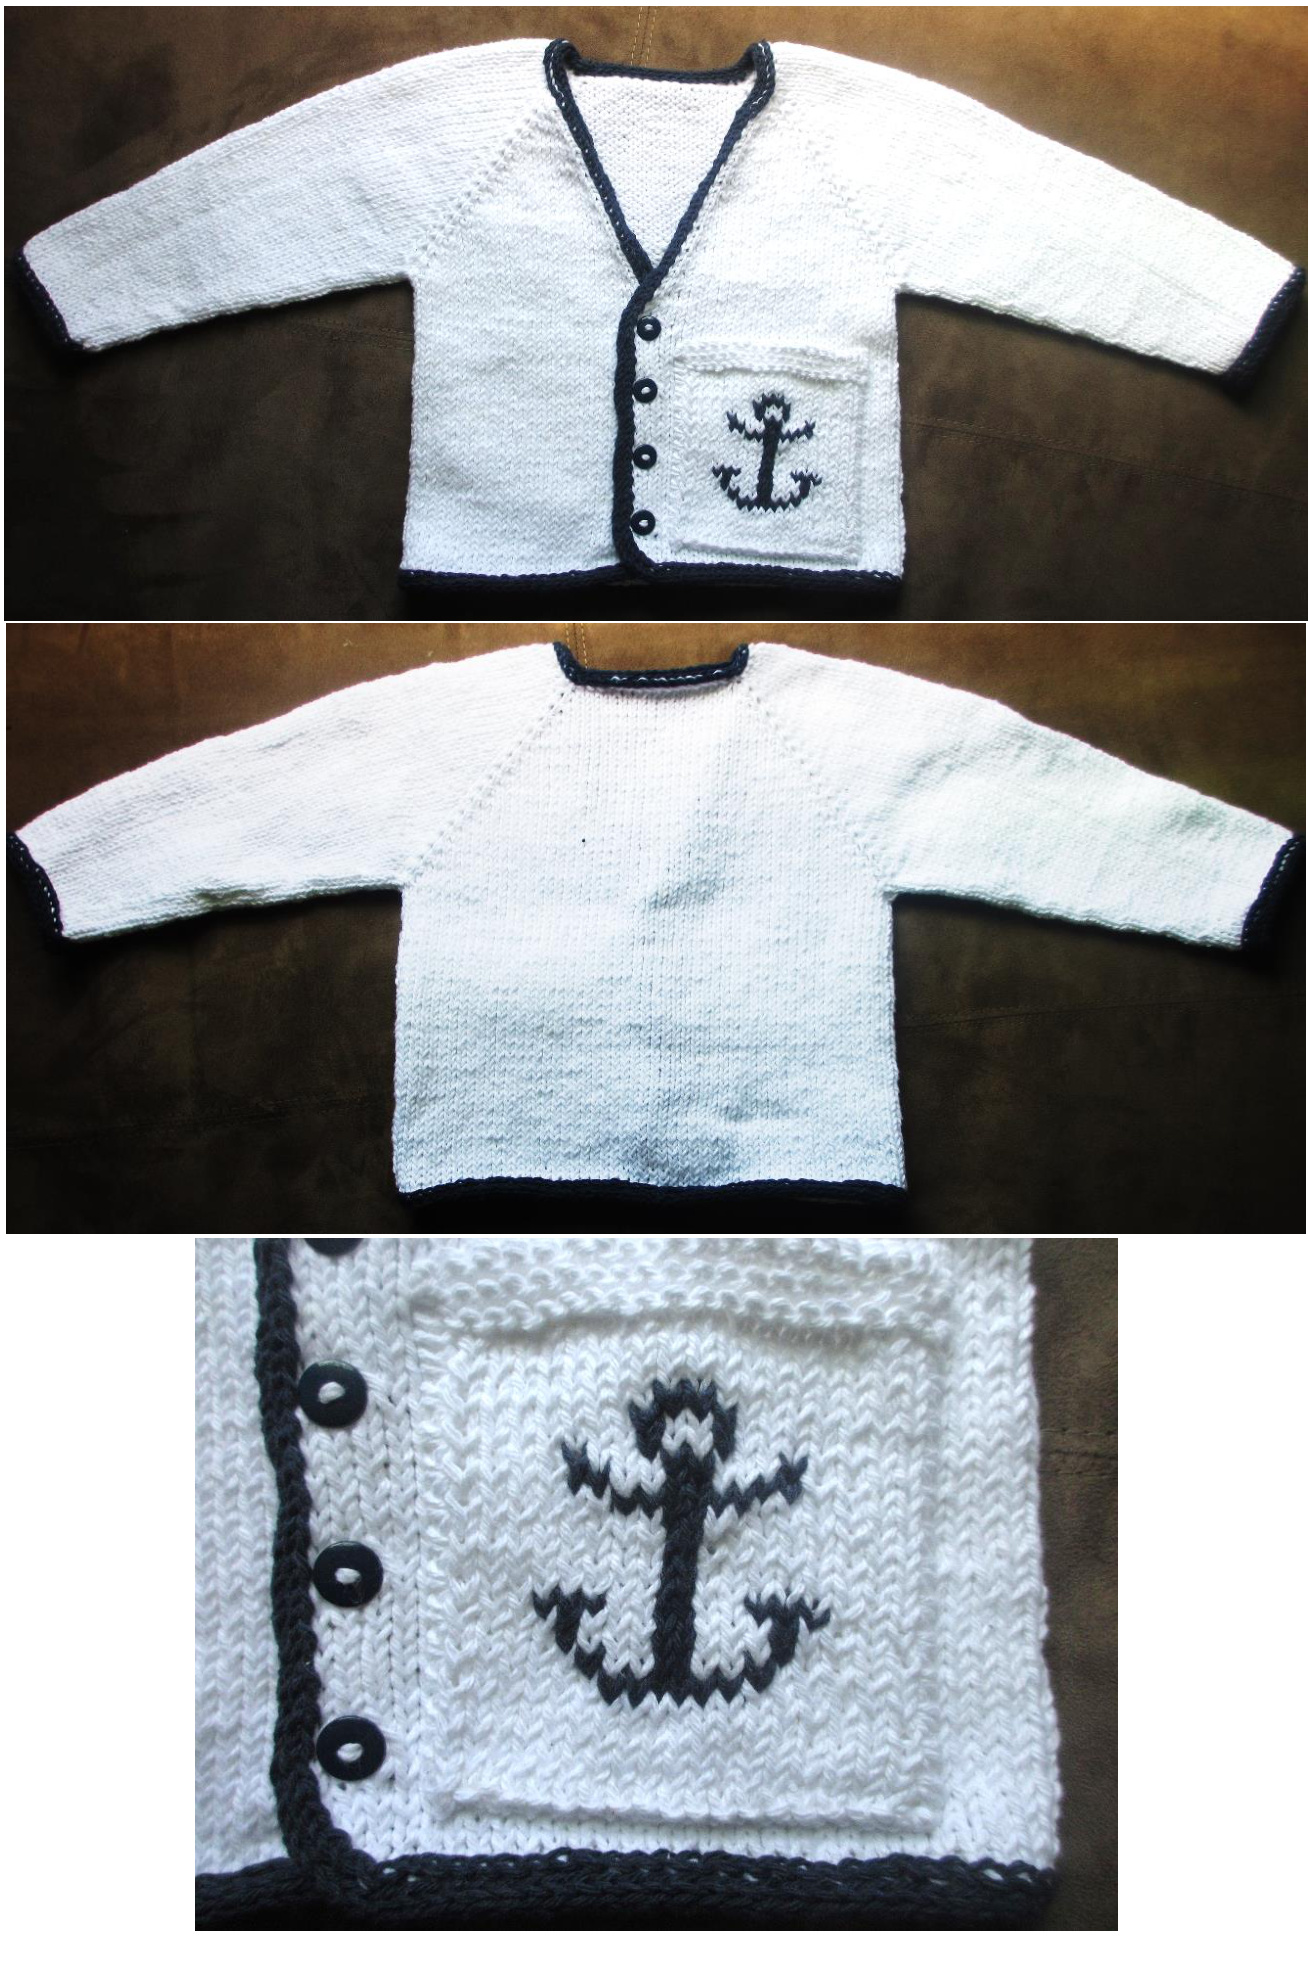
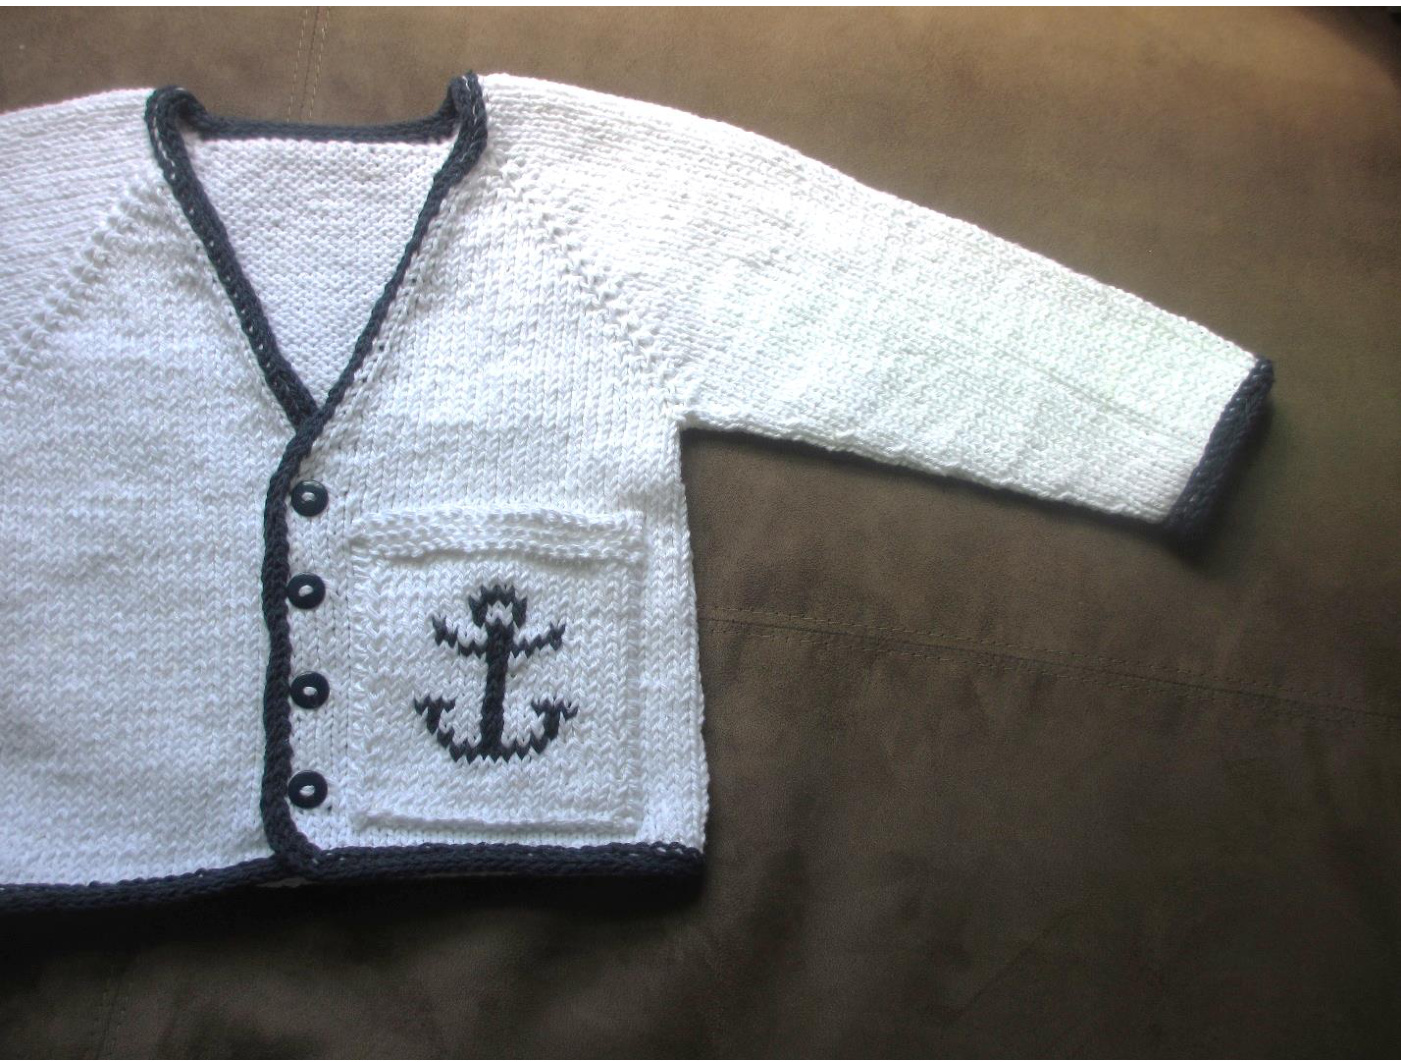
SAILOR CARDIGAN
Pattern by Ariana Ascherl, 2014
Size:
12-24 months (3, 4 years) Shown above in size 4 years.
Finished Measurements:
Chest: 20 (22, 24) in. Length: Center Back 12 (13, 14) in. , Sleeve (neck to cuff) 12 (13, 14) in.
Materials:
Suggested Yarns:
O Sailor: : Lily Sugar'n' Cream (100% Cotton, 120yd per 70g ball) in (MC) White, 2 (3, 4) balls and (CC) Indigo 1 (1, 1) ball, or Knit Picks Dishie (100% Cotton, 190 yd per 100g skein) in (MC) Swan, 1 (2, 2) skeins and (CC) Blue 1 (1, 1) skein, or any worsted weight cotton or cotton-blend yarn of your choosing. Pirate: : Lily Sugar'n' Cream (100% Cotton, 120yd per 70g ball) in (MC) Black, 2 (3, 4) balls and (CC) White 1 (1, 1) ball, or any worsted weight cotton or cotton-blend yarn of your choosing.
Recommended Needle Size:
US #7/4.5mm 24" or longer circular needles 1 set US #7/4.5mm double-point needles
Notions:
4 stitch markers 3 (4, 4) buttons, approx % in. diameter Yarn needle 2 stitch holders or scrap yarn
Gauge:
13 stitches/19 rows = 3 inches in stockinette
Pattern Notes:
Sweater is worked top-down from neck. Raglan sleeves and front are increased from cast-on edge, then are divided by placing the sleeve stitches on holders and working the remainder of the body. The deep-V shape of the neck is accomplished with increases. Decreases on the last two body rows create a rounded bottom edge. The sleeves are then worked in the round. The patch pocket is worked separately, incorporating an intarsia design, and is sewn on after. To finish, the I-cord edging is worked onto sleeve edges and the cast-on, selvage, and bind-off edges of the cardigan. M1L (left-leaning increase): Pick up yarn between sts with left needle from back to front and knit through front loop. M1R (right-leaning increase): Pick up yarn between sts with left needle from front to back and knit through back loop. K1fb: Knit through front and back of stitch.
Neck:
Using cabled cast-on method, or any cast-on you prefer (so long as it provides some stretch), cast on 32 (39, 46) sts. Set up row: Sl 1, K1fb, place marker (pm), K1fb, K 6 (8, 10), K1fb, pm, K1fb, K 10 (13, 16), K1fb, pm, K1fb, K 6 (8, 10), K1fb,pm, K1fb, K 1. Next row: Sl 1, P to end. Next row: Sl 1, K to 1 st before m, K1fb, Sl m, \*K1fb, Kto st before m, K1fb, Sl m\* 3 times, K1fb, K to end Next row: Sl 1, P to end. Next row: Sl 1, K 1, M1R, K to st before m, K1fb, Sl m, \*K1fb, Kto st before m, K1fb, Sl m\*, 3 times, K1fb, K to last 2 sts, M1l, K to end. Rep these last four rows 5 (6, 7) times. Next row: Sl 1, P to end. Sts are as follows: (right front) 21 (24, 27) sts, m, (right sleeve) 34 (40, 46) sts, m, (back) 40 (45, 52) sts, m, (left sleeve) 34 (40, 46) sts, (left front) 21 (24, 27) sts.
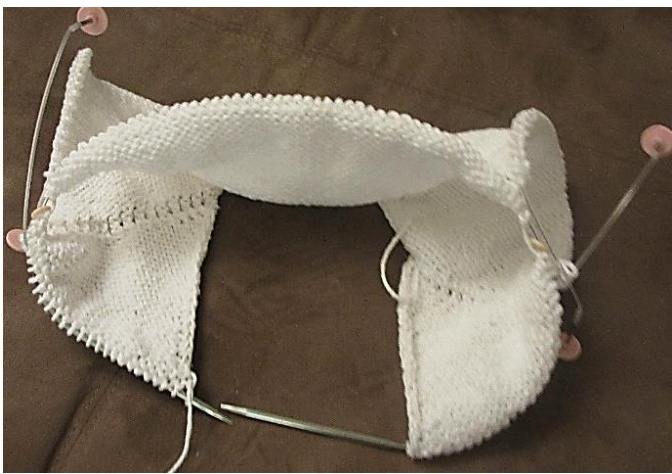
Divide body and sleeves
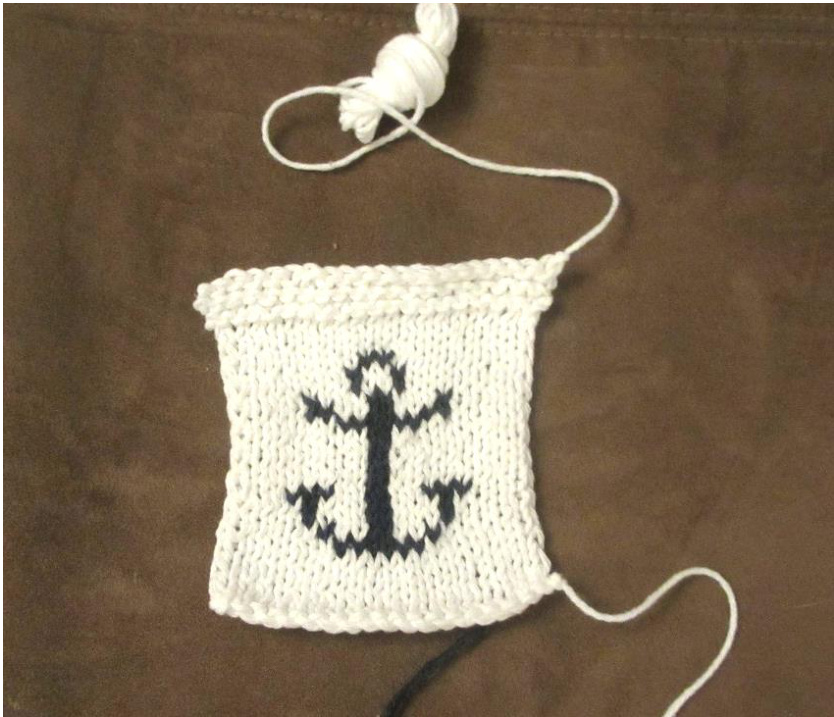
Sl 1, K 21 (24, 27) to 1st m, remove m, place 34 (40, 46) sleeve sts on holder, remove m, K 40 (45, 50) back sts, remove m, place 34 (40, 46) sleeve sts on holder, remove m, K 21 (24, 27) sts. Next row: Sl 1, P to end. 82 (93, 104) sts on needle. Work should look like this:
Next row: Sl 1, K 1, M1R, K to 2 sts before end, M1l, K 2. Next row: Sl 1, P to end. Next row: Sl 1, K to end. Next row: Sl 1, P to end. Next row- buttonhole row: Sl 1, K1, yo, Ssk, K to end (if larger buttonhole is desired: Sl 1, K2tog, yo twice, Ssk, K to end- on next row, be sure to work a stitch into each yo). Next row: Sl 1, P to end. Next row: Sl 1, K to end. Repeat these 2 rows 2 (2, 3) times Next row: Sl 1, P to end. Next row: Work buttonhole row. Repeat last 8 (8, 10) rows 1 (2, 2) times. Next row: Sl 1, P to end. Next row: Sl 1, K to end. Next row: Sl 1, P to end. Next row: Sl 1, K to last 2 sts, K2tog. Next row: Sl 1, P to last 2 sts, P2tog. Repeat last 2 rows once more. Bind off all sts.
Sleeves:
Right sleeve: Transfer 34 (40, 46) sleeve sts from holder onto double-point needles. Join yarn and K 34 (40, 46) sleeve sts, pick up and knit 2 sts from armpit area = 36 (42, 48) sts. Pm and join round. Knit 5 rounds even. Dec row: Ssk, K to 4 sts before end of round, K2tog, K 2 (2 sts decreased). Next 5 rounds: Knit. Repeat last 6 rounds 5 (6, 7) times. 24 (28, 32) sts on needles. Place sts on holder. Left Sleeve: Work as right sleeve.
Pocket:
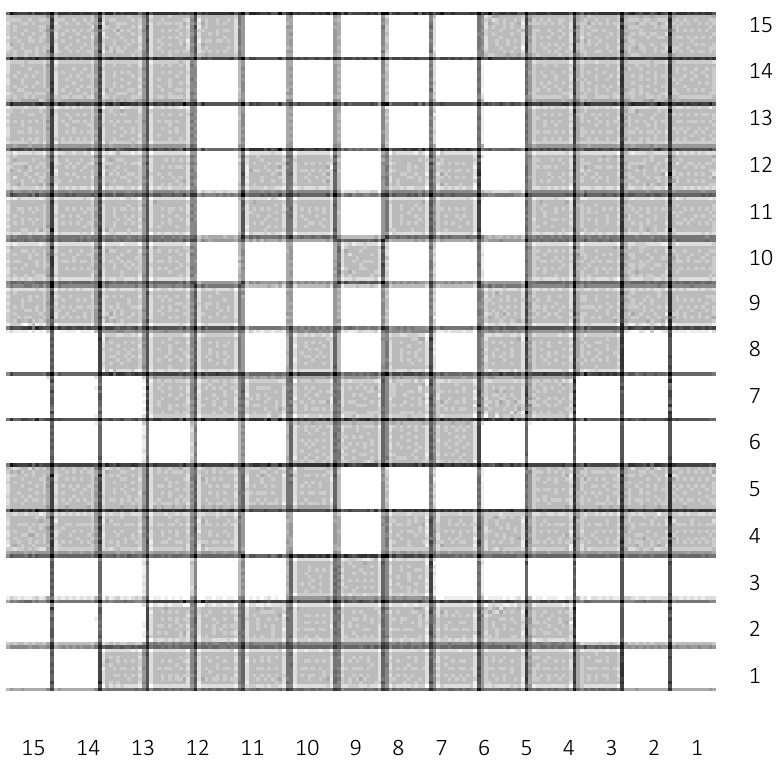
With MC, cast on 16 (18, 20) sts. Next row: Sl 1, P 1 (2,3), pm, P 12, pm, P 2 (3, 4). Work the following two rows 0 (1, 2) times: Next row: Sl 1, Knit. Next row: Sl 1, Purl. Working in Stockinette stitch (K for right side, P for wrong side), and Sl first stitch of each row, join CC and work intarsia chart between markers:
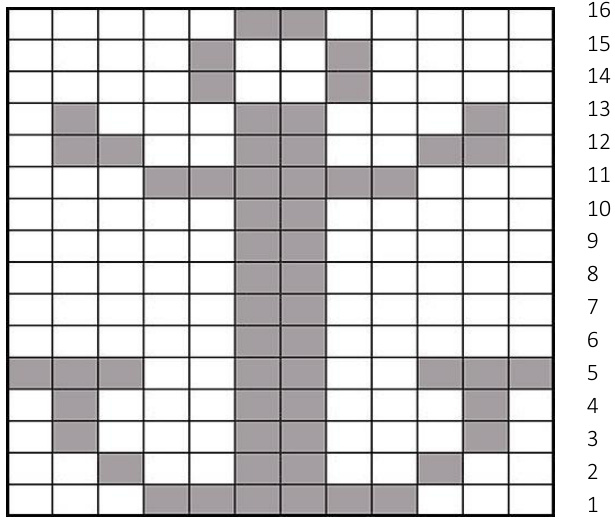
12 11 10 9 8 7 6 5 4 3 2 1 With MC, work 1 (3, 5) more rows in Stockinette. Next 4 rows: Knit. (This makes 2 Garter stitch ridges.) Bind Off, K-wise, break yarn leaving a long tail (to sew pocket onto sweater).
Pirate Pocket: With MC, cast on 19 (21, 23) sts. Next row: Sl 1, P 1 (2,3), pm, P 15, pm, P 2 (3, 4) Work the following two rows 0 (1, 2) times: Next row: SI 1, Knit. Next row: Sl 1, Purl. Working in Stockinette stitch (K for right side, P for wrong side), and Sl first stitch of each row, join CC and work intarsia chart between markers:
With MC, work 1 (3, 5) more rows in Stockinette. Next 4 rows: Knit. (This makes 2 Garter stitch ridges.) Bind Off, K-wise, break yarn leaving a long tail (to sew pocket onto sweater)
Edging:
With CC, using dpn, CO 4 sts. Body: Starting at center back, work applied I-cord edging around the fronts of the sweater, picking up stitches evenly as you go, until you have worked all the way around the body of the sweater and are back to where you started the I-cord. Around corners of sweater, pick up extra stitches to turn and allow I-cord to lie flat. BO and sew I-cord BO edge to I-cord CO edge. Sleeves: Starting at beg of rnd, work applied I-cord edging around the sleeve, working stitches from holder as you go along (treat them as sts you picked up on body). When all sleeve sts are worked and you are back to beg of rnd, BO and sew edges together as with body. For a tutorial on applied I-cord, visit: http://tutorials.knitpicks.com/wptutorials/sweaterfinishing-part-4-applied-i-cord/

Finishing:
Weave in ends. Place Pocket on front of sweater and sew in place. Sew on buttons. Block.