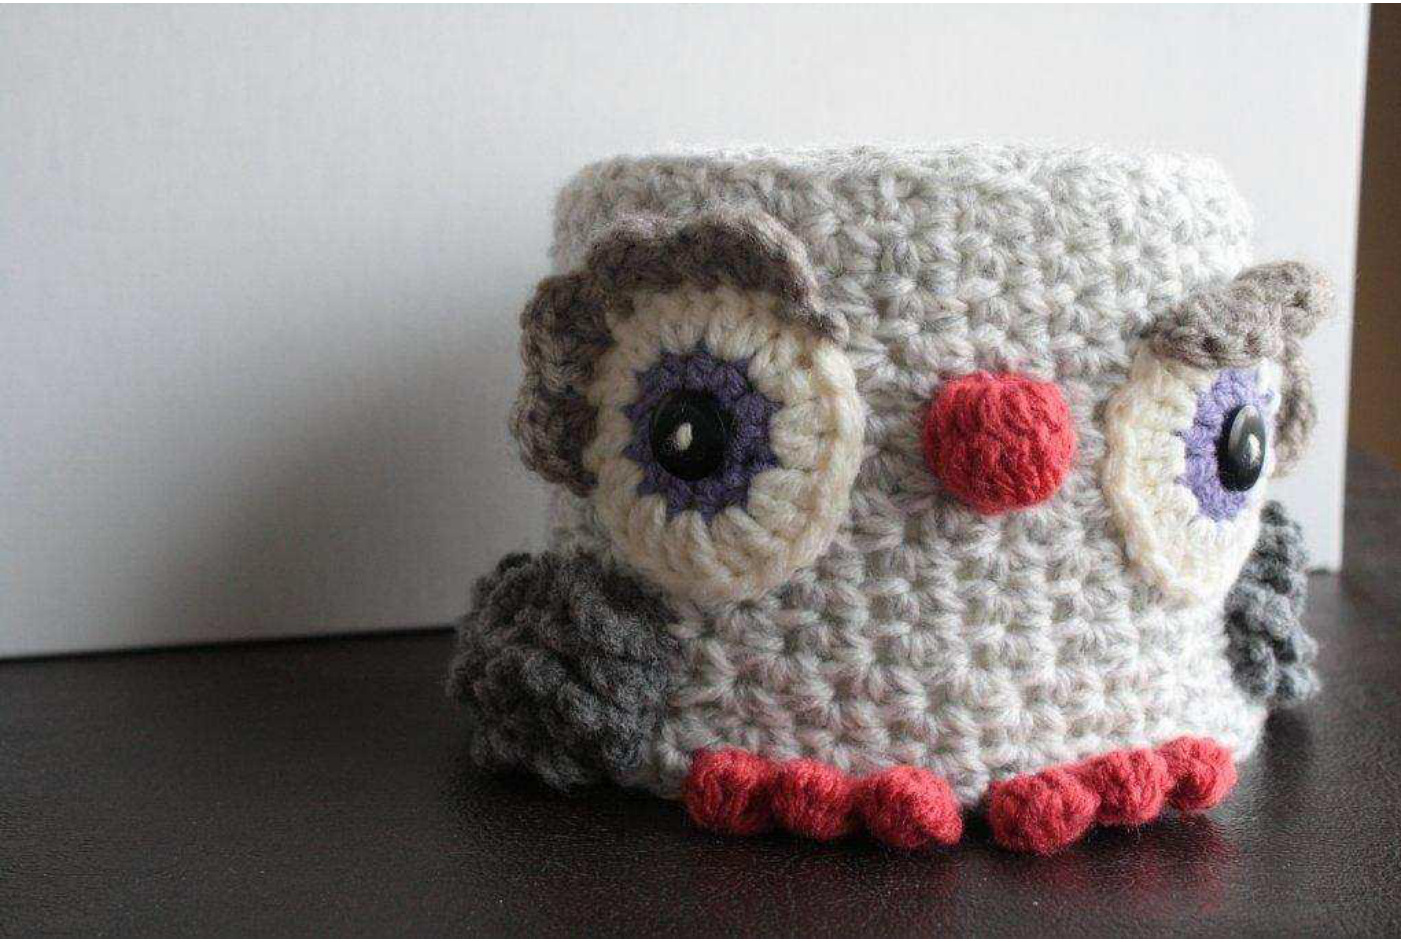
Little Owl TP Keeper
During a road trip with my Mother, I pulled out a ball of grey yarn to make a monkey hat. Mom looked away from the road and said “oh - that would make a sweet owl toilet paper cover!"' and so...I frogged the monkey hat and the little owl TP keeper was born! This pattern hasn't been “"tested" by anyone other than me - so - if you have any quirks, glitches, or generally want to mix a stiff drink and swear like a sailor because of my explanations - please let me know so that I can fix it! @ And thank you for taking the time to make my little TP Keeper!
Supplies:
Hook - 5mm 1 tapestry needle (to sew in ends and attach stuff) 2 black buttons Yarn - I used a worsted weight Bernat yarn in 6 colors (\*note - great project to use up the little bits that I didn't have the ambition to turn into granny squares! @) Colors: A) Body - variegated grey & white B) Nose & Toes - Orange-red C) Wings - Charcoal grey D) Eyebrows - Brownish grey E) Whites of the eyes -white F) Middle of the eyes - purple 1 roll of toilet paper to test for size
Stitches;
Sc - Single Crochet HDC - Half Double Crochet Bbl - bobble SK - skip Picot stitch
Eyes: (Make 2)
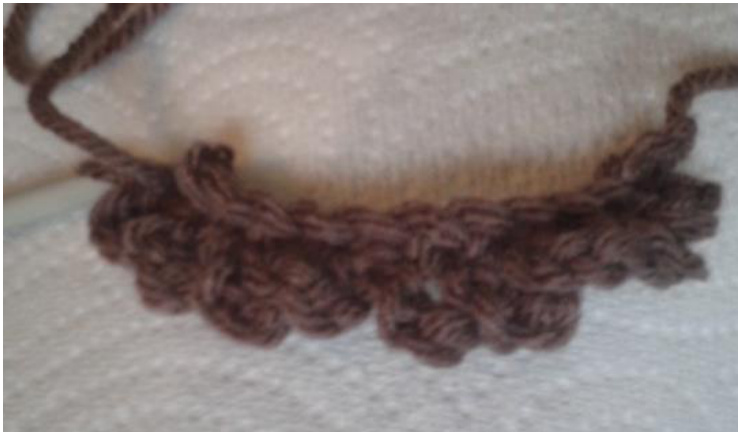
Row 1 - Using color F, make a magic ring with 6 stitches (6) Row 2 - 2HDC in each stitch around (12). Slip stitch last stitch into 1st stitch of the round and fasten off. Changeto color E. Row 3 - Attach color E to color F with slip stitch and chain 2. (this counts as 1st DC) DC in same stitch. 2Dc in each stitch around. (24). Slip stitch to top of ch 2 and fasten off. Eyebrows - The eyebrows are 4 shell stitches, made up of 4 DC's each that run across 13 stitches (#1 to #13). (See photo) Attach color D to color E with slip stitch ( stitch #1) DCx4 in stitch #2. Skip stitch #3 Slip stitch in #4 DCx4 in stitch #5 Skip stitch #6 Slip stitch in #7 DCx4 in stitch #8 Skip stitch #9 Slip stitch in #10 DCx4 in stitch #11 Skip stitch #12 Slip stitch in #13 and fasten off. To finish the eye, sew a black button into the center. When the eye is sewn to the body, be sure to sew around the white only, so that the ey

Wings; (Make 2)
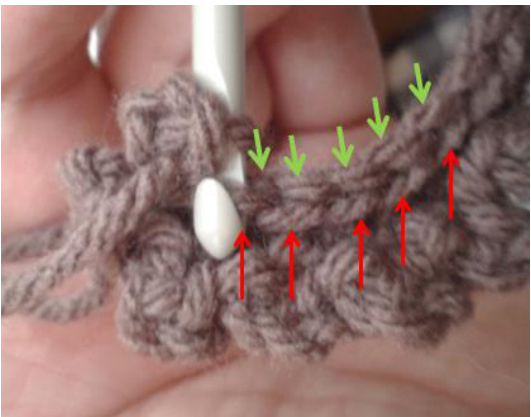
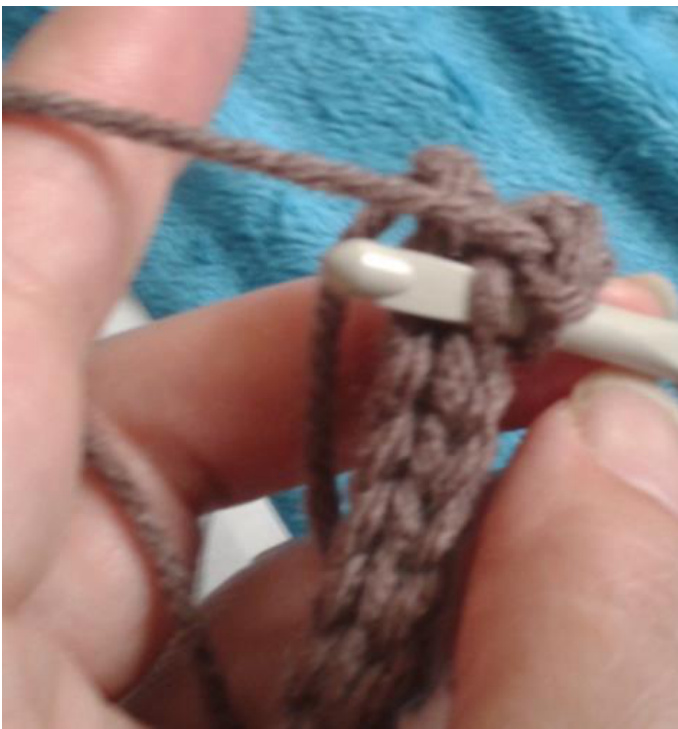
The wing “"feathers" are made up of a series of chain 3 from 1 stitch that is slip stitched into the next - it makes "loops" that act as feathers when done. When stitching the feathers across, they are stitched in the outside post only (see the red arrows in the pic) . The next row will be a SC across in the back side of each stitch. (See green arrows)
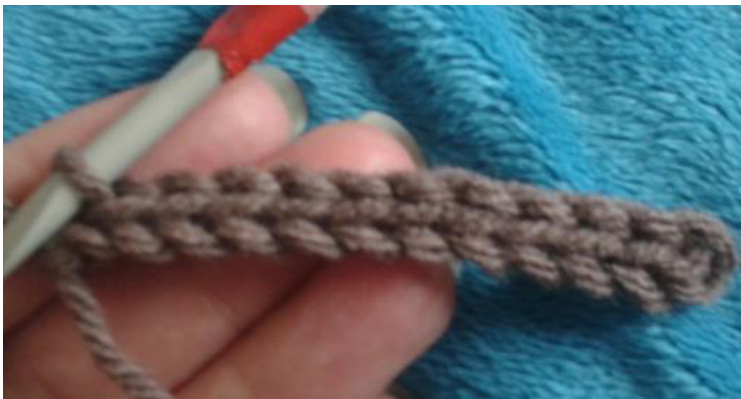
Row 1 - Using color C, Chain 12 (12) Turn and Slip stitch into each stitch of chain. (11)
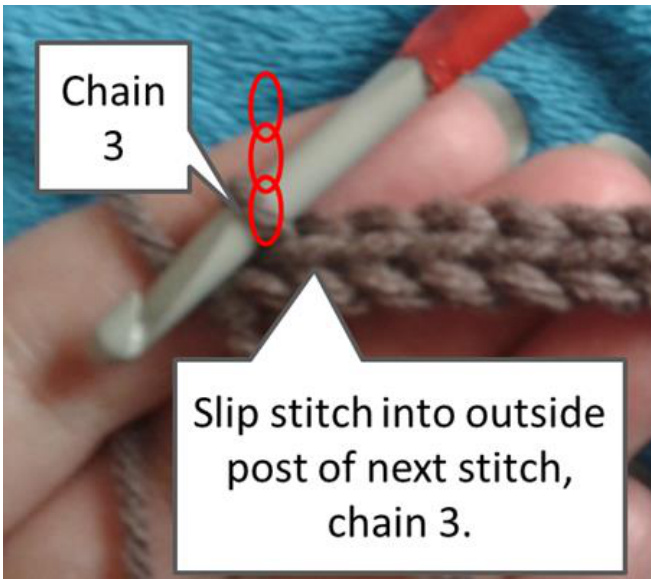
Row 2 - (stitch into outside post only) Chain 3, slip stitch in next stitch, chain 3, slip stitch in next stitch -repeat to the end.
Row 3 - Chain 3 and turn. SC in the outside post of each stitch across, starting with the 2nd stitch from the end. (1o)
Continue to repeat rows 3 and 4 until your wing is the size you want. Fasten off and leave a long tail for sewing onto the body.
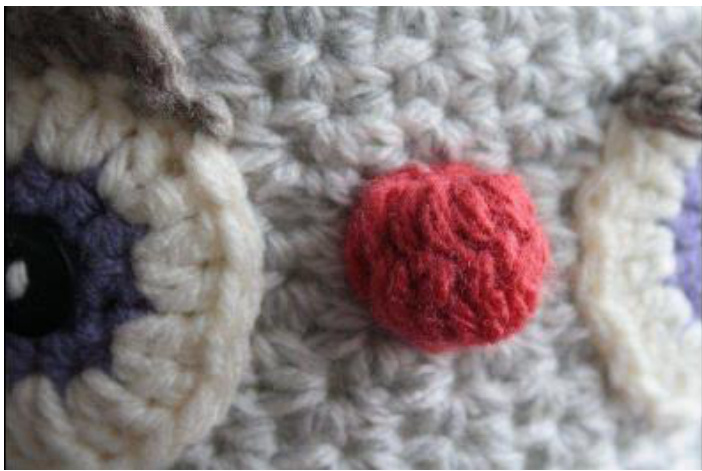
Nose (Make1 @ )
Using color B, chain 4. Slip stitch into 1st stitch of chain to form a right. Make an 8 stitch bobble into the ring. Yarn over hook, insert hook through ring and draw up a loop. Yarn over hook and pull through 1st 2 loops on hook. Repeat until you have 8 loops on your hook, then yarn over and pull through all 8 stitches. Fasten off.
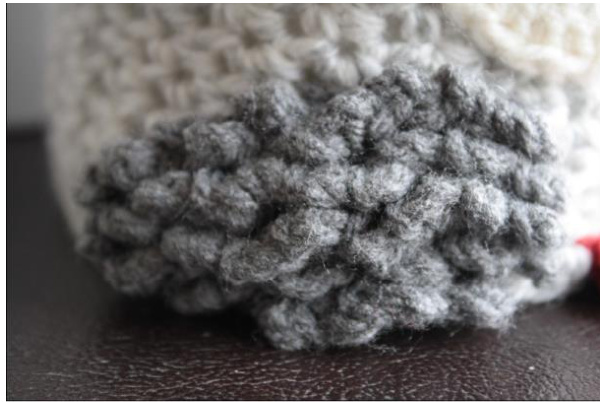
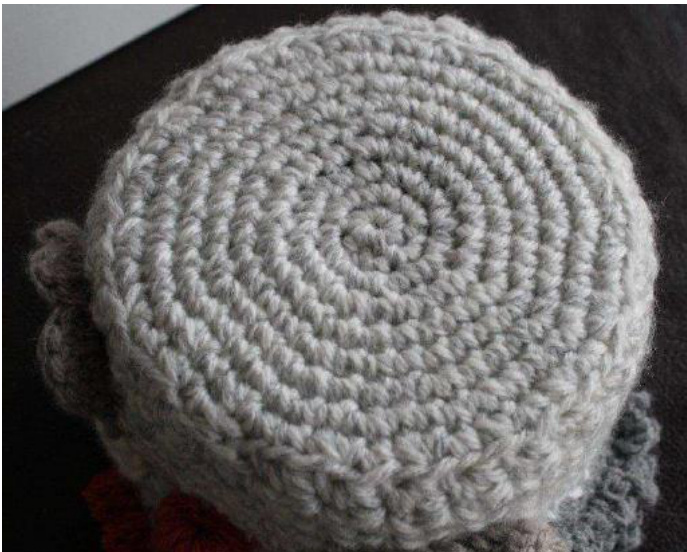
The Top... the pic below is of my first attempt, using HDC's around. The 2nd one, though, turned out a little better, using DC's around..I forgot to take pics of that one - but wrote up the instructions using the DC. 1. Starting with a magic ring with 6 stitches 2. 2 DC in each stitch around (12) 3. 2 DC in each stitch around (24) 4. 2 DC in 1st stitch, DC in next stitch - repeat around (36) 5. 2 DC in 1st stitch, DC in next 2 stitches- repeat around (48) 6. 2 DC in 1st stitch, DC in next 3 stitches - repeat around (60) 7. 2 DC in 1st stitch, DC in next 4 stitches - repeat around (72) \*note\* Continue to increase, until your circle is the same size as the top of your roll of toilet paper, then add 1 row. Slip stitch to the beginning stitch to finish the top - the body will be stitched in rows. The Bod... In the outside stitch only, sc in each stitch around. Slip stitch to the beginning stitch and chain 1. Skip the first stitch, HDC & SC in next stitch, skip next stitch stitch to beginning stitch. Repeat this row until the height matches the height of your roll of toilet paper, and then add 1 row. Slip stitch to beginning stitch in the row and fasten off.
Finishing;
Attach eyes, nose and wings. When you attach the eyes, make sure to stitch around the whites of the eyes only. The eyebrows should stay all“sticky-uppy", and not lay flat against his face. (See pic from page 2)
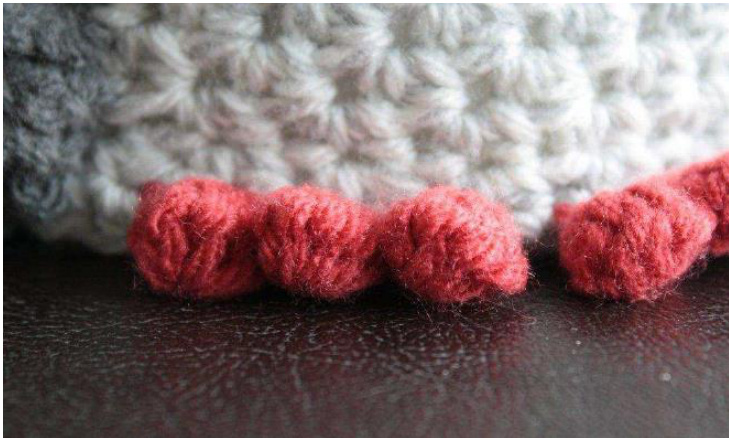
Toes
I have no idea what this is called, but the toes are bobble stitches that are stitched into a foundation SC's that has been stitched into body. Figure out where you want the toes to go, and using color B, slip stitch into the bottom row of the body, and SC in next 5 stitches. Turn, and Bobble into the 1st stitch, slip stitch into the next, bobble into the next, slip stitch in to the next, Bobble into the next, slip stitch into the next and fasten off. Weave in ends. Repeat this for the 2nd “foot".
Taa-Daaa! @ As long as my pattern wasn't too crazy, you should have your very own Little Owl TP Keeper! As I said before - please please pretty-please let me know if there are any glitches, goofs or groans in my pattern and I'll be happy to fix them right away! Happy stitching!