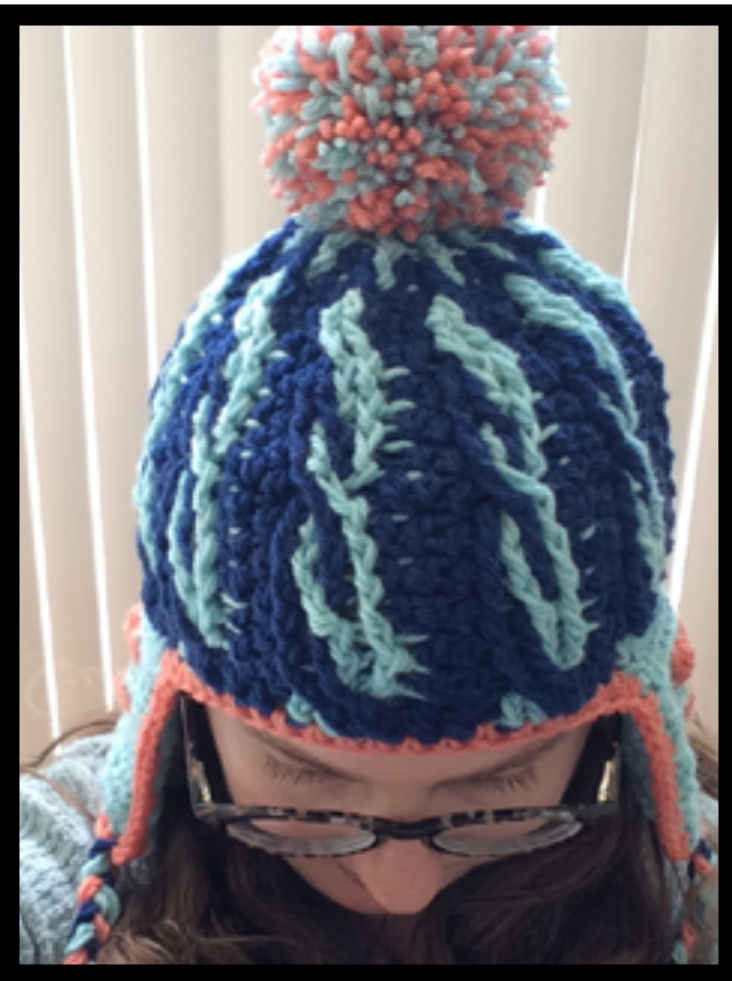
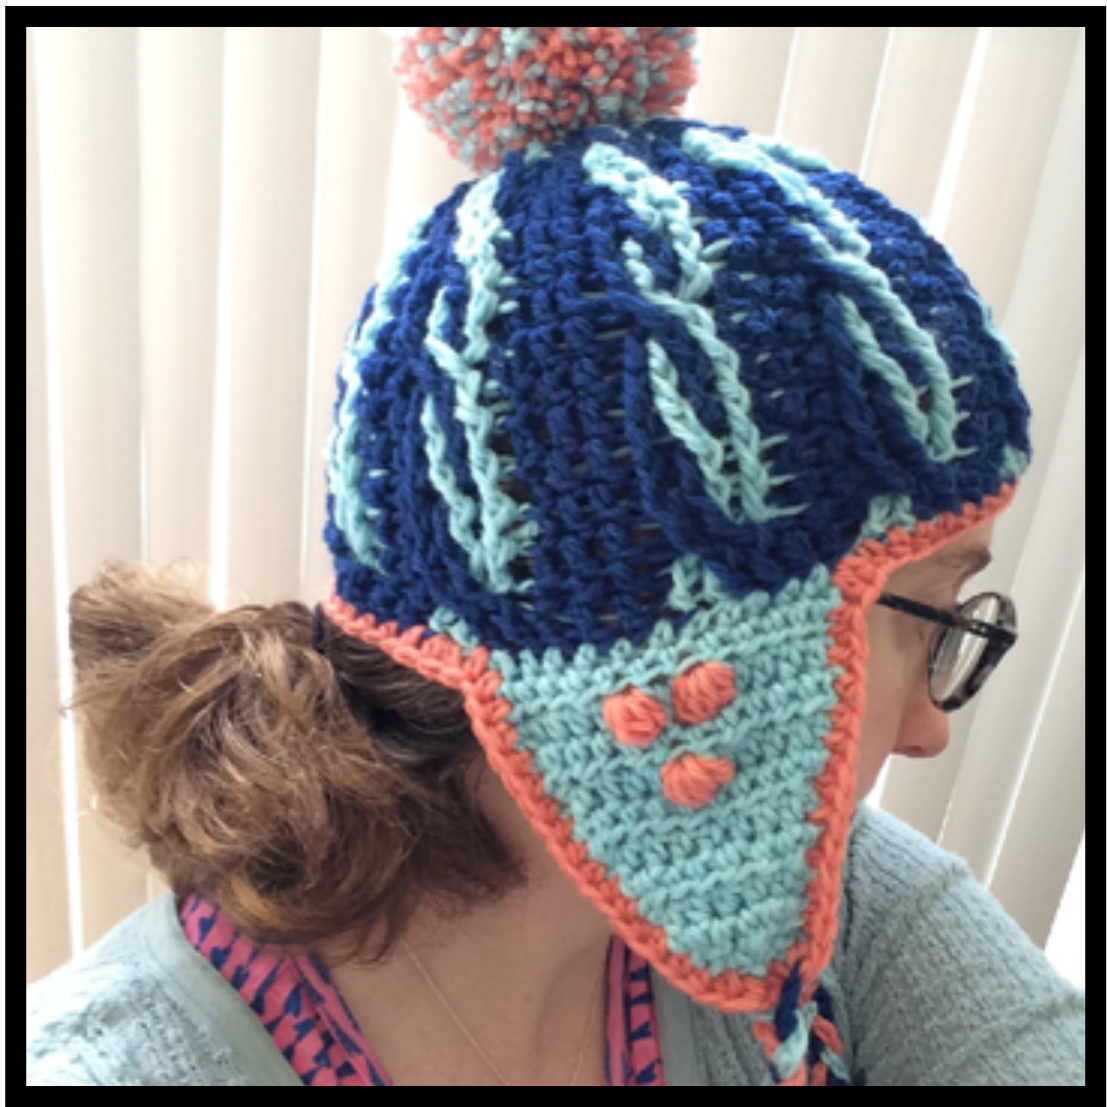
Crazy Dave's Magic River Hat
Kitty-Ears.com
Things you need:
1) 400 yards worsted weight yarn. (200 base color and 200 contrast color--I had cc yarn left over, ran out of base color because I only had 100 yards, so I used orange.)
2) Size 4.0 mm crochet hook
Gauge is hard to say, because of the fpdc and the cabling! After the increase section, one repeat of the pattern measures 1.5 inches. Gauge for the hdc ear part is 3.5 hdc sts per inch. Finished hat measures: 9.5 x 7 inches not including ear flaps or pompom (hat layed flat) ear flaps: 4 x 5 inches, not including tails. I added 12 inch braided tails to each flap, and a huge 5 inch pom to the top
Terms Used: Magic circle: use a loop of yarn to start crocheting ch: chain sl st: slip stitch dc: double crochet sc: single crochet colorwork: two colors are used throughout the hat. hold the unused color behind the work when crocheting, do not pull taunt. mc: main color of yarn cc: contract color of yarn fpdc: front post double crochet cable: we will cable stitches by fpdc into stiches and then going back to other sts to twist. We cable one, and two stitches in this pattern. hdc: half double crochet hdc2tog: hdc two stitches together to make one st. hdc3tog: hdc three stitches together to make one st nupp: bobble st. in one stitch make 5 hdc sts without pulling through the last loop. pull through with mc yarn to make a nupp/bobble
Two things you should know: chains never count as stitches, and you will always sl st with the main color when finishing a round. R1: Magic circle, ch 2. 10 dc into ring with main color (mc), sl st to join (10 dc) R2: Ch 2 and grab your second color (cc). we will be doing \*1 dc with mc, then fpdc into that same st with the cc, repeat from \* around, sl st to join in the round in mc (20 sts)
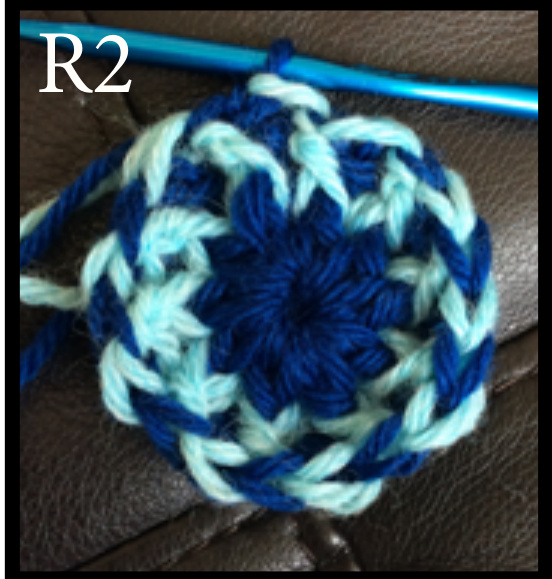
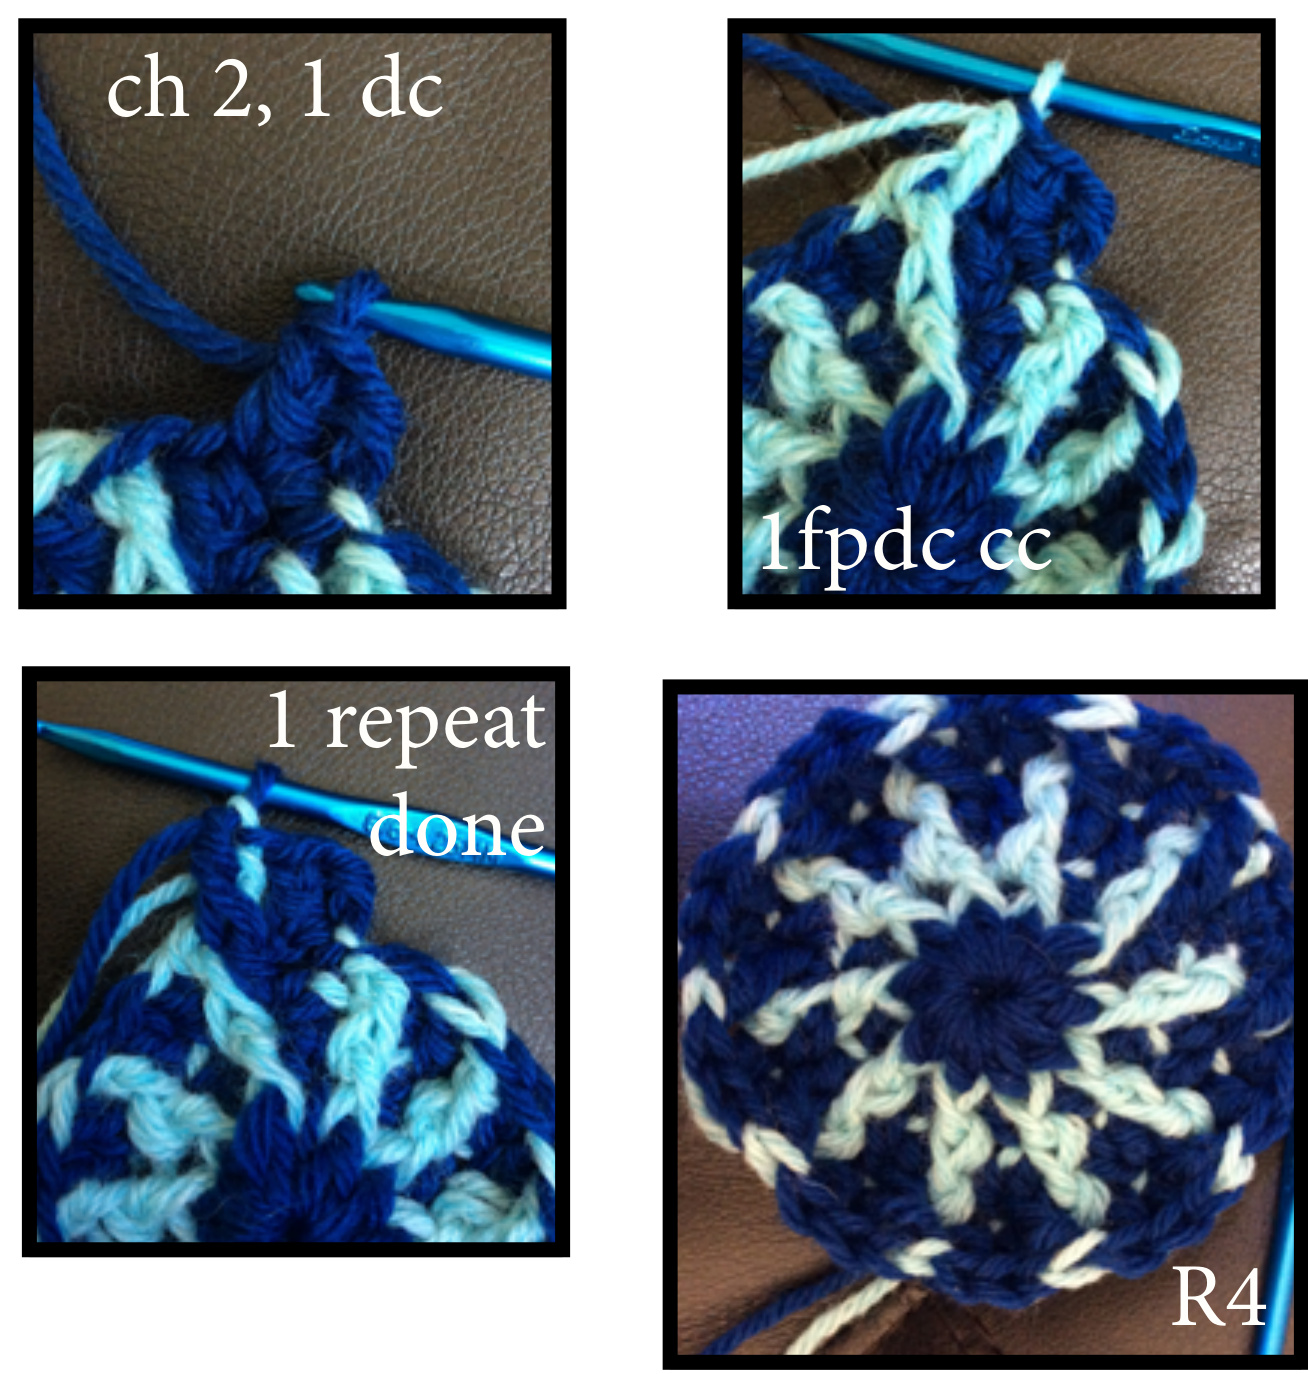
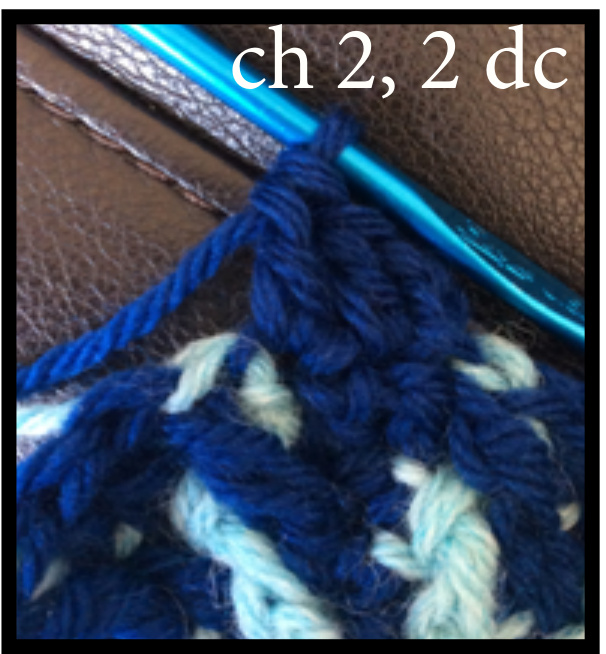
R3: ch 2. \*2 dc mc, 1 fpdc cc, repeat from \* around. (30 sts) The fpdc is performed into the previous row 2 fpdc
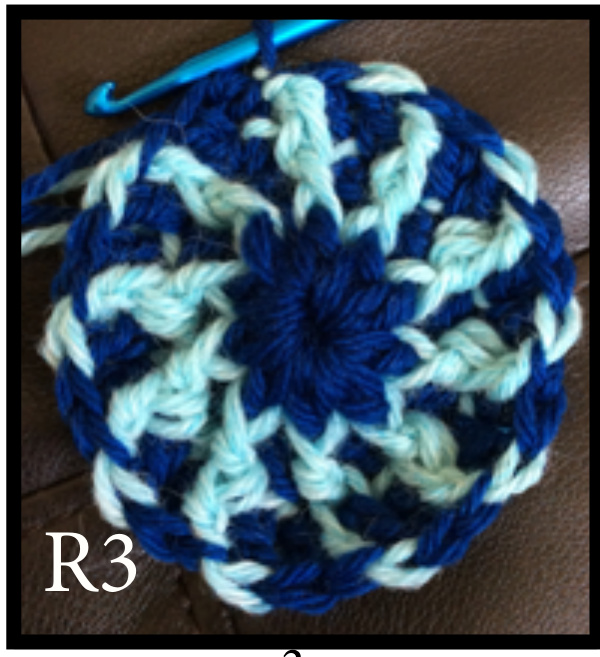
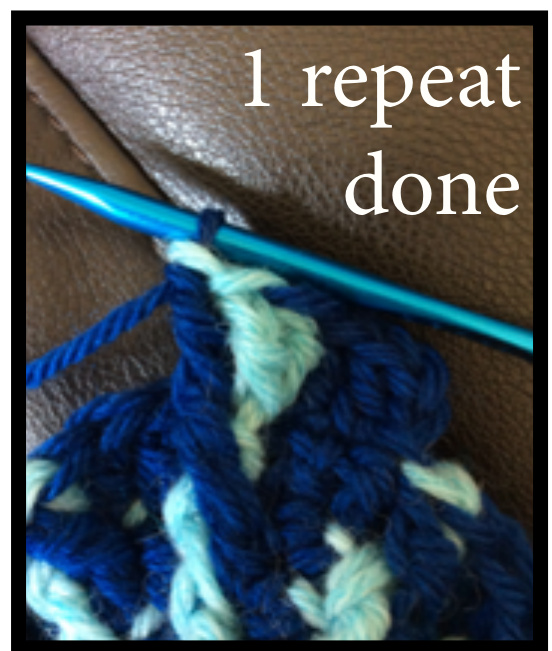
from this point on, all contract color (the light blue) is always worked fpdc into the cc from the row before. R3: ch 2. \*2 dc mc, cable with 1 fpdc cc, then cable back with 1fpdc mc repeat from \* around, sl st. We are twisting the cc with the main color here. (40 sts)
Need to find me? (clickable links below!) On Ravelry @moonofsilver On Twitter @moonofsilver

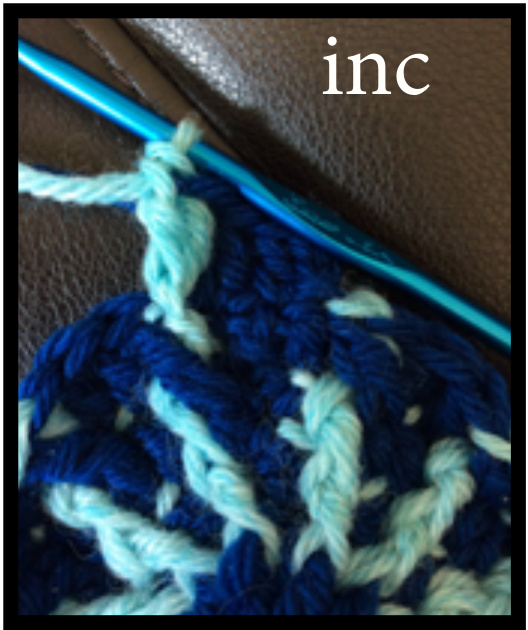
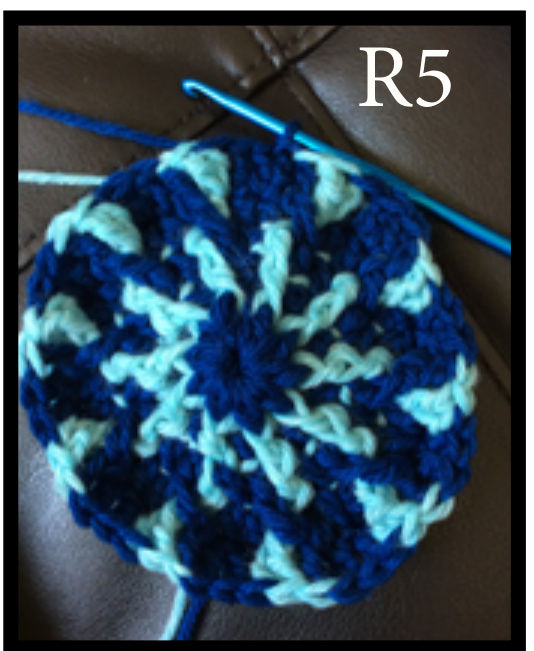
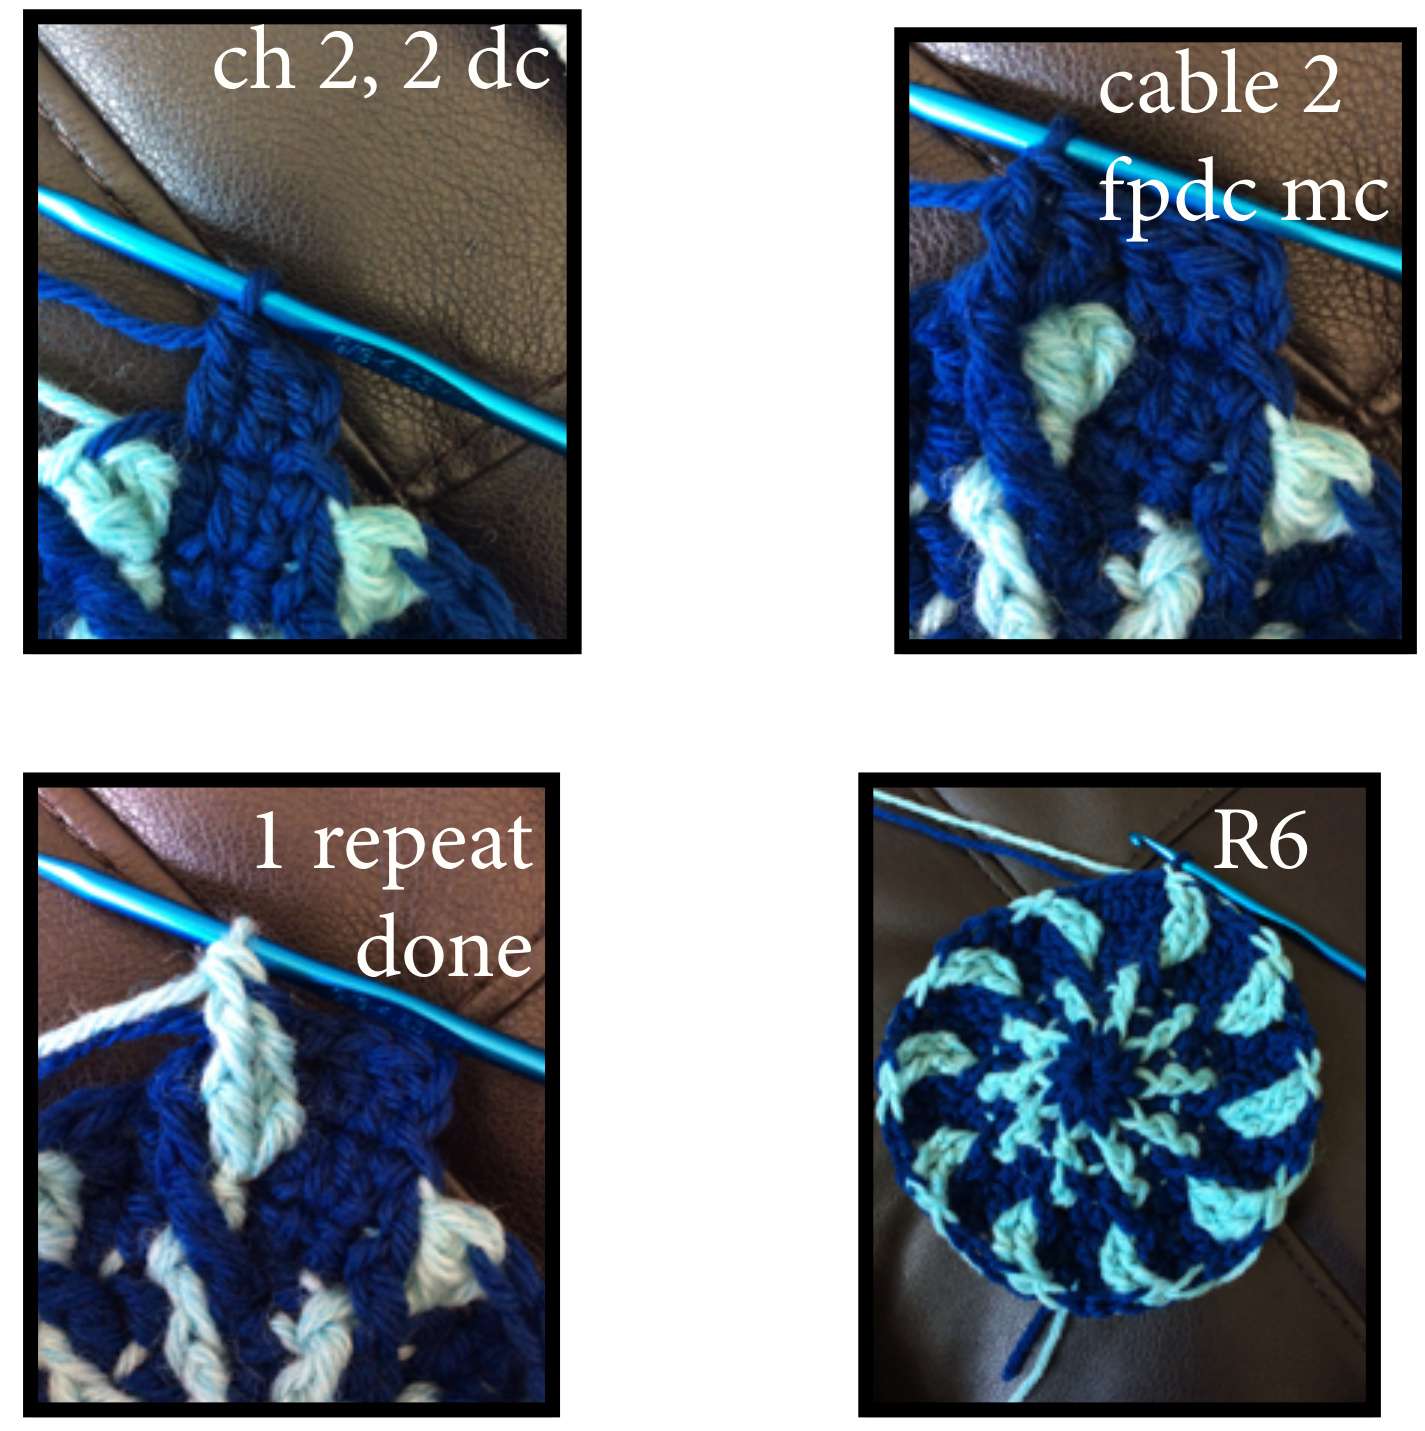
R5: ch 2. \*2 dc mc, 2 fpdc cc (this is the increase, you will do two fpdc in cc into the cc fpdc from row 4), then 1fpdc mc repeat from \* around, sl st. (50 sts)
R6: ch 2. \*2 dc mc, cable 2 fpdc mc (this is the increase, you will do two fpdc in mc into the 1 mc fpdc from row 5), then cable back 2fpdc cc repeat from \* around, sl st. (50 sts)
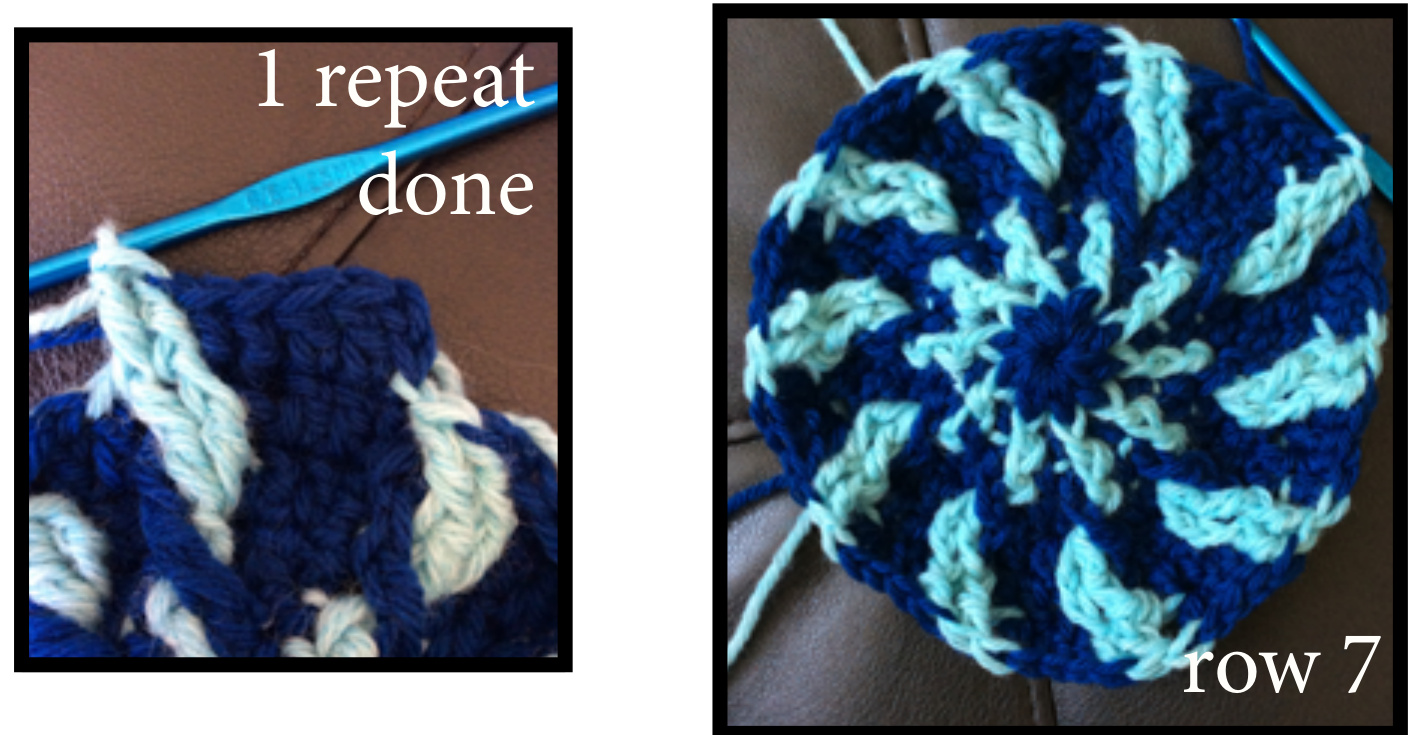
R7: ch 2. \*2 dc mc, 2 fpdc mc, 2 fpdc cc repeat from \* around, sl st. (60 sts)
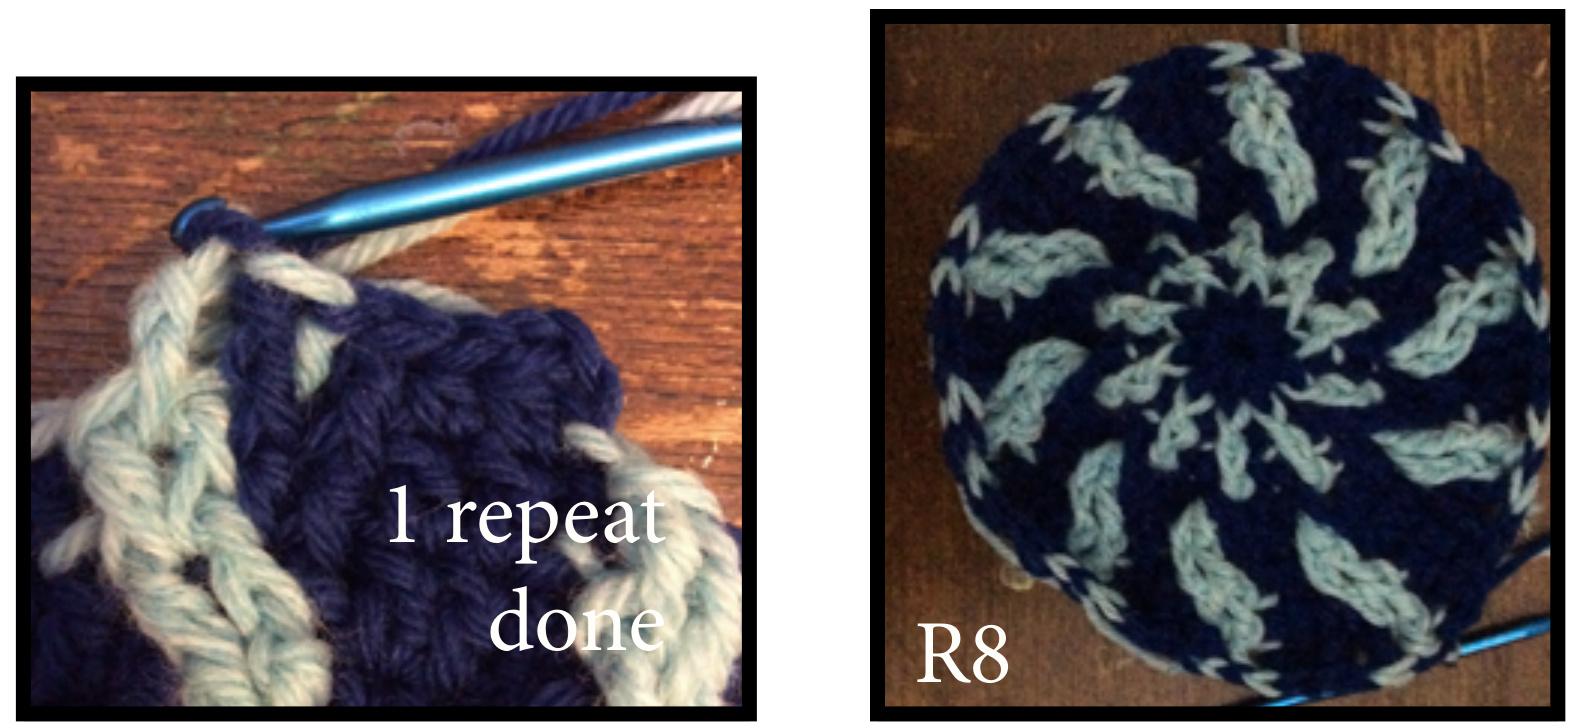
R8: ch 2. \*2 dc mc, 1 fpdc mc, cable one cc, cable back mc, 1 fpdc cc repeat from \* around, sl st. (here we are cabling the two center fpdc stitches) (60 sts)
R9: ch 2. \*2 dc mc, fpdc mc, fpdc cc, fpdc mc, fpdc cc repeat from \* around, sl st. (60 sts) This row you just dc the dc sts and fpdc the fpdc sts in their colors.

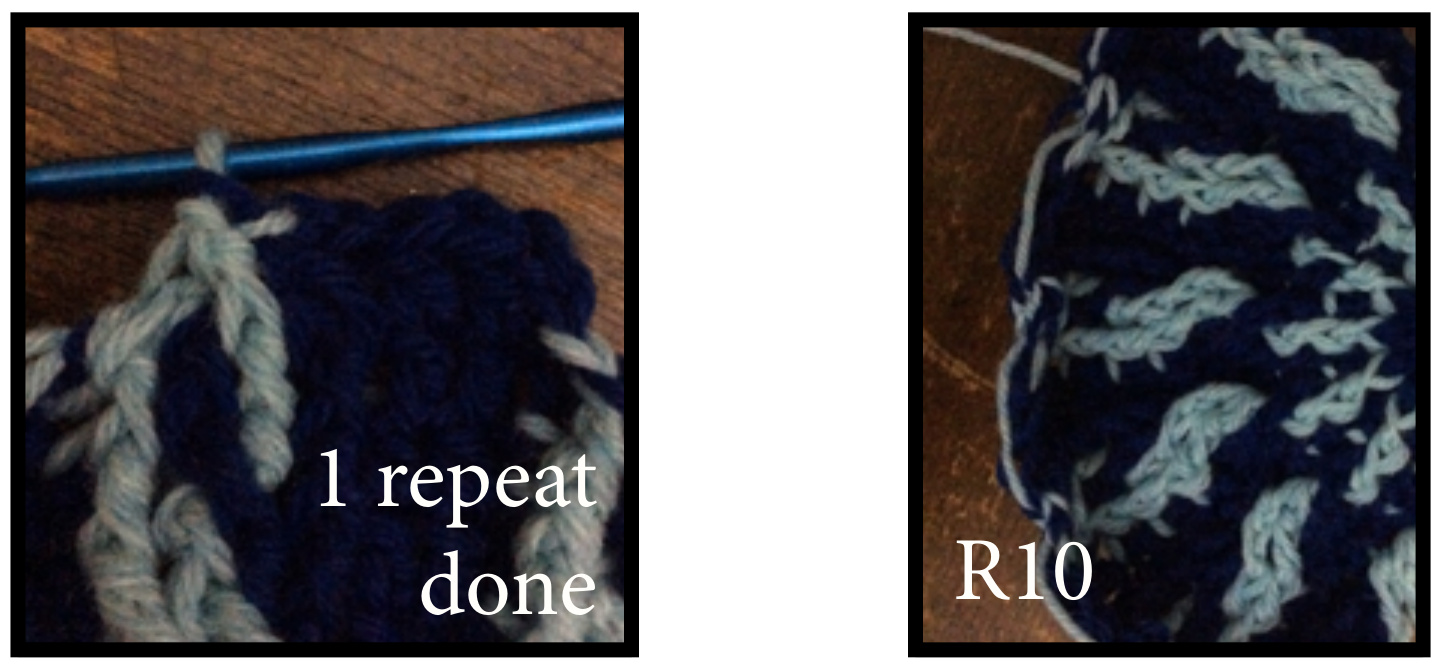
R10: ch 2. \*2 dc mc. cable two foward: fpdc cc, fpdc mc, then go back to grab the last two sts: fpdc mc, fpdc cc. (60 sts) what you are doing here is cabling those four fpdc sts, braiding the last two sts behind the first two sts
R11: ch 2. \*2 dc mc, fpdc mc, fpdc cc, fpdc mc, fpdc cc repeat from \* around, sl st. (60 sts) This row you just dc the dc sts and fpdc the fpdc sts in their colors.
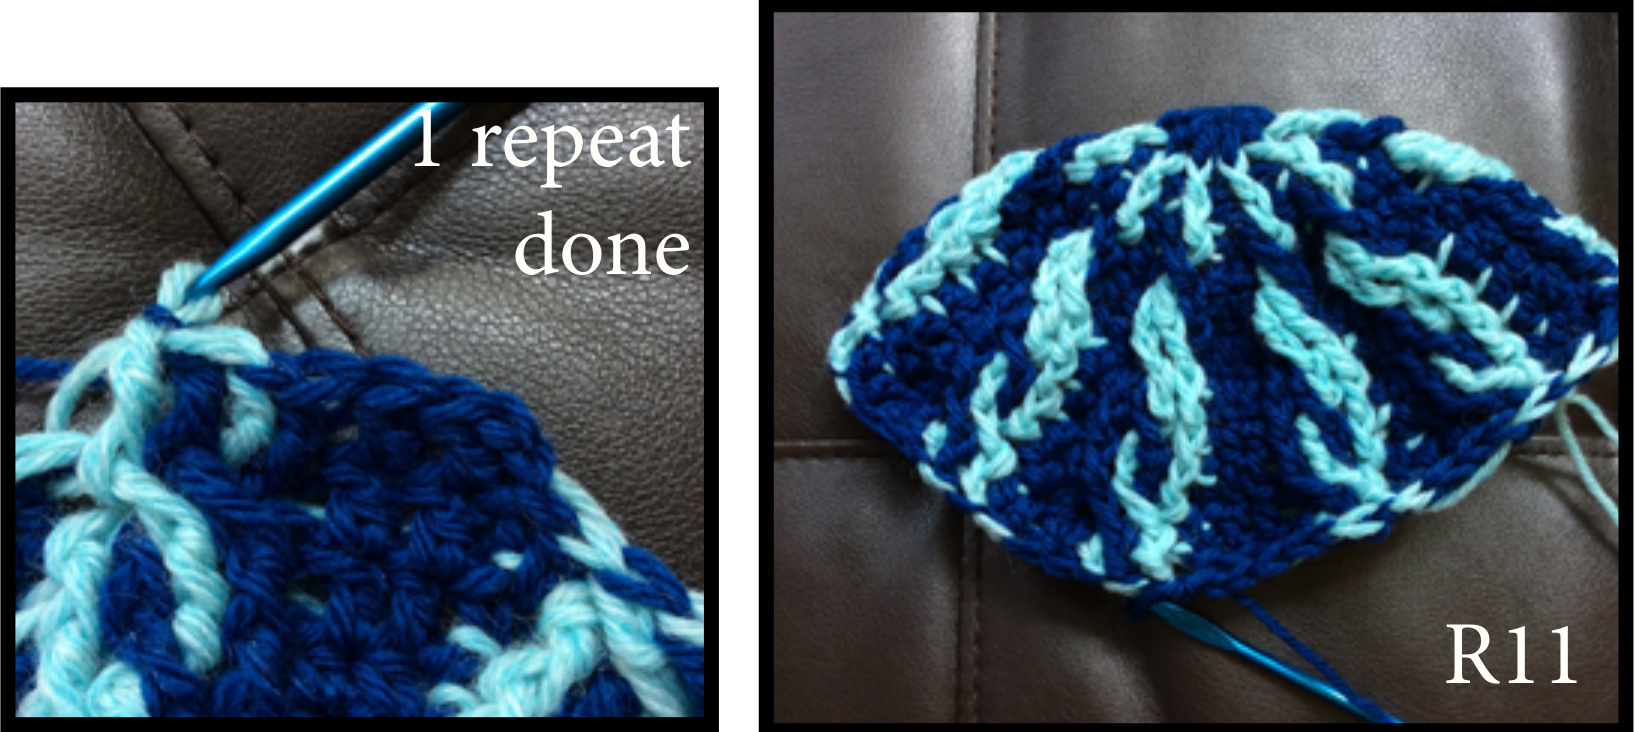
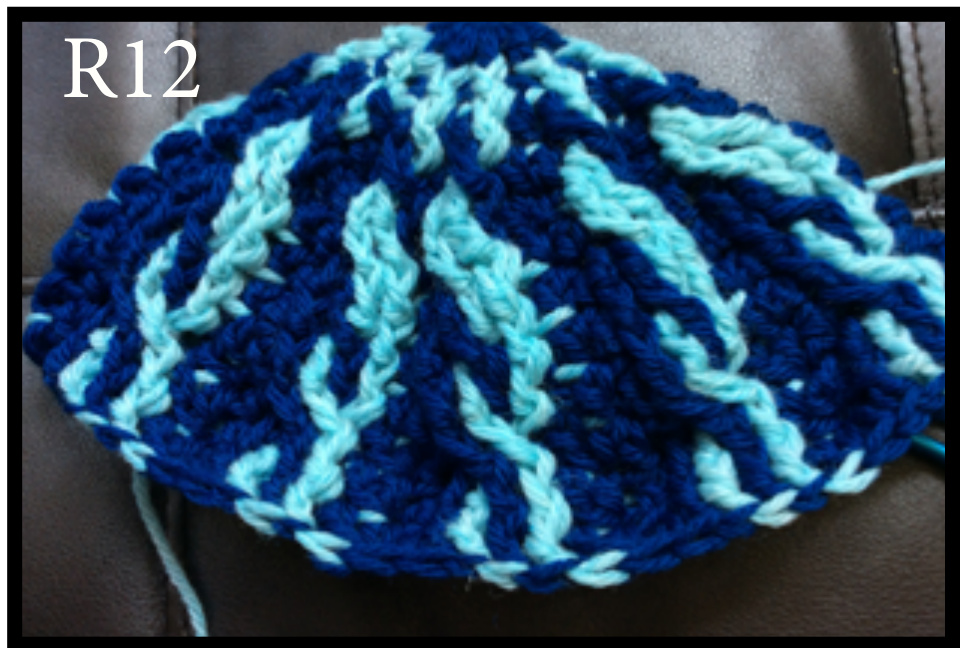
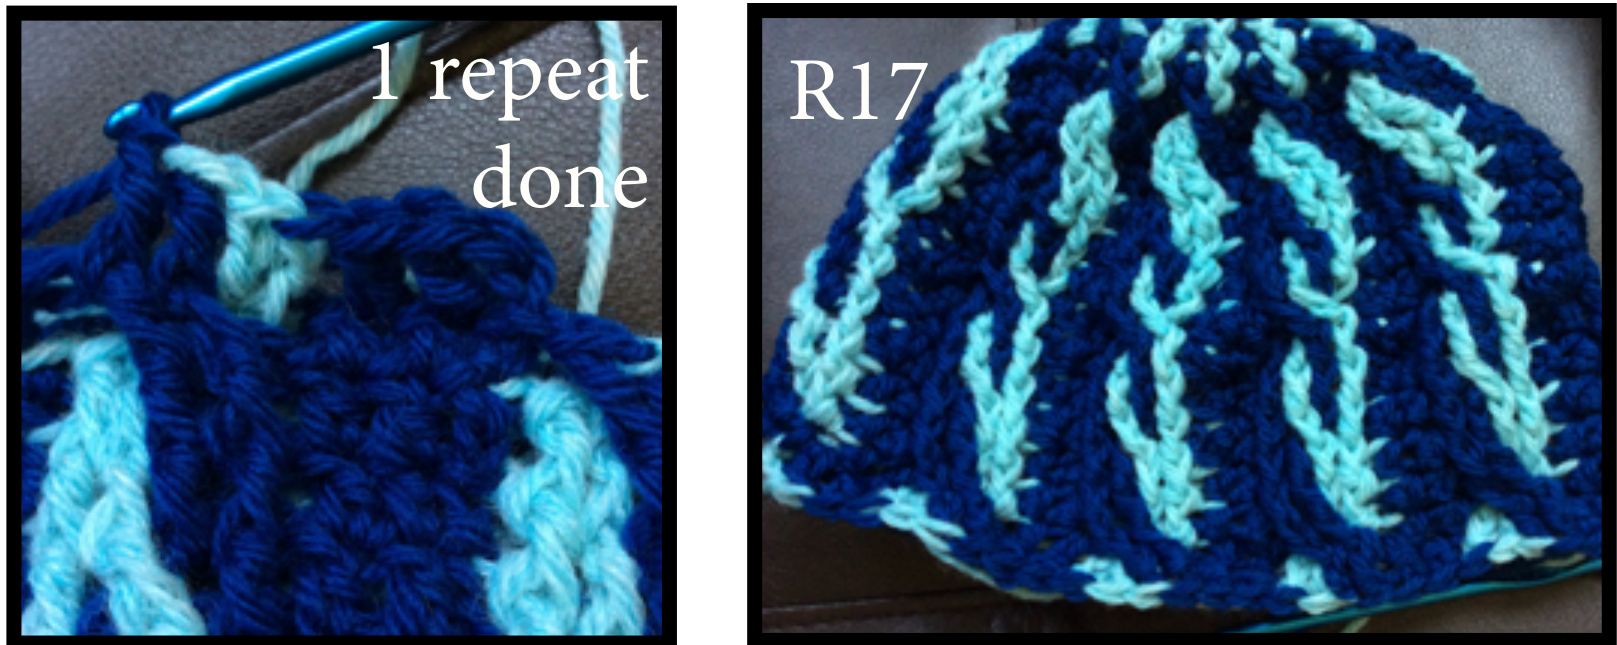
R12: ch 2. \*2 dc mc, fpdc mc, fpdc cc, fpdc mc, fpdc cc repeat from \* around, sl st. (60 sts) This row you just dc the dc sts and fpdc the fpdc sts in their colors. Also, R11 and R12 are the same, so I didn't take a "1 repeat done" picture.
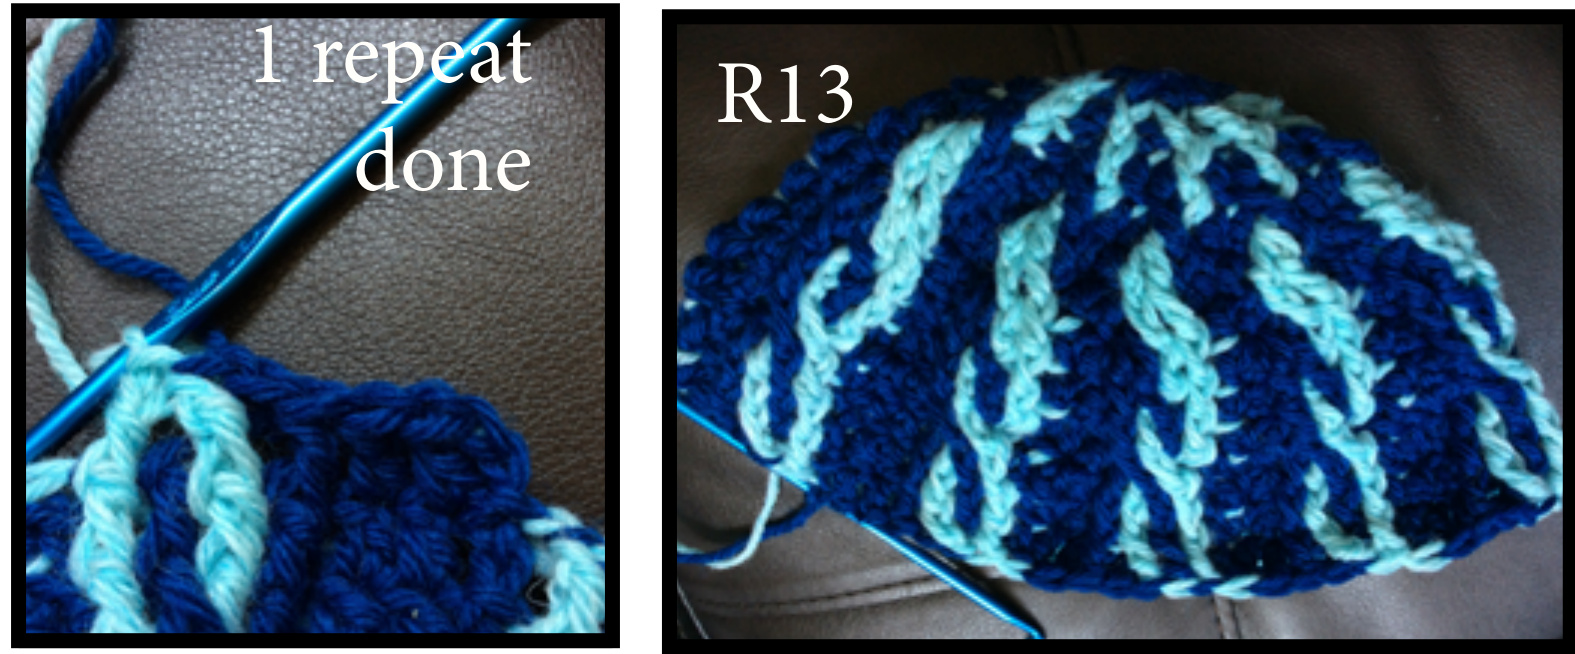
R13: ch 2 \*2 dc mc, fpdc mc, cable fpdc mc, cable back fpdc cc, fpdc cc, repeat from \* around, sl st (60 sts) We are cabling the two middle fpdc sts in this round.
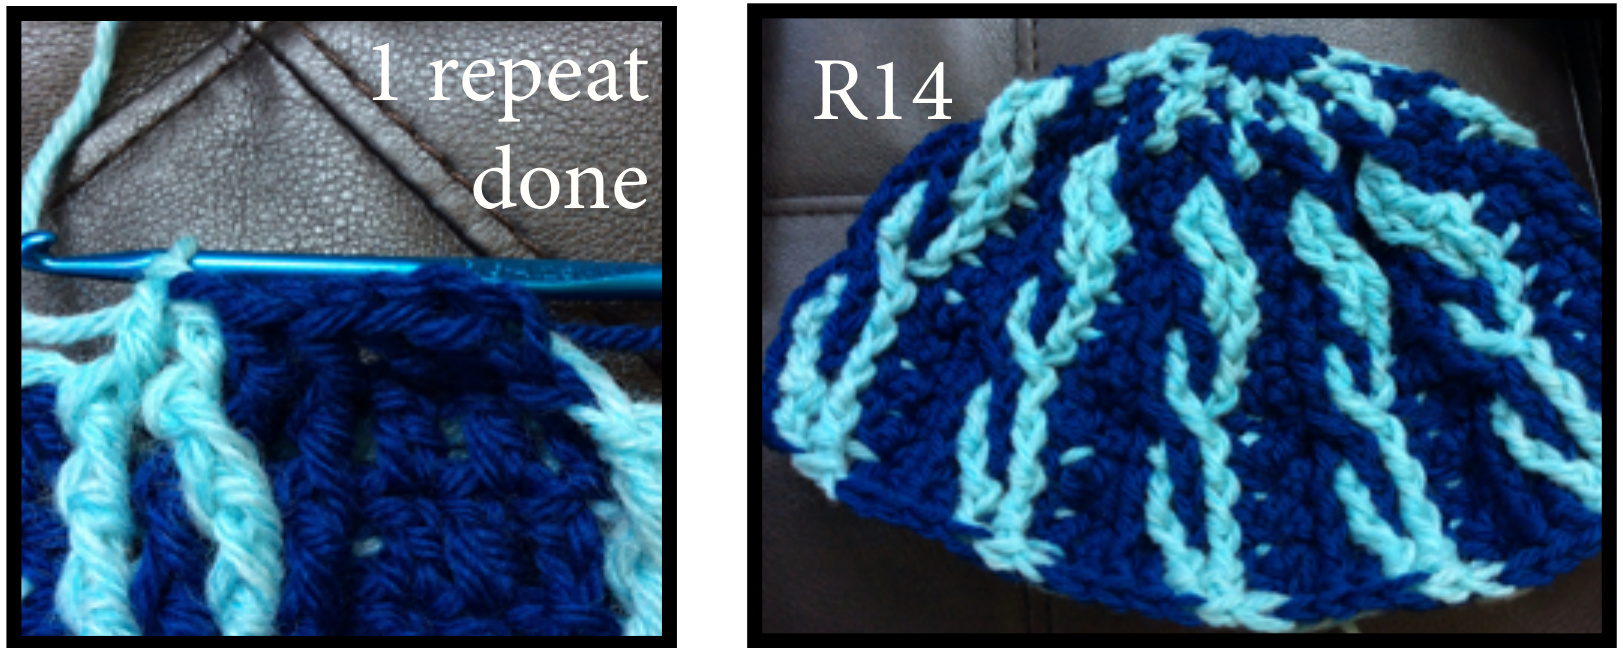
R14: ch 2. \*2 dc mc. 2 fpdc mc, 2fpdc cc, repeat from \* around, ch 2. This row you just dc the dc sts and fpdc the fpdc sts in their colors. (60 sts)
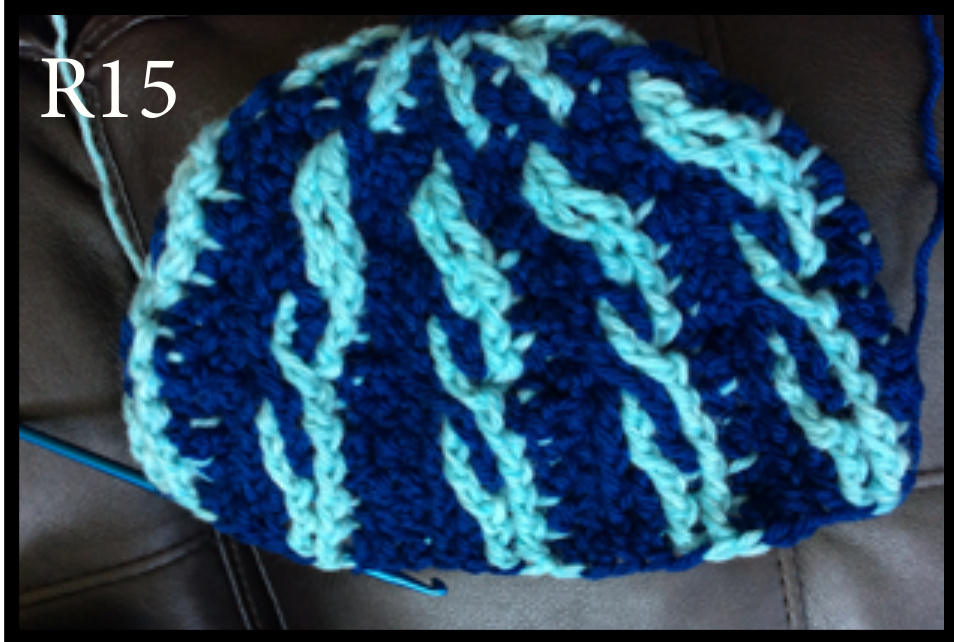
R15: ch 2. \*2 dc mc. 2 fpdc mc, 2fpdc cc, repeat from \* around, ch 2. This row you just dc the dc sts and fpdc the fpdc sts in their colors. Row 14 and 15 are the same (60
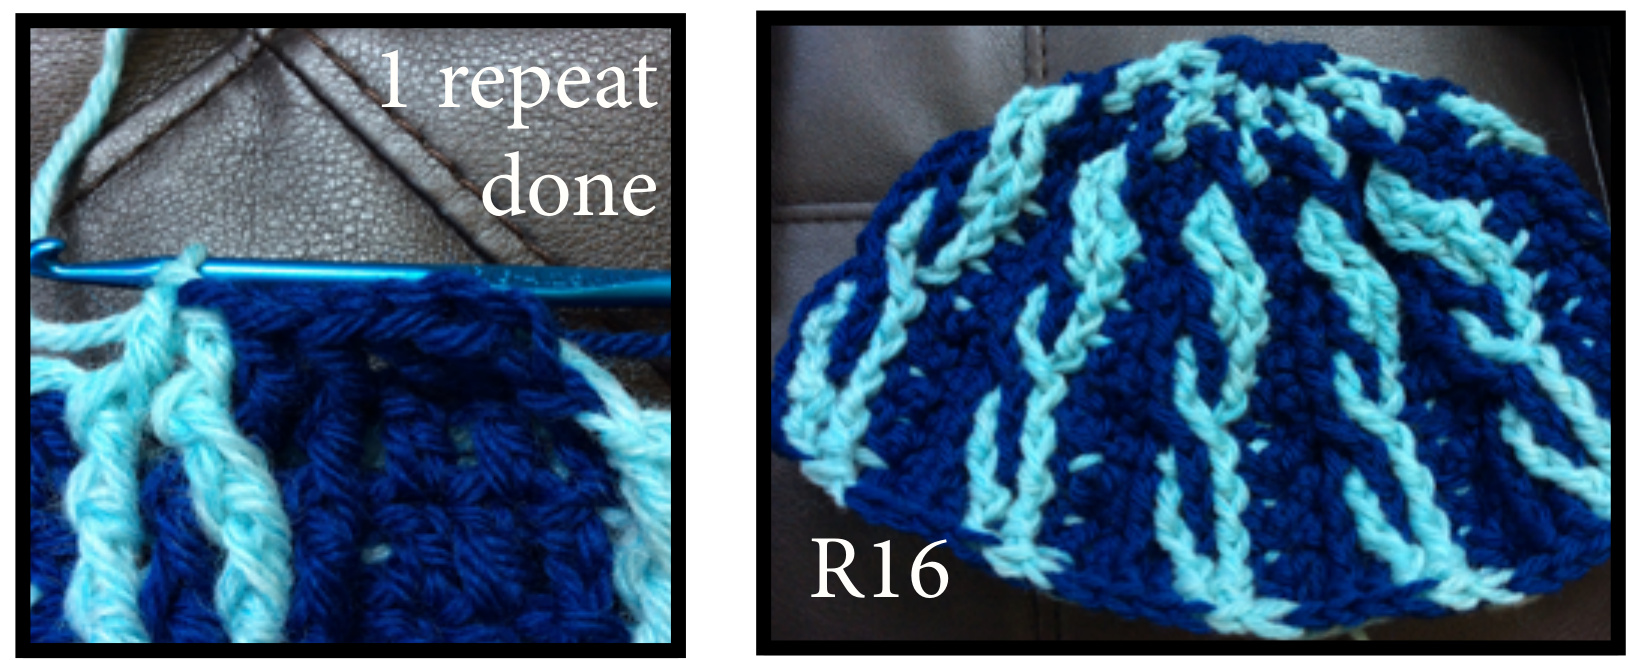
R16: ch 2 \*2 dc mc, fpdc mc, cable fpdc mc, cable back fpdc cc, fpdc cc, repeat from \* around, sl st (60 sts) We are cabling the two middle fpdc sts in round.
R17: ch 2 \*2 dc mc, 2fpdc cc, 2 fpdc mc, repeat from \* around, ch 2. (60 sts)
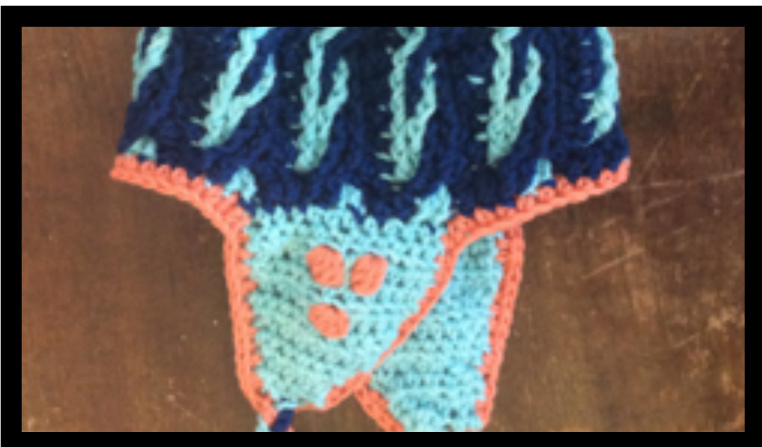
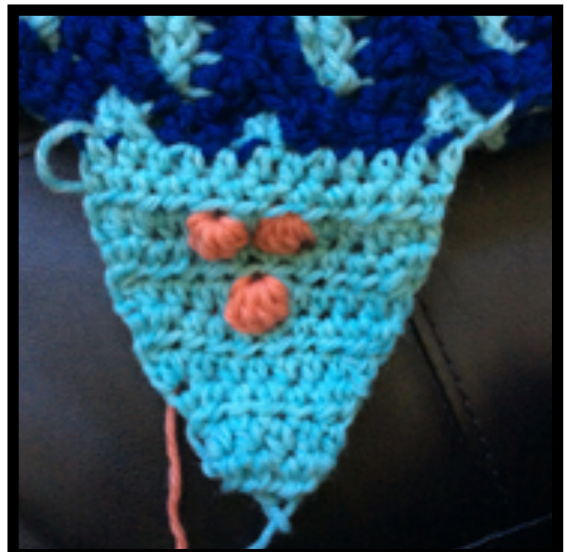
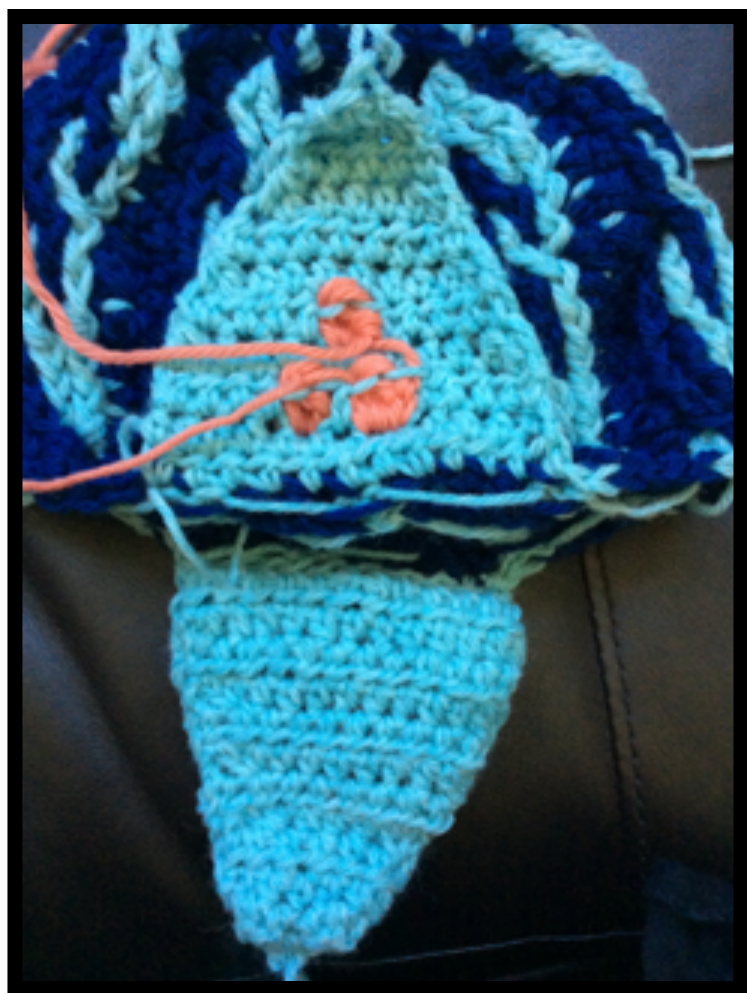
R18: ch 2 \*2 dc mc, 2fpdc cc, 2 fpdc mc, repeat from \* around, ch 2. (60 sts) R18 is the same as R17 so I didn't take any pictures. Cut yarn. We are done with the hat! Okay, so I ran out of dark blue yarn at this point, so I decided to make my ear parts light blue with orange bobbles. You can use the same colors as your hat or mix it up like I did. Using stitch markers we will mark the first ear. Place a stich marker on one stitch and 11 stitches from that stitch place another marker. Each ear will be 12 stitches. Ear 1:Starting with right side of hat facing you. R1: pull up a st, ch 1. 12 hdc R2: ch 1, 12 hdc R3: ch 1, 4 hdc, 1 nupp, 1 hdc, 1 nupp, hdc to end R4: hdc2tog, hdc until last 2 sts, hdc2tog (10 sts) R5: ch 1, 4 hdc, nup, hdc until end R6: ch 1, hdc2tog, hdc until last 2 sts, hdc 2 tog (8 sts) R7: ch 1, hdc all sts R8: hdc 2 tog, hdc until last 2 sts, hdc 2 tog (6 sts) R9: hdc all sts R10: hdc 3 tog, hdc 3 tog R11: ch 1, 2sc Leave a long tail, cut yarn. Ear 1 back: Ch13. R1: skip first ch, 12 hdc R2: ch 1, 12 hdc R3: ch 1, 12 hdc R4: ch 1, hdc2tog, hdc until last 2 sts, hdc2tog R5: ch 1, 10 hdc R6: ch 1, hdc2tog, hdc until last 2 sts, hdc2tog R7: ch 1, 8hdc R8: ch 1, hdc 2 tog, hdc until last 2 sts, hdc2tog R9: ch 1, 6 hdc R10: ch 1, hdc3tog, hdc3tog R11: ch 1, 2 sc.
Leave long. tail, cut yarn and sew to ear 1 around the edges. Weave in all ear yarn. Ear 2: Ear two starts 18 stitches from one end of your first ear. place a stitch marker on the 19th stich, and then count over 12 more stitches and place a marker on the 12th stitch. You can also put the hat on your head and mark where the other ear should be--definitely try it on to make sure the placement is right. Ear 2: start with right side of hat facing you. R1: pull up a st, (where the marker is) ch 1. 12 hdc R2: ch 1, 12 hdc R3: ch 1, 4 hdc, 1 nupp, 1 hdc, 1 nupp, hdc to end R4: hdc2tog, hdc until last 2 sts, hdc2tog (10 sts) R5: ch 1, 4 hdc, nup, hdc until end R6: ch 1, hdc2tog, hdc until last 2 sts, hdc 2 tog (8 sts) R7: ch 1, hdc all sts R8: hdc 2 tog, hdc until last 2 sts, hdc 2 tog (6 sts) R9: hdc all sts R10: hdc 3 tog, hdc 3 tog R11: ch 1, 2sc
Leave a long tail, cut yarn. Make ear two back just like ear one.
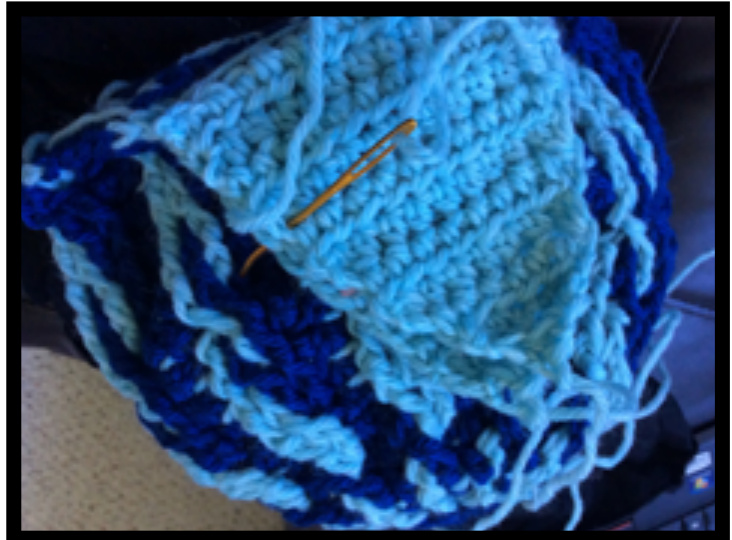
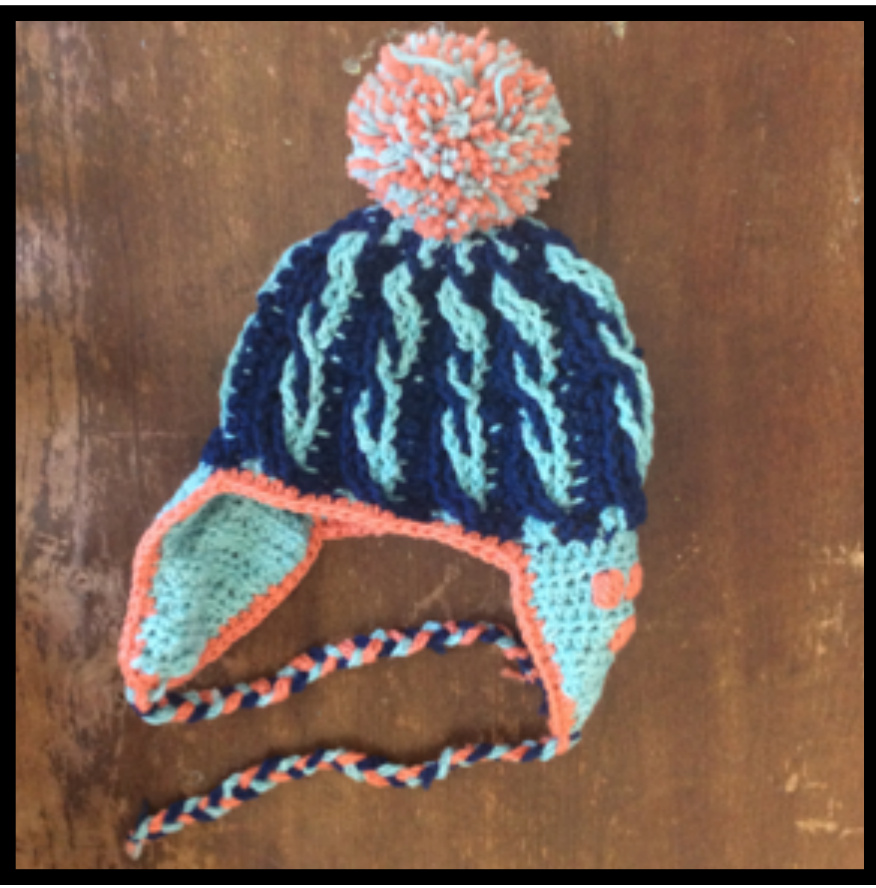
Finishing: I hdc all around the hat, ears included, in orange, and added a pom pom. I also added strings by chainging yarn and braiding it together. Just chain, attach, and braid. Enjoy your hat!
Need help with a pattern? am always willing to help! With a small child, it may take awhile for me to get to your e-mail, but I will try my absolute best! My Ravelry username is moonofsilver, and if you click the picture above it will take you to my profile. Happy Knitting! (You may sell anything you create from any of my patterns


