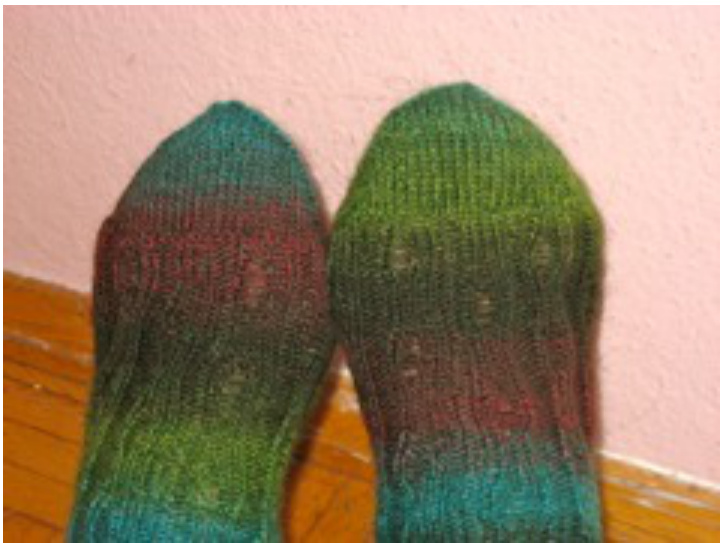
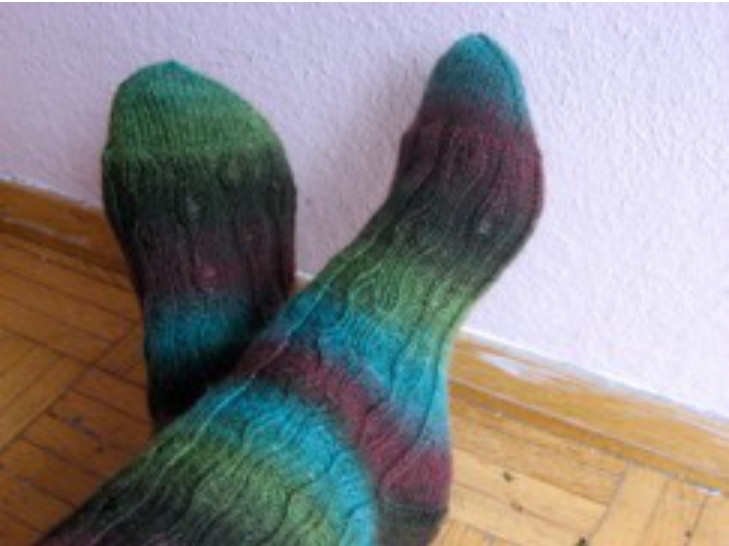
Mirkwood socks
by Margareta Marisch www.drutach.de
BEFORE YOU KNIT:
These socks were designed to pay tribute to the strangeness and wonderfulness of Mirkwood. They are a cuff-down design. Due to the number of stitches in the repeat each needle has a different number of stitches which will together make up the original number of 60 stitches. The repeat has 12 stitches, so the pattern can be up- or downsized according to your needs. Note: Because of the extra stitches which are later dropped the pattern has a little more ease than an ordinary 60 stitches pattern.
Size: women's average As the pattern describes everything in detail please consider printing it on scrap paper If you like charts, pp. 2-3 will do.
MATERIALS NEEDED:
Yarn:
100g (about 420 metres) of 4-ply sock yarn in a mysterious greenish colour, for example Lana Grossa Meilenweit Solo in red-green, colour 5261.
Needles:
one 3mm circular needle, 100cm or any other needles that you feel comfortable with knitting socks
Gauge:
6 stitches/10 rows make up 2 square centimetres, about one square inch
Extra gadgets:
tapestry needle to graft together the toe
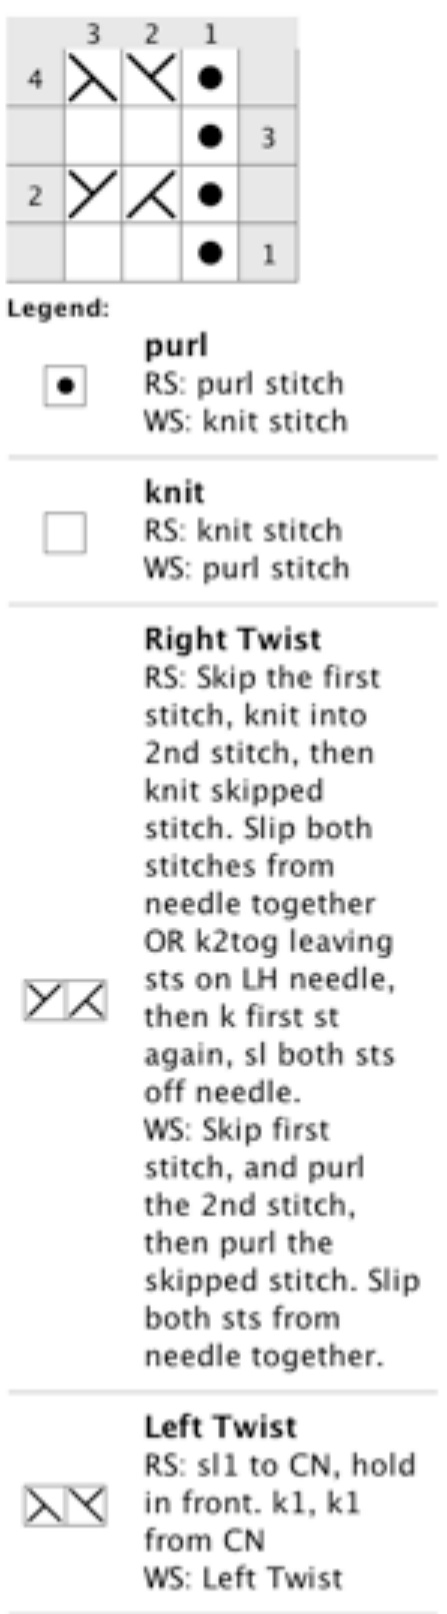
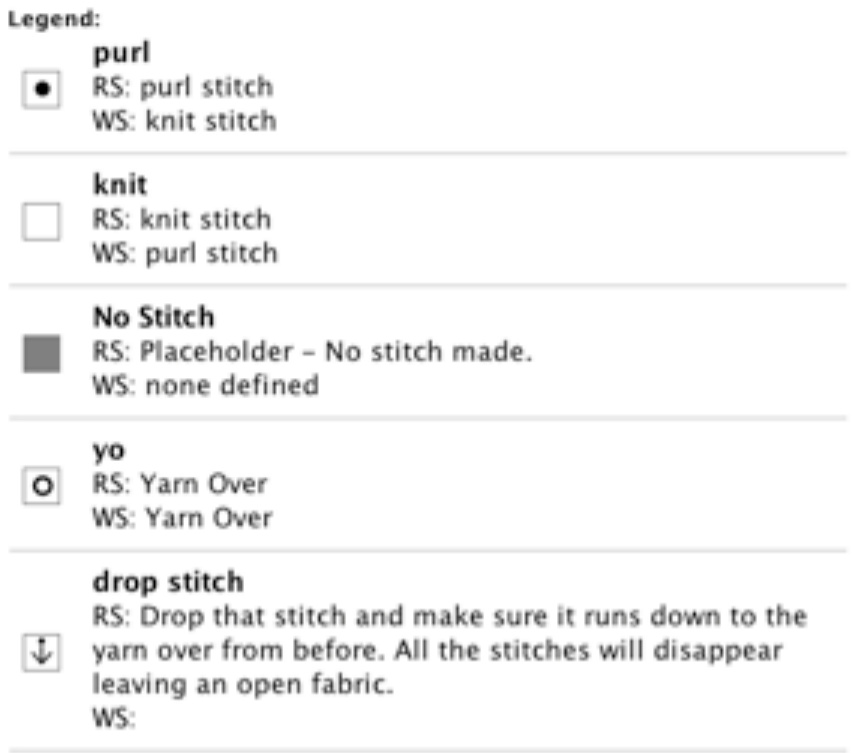
CHARTS AND SPECIAL STITCHES:
The pattern consists of two small charts which are also written out. The pattern features a dropped stitch which has to be actively dropped down to the point where it was a yarn over. Depending on the fuffiness of the yarn, it won't drop on its own but get stuck, so you need to help it along.
cable right (right twist)
= knit second stitch, knit first stitch, slip both stitches off left needle.
cable left (left twist)
= insert right needle from back to front between the next two stitches, knit the second stitch, then knit the first stitch, slip both stitches off the needle.
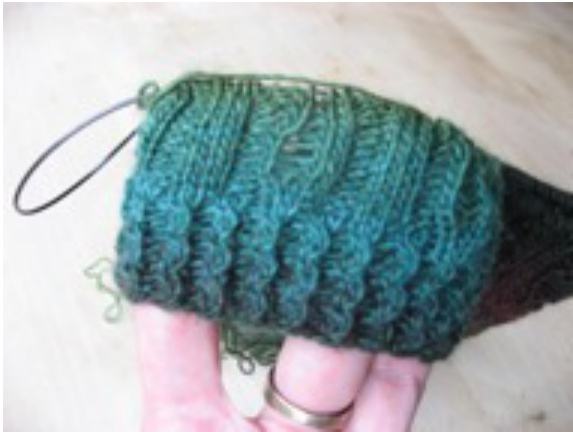
Cuff Pattern:
Created in KnitVisualize (www.knifoundny.com) The cuff consists of a little cable pattern that has a repeat of 3 stitches and 4 rows.
Round 1:
\*[p1, k2] until end of round Round 2: \*[p1, cable right], repeat until end of round Round 3: \*[p1, k2], repeat until end of round Round 4: \*[pl, cable left], repeat until end of round Repeat these four rounds until you're happy with the length of your cuff (about 3 times).
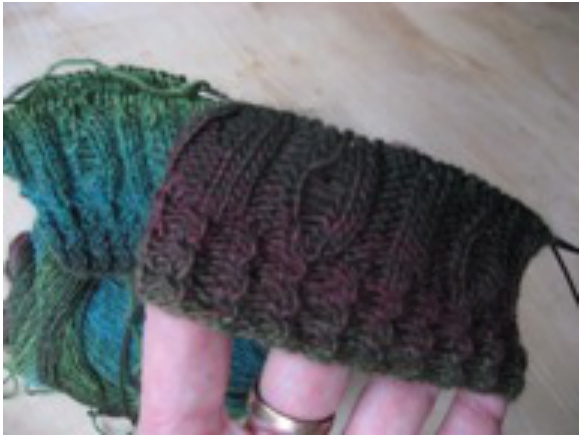
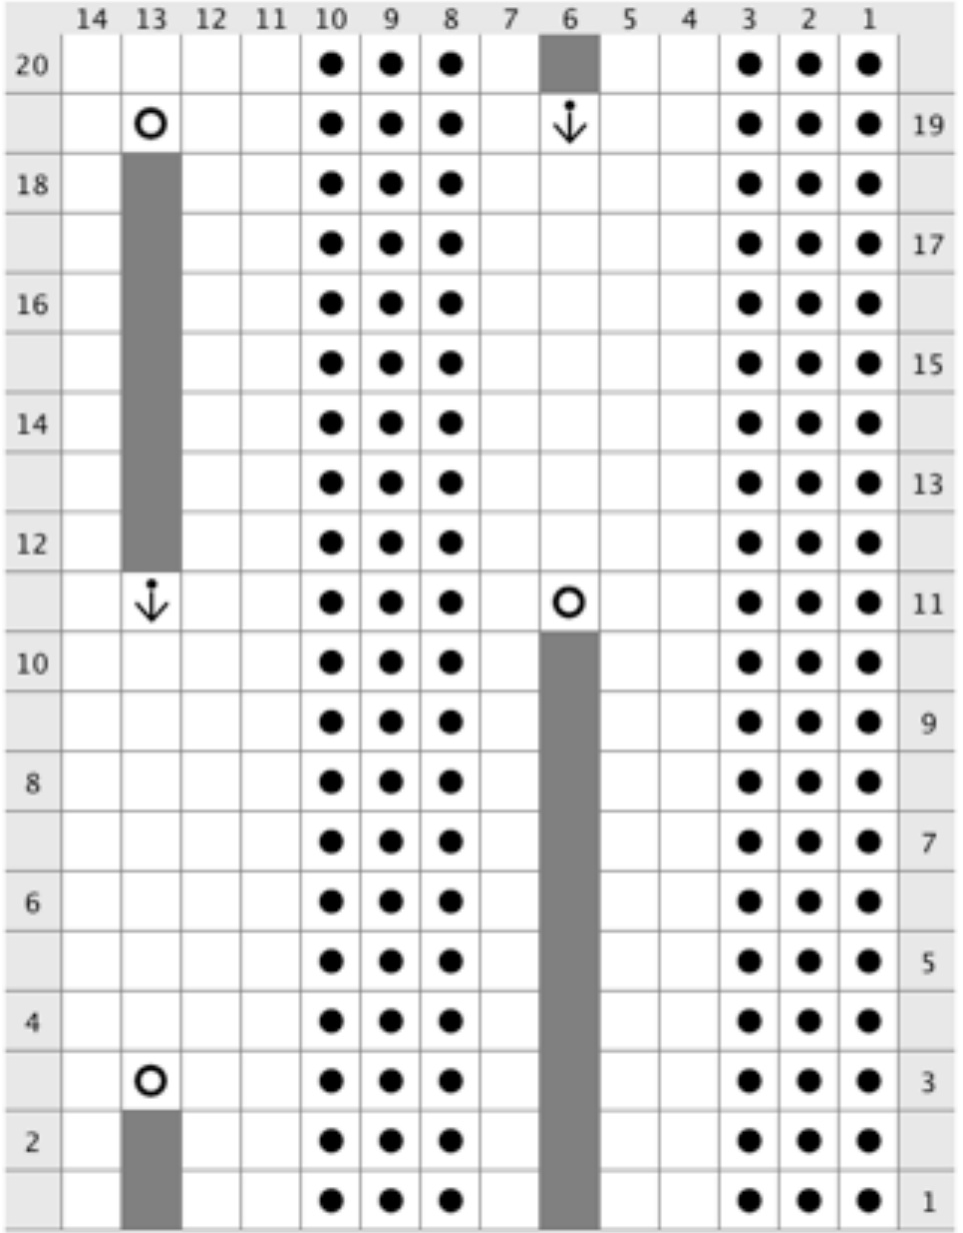
Mirkwood Pattern:
The pattern has a repeat of 12 stitches and 20 rows. Starting with the third round of your pattern you will have more stitches on your needle than you initially cast on due to the extra stitches picked up. This is nothing to worry about because it is very easy to see where the extra stitches are located.
Created in Knitivisaalizer (wnw.knitloundry.tom)
INSTRUCTIONS:
Work pattern with 60 stitches. Work cuff pattern three times for about 2,5 cm/l inch or as long you want (see above). Using the long tail cast-on, cast on 60 stitches and join in the round being careful not to twist
MIRKWOOD PATTERN:
Round 1: \*[p3, k3] Round 2: \*[p3, k3] Round 3: \*[p3, k3, p3, k2, yo, kl] Round 4: \*[p3, k3, p3, k4] Round 5: repeat round 4 Round 6: repeat round 4 Round 7: repeat round 4 Round 8: repeat round 4 Round 9: repeat round 4 Round 10: repeat round 4 Round 11: \*[p3, k2, yo, kl, p3, k2, drop stitch until gone, k1] Round 12: \*[p3, k4, p3, k3] Round 13: repeat round 12 Round 14: repeat round 12 Round 15: repeat round 12 Round 16: repeat round 12 Round 17: repeat round 12 Round 18: repeat round 12 Round 19: \*[p3, k2, drop stitch until gone, kl, p3, k2, yo, k1] Round 20: \*[p3, k3, p3, k4] After working round 1-4, repeat rounds 5-20 continuously.
HEEL:
Turn heel in the manner you like. If you like the short-row heel, don't forget your set-up rows for thatone. I prefer a heel fap. This heel Hap is done over 27 stitches, leaving 33 stitches for the foot. Arrange your needles so that the drop-stitch pattern has a p3 at either side (those are the extra 3 stitches). For the fit is does not matter that the sole is slightly narrower than it usually is and it looks so much nicer).
Row 1:
k3, \*[k1, sll purlwise yib] until 3 stitches before end of row, k3
Row 2:
k3, p all stitches until 3 stitches before end of row, k3 Repeat these two rows until you have worked 26 rows. Make sure that you knit the first and last stitches of each row. This will form little knots at the edges of your heel faps and will make it easier to pick up the stitches for the gusset without creating holes. ① drutach design 2013
TURN HEEL:
Row 1: K3, [sl 1 purlwise yib, k1] until you have worked 18 stitches in total, SSK, turn work Row 2: sll knitwise, purl 9 stitches, p2 tog, turn work Row 3: sl1 purlwise, work the next 9 stitches as they present themselves (k1, sl 1), then SSK the next two stitches, turn work Row 4: sl 1 knitwise, purl 9 stitches, p2 tog, turn work Continue to work in this fashion (rows 3 and 4) until the stitches at the sides of your heel fap have been used up and 11 stitches remain.
GUSSET:
Set up row:
Sl 1 purlwise and work the follwing stitches as they present themselves (k1, sl 1 purlwise) until the last stitch, knit this last stitch. Then pick up 13 stitches at the edge of your heel Hap, pulling the yarn through the little knots that you have created by knitting every stitch on front and back rows. Pick up a 14th stitch between the heel fap and the other half of your initial sock stitches. To avoid a hole, pick up that stitch through one of the stitches of the row before and not by just picking it up through the connecting strand between Hap and other half of the sock. To do that, put your right needle through one of the stitches of the row before (through one litle V) and put that stitch onto your left needle (You will have at least two strands of yarn on your needle, don't worry about it, they will all soon be gone). Then knit that stitch through the backloop. [Iincrease this stitch out of the stitchof the roe before rather than the strand between teo stitches because Ialeays produced a nasty little hole and that weay it is gone. But feel free to use the method you prefer.J There are now 25 stitches on your needle. Work the saved 33) stitches (other half of the sock) in the Mirkwood pattern from above. Then pick up one stitch between this needle and your heel fap (see above, from the stitch one row below) and after that pick up 13 stitches in the manner mentioned above with the help of the little knots at the edges of your heel flap. On this needle you have now 39 stitches. The beginning of the round is somewhere in the middle of those 39 stitches. I use two needles, one for the top of the foot and one for the sole, so my beginning of the round is in the middle of the sole needle. Please bear this in mind for the rest of the gusset instructions and arrange the needles and stitches according to your personal liking. nes will have to be decreased in the following rounds forming the gusset for the soc. ① drutach design 2013 Decrease the stitches in the following manner: Round 1: K all stitches on your sole/gusset needle, work in pattern on the saved 33 stitches. K stitches on your sole/gusset needle. Round 2: K to the last 3 stitches on (first) needle, k2 tog, kl; work pattern row across other needle(s); k1, SSK, k to end of round. Round 3: K to end of (first) needle; work pattern across other needle(s), k to end of round. Repeat rounds 2 and 3 until 27 stitches remain on your heel fap/sole needle. The initial 60 stitches in total.
FoOT:
Foot round: knit all stitches on needles where you decreased for the sole. Work pattern across other needle as before. Repeat foot row until foot measures 21 cm (about 8'); or till foot measures about 4cm (1,5 inches) shorter than desired finished length.
TOE:
The toe is worked in stockinette stitch. Decreases are worked knit 2 tog and SsK The round still starts in the middle of the heel/ sole needle. Round 1: knit to the last three stitches on sole needle, k2 tog, kl; k1, SSK, work pattern to the last three stitches on foot needle, k2 tog, kl; k1, SSK, knit to the end of the round. Round 2: work foot round Round 3: work foot round Round 4: work foot round Round 5: repeat round 1 Round 6: work foot round Round 7: work root round Round 8: repeat round 1 Round 9: work foot round Round 10: work foot round Round 9: repeat round 1 Round 10: work foot round Round 11: repeat round 1 Round 12: work foot round Round 13: repeat round 1 Round 14: work foot round Round 15: repeat round 1 Round 16 and all subsequent rounds: repeat round 1 until 8 stitches remain in total. This makes a very nicely shaped toe that is not too pointy. Arrange the last 8 stitches so that they face each other in the correct manner for the decreases and work kitchener stitch to close the toe. Weave in ends, block if you like. Enjoy. PS: When you are familiar with the drop stitch pattern, you might want to place your yo in different places as to make your own Mirkwood socks even more unexpected and mysterious!