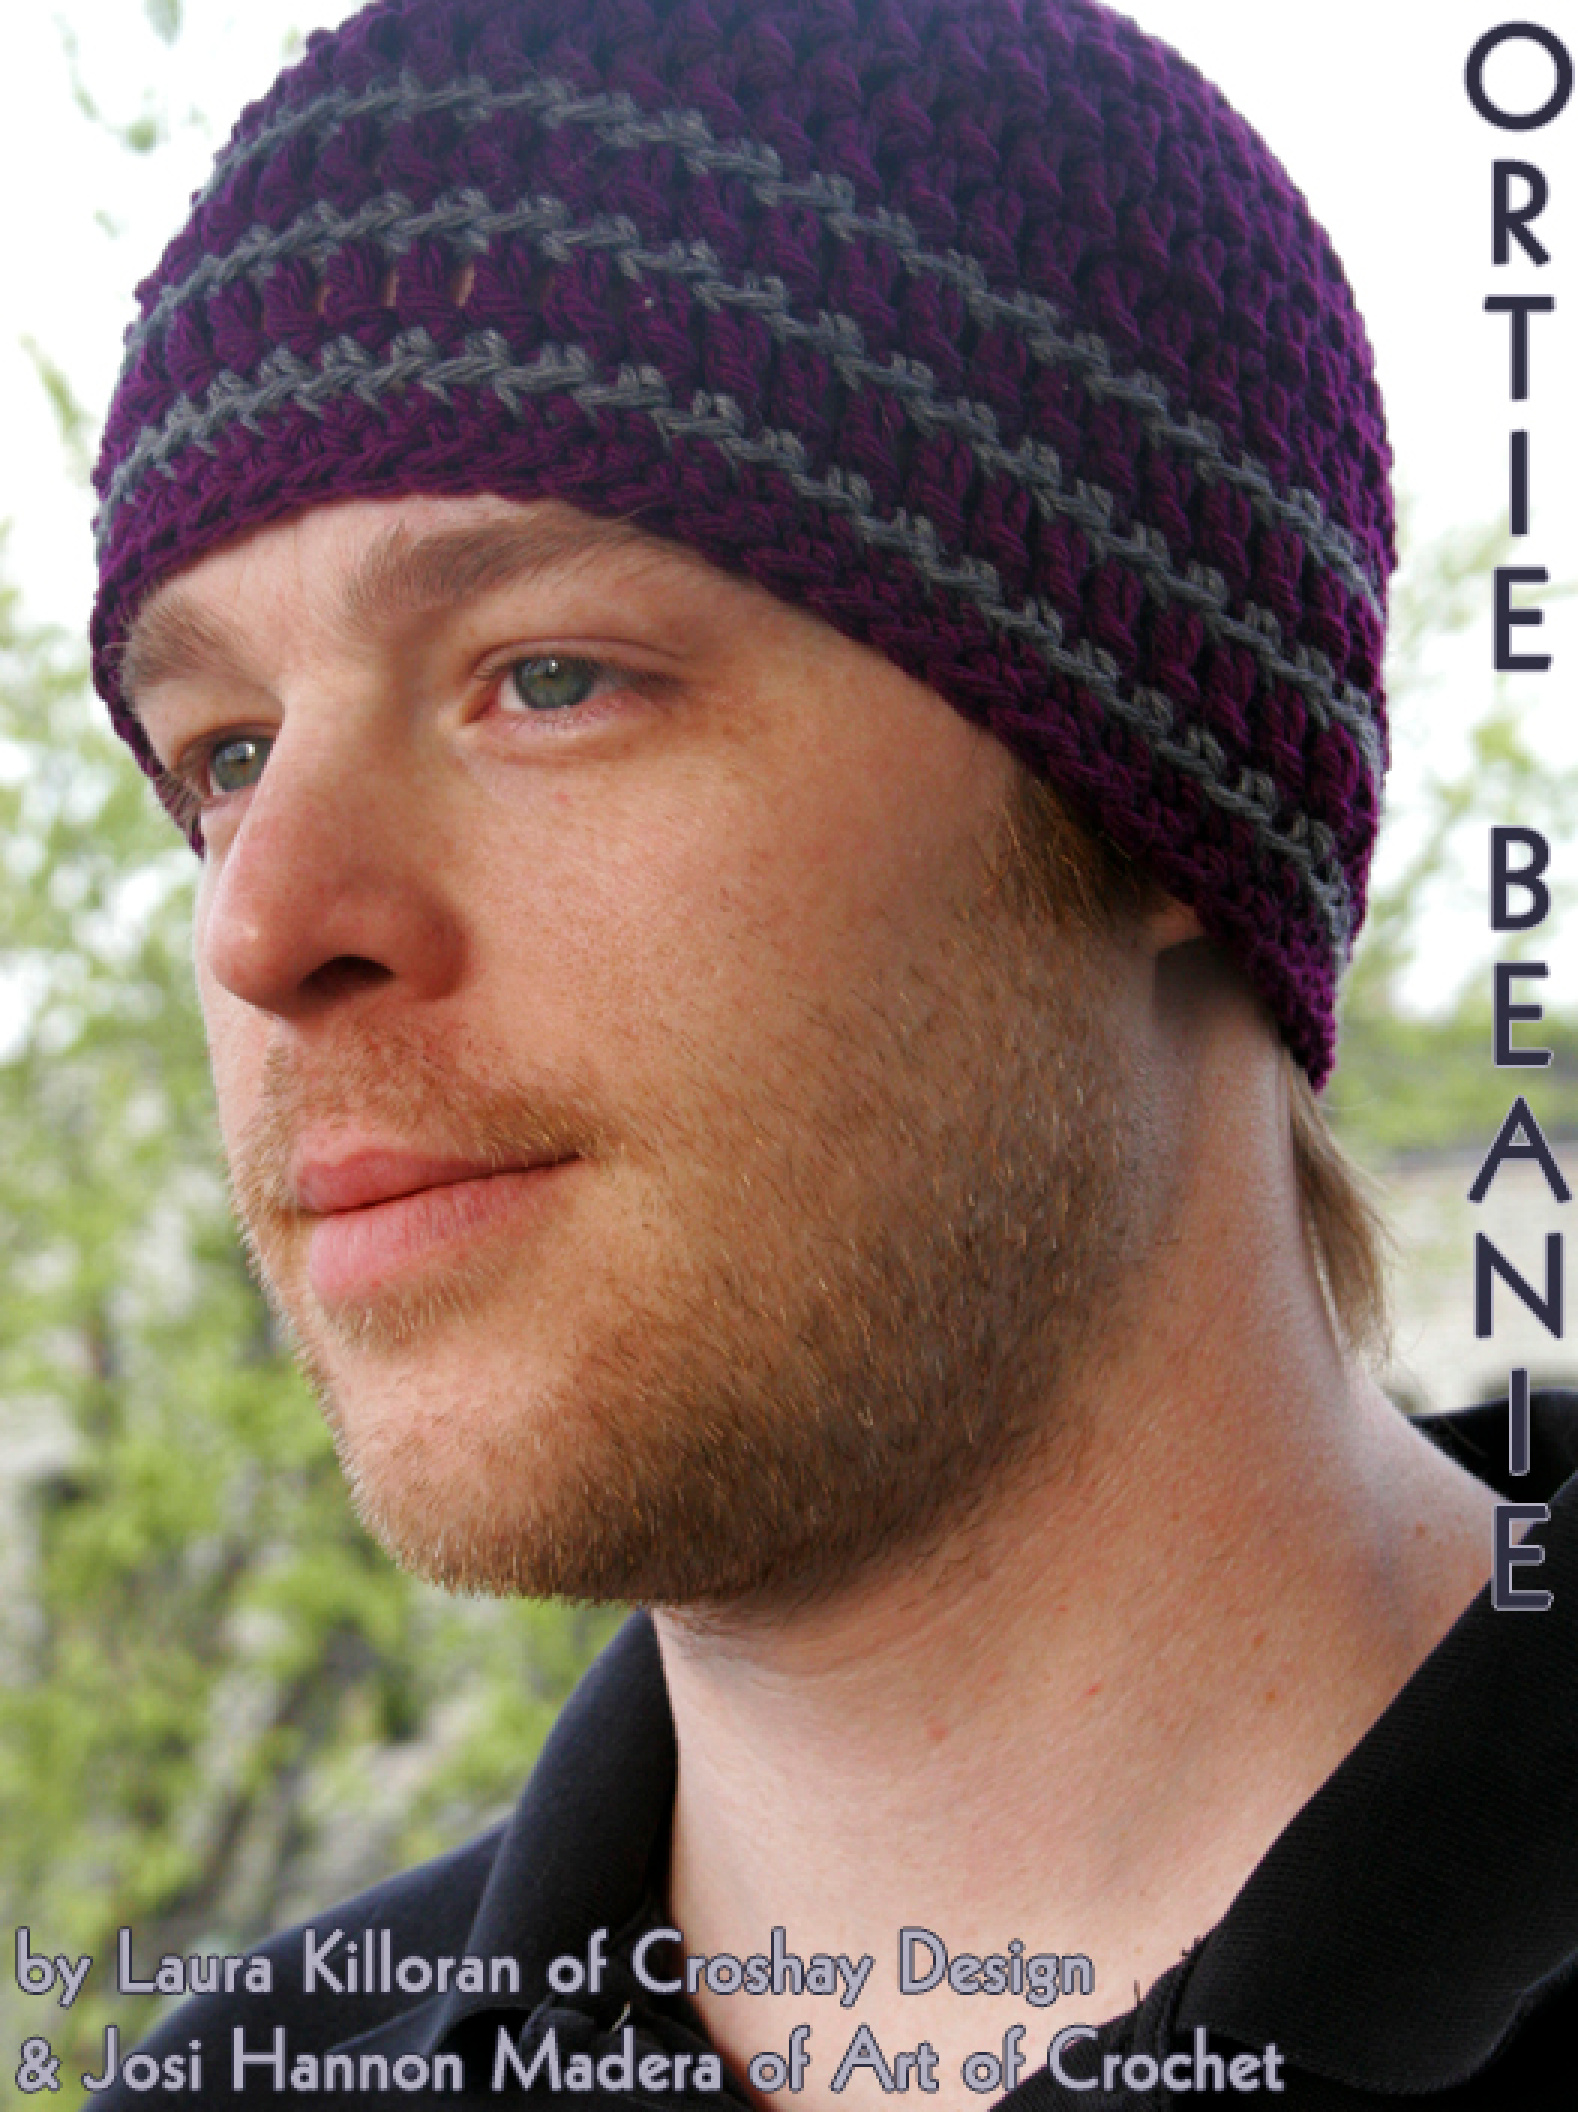
SHORTIE BEANIE 3.O - Full Tutorial
Original Pattern (Boy Beanie) by Laura Killoran of Croshay Design Added instructions and video by Josi of Art of Crochet This FREE tutorial and pattern is made possible by the Creative Commons License. See last page for details.
This pattern has several adaptations of more commonplace crochet practices, in order to create a superior hat. Even if you are an experienced crocheter, you'll find that this pattern and tutorial contains information that will improve your stitchwork. 1. This pattern is crocheted in the round without turns. Back-and-forth crochet, as in a scarf or blanket, requires one to turn one's work with each row. Crocheting in the round is sometimes worked that way, and sometimes it is worked without the turn. a. The advantage to turning one's work when working in the round is that it ensures a straight seam - one that doesn't "travel" at an angle. b. The advantage of not turning one's work is that each stitch is facing forward, giving the completed piece a more polished look. C. This pattern addresses the traveling seam issue, without turning after each round. Even if you've crocheted a hat before, follow these instructions exactly to get a straight, nearly invisible seam. 2. In addition to reducing the travel of the seam, this pattern also uses techniques to minimize the seam. Follow the instructions exactly, even if you've crocheted hats before, in order to learn a few secrets about creating a nearly invisible seam. There will be notes within the pattern that indicate where this pattern is different from others, with an explanation as to why it is done differently. Pay close attention to how many chains, and the back-loop slip stitches, used in the starting chain of each round. 3. This pattern also includes information on a method of changing color in the round that makes the color changes, at the seam, invisible, and allows for a quick and easy way of weaving in the ends. It minimizes the number of ends needed because is allows one to carry up the yarns in the stripes, while still keeping the color changes hidden on the inside of the hat, without breaking/cutting the yarn at each color change. 4. The method of increases is also different from standard crochet methods, in order to yield a round top instead of a polygon (a piece with straight sides). Again, even if you are familiar with crochet, working the increases as shown in the stitch diagram, and written in the pattern, will yield a more polished completed piece. 5. You may start this project in either of two ways: using a ring that is formed by chain stitches, or using the adjustable (magic) circle method. Both options have videos which show you these techniques. If you use the chain-ring method and find that after the first round, there is a hole or gap in the center of your project, it is recommended that you restartyourprojectusingtheadjustablecirclemethod.
Page 1
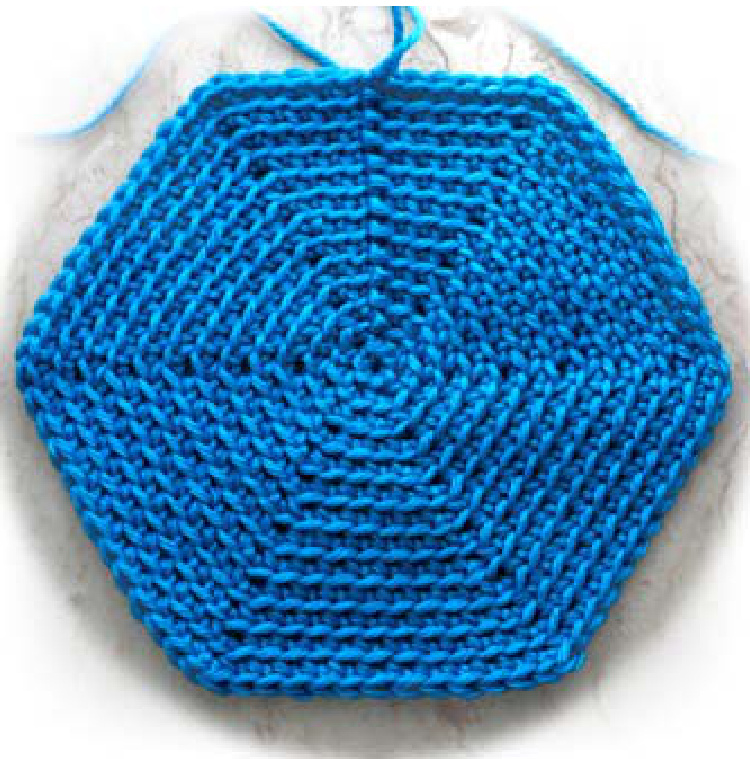
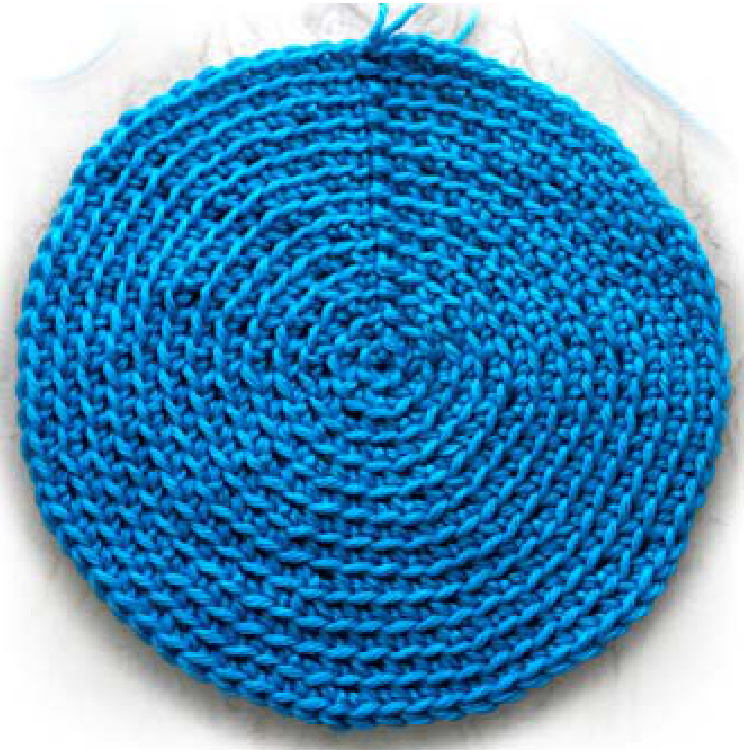
Creative Commons License from www.croshaydesign.com - See last page for details. First, here's some basic shaping theory. In the photo, the increases are stacked on top of each other with each round, creating a polygon with straight sides. In the second photo, the increases are shifted slightly in order to create a circle with no corners/edges. The photos that follow use single crochet back-loop-only stitches to create a ridge. The hat pattern that follows uses standard double crochet stitches to form a stretchy, curved/cupped crown. An example of stacked increases yielding a polygon:
An example of shifting the increases with each round in order to form a circle:
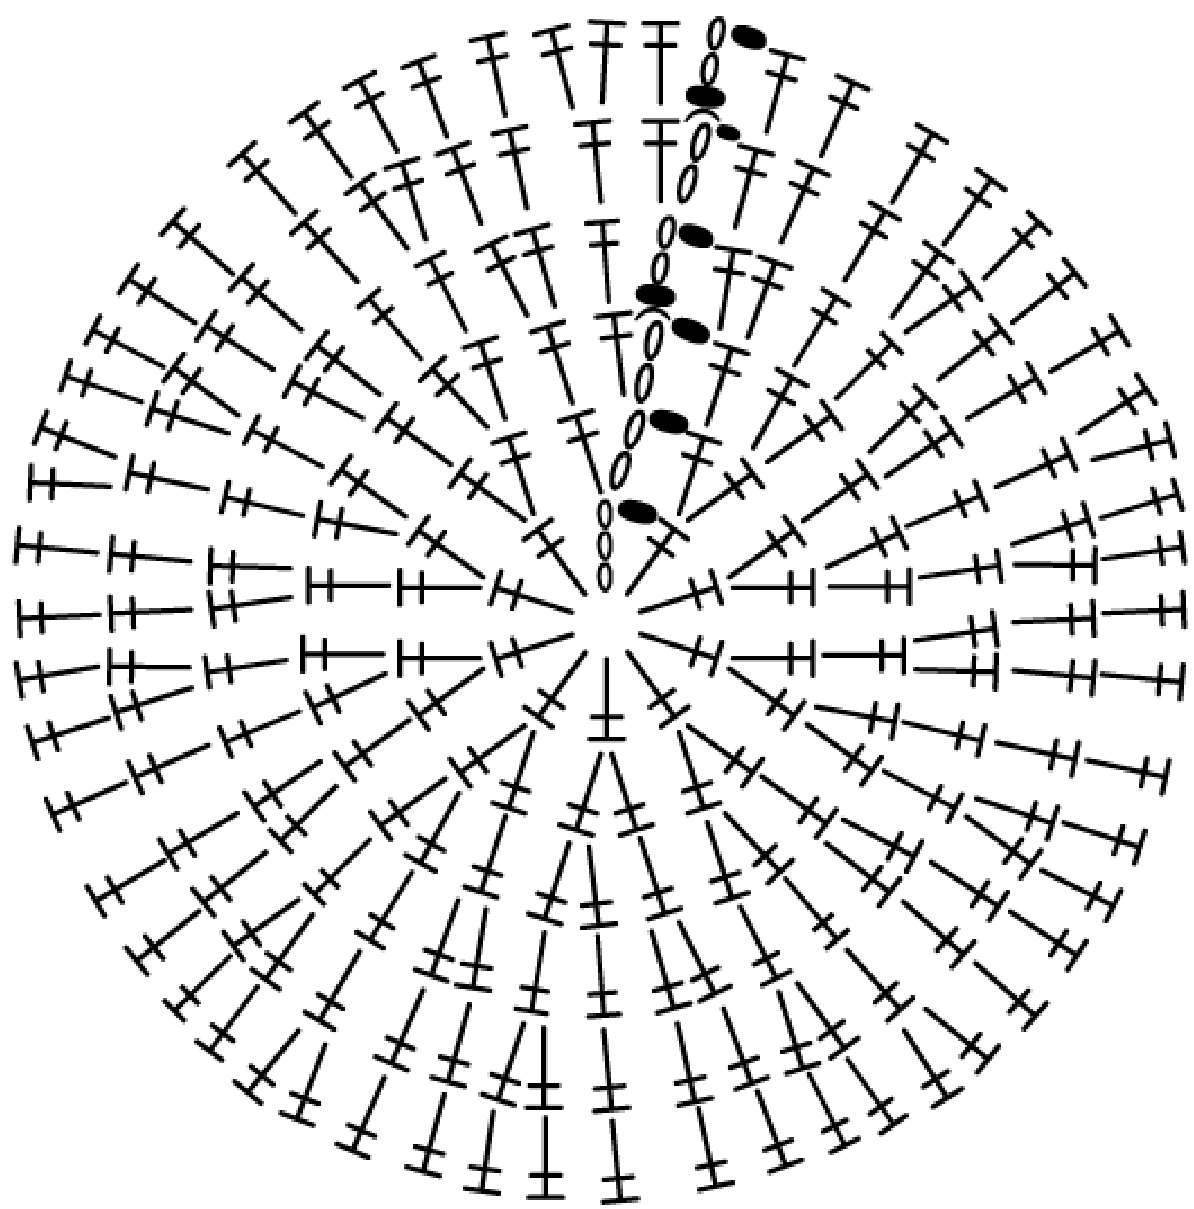
Page 2 Creative Commons License from www.croshaydesign.com - See last page for details. For the visually minded, and to illustrate the first 6 rounds of this hat pattern (where all the increases take place), here is a stitch chart. The stitch chart also notes the other differences with this pattern - even though the main stitch is a double crochet, which usually requires a 3-stitch starting chain, there are places where the starting chain is only 2 stitches. A 2-stitch starting chain, when crocheting in the round, helps reduce the gap normally created by the starting chain. Also of note, certain rounds are joined to the starting chain as usual, but then a back-loop-only slip stitch is added prior to the next round's starting chain. This alteration, compared to the usual method, turns the starting chain to face forward, also minimizing any gap in theseam. 0- chain stitch - slip stitch slip stitch through back loop only F - double crochet stitch
Page3 Creative Commons License from www.croshaydesign.com - See last page for details. Now that we've discussed some theory, here are links to stitch and technique video guides. Clicking on the link will take you to a YouTube page where the video is hosted - so you must be connected to the internet in order to access them. We recommend practicing the techniques in the same yarn, and hook, that you will use for this pattern. The Shortie Beanie calls for worsted weight yarn, and we recommend Knit Picks Brava Worsted (only available online), or Red Heart Super Saver Worsted Weight Acrylic (available at most craft stores like JoAnn or Michael's). Although both options are acrylic yarn, you may substitute any fiber you choose (Cascade 220 wool, for example) - just make certain it is worsted weight and practice to achieve the proper gauge. We recommend starting off with a US-I hook (5.50 mm), and adjust, if needed, after working the first four rounds and measuring for gauge. If your gauge differs from what the pattern indicates, you should start over and not just switch hooks mid-pattern. First, we have the two options for starting your hat: joining chain stitches into a ring, and the adjustable circle. The video for joining chain stitches shows more chains than used in this pattern - if using that method, this hat begins with a 3 chain ring. Click for video for Chain Stitch Ring (this video only - courtesy of Knit Picks) Click for video for Adjustable (Magic) Circle The following are videos for the other stitches and techniques used in this pattern: Joining In The Round With A Slip Stitch Single Crochet Double Crochet Back Loop Only Single Crochet - Back Loop Only Double Crochet is also used, just follow the technique shown in the video for the Back Loop Only Single Crochet, but work a double crochet stitch instead. Changing Color In The Round Weaving In Ends
SHORTIEBEANIEPATTERN
Iviatelldis 50 yds (45 m) worsted weight yarn in Main Color (MC)\* 30 yds (27 m) worsted weight yarn in Contrasting Color (CC)\* \*Wherever you see these abbreviations, they refer the color in which the round should be worked. Where required, you will be instructed to change color at the end of the previous round. 5.50 mm (US-l) standard crochet hook Tapestry needle (larger blunt-tipped needle), for weaving in ends Abbreviations : \* RND = round st = stitch ch = chain stitch sl st = slip stitch SC = single crochet stitch dc = double crochet stitch blo-sc = back-loop-only single crochet stitch blo-dc = back-loop-only double crochet stitch \* To keep pattern instructions shorter, most patterns use stitch abbreviations. (MC) BASE - ch 3 and join to form a ring OR start with an adjustable circle. If using anadjustable circle,follow thevideo through the first ch, tighten ch down and proceedtoRND1.\* \* If you use the chain method and find there is a gap/hole in the center of your first RND, trying switching to the adjustablecirclemethod. (MC) RND 1 - in and around ring or magic circle, ch 3 (starting chain, counts as first dc of RND), 9 more dc in ring/circle, join with a sl st to 3rd ch of starting chain. 10 dc total in RND 1. (MC) RND 2 - ch 2\* (counts as first dc of RND throughout pattern), dc into same ch as sl st of previous RND, 2 dc into each of the next 9 sts, join with a sl st to 2nd ch of starting chain. 20 dc total in RND 2. \* This is an instance of straying from crochet convention,in order to create theleastvisibleseam. (MC) RND 3 - ch 2, dc into same ch as sl st of previous RND, 1 dc into next st, {2 dc into next st, 1 dc into next st} x 9\*, join with a sl st to 2nd ch of starting chain, sl st into back-loop-only of same ch\*\*. 30 dc total in RND 3. \* The brackets indicate a section which will be repeated, following is how many timesitshouldberepeated. \*\* This extra sl st helps the starting chain of thenextroundtofaceforward,also minimizingtheappearanceoftheseam. (MC) RND 4 - ch 2, 1 dc into next st, 2 dc into next st, {1 dc into each of the next 2 sts, 2 dc into next st} x 9, join with a sl st to 2nd ch of starting chain. 40 dc total in RND4. Time to check your gauge. Measure across circlethroughthecenter.For thispattern, yourcircle shouldbe5 inches(12.7cm).If your circleistoo small,startoverwith a larger hook.Ifyour circleistoobig,start over witha smallerhook.Youcanalsotryto adjustyourtension-yourstitchesmightbe tootightortooloose.Practiceuntilyou meetgauge. (MC) RND 5 - ch 2, dc into same ch as sl st of previous RND, 1 dc into each of the next 3 sts, {2 dc into next st, 1 dc into each of the next 3 sts} x 9, join with a sl st to 2nd ch of starting chain, sl st into backloop-only of same ch. 50 dc total in RND 5. This next RND adds 5 sts, where the previous RNDs added 10 sts.It is also the final RNDof increases. (MC) RND 6 - ch 2, 1 dc into next st, {2 dc into next st, 1 dc into each of the next 9 sts} x 4, 2 dc into next st, 1 dc into each of the last 7 sts, join with a sl st to 2"d ch of starting chain. 55 dc total in RND 6. (MC) RND 7 - sl st into back-loop-only of same ch where you joined the previous RND, ch 2, 1 dc into each of the next 54 sts, join with a sl st to 2nd ch of starting chain. 55 dc total in RND 7. (MC) RNDs 8 & 9 - repeat RND 7. At end of RND 9, change to CC\*. \*Follow the method used in the Color Change In The Round technique video for the most stable, most invisible results. Thisbeaniehitsmid-ear.Youcanaddmore rounds here, to lengthen hat, if you choose. Rememberthatyouwillneedextrayarnin the MC than stated if you choose to add rounds. (CC) RND 10 - ch 1 (does NOT count as first sc), 1 sc into same stitch as joining sl st of previous RND, 1 sc into each of the next 54 sts, join with a sl st to first sc, change to MC. 55 sc total in RND 10. (MC) RND 11 - sl st into back-loop-only of same ch where you joined the previous RND, ch 2, blo-dc into each of the next 54 sts, join with a sl st to 2nd ch of starting chain, change to CC. 55 blo-dc total in RND 11. (CC) RND 12 - repeat RND 10. (MC) RND 13 - repeat RND 11. (CC) RND 14 - repeat RND 10. Leaving a 6-8 inch(15-20 cm) tail,cut CC.The remainderofthehatisstitchedintheMC. (MC) RND 15 - ch 1 (does NOT count as first sc), blo-sc into same stitch as joining st of previous RND, 1 blo-sc into each of the next 54 sts, join with a sl st to first sc. 55 blo-sc total in RND 15. (MC) RND 16 - ch 1 (does NOT count as first sc), sc into same stitch as joining st of previous RND, 1 sc into each of the next 54 sts, join with a sl st to first sc. 55 sc total in RND 15.Leaving a 6-8 inch(15-20 cm) tail, cut CC. Weave in ends, following the method used in the Weaving In Ends techniquevideo. Page5 Creative Commons License from www.croshaydesign.com - See last page for details. creative commons
Attribution-ShareAlike 3.0 Unported
You are free: to Share - to copy, distribute and transmit the work to Remix - to adapt the work Under the following conditions: Attribution. You must attribute the work in the manner specified by the author or licensor (but not in any way that suggests that they endorse you or your use of the work). ? Share Alike. If you alter, transform, or build upon this work, you may distribute the resulting work only under the same or similar license to this one. For any reuse or distribution, you must make clear to others the license terms of this work. The best way to do this is with a link to this web page. Any of the above conditions can be waived if you get permission from the copyright holder. Nothing in this license impairs or restricts the author's moral rights.


