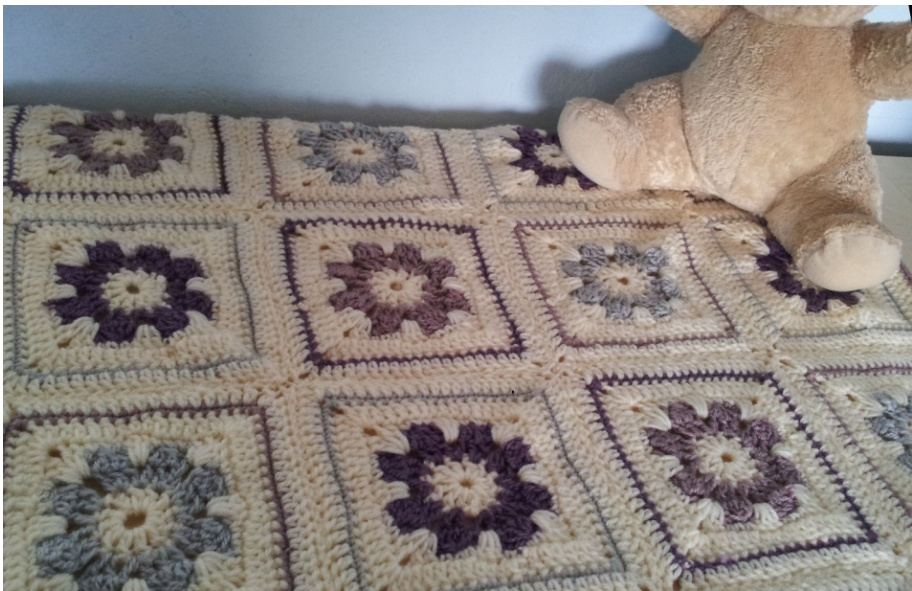
The Margaret Square
@ Olivia Rainsford 2014 Daisy used to be a popular nickname for girls called Margaret. This square is a little bit more formal and a little less frivolous than many daisy squares, so it's called a Margaret Square instead! These squares are done in three colours. The finished blanket pictured used 200g cream yarn and less than 50g of each of the other three colours in DK-weight yarn. The amount of yarn you use will depend on your gauge and the size of your blanket, so buy a bit more than you think you will need. Gauge: 5mm (h) hook and DK yarn = 15 cm / 6 in diameter For American crocheters: a larger hook and worsted weight yarn will make a square close to 8 in. If the square is slightly too small, add an extra round of sC in your main colour at the end.
This pattern uses American terminology. The British terms are in [brackets]. Abbreviations used in this pattern / American Ch chain SC single crochet HDC half double crochet sp(s) space(s) DC double crochet TR treble crochet Abbreviations used in this pattern / [British] Ch chain [DC] double crochet [HTC] half treble crochet sp(s) space(s) [TR] treble [DTR] double treble Everyefforthasbeenmadeindesignand testingtomakethispattern asuser-friendly aspossible.Shouldyou,however,findany quirksoroddities,pleaseletmeknow. Youmaysellitemsmadefrom this patternprivatelyoratcraftfairs.Infact,I'd be happy if my designs helped you earn a littlemoney!Ifyousellitems madefrom this patternonsitessuchasEtsy,itwouldbe courteous to let me know... and giving me credit for the designwouldbethehonorable thing to do. What is expressly forbidden, of course,is reproducing this pattern in print or electronic form, passing it off as your own work or re-selling it as your own design. That's a big crafting no-no - but I don't need totellyouthat.Youseemlikeanall-round goodegg
margaret Square
Start withyour main colour Chain 4. Join with a sl st to form a loop. (Or use the Magic Loop method, if you prefer.) Round 1: Chain 3. This counts as 1st DC [TR] here and throughout! 11 DC [TR] in loop. Join with sl st to top of ch 3. (Stitch count: 12 DC [TR] in loop.)
Round 2
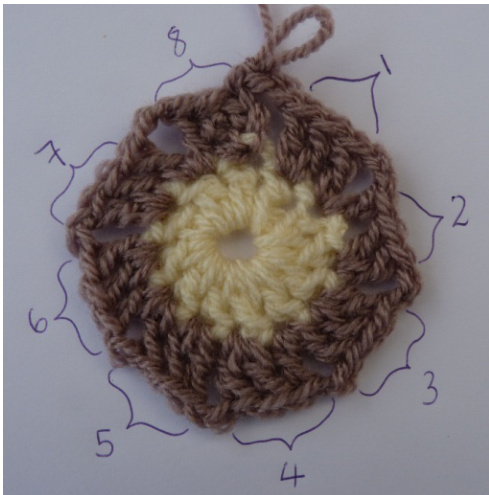
Change colour (CC1). Round 2 requires a bit of concentration, but once set up, the rest of the flower is a breeze! Join yarn in any stitch. Ch 3, then 1 DC [TR] in the same stitch. 1 DC [TR] + 2 ch + 1 DC [TR] in the next stitch. 2 DC [TR] in the next stitch. \*Chain 2. 2 DC [TR] in the next stitch. 1 DC [TR] + 2 ch + 1 DC [TR] in the next stitch. 2 DC [TR] in the next stitch. \*\* Repeat from \* to \*\* twice more, then join the 2 ch to the top of the first “fake DC′ (the 3 ch you began the round with.) When you are finished this round, you should have eight little groups of 3 DC [TR], which form the base of the eight petals.
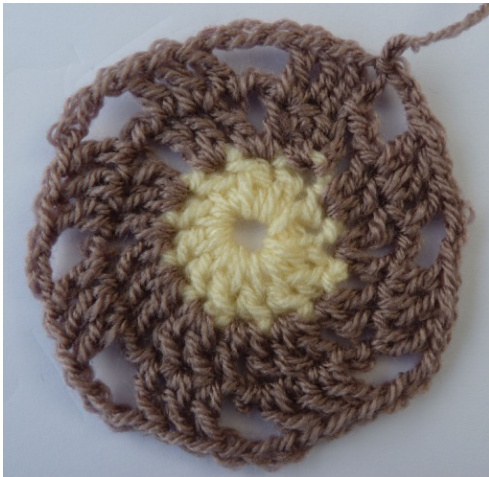
Round 3
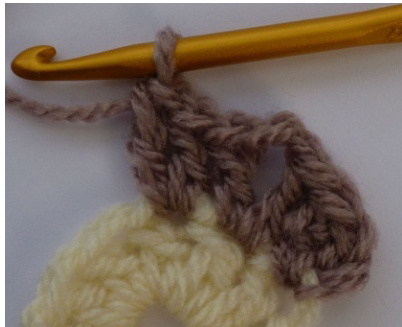
Chain 3, do 1 DC [TR] in the next two stitches, chain 3. \*1 DC [TR] in the next 3 stitches, chain 3 \*\* Repeat from \* to \*\* six more times , then join the 3 ch to the top of the first ‘fake DC' (the 3 ch you began the round with.)
Round 4
Use your main colour again and join in the top of a DC [TR] that comes before the chain spaces made between the 1 DC [TR]+ 2 ch + 1 DC [TR] in round 2. What??? Have a look at the picture!
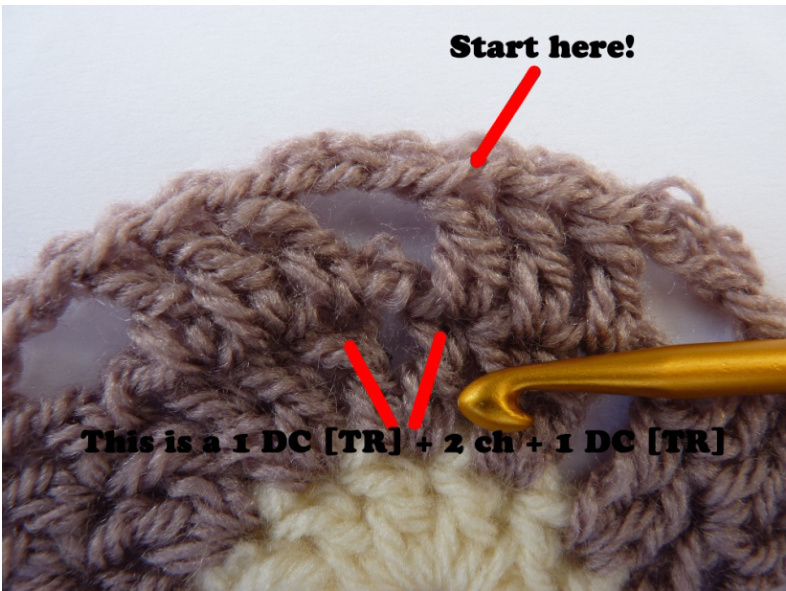
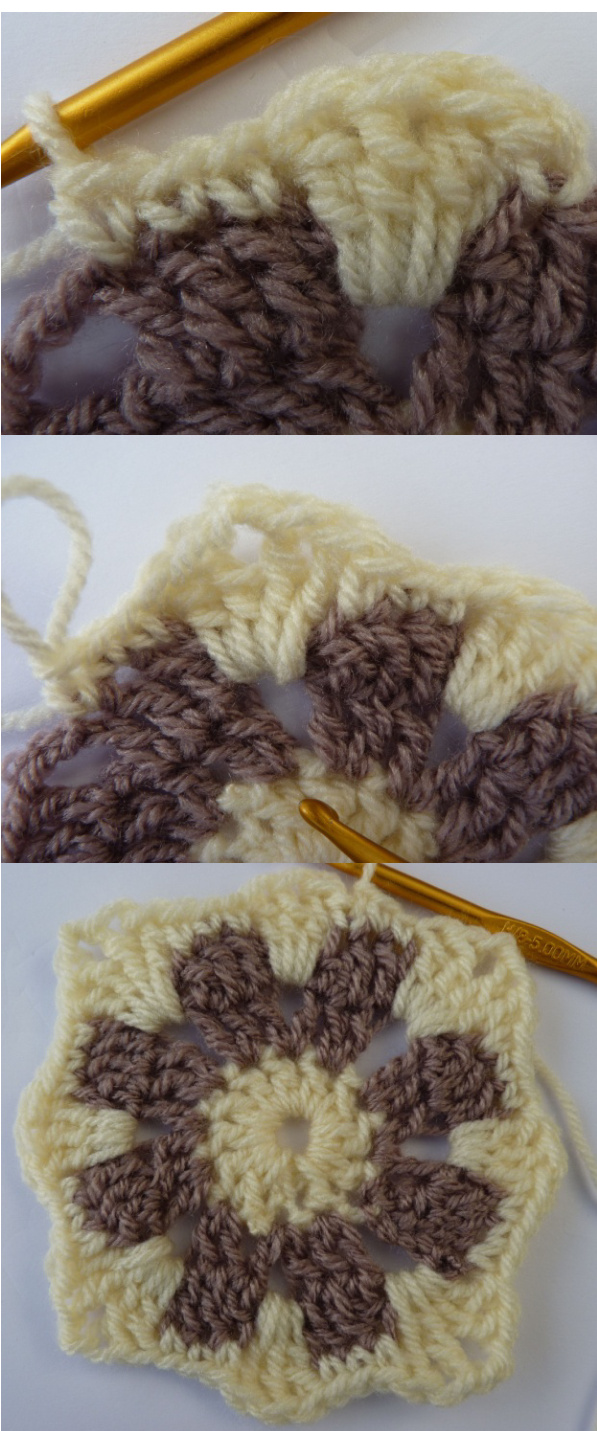
Ch 2. \*Do 3 DC [TR] into the two chains in the 1 DC [TR]+ 2 ch + 1 DC [TR] in round 2. Crochet 1 SC [DC] into the top of the next three DC [TR]. Corner: in the chain space between 2 DC [TR] and 2 DC [TR] from round 2, do 2 TR [DTR] + 2 ch + 2 TR [DTR]. Crochet 1 SC [DC] into the top of the next three DC [TR].\*\* Repeat from \* to \*\* twice, then once more. The third time you repeat it, you will only need to do 2 SC [DC] into the last group of three DC [TR] because you have started this round by doing ch 2 into the last stitch of this group of three. Join your yarn to the top of this ch 2.
Round 5
Ch 3 (This counts as 1st DC [TR]). Do 1 HDC [HTR] in the next three stitches (the DC [TR] of the previous round). Do 1 DC [TR] in the next three stitches (the SC [DC] of the previous round), then 1 HDC [HTR] in the next two stitches (the TR [DTR] that form the corner in the previous round.) In the corner ch 2 space, crochet 2 DC [TR] + 2 ch + 2 DC [TR]. In this round, you will crochet a HDC [HTR] in
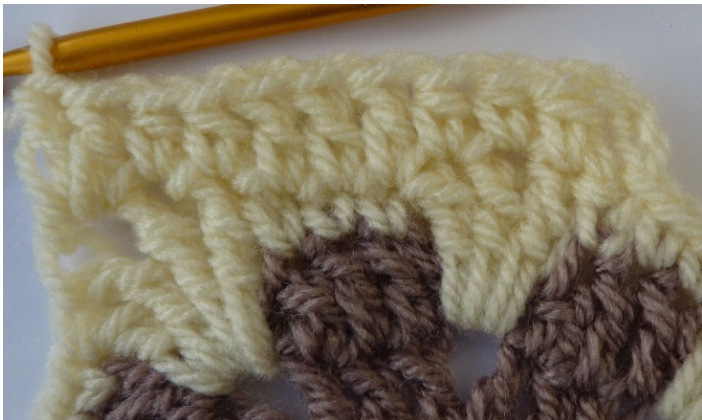
every DC [TR] or TR [DTR] of the previous round. You crochet a DC [TR] in every SC [DC] of the previous round. We are straightening out the sides so they're not as wavy as after round 4. This means that after you have formed the corner above (the 2 DC [TR] + 2 ch + 2 DC [TR]), youdo: \*1 HDC [HTR] in the next two stitches, 1 DC [TR] in the next three stitches, 1 HDC [HTR] in the next three stitches, 1 DC [TR] in the next three stitches, 1 HDC [HTR] in the next two stitches, crochet 2 DC [TR] + 2 ch + 2 DC [TR] in the corner space.\*\* Repeat from \* to \*\* twice. 1 HDC [HTR] in the next two stitches, 1 DC [TR] in the next two stitches. Join yarn to the top of the ch3 you began the round with.
Rounds 6 and 7 are optional. You could stop here and have smaller squares. As you might have noticed, the edges are still a bit wavy. I find this is not as noticeable when the squares are sewn together, as the yarn is tugged into shape, but you can also block them if you prefer.
Round 6
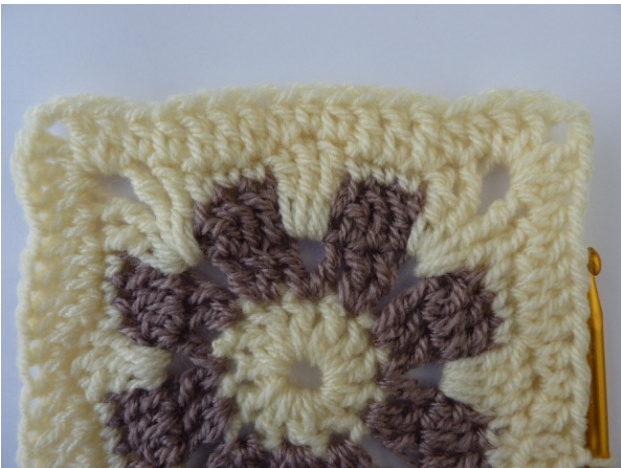
Join a new colour yarn or use the same colour as you used in round 2 and 3. Join in any stitch. Begin with 2 ch, then do 1 SC [DC] in every stitch and 1 SC [DC] + 2 ch + SC [DC] in each cornerspace.
Round 7
Join your main colour in any stitch. Do 3 ch, then do 1 DC [TR] in every stitch and 1 DC [TR] + 2 ch + DC [TR] in each corner space. Leave a long tail to sew the squares together.
The Morgaret Squore
Start with your main colour Chain 4. Join with a sl st to form a loop. (Or use the Magic Loop method, if you prefer.) Round 1: Chain 3. This counts as 1st DC [TR] here and throughout! 11 DC [TR] in loop. Join with sl st to top of ch 3. (Stitch count: 12 DC [TR] in loop.)
Round 2
Join yarn in any stitch. Ch 3, then 1 DC [TR] in the same stitch. 1 DC [TR] + 2 ch + 1 DC [TR] in the next stitch. 2 DC [TR] in the next stitch. Chain 2. 2 DC [TR] in the next stitch. 1 DC [TR] + 2 ch + 1 DC [TR] in the next stitch. 2 DC [TR] in the next stitch. Repeat from \* to \*\* twice more, then join the 2 ch to the top of the first fake DC’ (the 3 ch you began the round with.) When you are finished this round, you should have eight little groups of 3 DC [TR], which form the base of the eight petals.
Round 3
Chain 3, do 1 DC [TR] in the next two stitches, chain 3. \*1 DC [TR] in the next 3 stitches, chain 3 \*\* Repeat from \* to \*\* six more times , then join the 2 ch to the top of the first “fake DC' (the 3 ch you began the round with.)
Round 4
Use your main colour again and join in the top of a DC [TR] that comes before the chain spaces made between the 1 DC [TR]+ 2 ch + 1 DC [TR] in round 2. Ch 2. \*Do 3 DC [TR] into the two chains in the 1 DC [TR]+ 2 ch + 1 DC [TR] in round 2. Crochet 1 SC [DC] into the top of the next three DC [TR]. Corner: in the chain space between 2 DC [TR] and 2 DC [TR] from round 2, do 2 TR [DTR] + 2 ch + 2 TR [DTR]. Crochet 1 SC [DC] into the top of the next thre DC [TR].\*\* Repeat from \* to \*\* twice, then once more. The third time you repeat it, you will only need to do 2 SC [DC] into the last group of three DC [TR] because you have started this round by doing ch 2 into the last stitch of this group of three. Join your yarn to the top of this ch 2.
Round 5
Ch 3 (This counts as 1st DC [TR]). Do 1 HDC [HTR] in the next three stitches (the DC [TR] of the previous round). Do 1 DC [TR] in the next three stitches (the SC [DC] of the previous round), then 1 HDC [HTR] in the next two stitches (the TR [DTR] that form the corner in the previous round.) In the corner ch 2 space, crochet 2 DC [TR] + 2 ch + 2 DC [TR]. In this round, you will crochet a HDC [HTR] in every DC [TR] or TR [DTR] of the previous round. You crochet a DC [TR] in every SC [DC] of the previous round. We are straightening out the sides so they're not as wavy as after round 4. This means that after you have formed the corner above (the 2 DC [TR] + 2 ch + 2 DC [TR]), youdo: \*1 HDC [HTR] in the next two stitches, 1 DC [TR] in the next three stitches, 1 HDC [HTR] in the next three stitches, 1 DC [TR] in the next three stitches, 1 HDC [HTR] in the next two stitches, crochet 2 DC [TR] + 2 ch + 2 DC [TR] in the corner space.\*\* Repeat from \* to \*\* twice. 1 HDC [HTR] in the next two stitches, 1 DC [TR] in the next two stitches. Join yarn to the top of the ch3 you began the round with. Rounds 6 and 7 are optional. You could stop here and have smaller squares. As you might have noticed, the edges are still a bit wavy. Ifind this is not as noticeable when the squares are sewn together, as the yarn is tugged into shape, but you can also block them if you prefer.
Round 6
Join a new colour yarn or use the same colour as you used in round 2 and 3. Join in any stitch. Begin with 2 ch, then do 1 SC [DC] in every stitch and 1 SC [DC] + 2 ch + SC [DC] in each cornerspace.
Round 7
Join your main colour in any stitch. Do 3 ch, then do 1 DC [TR] in every stitch and 1 DC [TR] + 2 ch + DC [TR] in each corner space. Leave a long tail to sew the squares together.


