"WELCOME EMILy"
A Circular Pi Shawl Designed by Priscilla White-Tocker
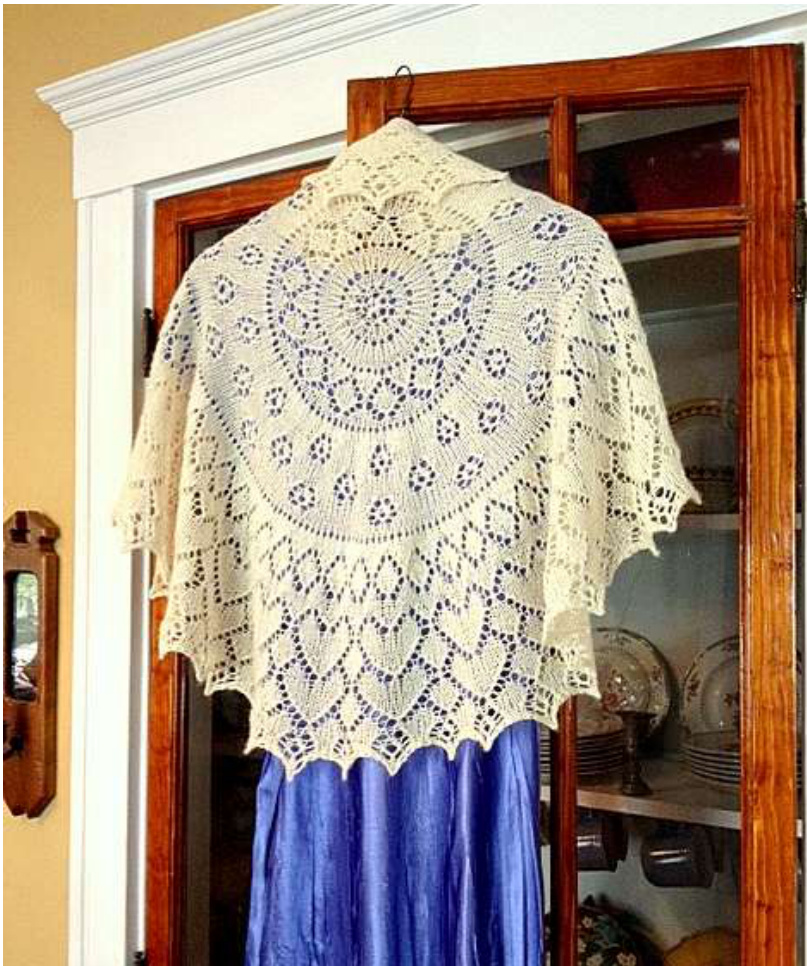
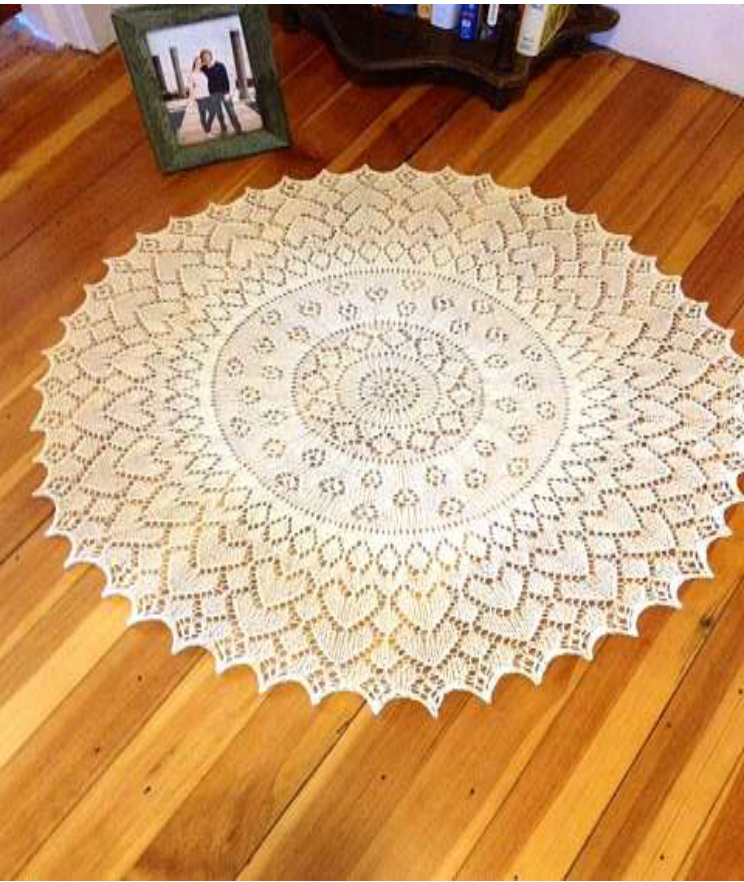
This design is inspired by my lovely new daughter-in-law, Emily, and I decided to officially welcome her into our family by using her as the inspiration for the next design in my Family of Women Series. She and my son Chris married on June 27, 2014, and as I watched my son marry it made me think of the continuous movement of the generations through the Circle of Life. Thus I decided that Emily's shawl should be a circular, and what better way to celebrate the love that brought her and my son together than by designing a shawl featuring eternal symbols of that love - diamonds, roses, and hearts. This pattern is designed to be knit with any weight/gauge of yarn and any size needles to whatever measurements you desire. The suggested materials and gauge provided in the instructions were used to create the shawl in this photo, which was knit with lace weight yarn and has a diameter of 36". The shawl would be equally lovely if you wished to make it larger by using DK or worsted weight yarn with larger needles.
INSTRUCTIONS FOR SHAWL
Suggested Materials: (used for shawl in the photo) - Yarn: Superfine Airy - Breath of the Wind (76%Hucaya, 4%Suri, 20%Soy Silk, 210 yds./skein), 3 skeins, Natural/Undyed - Needles: Set of 4 US# 4 double pointed needles (dpn's), US #4 circular 16" and 27" (so that you can increase the length of your circular needle as your shawl enlarges) or size for desired gauge. Shawl in this photo is knit to gauge of 8" per inch (unblocked) in stockinette. - Round stitch markers to mark off the beginning of the round and repeats of the pattern - Small tapestry needle for weaving in ends - Large blocking board and rust-proof pins for blocking
Legend:
K= knit P= purl YO= yarn over K2TOG=knit 2 stitches together (creates a right-leaning decrease) SSK=slip two stitches knit wise and separately to the right needle, then knit both together through the front of the stitches (creates a left-leaning decrease) K3TOG= knit 3 stitches together S1-K2TOG-PssO=slip one stitch knit wise, knit next two stitches together, pass slipped stitch from right to left over this new stitch and off the needle
Chart Legend:
| K | |
| P | |
| YO | |
| / | K2TOG |
| SSK | |
| > | K3TOG |
| A | S1-K2TOG-PSSO |
| S | Slipstitch |
| Section to be repeated in each round |
General Notes on the Charts
- Each chart is read starting in the lower right hand corner, with row 1 at the bottom of each chart and the rows are read upward. Each row is read from righto left. - Each round starts and ends with the unshaded stitches. In between, you willrepeat the set of blue shaded stitches as many times as you need to complete each round. I highly recommend that you place stitch markers before and after each of the sets of repeated stitches within each round. Doing this will make it much easier for you to keep track of your stitch count and to identify where any mistakes may have occurred so that you can make adjustments. Keep slipping the markers upward as you go and add additional markers as your shawl enlarges. - For most of the rounds in each chart, the first and last sets of stitches of the round (unshaded) are the same as those in the section shaded in blue. In a few rounds, however, the first and/or last stitch sets may be different in order to make the lace pattern align correctly within the circular design. This makes for very subtle variations in the lace patterns within these rows, which are nearly impossible to detect when you are looking at the shawl in its entirety. (I decided to make these slight variations so that the beginnings and ends of the rounds would not keep shifting back and forth and therefore the charts would be easier to read) These rounds are marked with an \* on the charts and there are special instructions for these rows with each chart.
Starting to Knit
1. Using your dpn's, cast on 6 stitches. If you are able, join in the round, being careful not to twist, and knit one round. \*Please note - it is VERY difficult to join 6 stitches in the round without having them twist, especially if you are working at a small gauge. Instead of joining in the round in the beginning, I knit the rows back and forth on two needles until I had 24 stitches, then joined in the round and continued on. If you cast on using a long tail cast on, you can use the tail to weave together the small gap that was made before joining in the round. This also means that the small center circle of the shawl is garter stitch rather than stockinette, but I think that this makes for a nice design feature. 2. [YO, K1] for one round to make 12 stitches. Then knit 2 rounds. 3. [YO, K1] for one round to make 24 stitches. Then knit 4 rounds. 4. [YO, K1] to make 48 stitches, and knit 8 rounds. 5. [YO, K1] to make 96 stitches, and knit Chart A. \*Please note that Round 7 of this chart starts and ends at the same point as the other rounds, but you will be moving your markers between the 8-stitch repeats one stitch over to the right as you work this round.
| 16 | ||||||||||||||||||||||||||||
| 15 | ||||||||||||||||||||||||||||
| 0 | 0 | 0 | v | 0 | v | 14 13 | ||||||||||||||||||||||
| 0 | 0 | 12 | ||||||||||||||||||||||||||
| 0 | 0 | 0 | 0 | 1 | 11 | |||||||||||||||||||||||
| 0 | 10 | |||||||||||||||||||||||||||
| 0 | 7 | 1 | 0 | 0 | 0 | o | 9 | |||||||||||||||||||||
| 1 | 0 | 8 | ||||||||||||||||||||||||||
| 0 | 1 | 0 | A | 0 | 0 | 0 | 7* | |||||||||||||||||||||
| o | 6 | |||||||||||||||||||||||||||
| 0 | 0 | 1 | 0 | 0 | 1 | 5 | ||||||||||||||||||||||
| 4 | ||||||||||||||||||||||||||||
| 1 | 0 | o | 0 | 1 | 3 | |||||||||||||||||||||||
| 0 | o | |||||||||||||||||||||||||||
| 2 1 |
6. After completing Chart A, [YO, K1] around the row to make 192 stitches. 7. Then knit Chart B. \* Please note the special instructions for Rounds 17, 19, and 20: - Round 17 starts and ends in the same place as the other rounds, however in this round you will be moving each marker between the 16-stitch repeats one stitch over to the right. - Round 19 starts with a slip stitch. Move your marker which indicates the beginning of this round, and place it after the slip stitch (this will end up marking the beginning of your next round). Continue working this round as charted, and you will find that you are moving each marker between each 16-stitch repeat one stitch over to the left. The very last stitch of the round (S1-K2-PSSO) will incorporate the slip stitch that started the round. I yarn over, which will actually complete the final rosebud that you knit in Round 19
| 32 | ||||||||||||||||||||||||||||||||
| 31 30 | ||||||||||||||||||||||||||||||||
| 29 | ||||||||||||||||||||||||||||||||
| o v 0 | 0 v | 0 | v | 0 | 28 27 | |||||||||||||||||||||||||||
| 0 | o | 0 | > 0 | 0 | 0 | o | 26 25 | |||||||||||||||||||||||||
| 0 | 0 | 0 | 0 | 0 | 0 | 24 23 | ||||||||||||||||||||||||||
| 0 | o | 1 | 0 | 0 | 0 | o | 22 21 | |||||||||||||||||||||||||
| v | 0 | 0 | 0 | 0 | v | 0 | 0 S | 20* 19* | ||||||||||||||||||||||||
| 0 | o | 0 | > 0 | 0 | 0 | > 0 | 0 | o | 18 17* | |||||||||||||||||||||||
| / | 0 | 0 | 0 | o | 16 15 | |||||||||||||||||||||||||||
| 0 | 7 | 0 | 0 | 0 | 7 | 0 | 14 13 | |||||||||||||||||||||||||
| 0 | v 0 | 0 | v 0 | v 0 | 12 11 | |||||||||||||||||||||||||||
| > | 0 | o | 10 | |||||||||||||||||||||||||||||
| 0 | 0 | 0 > 0 | 0 0 | 0 0 | 0 0 | > 0 | 0 | o 0 | 9 8 6 5 4 3 2 | 7 1 CHART B | ||||||||||||||||||||||
| 1 0 0 | 0 | / |
8. After you have completed Chart B, [YO, K1] around the row to make 384 stitches.
| 29 | ||||||||||||||||||||||||||||||
| 0 | 0 | 28 | ||||||||||||||||||||||||||||
| 1 0 | o | 0 | 0 | 27 | ||||||||||||||||||||||||||
| 0 v | 0 | 0 | o | 0 | 26 | |||||||||||||||||||||||||
| 0 0 | 25 | |||||||||||||||||||||||||||||
| 0 | 0 | 0 v | 0 | 0 | v | 0 | 0 | 24* 23 | ||||||||||||||||||||||
| 0 | 0 | 0 | 0 | 0 | 1 | 0 | 0 | 0 | 0 | 0 | 0 | 22 21 | ||||||||||||||||||
| o | 0 | 1 0 | 0 | 0 | 0 | 0 | 0 | 1 | o | 0 | 一 | 0 | 0 | 20 | ||||||||||||||||
| 19 | ||||||||||||||||||||||||||||||
| 18 | ||||||||||||||||||||||||||||||
| 17 16 | ||||||||||||||||||||||||||||||
| o | o | 0 | 0 | 0 | 0 | v 0 | 0 | v | 0 | o | 15* | |||||||||||||||||||
| 0 | o | 14 | ||||||||||||||||||||||||||||
| o | 0 | 0 | 0 | 0 | 0 | 0 | 0 | 0 | 13 12 | |||||||||||||||||||||
| 0 | 0 | 0 | 0 | o 一 | o | 0 | 0 0 0 | 0 v 0 | 0 | 0 | 0 | 0 0 0 | 0 0 | 0 0 | 0 | 0 | 0 | 0 1 o | 0 o | 0 v | 0 o 1 | o | 11 10 9 8 7 6 5 4 3 2 1 | |||||||
| 0 / | 0 | 0 | o o | o | 0 o |
| 0 | 0 | / | 1 | 0 | 0 | 0 | 0 | o | 56 55 | ||||||||||||||||||||
| 0 | 0 | 54 | |||||||||||||||||||||||||||
| 53 | |||||||||||||||||||||||||||||
| 52 | |||||||||||||||||||||||||||||
| 1 | 0 v | 0 | 0 | 0 | v 0 | 0 | 0 | v 0 | 52* | ||||||||||||||||||||
| 51 | |||||||||||||||||||||||||||||
| 0 | 0 | 0 | 0 | 0 | 0 | 0 | 0 | 50 49 | |||||||||||||||||||||
| 0 | 0 | 0 | 0 | 0 | 0 | 0 | o | o | 0 | 48 | |||||||||||||||||||
| 0 | 0 | 0 | 0 | 一 o | 0 | 47 46 | |||||||||||||||||||||||
| 45 | |||||||||||||||||||||||||||||
| 0 | 0 | 0 | 0 | o | 44 | ||||||||||||||||||||||||
| 43 | |||||||||||||||||||||||||||||
| 0 | 0 | 0 | o | 42 | |||||||||||||||||||||||||
| v | 0 0 0 0 | 0 | o 0 / | v | 0 0 1 | 0 0 0 0 | 0 0 | 0 | 0 0 1 0 | 0 0 | 0 0 | 0 0 | o | o o | 0 0 | 0 | v 0 | o 0 | 0 0 | 0 | 41 40 39 38* 37 36 35 34 33 32 31 30 | ||||||||
| 0 o | 0 | 0 |
CHART C- Rows 57-64
| --------------- | ------ -- ---- - -- | 64 | ||||||||||||||||||||||||||
| --- - ----- - - -- - | --- - -- - -- - - -- - -- | 63 | ||||||||||||||||||||||||||
| 0 ~ | 0 | v | v | 0 | vo | 0 | 62* 61* | |||||||||||||||||||||
| 0 | 0 | 0 | 0 | 0 | 0 | S | 60 | |||||||||||||||||||||
| 0 | o>o/ | 0 | 0 | >o1 | 0 | ov | 0 | 0 | 0 V | 0 | 0 | 59* | ||||||||||||||||
| 0 | 58 | |||||||||||||||||||||||||||
| / | 0 | / | 0 | 0 | 0 | 0 7 | 1 0 | / | 0 | o/ | 1 o | 57 |
10. Bind off loosely using the following Picot Chain Bind off, also known as the Yarn-Over Bind Off (please note that you can find illustrations of this bind off in the book Cast On, Bind Off: 211 Ways to Begin and End Your Knitting by Cap Sease): 1. Knit 2 and use the left needle to lift the right stitch on the right needle over the left stitch and off the needle (as in a standard bind off). 2. Insert your left needle into the front of the stitch on the right needle from right to left. Wrap your working strand around the right needle as if to knit it (thus creating your yarn over), and then lift the stitch on your left needle over the yarn over and off the needle. 3. Knit 1, lift the right stitch over the left and off the needle. 4. Repeat steps 2 and 3 until you have bound off the entire circle. Break off yarn and weave in alledges on the wrong side. 11. Now block your shawl, making scalloped edges as shown in the photo or,if you prefer, making an even edge around the circle. Pin the center of the shawl and then measure outward from the center hole as you block so that the radius is equal at all points. Make sure that you leave the shawl on your blocking board until it is completely dry. (I left my shawl on the blocking board for 3 days, which completely eliminated the rolled edge that it had before it was blocked). Once it is dry, you can unpin, wear, and enjoy your beautiful shawl! ibout this pattern, you can message me directly on Ravelry, user name pwhitocker.


