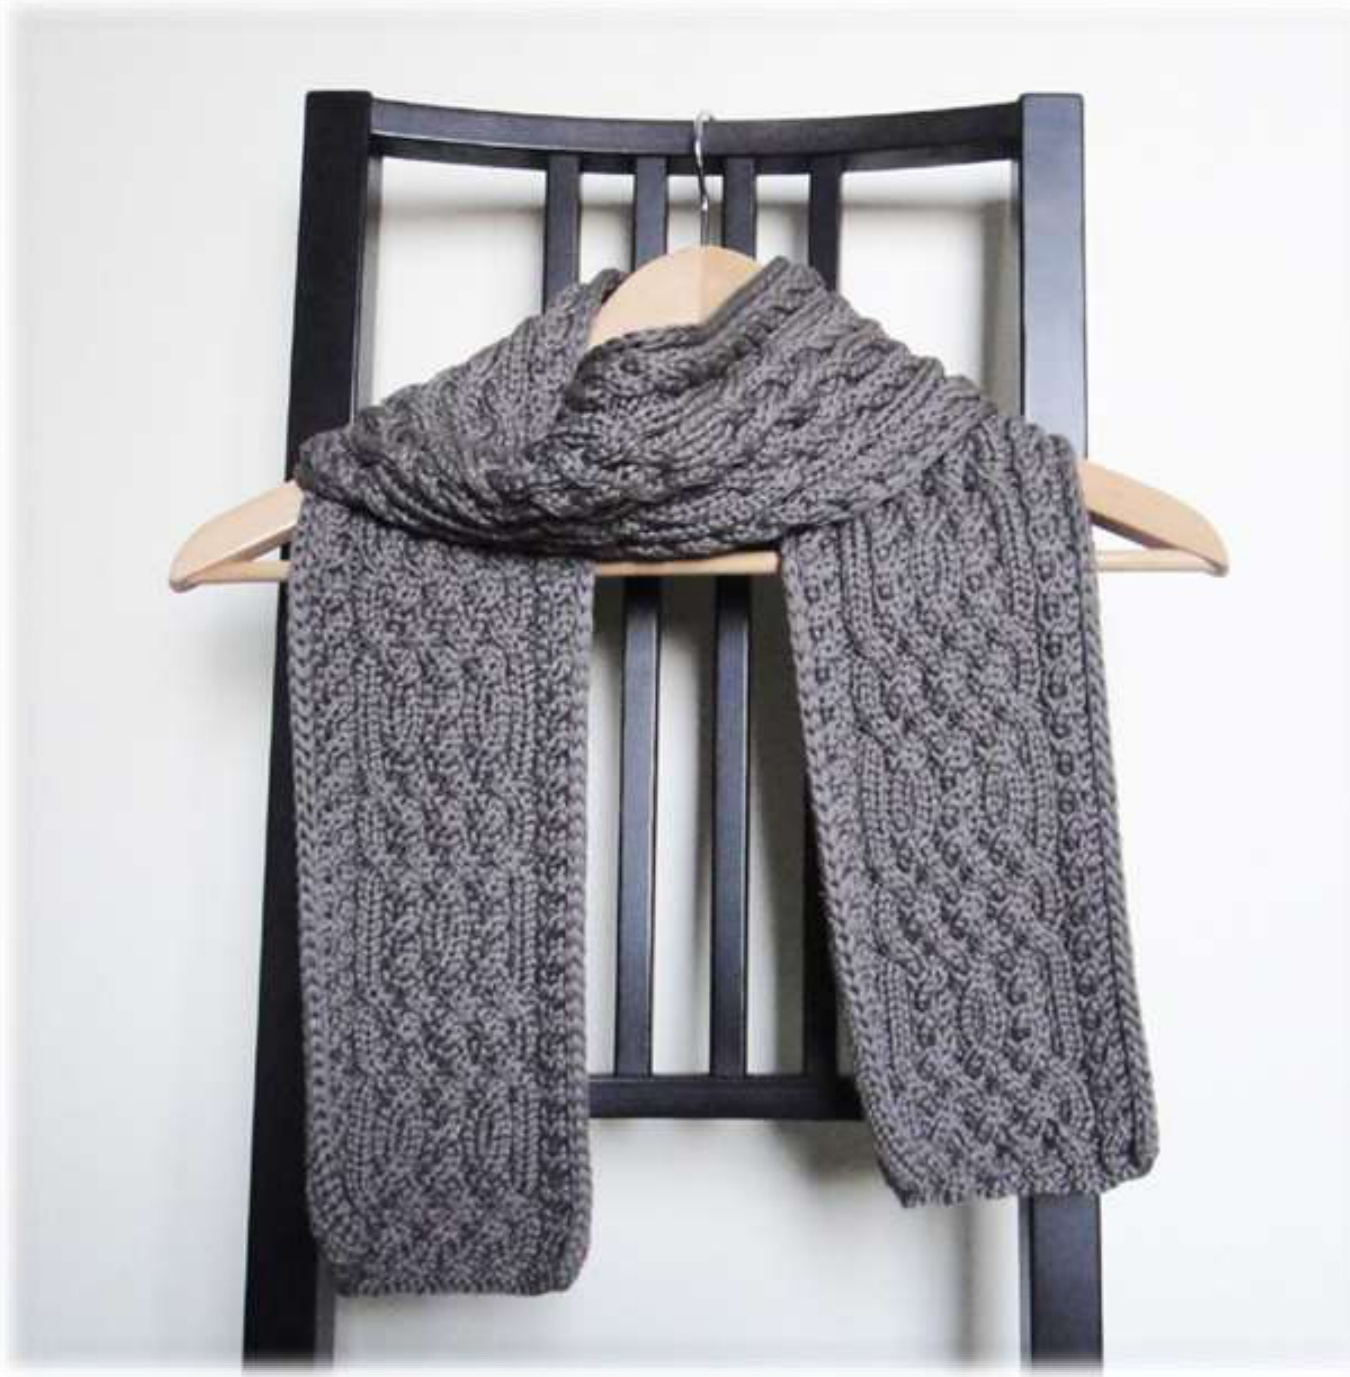
STATUS QUO SCARF
BY NATALIA VASILIEVA
DIFFICULTY: INTERMEDIATE SKILLS USED: CROCHET CHAIN CAST-ON, SLIPPED STITCHES, BASIC CABLES, DEALING WITH CABLE SPLAY, FOLLOWING CHARTS, BIND-OFF IN PATTERN.
FINISHED MEASUREMENTS
5" wide and 60" long (12.5 x 150 cm)
TOOLS AND MATERIALS
Schulana Fashion Silk (85% silk, 15% polyester; 120 yds (110 m) per 50 g); color #19 (brown): 4 skeins US 10 (6 mm) needles 6 mm (J) crochet hook Cable needle
GAUGE
Cabled pattern: 24 sts x 24 rows = 33/" x 4"(8.5 x 10 cm)
PATTERN NOTES
To prevent cable splay, the scarf begins with casting on a smaller number of stitches that are increased in the 1st row and decreased back before bindOff. Selvedge with two slipped stitches produces slim tubes along scarf edges that can be used to hide yarn ends. Always join a new skein at the edge.
SPECIAL STITCHES
BTS (tube selvedge at the beginning of the row): slip 1 wyib, k1 ETS (tube selvedge at the end of the row): slip 1 wyif, p1. Right cable increase (resembles left leaning lifted (raised) increase, LLinc): k2, then lift purl bumps behind 2 sts just knitted onto left needle and knit these purl bumps - 2 sts increased.1 Left cable increase (resembles right leaning lifted (raised) increase, LRinc): with help of cable needle, pick up purl bumps behind 2 rightmost sts on left needle, k2 from cable needle, then k2 as usual - 2 sts increased.2 Right Cable k2/k2: slip 2 sts to cable needle and hold to back of work, k2, k2 from cable needle. Left Cable k2/k2: slip 2 sts to cable needle and hold to front of work, k2, k2 from cable needle. Right Twist p1/k2: slip 1 st to cable needle and hold to back of work, k2, p1 from cable needle. Left Twist k2/p1: slip 2 sts to cable needle and hold to front of work, p1, k2 from cable needle. Right cable decrease: slip 2 sts to cable needle and hold to back of work, then knit 1 st from left needle together with 1 st from cable needle, 2 times - 2 sts decreased. Left cable decrease: slip 2 sts to cable needle and hold to front of work, then knit 1 st from cable needle together with 1 st from left needle, 2 times - 2 sts decreased.
DIRECTIONS
Using a crochet hook and the crochet chain method, cast on 32 stitches. Set-up row 0 (WS): BTS, k2, p2, k3, [p2, k2] x4 times, k1, p2, k2, ETS. Row 1 (RS): BTS, p2, right cable increase, p3, [left cable increase, p2] x4 times, pl, right cable increase, p2, ETS = 44 stitches. Row 2 and all WS rows: BTS, knit all knit stitches and purl all purl stitches, ETS. Then follow the Charts, always joining new skeins at the edge. Knit rows 2-4 once (Chart 1), repeat rows 5-28 throughout (you may use Chart 2a and 2b interchangeably) and end with rows 29-32 (Chart 3). Last row 33 (RS): BTS, p2, right cable decrease, p3, [left cable decrease, p2] x4 times, p1, right cable decrease, p2, ETS = 32 stitches. Bind off in pattern using chain bind-off.
FINISHING
Hide all ends in tube selvedges. Block if desired.

Chart 2a (Chart 1 is below)
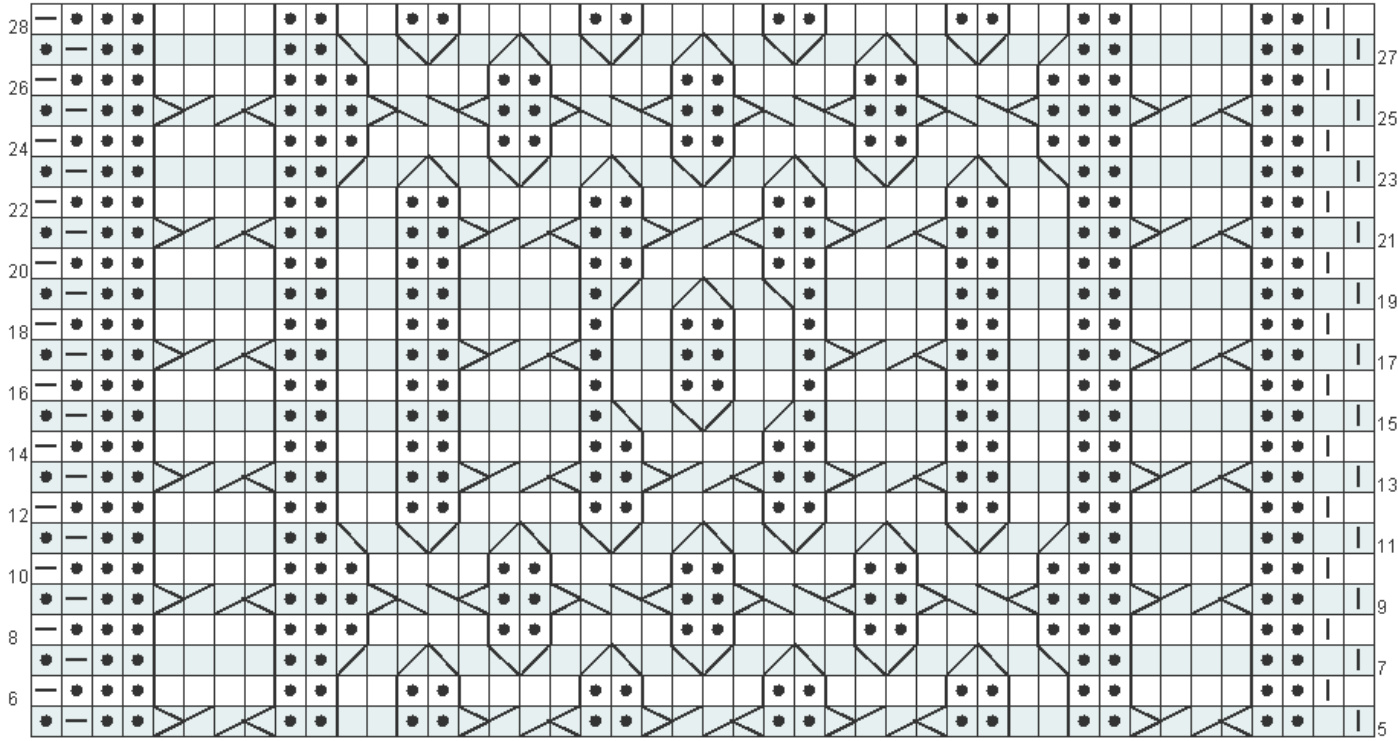
Chart 1

Stitch Key Left Cable k2/k2 Right Cable k2/k2 Left Twist k2/p1 Right Twist p1/k2 k1 on RS, pl on WS p1 on RS, k1 on WS BTS (see Special Stitches) [ETS (see Special Stitches) right cable increase (see Special Stitches) left cable increase (see Special Stitches) right cable decrease (see Special Stitches) left cable decrease (see Special Stitches) no stitch
Chart 3
| 32 | 33 | |||||||||||||||||||||||||||||||||||
| 30 | 31 | |||||||||||||||||||||||||||||||||||
| 29 |
Chart 2b
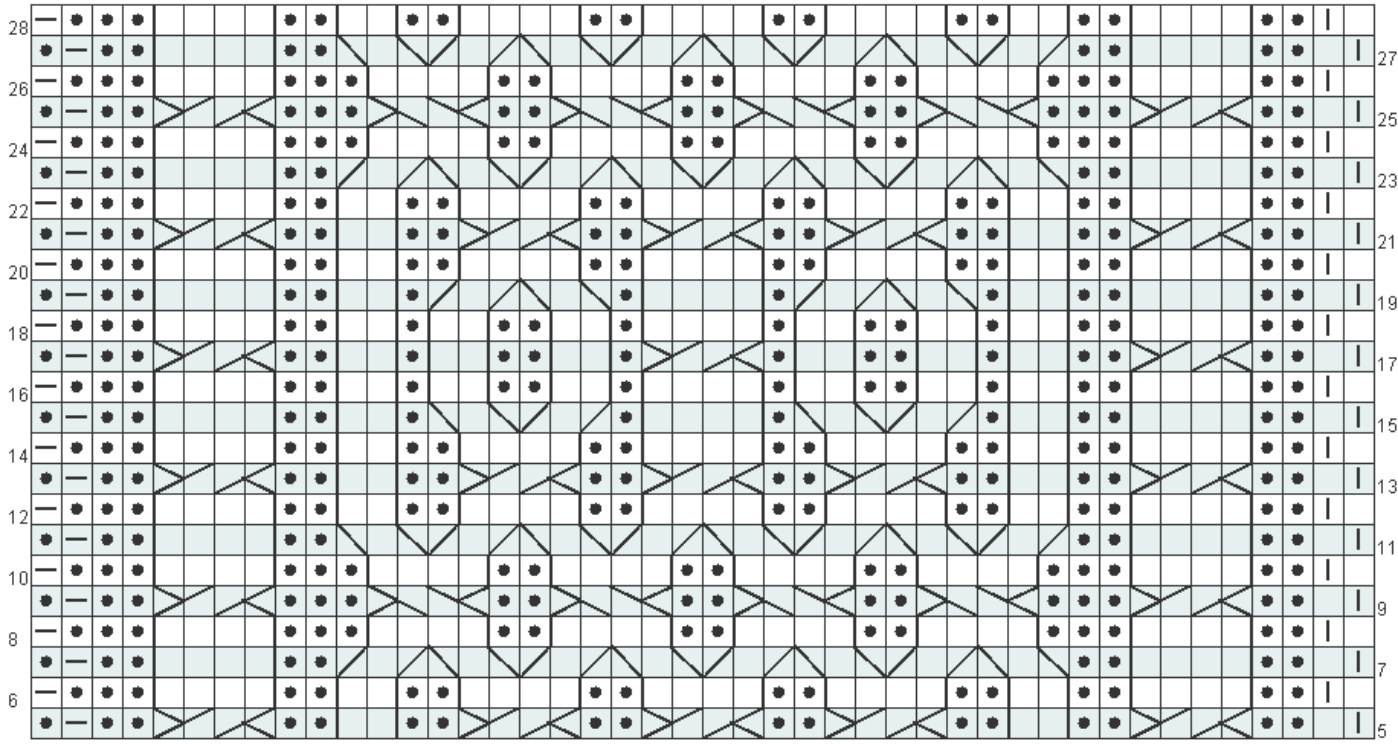
Stitch Key Left Cable k2/k2 Right Cable k2/k2 Left Twist k2/p1 Right Twist p1/k2 k1 on RS, pl on WS p1 on RS, k1 on WS BTS (see Special Stitches) [ETS (see Special Stitches) right cable increase (see Special Stitches) left cable increase (see Special Stitches) right cable decrease (see Special Stitches) left cable decrease (see Special Stitches) no stitch


