This photo tutorial shows you the basic steps to make the stitch called "Leg Single Crochet (L-sc)" in the book "Single Crochet from A to Z" by Bendy Carter. You can also find it called "Waistcoat Stitch (WST)" In this tutorial you'll learn to work in the round. It includes how to begin, make increases, decreases and change colors, as well as some tips and ideas that can be useful when making a project. You can practice making some balls. You'll find the instructions in the last page of this tutorial.
The “Leg Single Crochet" stitch
A photo tutorial
Some advantages:
X The stitch forms a V shape similar to the knit stitch in knitting, but with the easiness of using a hook. You can use several colors and create figures and forms (like in jacquard or tapestry crochet) The resulting fabric is thicker than using a normal single crochet.
By Rosaura Valdez
The final result is not an elastic fabric (as in knitting) It requires a little bit more yarn than with regular single crochet X And it takes also a little bit more time and effort to do than single crochet (although, once you master the technique it may take you the same time) This tutorial and instructions are written using USA terminology. IMPORTANT. This tutorial is better viewed in full color. You may wish to practice a couple of times with some scrap yarn and a big hook until become familiar with the stitch before to start a project. The pictures show the beginning of a project using a "magic circle" to start.
Knowing the stitch
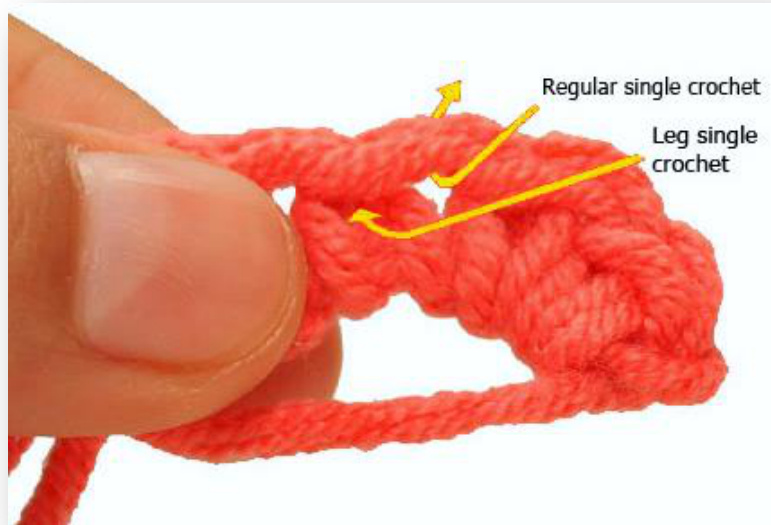
The L-sC is a variation of the regular Single crochet (sc). The only difference is that you'll need to insert your hook in a different place to where you normally would to make a sC.
"Leg single crochet" Photo tutorial
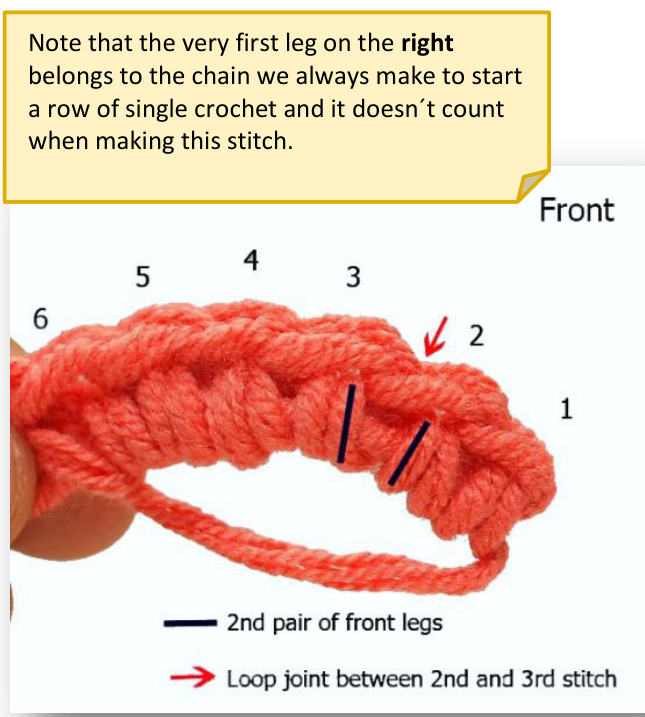
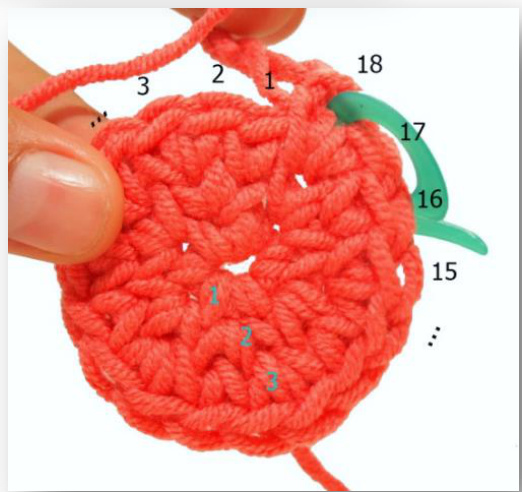
To make the L-sc you need to identify in the FRONT of your work: 1) The loops or chains in the top that belong to each sc of the 1st round - in this case six (numbered 1-6 in the picture) 2) The place where two loops meet (shown with the red arrow in the picture), and the most important 3) The “pair of legs" of each stitch.There is a leg each side of the place where two of the top loops Again, the very first leg at the left of the picture belongs to the starting chain and it doesn't count. In the BACK, you also need to find three elements: 1) The top loops (numbered 1-6 in the picture) 2) The horizontal bar that is created in each stitch (shown with the green line in the picture) 3) The pair of back legs of each stitch. You can easily find them just beneath each bar. (Shown with blue lines in the picture.) The first round is made using regular sc. Starting from the 2nd round, you'll be using L-sc. To do it, instead of the place where you'd normally insert the hook to make a regular single crochet, you need to introduce the hook between the pair of front legs of each stitch making sure that the hook is going out the back also between the back legs, just beneath the horizontal bar. "Leg single crochet" Photo tutorial
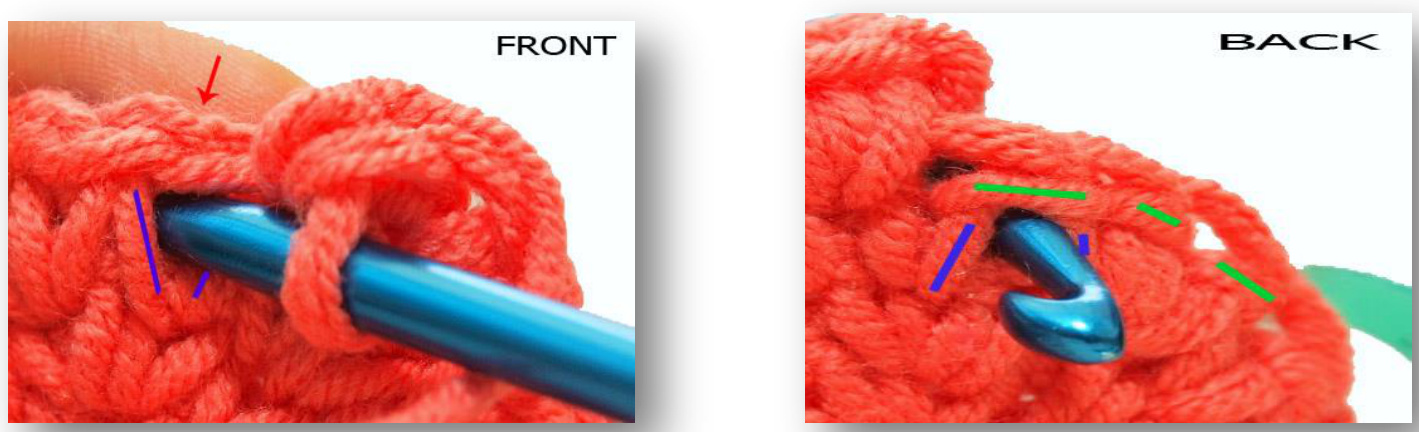
By doing this, you will be hiding the top loops of your work on every round just leaving the "legs" visible on the surface. To obtain the perfect knit look, you need to work always in the same side and in the same direction, which means no turnings. You need to do your stitches quite loose and keep the same tension on all your work. Avoiding having the stitches too tight will help you to insert the hook more easily in the proper place. To increase (inc): find the first pair of legs of the 1st round, make a L-sc, insert the hook again between the same pair of legs and make the second L-sc (this is 1 inc). The 2nd round will be the most difficult, but once the stitch is established the next rounds are easier to make. You'll easily find each pair of legs, which are now in the front of your work clearly forming a V shape.

To decrease (dec), as in regular single crochet, make one stitch over two of the stitches from the previous round. Just remember to insert the hook in the L-sc spot: Insert the hook in the next stitch, yarn over, pull through a loop, insert the hook again in the next stitch, yarn over, pull through (now you have three loops in the hook), yarn over, and pull through the three loops together. @ 2014 Rosaura Valdez. All rights reserved. This photo tutorial is for personal use only. Please do not sell, redistribute or edit this photo tutorial in any form. If you have any questions or comments about this tutorial, you can contact me at rosssval@gmail.com or via my Ravelry store www.ravelry.com/designers/rosaura-valdez "Leg single crochet" Photo tutorial
In the next round, once you get to the decreased stitch, to create a straight line over the stitch, first pass the hook under the diagonal bar of the stitch that is on the top and then insert the hook between the legs of the stitch that is behind and finish the stitch as regularly.

The number of rounds (shown in light blue in the picture) is easy to count in any part of the work, as are the number of stitches or top loops you have (numbered outside of the circle).
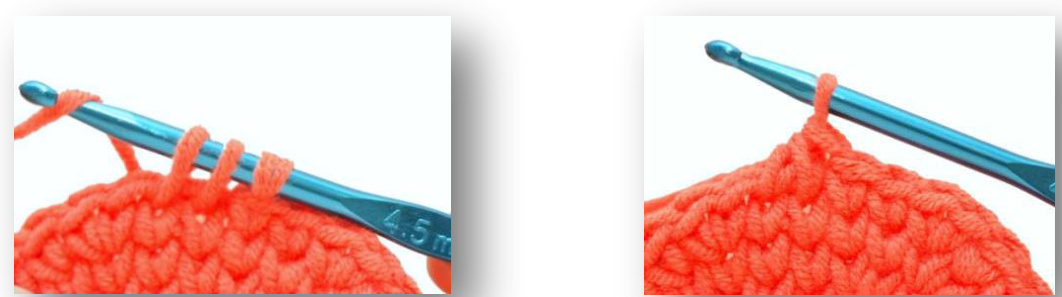
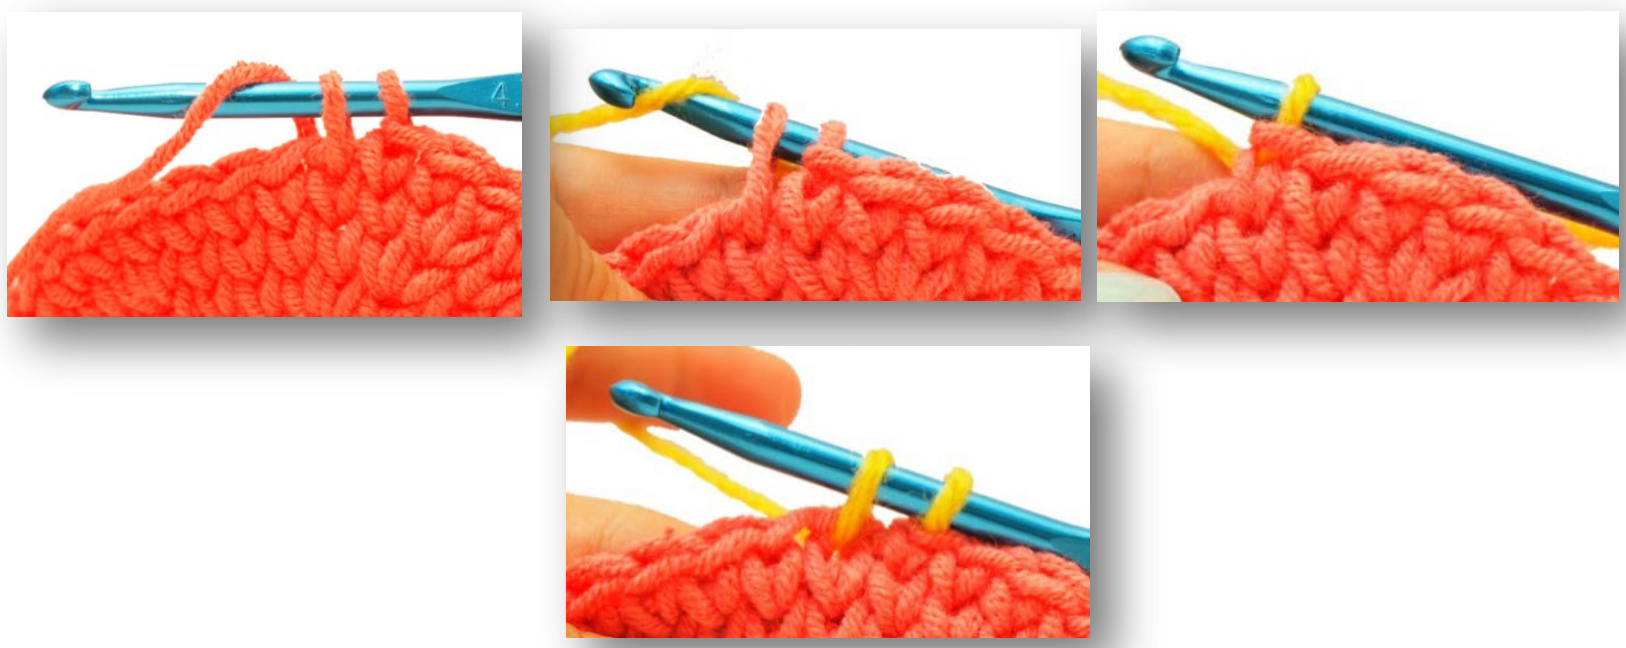
To change the color of some stitches, do it the same way as changing color in single crochet, but, inserting the hook in the correct place for Leg-single crochet. Work to the final step of the last stitch before you need to change color. Instead of yarn over with the old color (like the first picture below), yarn over with the new color and complete the stitch pulling through the two loops in your hook. Continue with the new color and carry the old color loosely behind. "Leg single crochet" Photo tutorial
SOME TIPS:
+ Remember working the L-sc stitch loosely. It can be quite tight and difficult to work with your usual tension. + You can make the 1st round using a hook 0.50mm larger in order to get the loose tension to start the L-sc's + To work in a spiral, place a stitch marker at the beginning/end of each round and continue with the instructions of the next round. + When you make an increase, the legs of the two stitches are going to be a little bit squished, so you need to be careful in the next round to insert the hook properly. + When you carry the yarn you are not using in the back of your work, make sure you are leaving sufficient yarn to have a flat and smooth result. Do not pull the carried yarn tight!. Ready to start your first project? Go to the next page!
"Leg single crochet" Photo tutorial
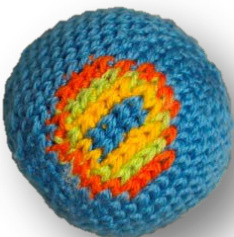
HOW TO MAKE a SIMPLE BALL?
Using the technique you've just learnt, try to make this ballin any of its variations: plain, with a little motif in the middle or in sections using several colors.
For the plain version:

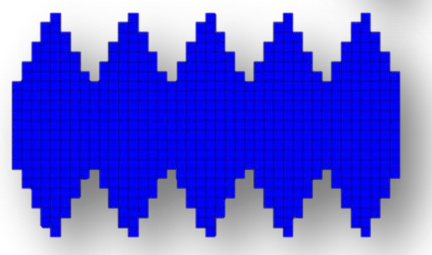
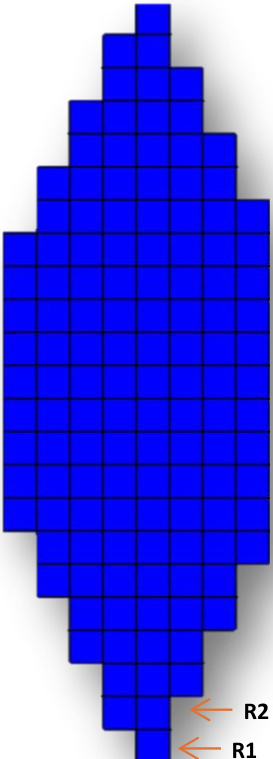
Rnd 2: 5inc (10 sts) Rnd 3: [inc, 1 L-sc] 5 times. (15 sts) Rnd 4: [2 L-sc, inc] 5 times. (20 sts) Rnd 5: [inc, 3 L-sc] 5 times. (25 sts) Rnd 6: [4 L-sc, inc] 5 times. (30 sts) Rnd 7: [inc, 5 L-sc] 5 times. (35 sts) Rnd 8: [6 L-sc, inc] 5 times. (40 sts) Rnd 9-16: 1 L-sc in each st. (40 sts) Rnd 17: [6 L-sc, dec] 5 times. (35 sts) Rnd 18: [dec, 5 L-sc] 5 times. (30 sts) Rnd 19: [4 L-sc, dec] 5 times. (25 sts) Rnd 20: [dec, 3 L-sc] 5 times. (20 sts) Rnd 21: [2 L-sc, dec] 5 times. (15 sts) Rnd 22: [dec, 1 L-sc] 5 times. (10 sts) Rnd 23: 5dec (5 sts) Fasten off yarn and leave a short tail to close the end. Weave the yarn through the remaining stitches and pull tight. Secure with a knot and hide the tail. There is also a way to represent these instructions in a graphic manner using charts like in knitting: These are the 23 rounds needed to make the ball, but just one of the 5 repeats you make in the pattern. As we are working in spiral (no turns) all rows areread from right to left starting from the bottom up. The entire ball would be like this:
Adding a small detail
HOw? Work rounds 1-8 of the plain version in your main color. From rounds 9-16 work the motif of your choice. Here you have two simple forms that you can use in any color.
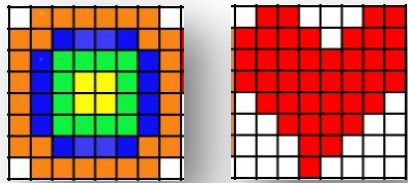
Each square represents one stitch and it will fit in the middle space (8 x 8 stitches) of each repeat of your ball. white spaces need to be worked in your main color.
Working in sections:
It is easier if you have one ball of yarn for each color you are going to use.
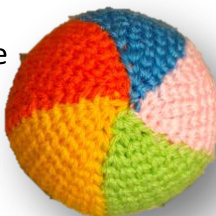
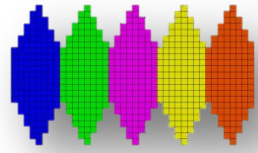
Follow the instructions as for the plain version, but make Round 1 with one stitch in each color and then work each repeat switching the colors.
If you feel ready for a challenge using the L-sc, you can give my Blue lizard pattern a try. It is available as a free download on my Ravelry store. I also have some other patterns using this stitch for sale on my Ravelry store. Have fun, and happy crocheting!!!! Please do not sell redistribute or edit this photo tutorial in any form. If you have any questions or comments about this tutorial, you can contact me at rosssval@gmail.com or via my Ravelry store www.ravelry.com/designers/rosaura-valdez


