Pink Blueberries Spring Scarf or Wrap
designed by Katy Banks I must have watched The Sound of Music hundreds of times in my childhood. There is a part of the movie when Captain Vontrapp asks his children what they have been doing; they answer that they were picking blueberries. When he informs them that it is too early for blueberries, their answer is that it was actually strawberries they were picking, but since it had been so cold lately the berries had turned blue. As I was creating this scarf, this scene kept resurfacing from my memories. If strawberries could be blue from cold, why couldn't blueberries become pink from the warming of spring? Such are the dream-like thoughts that come to mind when we knit. And so, the name for this pattern arose.
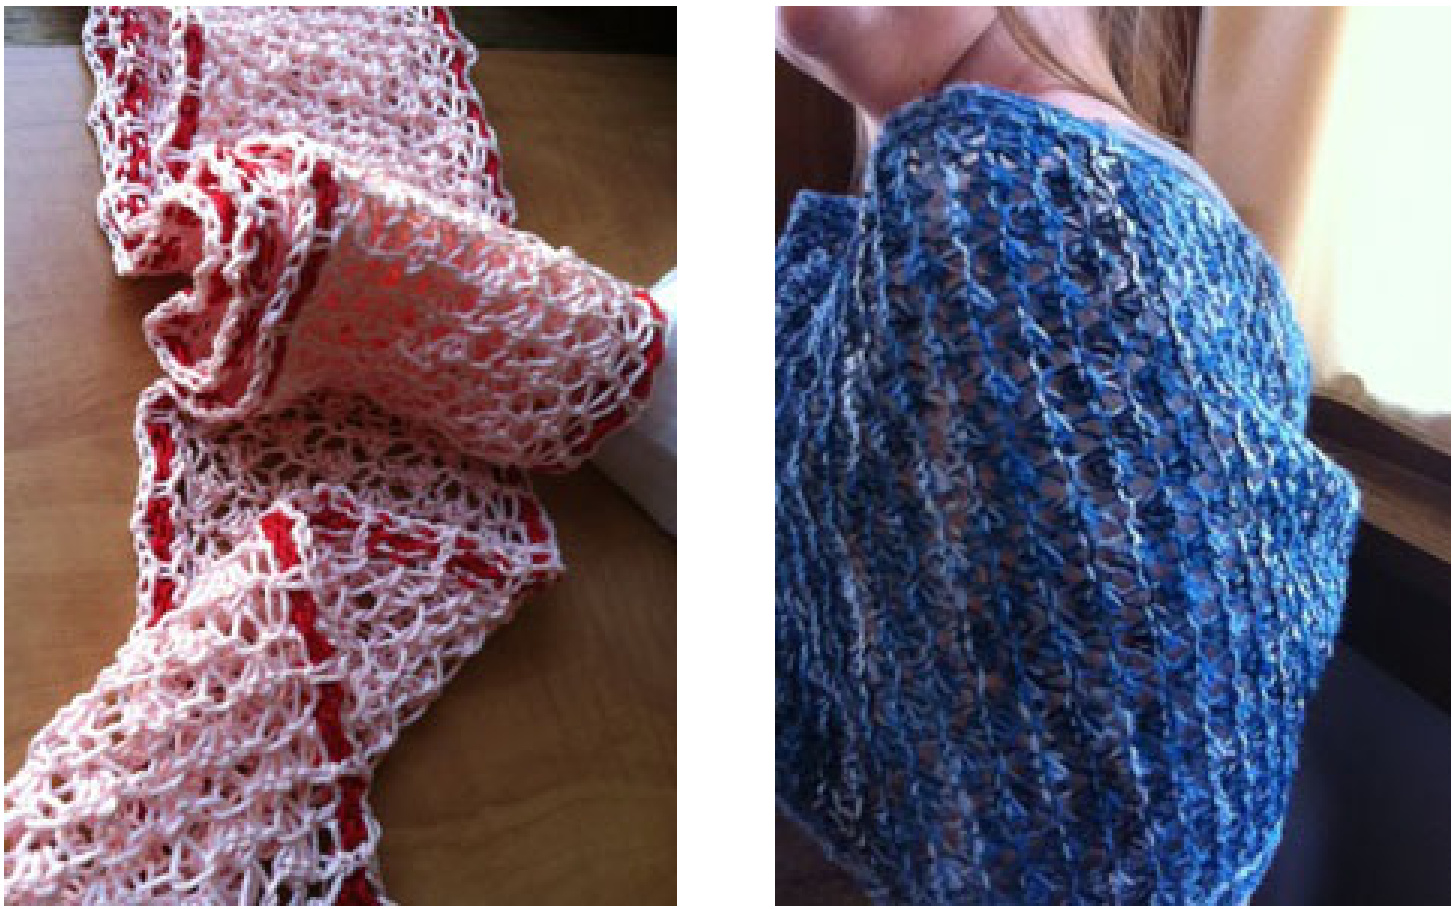
Originally created for a child's version, I have included instruction for an adult version as well. The child version is pictured in pink and red cotton and was agressively blocked to open the lace as much as possible. The adult version is pictured in tonal blues of lace-weight merino wool held doubled and is knit-up wider to give more versatility in wearing. One of the wonderful things about lace is that your finished piece can become many different sizes depending on how much you open it up in the blocking proce ss. So please make it your own! The construction begins with casting on stitches for the width of the center section. The entire center section is knit in one piece and then bound off. The border is then picked up all the way around and knit in the round to the edges with increases at the corners to maintain a strict rectangular shape.
Sizes: child (adult)
surements after blocking: 5(11) inches wide by 44(64) inches long
Materials:
for child version: Patons North America Grace in - MC Blush (1 skein) \*note that the sample took nearly all of one skein, you may wish to purchase 2 to be safe - CC Cardinal (1 skein) for adult version: Knit Picks Shadow in Stone Washed Tonal (2 hanks) \*this colorway is not available, but Knit Picks has many lovely laceweights you can choose from
Needles:
US size 8 needles (straight or circular, as you wish) US size 2 needles (1 or 2 very long circulars recommended to acomodate large number of border stitches) Gauge: 16 st x 16 rows = 4" in center stitch pattern on larger needles after blocking \*Every knitter's gauge is unique - be sure to check your gauge. Because exact dimensions are not critical for a scarf, this project could be succe ssful with a variety of different gauges; just be sure to keep in mind that too much variance in gauge could cause the resulting fabric to have more drape or to be morestiff.

Instructions:
Center
With MC and larger needles, CO 18 (42) stitches Row 1: s1, \* k3tog, incr3 \*, repeat from \* to \* until the last st, k1 Row 2: s1, k to the end Row 3: s1, \* incr3, k3tog \*, repeat from \* to \* until the last st, k1 Row 4: s1, k to the end Repeat rows 1 - 4 until piece is approximately 36 (50) inches long BO all stitches but do not break yarn. Border Switch to smaller needles and continue with MC Pickup and knit stitches all around the border of the piece, marking the corner stitches as you make them and adjusting stitch count as necessary to ensure each side of the piece has a multiple of 4 stitches plus 1 stitch in between each corner Stitch. Drop the MC working yarn (do not break) and join CC. Rnd 1: [kl corner stitch, slip1 wyib, \* kl, slip1 wyif, kl, slip1 wyib \*, repeat from \* to \* until the next corner stitch] 4 times Rnd 2: [p1 corner stitch, slip1 wyib, \* p1, slip1 wyif, pl, slip1 wyib \* repeat from \* to \* until the next corner stitch] 4 times Rnd 3: [incr3 in corner stitch, slip1 wyib, \* k1, slip1 wyif, k1, slip1 wyib \*, repeat from \* to \* until the next corner stitch] 4 times - each corner area now consists of 3 stitches Rnd 4: [p3 corner stitches, slip1 wyib, \* pl, slip1 wyif, p1, slip1 wyib \* repeat from \* to \* until the next corner stitch] 4 times Rnd 5: [k1, incr3, k1, slip1 wyib, \* k1, slip1 wyif, k1, slip1 wyib \*, repeat from \* to \* until the next corner stitch] 4 times - each corner area now consists of 5 stitches Rnd 6: switch to MC and BO all stitches purl-wise
Finishing
Weave in ends and block as desired.

Designed with Intwined Pattern Studio (intwinedstudio.com)
Center Chart
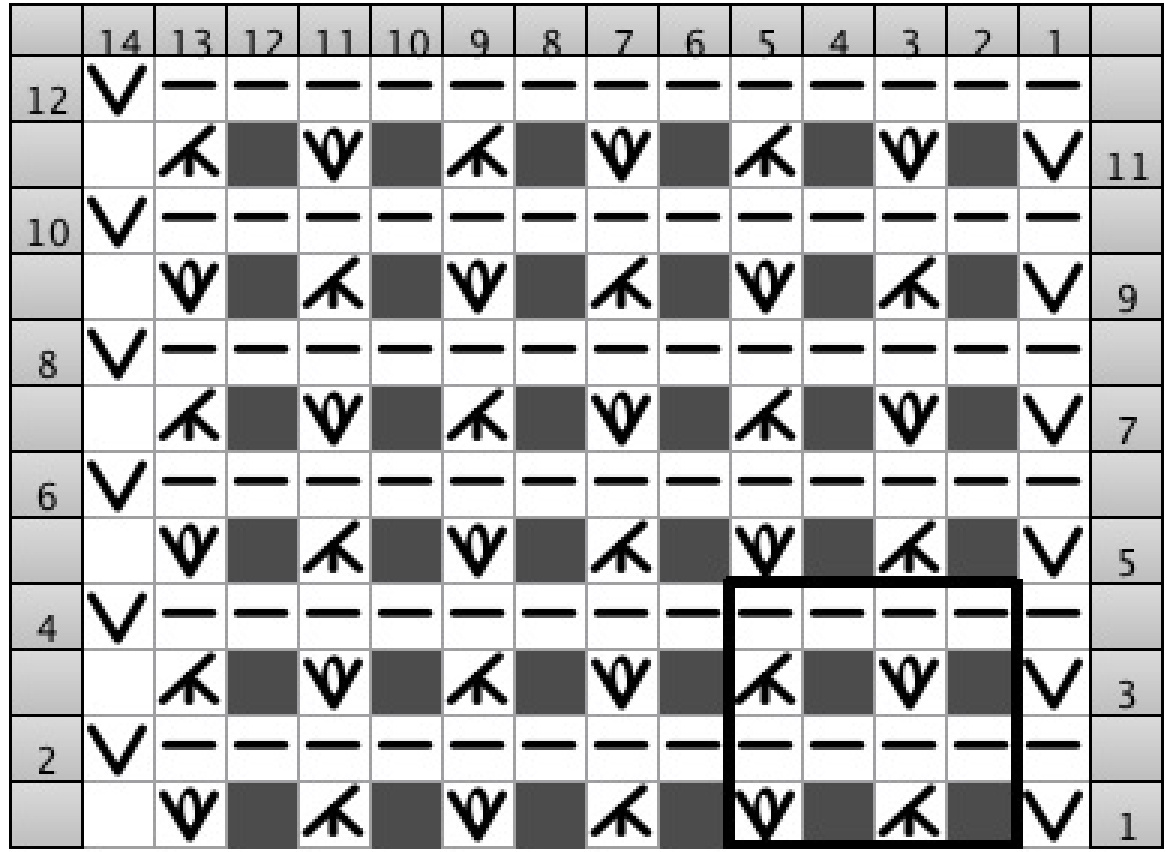
This chart is worked back and forth in rows. The stitch repeat section is inside the box. More stitches and rows are pictured in the chart to aid your visualization.
Border Chart
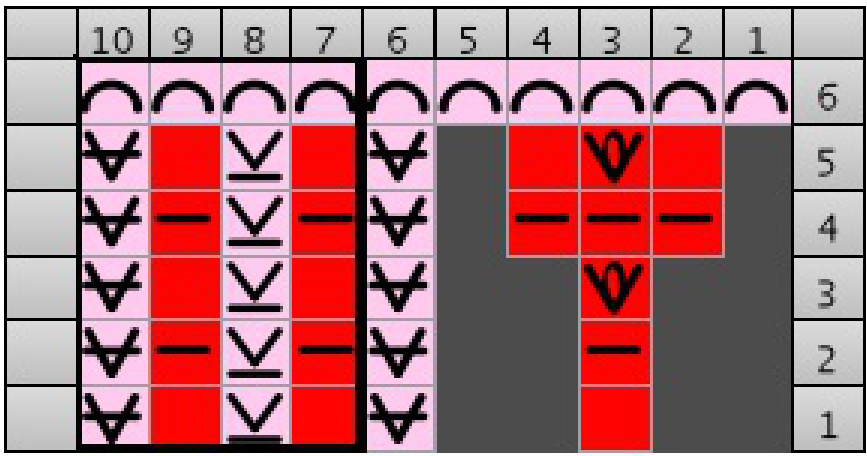
This chart is worked in the round. The right side of the chart shows the corner area. The area inside the box (on the left side of the chart) is repeated as many times as necessary to reach the next corner area.


