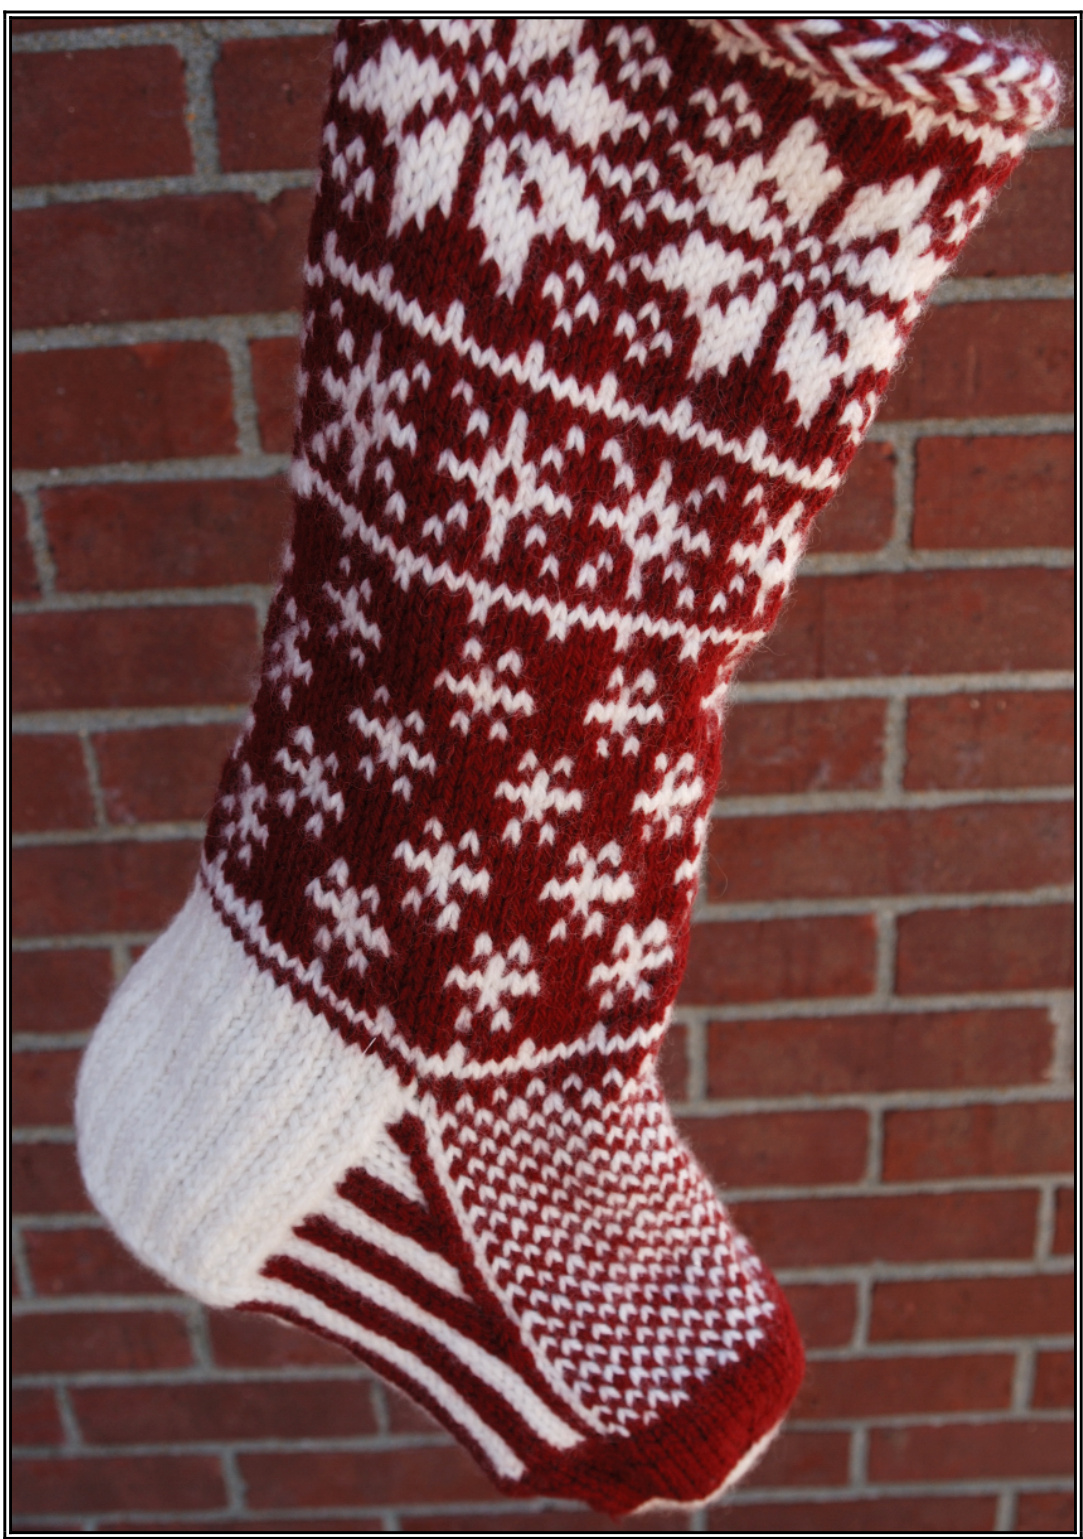
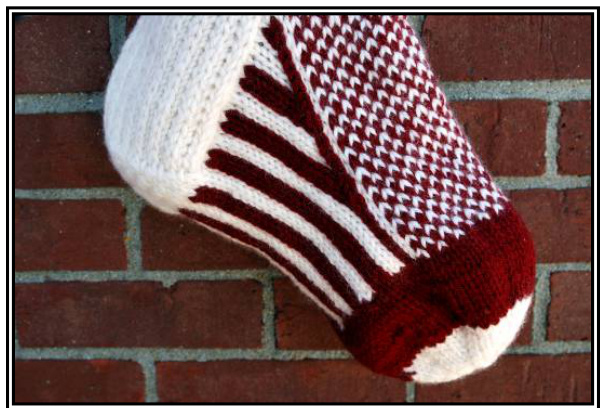
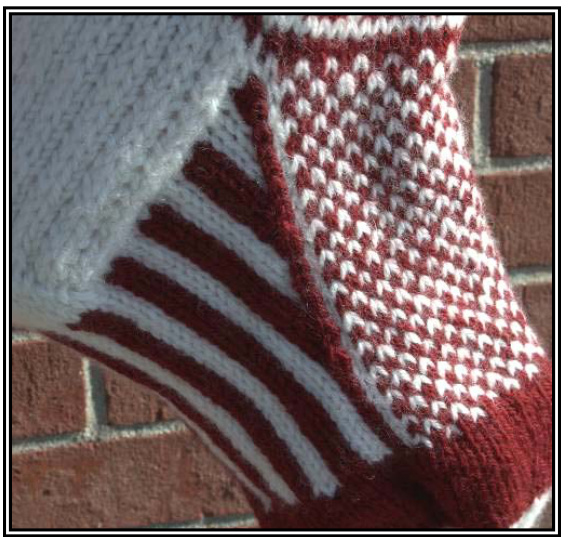
This was originally knit as a Christmas gift for my niece, Paige. The stocking uses bulky weight yarn and real sock construction, including a short row heel and abbreviated rounded toe. So, if you wanted a pair of socks to wear, knitting with fingering weight yarn and minor modifications should do the trick. in bulky yarn, however, this is one laaarge rustic looking stocking! Yarn: $\pmb{M}\pmb{C}=\mathsf{K}\mathsf{n i t}$ Picks Wool of the Andes Bulky - red: 2 skeins (I just barely dipped into the $2^{n d}$ skein..you could probably drop the last round of the smallest snowflakes and complete the stocking with 1 skein) $\pmb{c}\pmb{c}=$ Knit Picks Bare Peruvian Highland Wool Bulky Weight - 1 skein Needles: US 10 (6mm), 16" circs and dpns or magic loop length of choice. Gauge: 4 sts and $4\ \mathsf{r o w s}=1$ -inch Gauge is not critical to this project.
Finished Size:
16-inch circumference at cuff 20-inches from top of cuff to bottom of heel 14-inches from back of heel to tip of toe.
The Pattern
CO 64 using the long-tail, two-color cast on \*\*Long-Tail, Two-Color Cast On is almost identical to the normal long-tail method. It begins with a slipknot joining the MC and CC, placing the CC on the needle first. Please note that the slipknot counts as one stitch. Simply hold the MC over the index finger and the CC over the thumb. Then just follow the usual long-tail method. \*\* Now, begin the Latvian Plait with a setup row. Setup: \*k1 CC, k1 MC\* around Round 1: With both colors in front and bringing your working yarn in front of (over) the previous stitch, \*p1 CC, p1 MC\* around
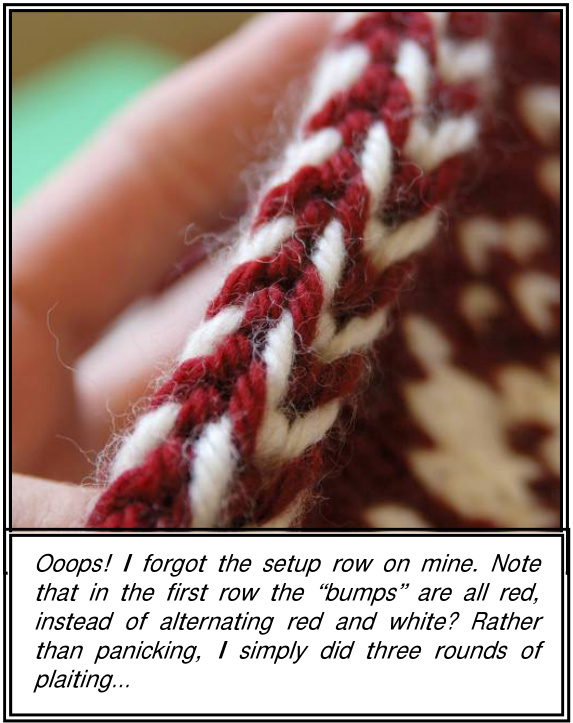
Round 2: With both colors in front and bringing your working yarn behind (under) the previous stitch, \*p1 CC, p1 MC\* around Now get started on the chart! See you on the other side.
Great. Onto the heel.. So, grab 2 of your dpns or an extra pair of straights for this part. If you don't have extra US10s, you'll need to slip the non-heel stitches to a holder some waist yarn until the heel is finished.
Be sure to place a marker at the beginning of the round!
Helpful abbreviations
(wyf) $=$ with yarn in front (wyb) $=$ with yarn in back sl1 $=,$ slip 1 st pwise $=$ purlwise p2tog $=$ ourl 2 sts together ssk=slip 2 sts knitwise, then knit them together through the back loops. Heel Flap Using CC, k15, turn (wyf) sl1 pwise, p 29
Row 1: \*(wyb), sl1 pwise, $\mathsf{K}1^{\star}$ repeat to end Row 2: (wyf), sl1 pwise, p to end Repeat rows 1 and 2 - 15 times, then complete row 1 again. You should now have 15 selvage stitches. Now it's time to turn the heel.
Short Row Heel.
Row 1: (wyf) sl 1 pwise, p16, p2tog, p1, turn Row 2: (wyb) sl 1 pwise, k5, ssk, k1, turn Row 3: (wyf) sl1 pwise, p6, p2tog, p1, turn Row 4: (wyb) sl1 pwise, k7, ssk, k1, turn Continue in this fashion until 18 sts remain and get ready for the gusset.
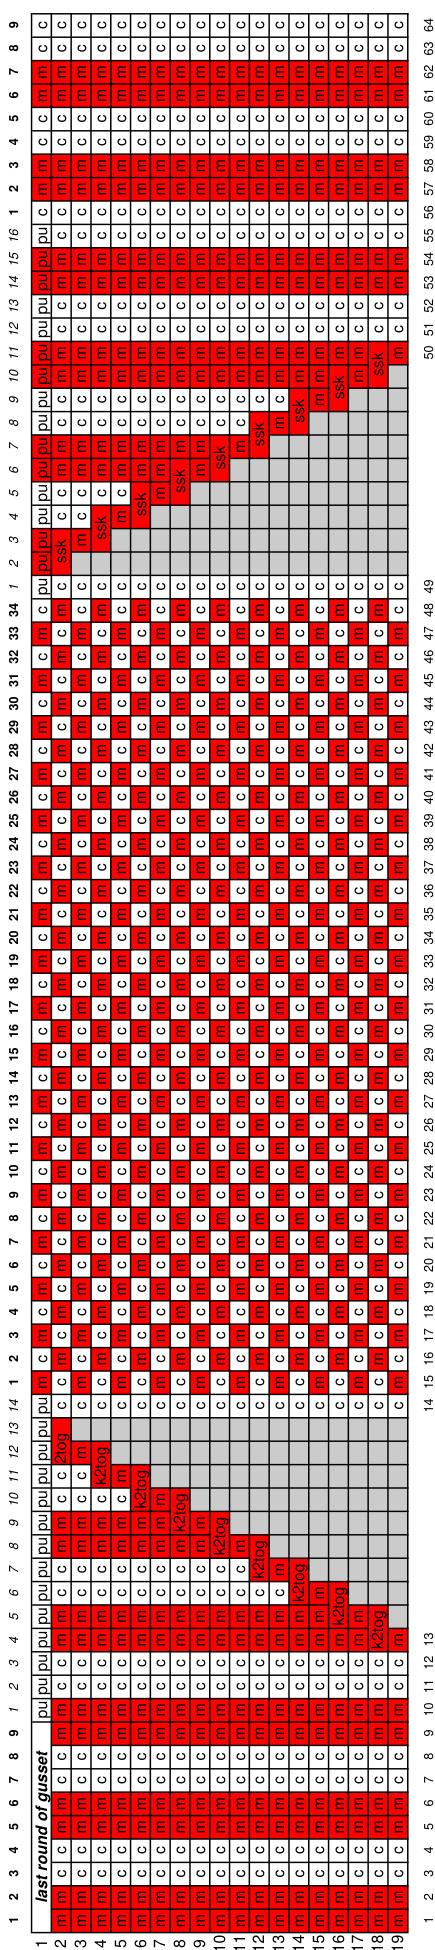
Gusset
We'll pick up 14 sts along the first selvage edge of the heel and 16sts on other. If you're trying this out on fingering weight yarn for wearable (l hope - please remember that the whole "wearable" theory has not been tested) socks, you'll probably want to pick up 17 and 18 sts respectively.
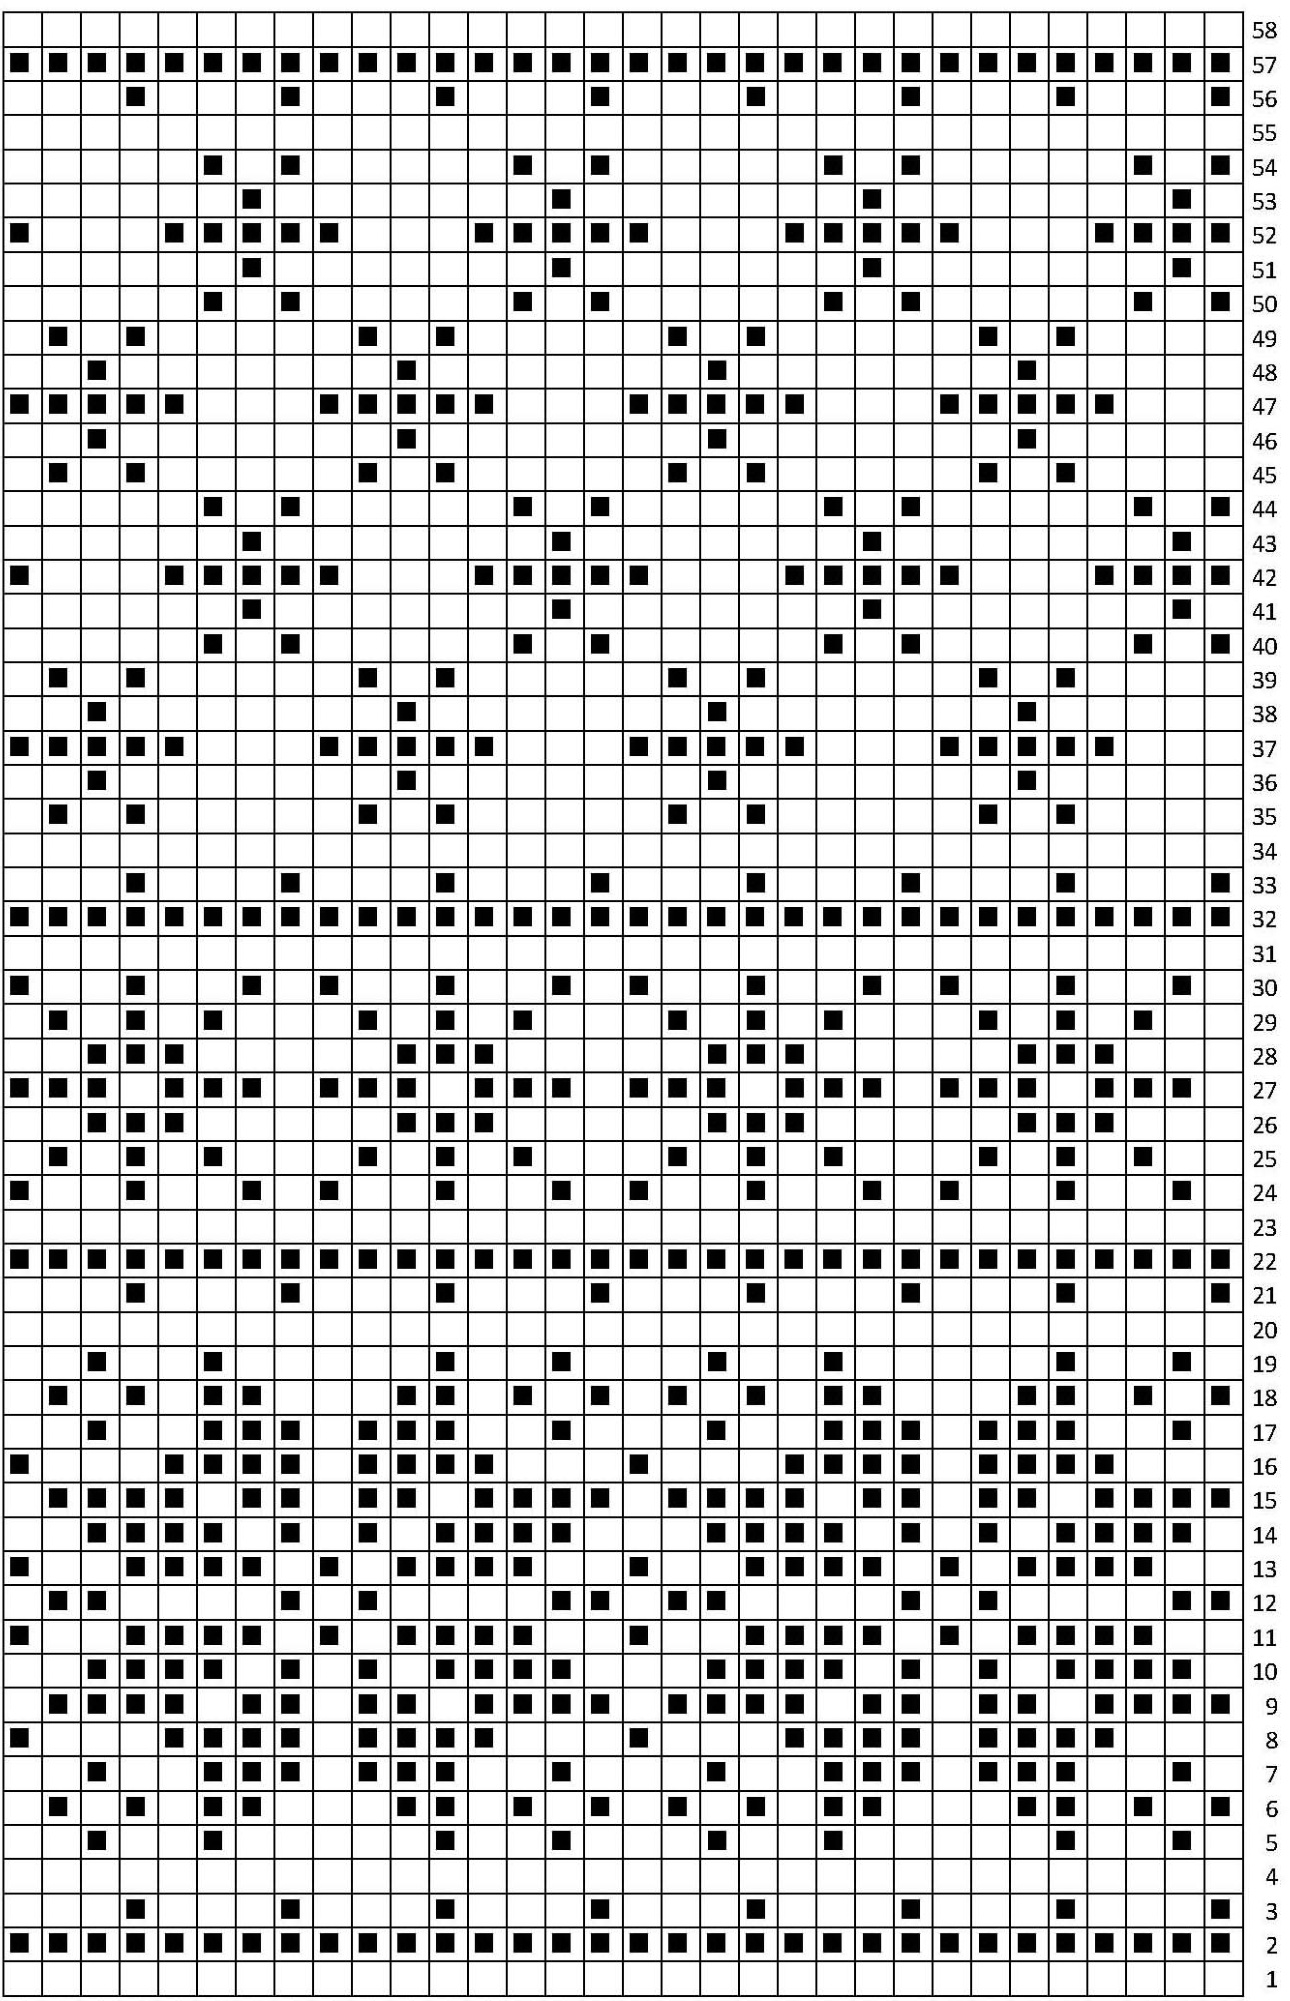
You'll notice that the MC yarn you've been ignoring while you worked the heel is patiently waiting for you. There's a chart diagramming the gusset at the end of the pattern. Round 1: (starting at the end of the gusset work without turning) Pick up. 14 sts along selvage edge, \*k1MC, k1CC\* 17 times, pick up 1 st in CC, \*pick up 2 sts in MC, pick up 2 sts in $\mathsf{C C}^{\star}\,\mathsf{3}$ times, pick up 2 sts MC, pick up 1 st CC, k1CC, \*k2MC, k2CC\* twice. Round 2: (round starts in the middle of the bottom of the heel) \*k2MC, k2CC\* 5 times, k2togMC, k1CC, \*k1CC, k1MC\* 17 times, k1CC, ssk MC, \*k2CC, k2MC\* 5 times, k2CC. Round 3: \*k2MC, k2CC\* 5times, k1MC, k1CC, \*k1MC, k1CC\* 17 times, k1CC, k1MC, \*k2CC, k2MC\* 5 times, k2CC. Round 4: \*k2MC, k2CC\* 4 times, k2MC, k1CC, k2togMC, k1CC, \*k1CC, k1MC\* 17 times, k1CC, ssk MC, k1CC \*k2MC, k2CC\* 5 times. Round 5: \*k2MC, k2CC\* 4 times, k2MC, k1CC, k1MC, k1CC \*k1MC, k1CC\* 17 times, k1CC, k1MC, k1CC \*k2MC, k2CC\* 5 times.
Continue in pattern, reducing 2 sts every other round until 64sts remain.
Knit even in pattern for another 1-1/2 inches, or until you think the foot is long enough. Ready for the toe?
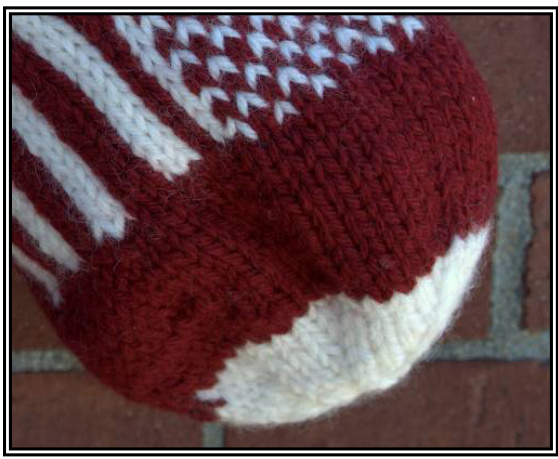
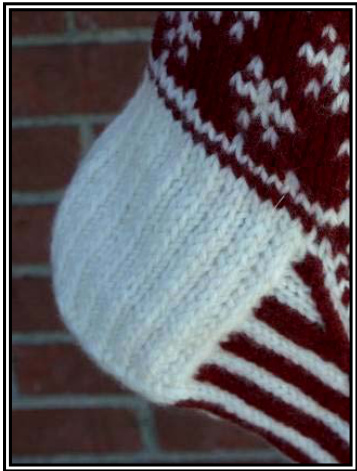
Rounded toe
This is a severely modified rounded toe. The full toe was comically large. Like, so large that hubby couldn't force out the words "It looks fine." Instead, he raised both eyebrows and said, "You're frogging that back, right?" Using MC Rnd 1: $\star_{\mathsf{K}6}$ , k2tog\* 7 times, k6, k2tog (56 sts) Rnd 2-7: k Rnd 8: $\star_{\mathsf{K}5}$ , k2tog\* 8 times (48 sts) Rnd 9: k Rnd 10: k Rnd 11: k (If you were doing a true “Round Toe", you'd k 2 more rounds for a total of5) Rnd 12: \*k4, k2tog\* 8 times (40 sts) Switch to CC Rnd 13: k (For a full “Round Toe", k 4 rounds) Rnd 14: \*k3, k2tog\* 8 times (32 sts) Rnd 15: k (For a full “Round Toe", k 3 rounds) Rnd 16: \*k2, k2tog\* 8 times (24 sts) Rnd 17: k (For a full "Round Toe", k 2 rounds) Rnd 18: \*k1, k2tog\* 8 times(16 sts) Rnd 15: k2tog around (8 sts) Cut the yarn, leaving a tail long enough to weave through the remaining 8 sts, close the toe, and you are done! My notes were a bit sketchy by the time I'd finished the stocking (translation: I didn't make any notes), so please let me know if you run into problems.Cheers!