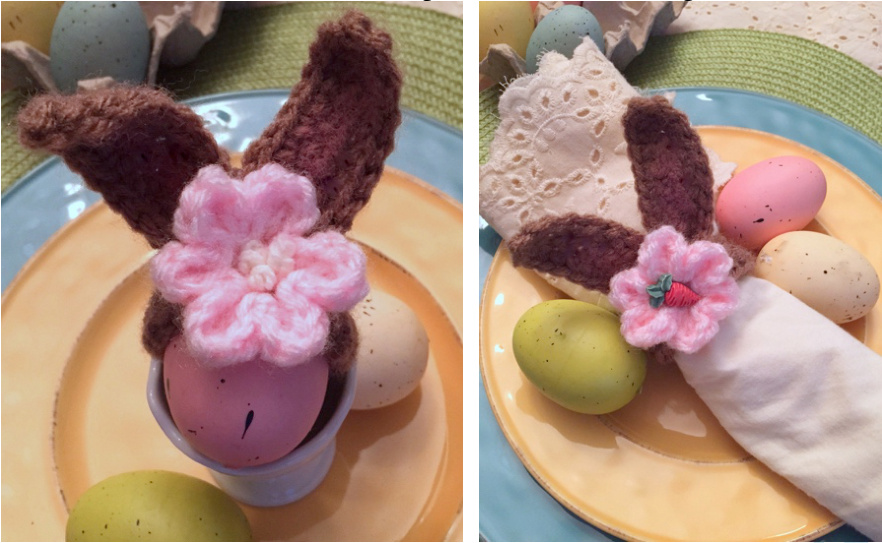
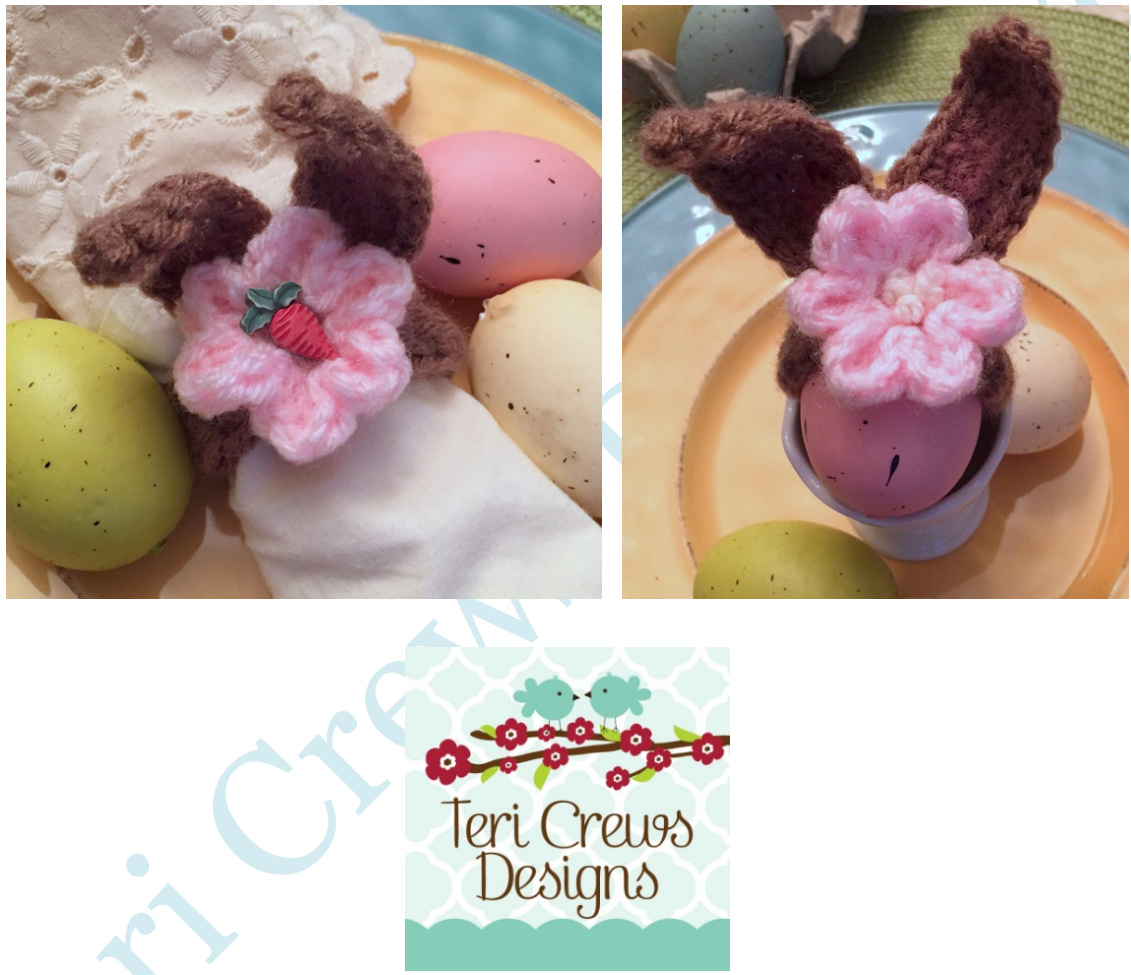
Bunny Ear Napkin Ring Crochet Pattern by Teri Crews Designs
Materials:
\~Medium Worsted Weight Yarn \~Sample made with small amounts of Red Heart Super Saver: Café Latte, Pink and Cream \~SizeG (4 mm)hook \~TapestryNeedle
Optional:
\~Dry powder blush or pink pigment ink for coloring inside ears \~Button for center of flower Finished measurements: Ears approx. 3" long, ring approx. 6" round Abbreviations and Stitches Used: ch=chain fo=fasten off hdc=half doublecrochet sc=single crochet sl st=slip stitch st(s) = stitch(es) sc2tog=sc 2sts together dc=doublecrochet tr=treble crochet () = repeat between O number of times indicated or all in one stitch as noted [1 = repeat between brackets number of times indicated
Notes and Tips:
Helpful to read these before starting and maybe even again when it's time to put your softietogether
\~Do not join pieces that are crocheted in the round unless otherwise indicated \~A stitch marker will come in handy when repeating rounds or another helpful way to keep track of your rounds is to start all pieces with a long tail, and pull the tail through the beginning stitch of each round. \~Coloring: rub a little dry powder blush or pink pigment ink onto your finger or paper towel, and rub in center of ear.
Ears (make 2)
Starting at bottom of ear with Café Latte, working in rows 1: ch 9, sc in 2nd ch from hook, sc in each of the next 2 chs, hdc in each of the next 2 chs, dc in each of the last 3 chs, turn 2: working along side of ear, ch1, sc in each of the next 7 sts, 3 sc in next st, working down other side, sc in each of next 8 sts, FO, leave a long tail to use for sewing Weave in beginning yarn. Thread tapestry needle with ending yarn tail and weave needle through bottom row of stitches, tug lightly to slightly indent ear. Sew 3-4 stitches of side of ears together. Set aside until band is finished or go directly to the flower and use these cute little ears as appliques, embellishments,etc.
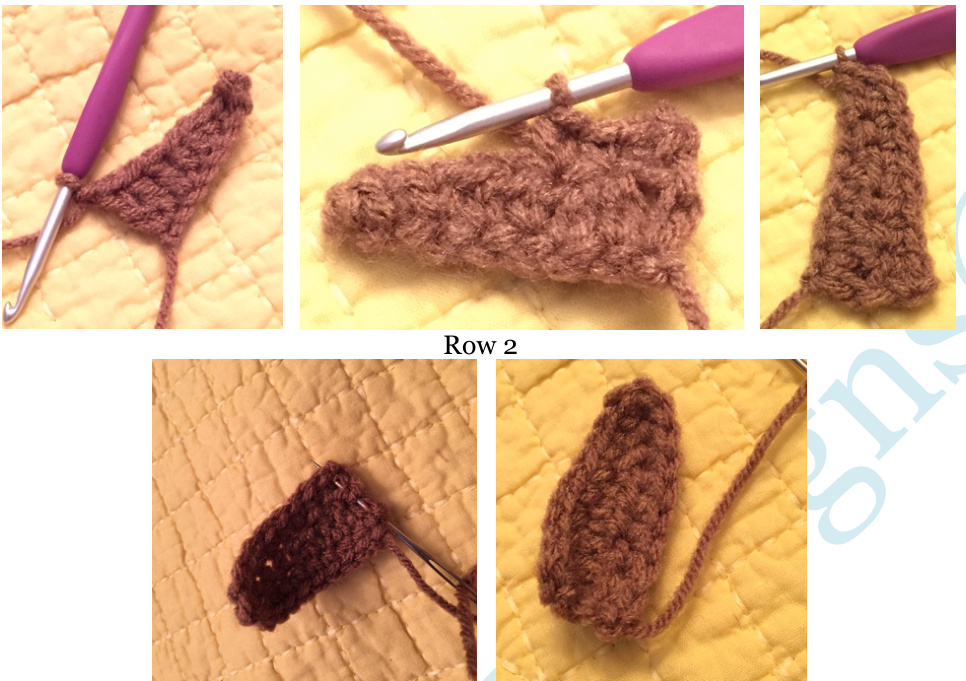
Weave threaded needle through bottom row of stitches, tug lightly to slight indent ear
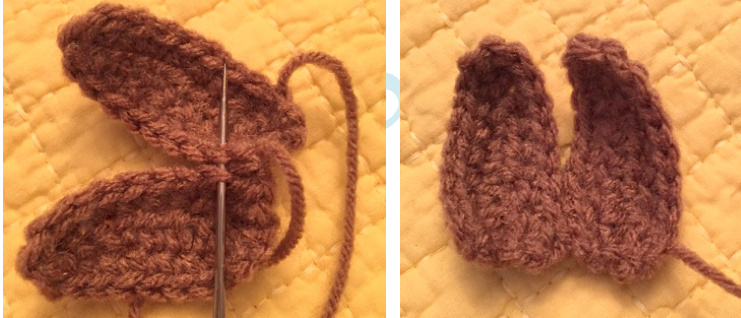
Sew 3-4 stitches of inside each ear together
Band/Ring
Working in rows with Cafée Latte 1: ch 21, dc in 4th ch from hook (first skipped 3 chs count as first dc), dc in each of next 16 chs, ch 3, sl st in last ch, working on opposite side of ch, sc in each st to end, Fo, leave a long tail to
use for sewing
Weave in beginning yarn. Thread tapestry needle with ending yarn, sew ends together with small whipstitches.
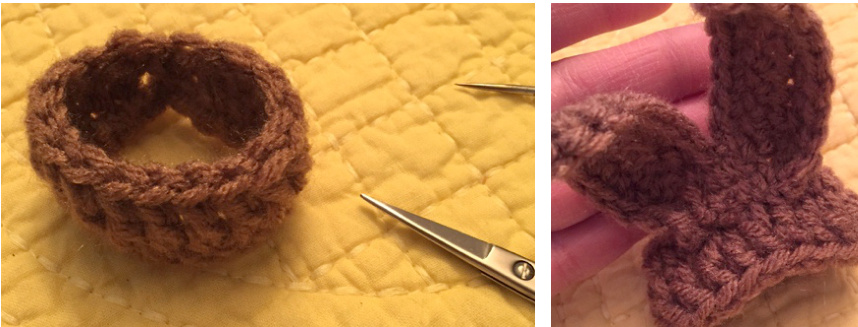
Sew Ears to center front of ring.
Flower
With Pink working in the round 1: ch 2, 6 sc in 2nd ch from hook, join to first sc with sl st (6) 2: ch 2 (hdc, 2 dc, hdc, sl st) in same st, \*sl st ch 2, (hdc, 2 dc, hdc, sl st) in next sc, sl st in next sc, \* repeat from \* to \* 4 more times, join with sl st to beginning ch-2, FO Weave in ends. Sew Flower to center of ears: add French Knots or Button to center. I hope you enjoyed creating your bunny ear napkin ring. Add ears to barrettes, headbands, bracelets, pins, clothespins, and use as appliques, scrapbooking, on cards, bags, tags and more. Your little napkin ring even makes a cute egg cozy.
Happy Crocheting>
Be sure to visit my website: http://www.tericrewsdesigns.com Or Blog: http://www.tericrews.blogspot.com for tutorials, news, current promotions and pattern errata Bunny Ear Napkin Ring Crochet Pattern by Teri Crews Designs?2015 Do not copy, alter, share or sell pattern, pictures or images. Copies may be made for owner's personal use only. Feel free to sell your finished items, but please do not copy, share or sell pattern.


