
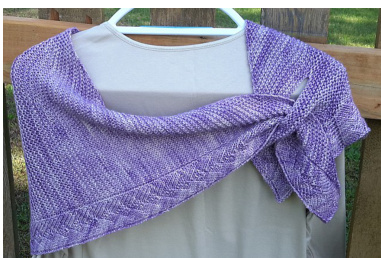
"Wrong" side "Right’′ side

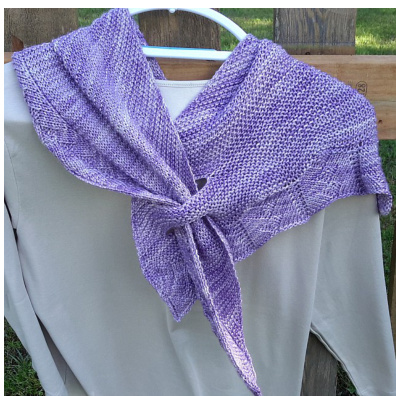
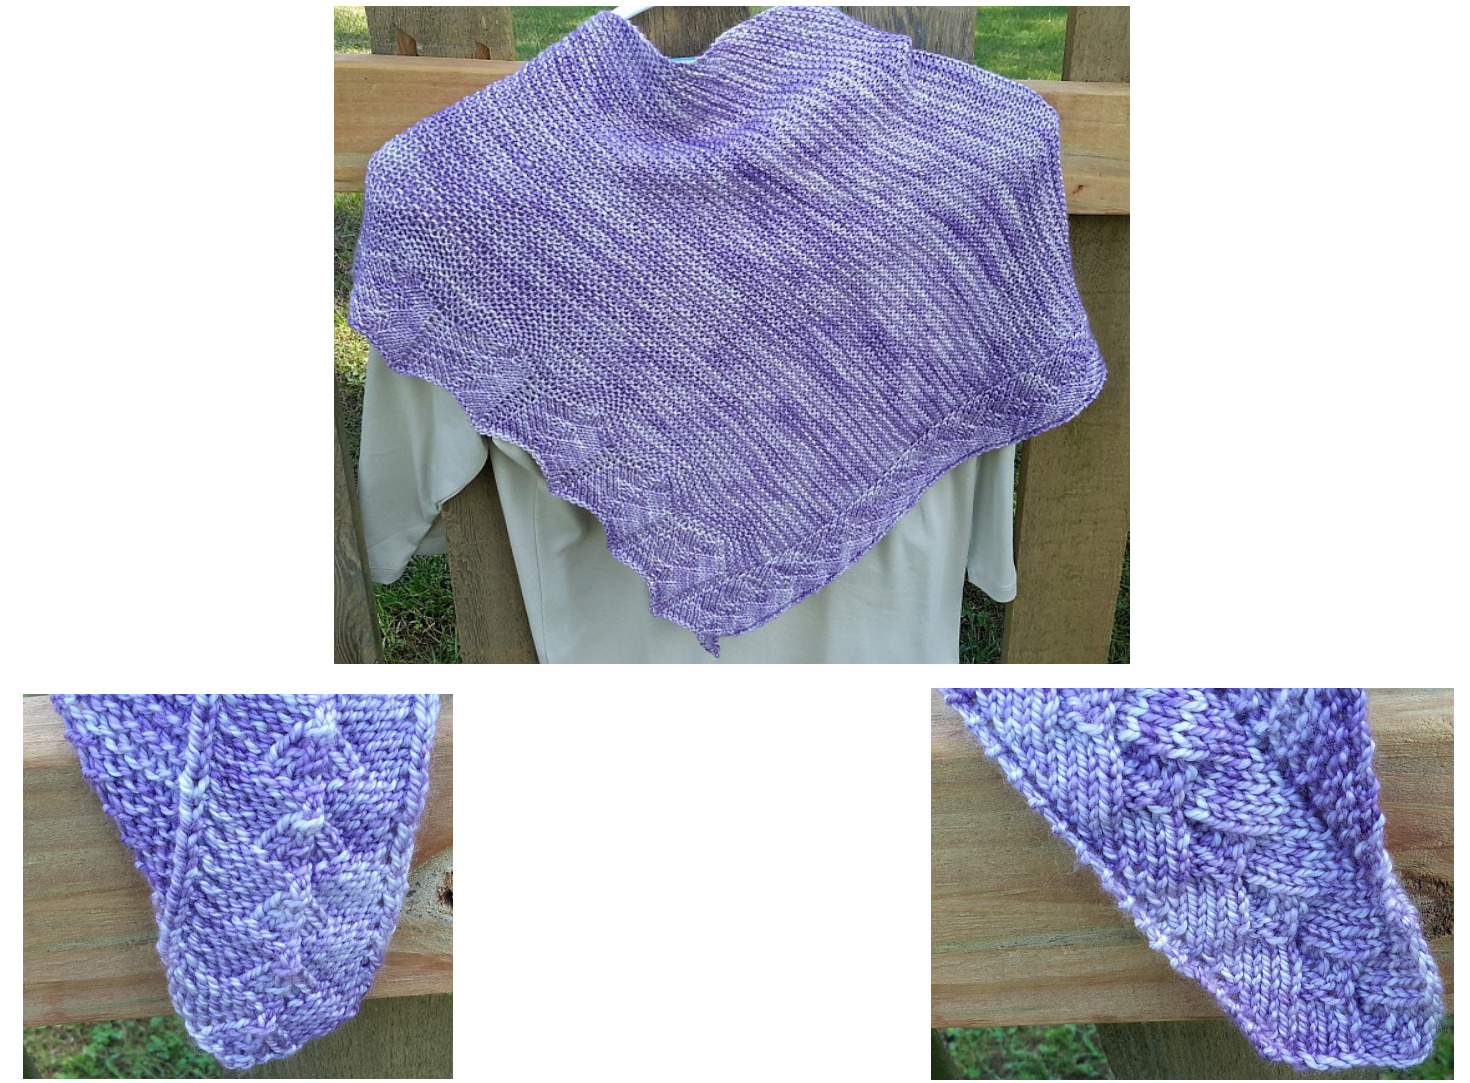
Finished size:Wingspan 51"x 22"At Deepest Point
Materials:
Zen Serenity DK 90% superwash merino, 10% Cashmere (250 yd/229 m, 3.5 oz/100 g), 2 skeins color Ametrine US size 5(3.75 mm) 24" circular needle (or size required to achieve gauge) Stitch Markers optional Tapestryneedle Gauge: 19st/24r = 4 in (10 cm) in Garter Stitch after blocking. Note: while gauge is not critical for this project, a different gauge will affect the size of the finished shawl and the yardage requirements. Notes: Optional stitch marker can be used to mark separation between the pattern stitch along the edge and the garter stitch section to eliminate the need for counting Stitches. Customize it! Use a different weight yarn with appropriately sized needles. Add more rows, or remove some rows to get the wingspan that is just right for you! The ending stitch pattern along the short side of the shawl is worked over a multiple of 15 stitches so just be sure that your garter stitch section is a multiple of 15 AND you have completed a row 6 of the pattern along the long edge. Also keep in mind that any changes you make will affect the yarn requirements.
Abbreviations
BO = bind off. CO= Cast on. Kfb = knit front and back. Knit into the front of the next stitch, leave it on the needle and knit into the back of the same stitch. (one stitch increased). M = marker. M1L = make one left. Insert needle from front to back through the strand between the two stitches, place that strand on the working needle and knit it through the back. M1R = make one right. Insert needle from back to front through the strand between the two stitches, place that strand on the working needle and knit it through the front. P2tog = purl 2 together. Purl the next two stitches together (one stitch decreased). P3 tog = purl 3 together. Purl the next three stitches together (two stitches decreased). PM = place marker. RS = right side of work. SM = slip marker WS = wrong side of work.
Instructions:
CO 17. Row1 (RS): K1, p1, M1L, k3, p2, p3tog, p2, k3, M1R, pl, k1. Row 2 (WS): K2, p4, k5, p4, k2. Row 3: K1, p1, M1L, k4, pl, p3tog, pl, k4, M1R, pl, kl. Row 4: K2, p5, k3, p5, k2. Row 5:K1, pl, M1L, k5, p3tog, k5, M1R, p1, k1. Row 6: K1, p6, k1, p6, k2. Row 7: Kfb, pl, M1L, k3, p2, p3tog, p2, k3, M1R, p1, k1. Row 8: K2, p4, k5, p4, k1, pm, k to end. Row 9: Kfb, k to m, sm, pl, M1L, k4, pl, p3tog, pl, k4, M1R, pl, k1. Row 10: K2, p5, k3, p5, k1,sm k to end. Row 11: Kfb, k to m, sm, p1, M1L, k5, p3tog, k5, M1R, p1, k1. Row 12: K2, p6, kl, p6, k1, sm, k to end. Rep rows 7-12 for patt.
Optional Slit Placement:
When you have completed 37 patt reps (222 rows, 108 garter sts) Make 15 st buttonhole on the next RS row: Kfb, k7, bring the yarn to the front and slip 1 purlwise. Take the yarn to the back and leave it there. The bind off is done without knitting the stitches being bound off. \* Slip the next stitch, then pass the previously slipped stitch over it.
1 buttonhole stitch complete.Repeat from \* 14 more times (15 sts BO). Put last slipped stitch back onto your left needle. Step 2: Turn your work. Bring the yarn to the back and cable cast on as follows: \* Insert the right needle between the first and second stitches on your left needle. Wrap the yarn as if to knit, pull the loop through, and place it on your left needle. Repeat from \* until you have cast on 16 stitchs (one more than was bound off.) Step 3:Turn your work. Bring the yarn to the back and slip the first stitch from your left needle to your right hand needle. Pass the extra cast-on stitch over it and tighten. Finish row in pattern
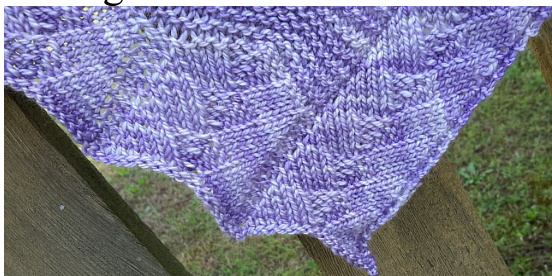
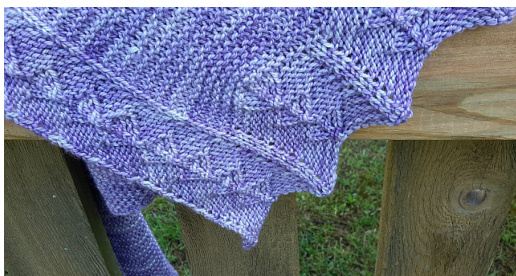
Work 11 more rows in patt as established then repeat the buttonhole row one more time. Cont in patt until you have 136 sts (41 patt reps, 120 garter sts) Ending Border: Row 1 (RS): Kfb, M1L, k3, p2, p3tog, p2, k3, M1R, p1, \*p1, M1L, k3, p2, p3tog, p2, k3, M1R, pl; rep from \* to last st, end k1. Row 2 (WS):K2, \*p4, k5, p4, k2; rep from \* to end, slipping m as you go. Row 3: K1, \*p1, M1L, k4, pl, p3tog, pl, k4, M1R, pl;Rep from \* to last st, end k1. Row 4: K2, \*p5, k3, p5, k2; rep from \* to end. Row 5: K1, \*p1, M1L, k5, p3tog, k5, M1R, pl; rep from \* to last st, end k1. Row 6: K2, \*p6, k1, p6, k2; rep from \* to end. Work rows 1-6 two more times then BO using any stretchy BO you prefer.
Finishing
"Wrong" side
"Right”’ side Weave in ends. Aggressively block to achieve finished measurements. I hope you enjoy this pattern.
BlueberryShawlBody
| MR | ||||||||||||||||||||||||||
| MR | ||||||||||||||||||||||||||
| MR | ||||||||||||||||||||||||||
| MR | ||||||||||||||||||||||||||
| MR | ||||||||||||||||||||||||||
| MR | ||||||||||||||||||||||||||
| MR | ||||||||||||||||||||||||||
| MR |
BlueberryShawlEndingBorder
Leqend: Created in KnitVisualizer (www .knitfoundry .com)
| No Stitch | |
| kfb | |
| M | make one left |
| knit | |
| purl | |
| MR | make one right |
Questions? Comments? Please email me at : sgressman@gmail.com


