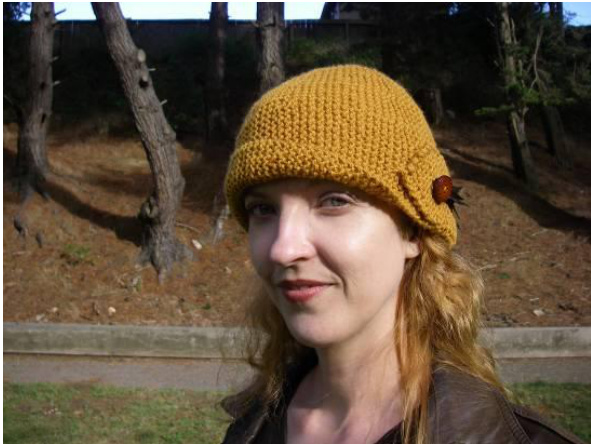
This hat was the rage in the roaring twenties, and again today. I've made this project quite simple, for a bit of mindless knitting.
Ingredients
One ball of Patons Wool Classic Merino (120 - 170 yards) or any worsted weight is recommended. Size 8 $:5\mathsf{\ m m}$ circular needle (or size needed to attain gauge) at least 24 inches (60cm) in length. Straight needles are likely to drop stitches while turning short rows. Short stitch markers made of yarn Darning needle Double pointed needles in same size as gauge needle
Gauge
22 sts and 24 rows to $4^{\prime\prime}$ (10cm). This gauge is intentionally tight for this yarn.
Sizes
Sizes are given as Small (Med, Large). Small fits up to 21," (53.5cm) Medium up to 22.5,"(57cm) Large up to 23.5" (59.5cm)
Glossary
st/sts $=$ stitch/stitches · $\mathsf{P M=}$ placemarker · Rem $=$ remaining $\mathsf{W Y I B}=$ with yarn inback
Construction
Knit a garter stitch wedge shaped with short rows. Increase in each wedge to create selvedge band. After hat is knit, but not bound off, graft cast on edge together with remaining sts on needle. Knit in button tab if desired. Turn up band and sew on button.
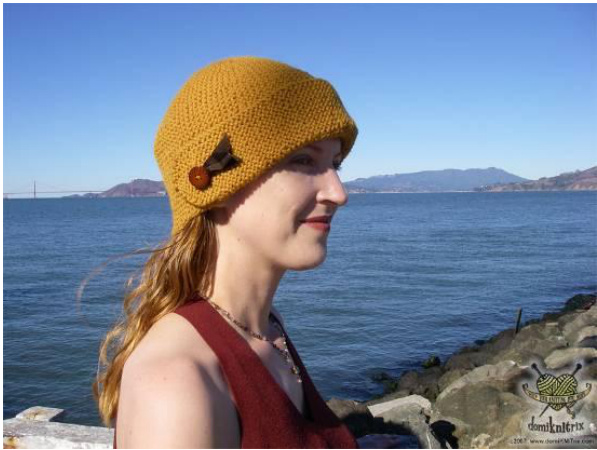
Cloche - worn in reverse
Provisionally cast on 30 (33, 36) sts. If you wish the hat to be deeper, you may add sts accordingly.
Prep row: K1, PM, k1, PM, k2, PM, k3, PM, k4, PM, k5, PM, k6, PM, k to end
Staying oriented:
The end of the needle with markers close together will be the top of the hat. Do not knit all the sts at this end except on complete rows 1-2 and 3-4 which end each half of the segment. Note: Wrap all sts wyib. Short row 1 (ws): Knit to first marker, wrap and turn-30 (33, 36) sts. All short rows (RS) to SR 14: Knit to end Short row 3: Knit to second marker, wrap and turn. Short row 5: Knit to third marker, wrap and turn. Short row 7: Knit to fourth marker, wrap and turn. Short row 9: Knit to fifth marker, wrap and turn. Short row 11: Knit to sixth marker, wrap and turn. Short row 13: Knit to last marker, wrap last stitch and turn. Short row 14: Knit to end Complete row 1 (ws): Knit to first marker, inc 1, knit to end—31 (34, 37) sts Complete row 2 (Rs): Knit all sts Short row 15: Knit to last marker, wrap last stitch and turn. Short row 17: Knit to sixth marker, wrap and turn. Short row 19: Knit to fifth marker, wrap and turn. Short row 21: Knit to fourth marker, wrap and turn. Short row 23: Knit to third marker, wrap and turn. Short row 25: Knit to second marker, wrap and turn. Short row 27: Knit to first marker, wrap and turn. Short row 28: Knit to end Complete row 3 (ws): Knit to first marker, inc 1, knit to end—32 (35, 38) sts Complete row 4 (Rs): Knit all sts This completes one wedge. Rep from short row 1 five more times, or until hat measures 21"(53.5cm) [22.5,"(57cm), 23.5"(59.5cm)], end at complete row 3 if this meets your measure; end ws-42 (45, 48) sts. Move 12 sts for band to holder. Do not break yarn. Leave rem sts on ndl. Remove provisional cast on and place those sts onto a working needle orienting needle points to be on same end of hat. Meet cast on edge with live sts as if to seam, RS up, and making sure that one RS edge ends in knit and the other in purl. Use garter stitch grafting to sew the side seam of the hat invisibly. Peak of hat Using DPN, pick up and knit one st for not pick up in any wraps-12 sts. Round 1: Purl. Round 2: K2 tog, rep to end—6 sts. Use a darning needle to pull yarn end through rem 6 sts. Button tab Move 12 sts back to ndl; knit 12 rows. Dec row: K2 tog, k until 2 sts rem, ssk. Next row: Knit Rep these rows until 2 sts rem. Use darning needle to pull yarn end through rem sts. Fold band over to RS and loosely stitch down button tab.
Covered Button
If desired, cover a button with knitting by making stockinette square 1.5 times the width of your button. With knit side facing button, fold corners around button and sew from behind, allowing knit to show its purl side and stretch around button.
Finishing
Sew button to hat. Weave in ends.


