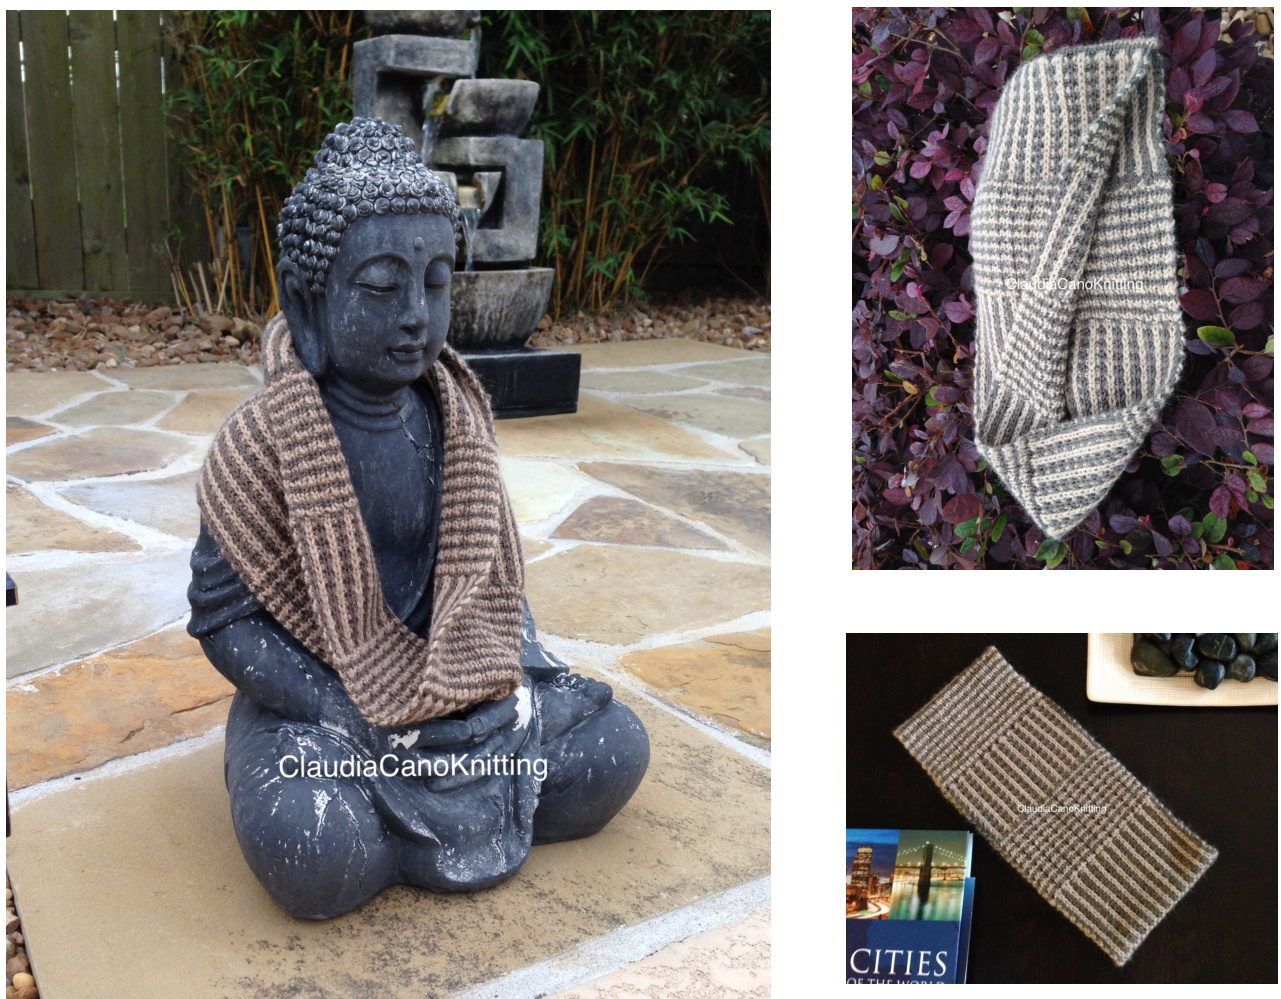
PLAYINGWITHREVERSIBLEPATTERNSCOWL BY CLAUDIA CANO,April, 2016
Thank you Renee Van Hoy from the Ravelry group "Loom Knitters" for helping me with the publication of this pattern, and Kimberly Carrigan, from the Facebook group "Double Dutch Loom Knitting", for testing this pattern, and teaching me the easy way to do the slip stitch with yarn in front (S1WYF). Copyright @2016- Claudia Cano. All rights reserved. Do not copy or distribute except for personal use.
Playing with Reversible Patterns Cowl By Claudia Cano - April, 2016
I've been playing with two color reversible stitch patterns and adapting them to "flat" loom knitting. This is a pattern/ tutorial for a sampler cowl, and it shows how you can create warm and beautiful reversible stitch patterns, with different color designs on the opposite sides of your fabric, by working with slipped stitches, yarn overs, and switching colors every two rows like they do in needle knitting mosaic patterns. The cowl is knitted flat. It starts with a provisional cast on, then you work eight sections using a sequence of four different stitch patterns, and end with a provisional bind off. Finally, the cast on and bind off ends are grafted. There is a photo tutorial at the end of the pattern showing how to work all the techniques used here. Skill level: From the adventurous beginner to intermediate loom knitter.
Measurements:
The cowl is approximately 7" wide, and 30" long (blocked) NOTE: If you want to make a 7" x 6o" infinity scarf, repeat the eight sections once. Gauge: 29 stitches and 42.4 rows = 4" (blocked), but the gauge is not important. This pattern uses multiples of 4+3 stitches, so you can add, or subtract multiples of 4 stitches, or 4 rows, to adjust the pattern to the desired measurements.
Materials:
Loom: The Original Sock Loom from Authentic Knitting Board, with a gauge of 5/16" between pegs, was used for this pattern but you can use any loom you want, and adjust your gauge to the item you want to make. Yarn: DK yarn was used for this pattern, but you can use any yarn you want that fits the loom you are using. Color A (main color): 138 yd (54 gr) of Cashmere Merino Silk DK by Sublime yarns, in Brown. (1 ball = 50 gr, 127 yd) Color B (contrast color): 119 yd (54 gr) of Alpaca Merino Blend DK by Kraemer yarns, in Tan. (1 ball = 100 gr, 220 yd) Notions: Loom knitting Hook, crochet hook, waste yarn, stitch markers, yarn needle, row counter. Stitch Key: CO= Cast on. Use the chain provisional CO -see techniques section for how to do this. K= Traditional knit stitch (the opposite of purl stitch). P= Purl stitch. S1WYF= Slip one stitch with the WY in front of the stitch - see techniques section for how to do this. S1WYB= Slip one stitch with the WY in back of the peg - see techniques section for how to do this. YO= Yarn over with yarn in front of the peg - see techniques section for how to do this. Rep\*= Repeat directions inside parenthesis. BO= Bind off. Use a provisional BO - see techniques section for how to do this. A= Color A (dark color). B= Color B (light color). R to L= Work the row from right to left. L to R= Work the row from left to right. R= Row number WY= Working yarn. St(s)= Stitch(es) Pattern Notes: see photo-tutorial at the end. :Provisional chain CO: With waste yarn and a crochet hook, make 4-5 chain stitches, then work the chain CO on the loom. After the last peg is casted on, make 4-5 chain stitches more, and close the last one. Then, start working with the yarn established in the pattern. S1WYF: Usually, this stitch is worked by lifting the stitch from the slipped peg, passing the working yarn in front of the stitch, behind the peg, then putting the lifted stitch back on the peg. I'm using a modified version I learned from Kimberly Carrigan, that I find easier and faster: First, start a purl stitch on the peg you are going to skip. When you have the new loop formed, don't lift the old stitch from the peg, instead, pass the new loop behind the peg and pull the WY. You can watch a video from Kimberly Carrigan using this method on her version of the "Quick and Easy Linen Stitch on Loom": http://youtu.be/lkFBy30v55k - Provisional BO: After you work the last row of the pattern, use waste yarn and work three rows of [\*(K1, P1)Rep\* to the stitch before the last one, K1], then take the work off the loom. Grafting the live stitches from the beginning and the end of the work: You can use any grafting method you prefer. Since this is a reversible fabric, I grafted the knit stitches from one side first, using the duplicate stitch method. Then, flipped the cowl and grafted the knit stitches from the other side, using the same technique.
Stitch Patterns:
All four stitch patterns use multiples of 4 + 3 stitches for flat knitting. Always work with B on rows 1 & 2, and with A on rows 3 & 4. R1 always starts from R to L. R3 always starts from L to R (this way the edges look alike). NOTE: If you want to use this stitch patterns for knitting in the round, use multiples of 4 stitches. - Stitch Pattern #1: Shows horizontal stripes on the front, and vertical stripes on the back side: R1 & R2: with B. K1, S1WYF, K1, \*(P1, K1, S1WYF, K1)Rep\* to the end. R3 & R4: with A. K1, P1, K1, \*(S1WYF, K1, P1, K1)Rep\* to the end. Repeat rows 1-4 for stitch pattern #1. - Stitch Pattern #2: Shows Vertical stripes on the front, and mock houndstooth on the back side. The knit stitch has three loops on R1 and R3; knit off those three loops as if they are one. R1 & R2: with B. P1, YO, P1, \*(K1, P1, YO, P1)Rep\* to the end. R3 & R4: with A. P1, K1, P1, \*(YO, P1, K1, P1)Rep\* to the end. Repeat rows 1-4 for stitch pattern #2. - Stitch Pattern #3: Shows mock houndstooth on the front, and vertical stripes on the back side. The purl stitch has three loops on R1 and R3; purl those three loops as if they are one. R1 & R2: with B. K1, YO, K1, \*(P1, K1, YO, K1)Rep\* to the end. R3 & R4: with A. K1, P1, K1, \*(YO, K1, P1, K1)Rep\* to the end. Repeat rows 1-4 for stitch pattern #3. - Stitch Pattern #4: Shows vertical stripes on the front, and horizontal stripes on the back side. R1 & R2: with B. P1, S1WYB, P1, \*(K1, P1, S1WYB, P1)Rep\* to the end. R3 & R4: with A. P1, K1, P1, \*(S1WYB, P1, K1, P1)Rep\* to the end. Repeat rows 1-4 for stitch pattern #4. Using the provisional CO method, chain CO 51 sts: (12 rep x 4 sts + 3), working from L to R. NOTE: If you don't want to graft the ends of the cowl, use the long tail CO with color A, from R to L, alternating one knit stitch, and one purl stitch, and skip the set up row. Set up row: With A, make a slip knot and put it on the first peg on the right. Work one row [\*(K1, P1) rep\* to the stitch before the last one, K1].
First section:
Make a slip knot with B and put it on the first peg at the right. Work Stitch Pattern #1, ten times. Continue to the next section. Second section: Work Stitch Pattern #2, ten times. Continue to the next section. Third section: Work Stitch Pattern #3, ten times. Continue to the next section. Fourth section: Work Stitch Pattern #4, ten times. Continue to the next section. Fifth Section: Work Stitch Pattern #1, ten times. Continue to the next section. Copyright @2016- Claudia Cano. All rights reserved. Do not copy or distribute except for personal use.
Sixth Section:
Work Stitch Pattern #2, ten times. Continue to the next section.
Seventh Section:
Work Stitch Pattern #3, ten times. Continue to the next section.
Eighth Section:
Work Stitch Pattern #4, nine times, then work R1 & R2 one more time. Cut B leaving a 6" tail, and cut A leaving a tail about six times the width of the cowl. NOTE: if you don't want to graft the ends, work Stitch Pattern #4 ten times instead, and use a stretchy BO.
Finishing:
- Provisional BO: Using waste yarn, work three rows of [\*(K1,P1) rep\* to the stitch before the last one, K1]. Then, take the cowl of the loom. - Graft ends: With A, graft the ends of the cowl using duplicate stitch. Graft the "knit" stitches from one side first, then flip the cowl, and graft the "knit" stitches from the other side. See techniques section for how to do this. Weave in tails. Block according to the characteristics of the yarn used.
THE END
Copyright @2016- Claudia Cano. All rights reserved. Do not copy or distribute except for personal use.
TECHNIQUES
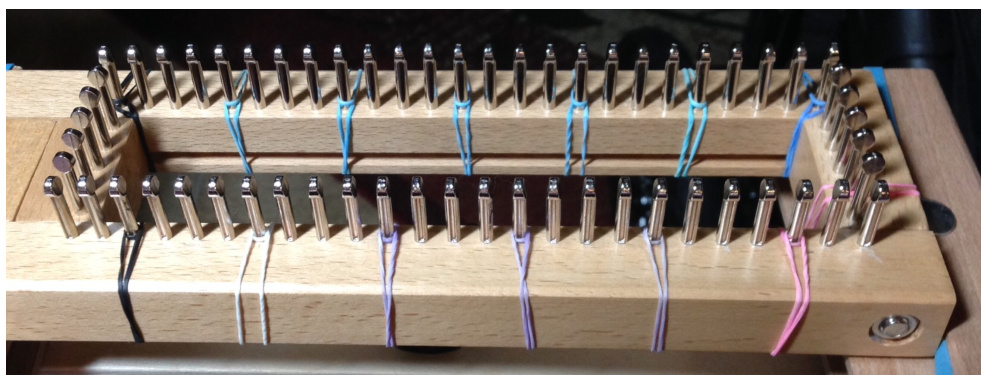
SETTING UP THE STITCH MARKERS: Mark every four stitches to the end.
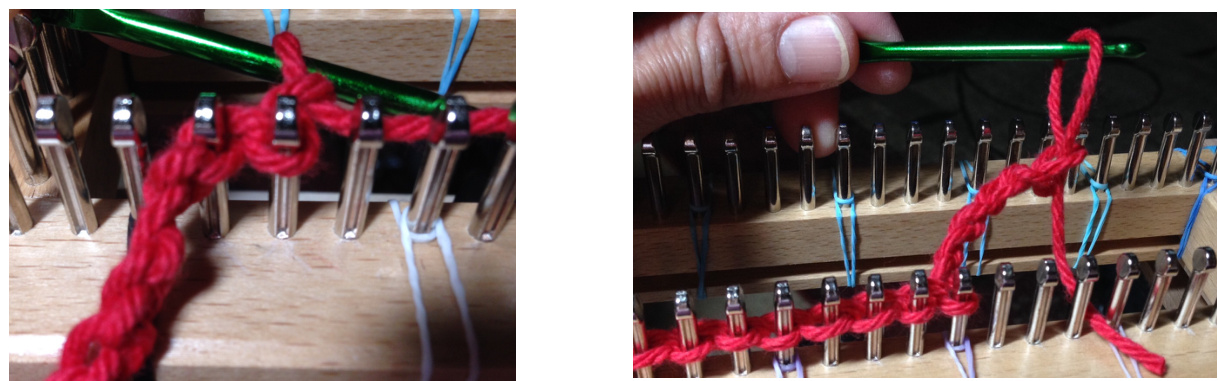
PROVISlONAL cO: with waste yarn and a crochet hook, make 4-5 chain stitches, then work the chain CO on the loom. After the last peg is casted on, make 4-5 chain stitches and close the last one. Then, start working with the yarn established in the pattern.
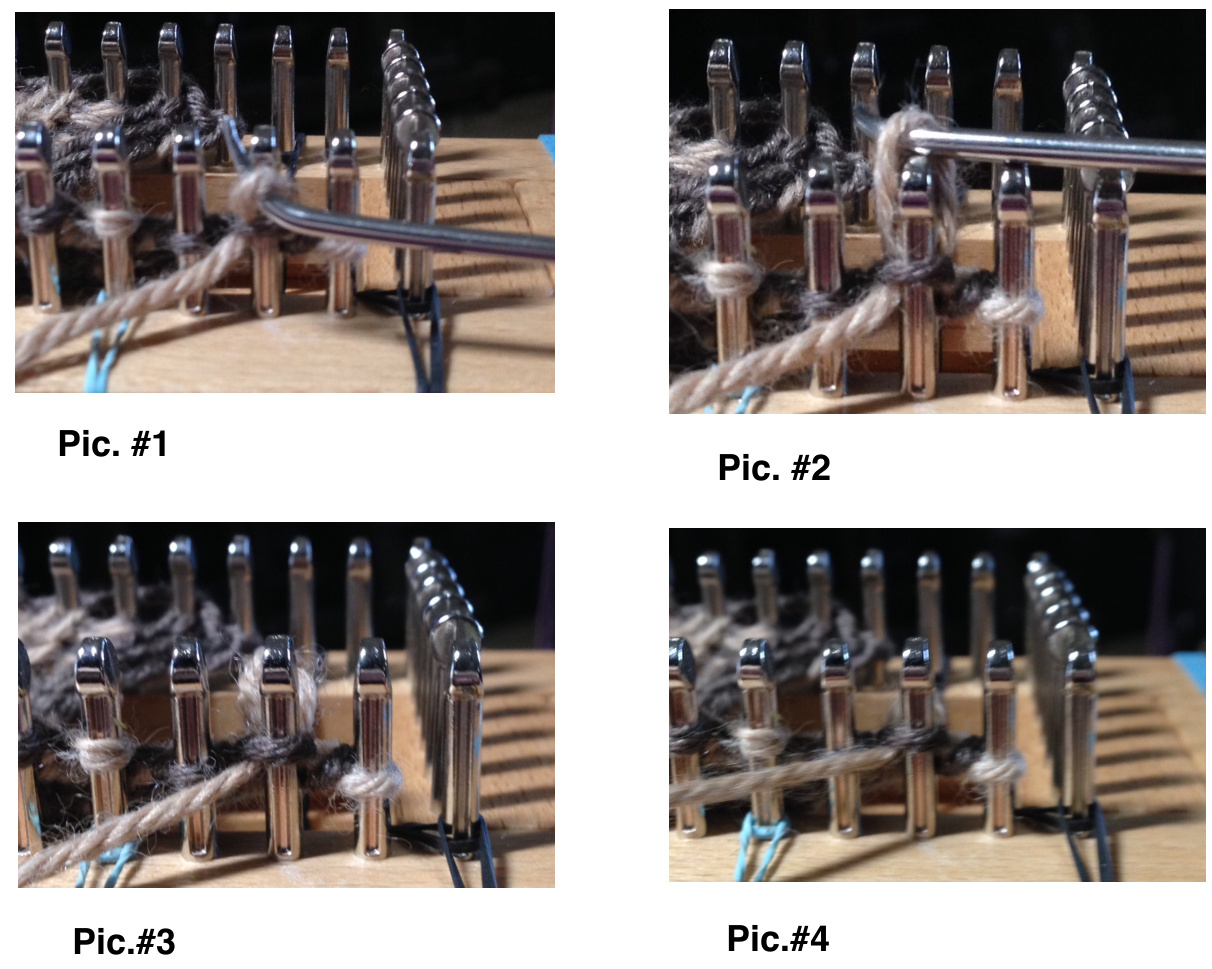
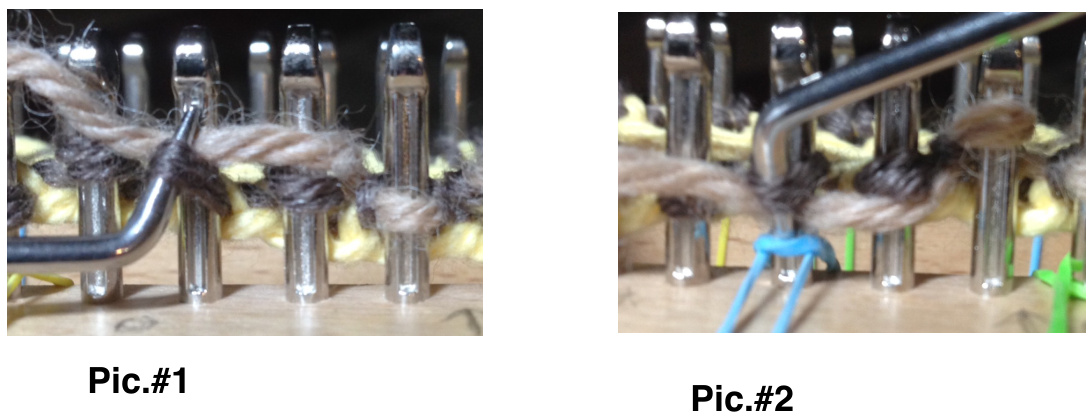
Copyright @2016- Claudia Cano. All rights reserved. Do not copy or distribute except for personal use. S1WYF: Slip one stitch with the yarn in front of stitch. Start a purl stitch on the peg you are going to slip (Pic. #1). When you have the new loop formed, don't lift the old stitch from the peg, instead, pass the new loop behind the peg (Pic. #2- #3), and pull the WY (Pic. #4).
YO: Yarn over. Slip the peg, pass the WY in front of that peg, and proceed to work the next stitch. It can be done in the middle of two knit stitches (Pic.#1), or in the middle of two purl stitches (Pic.#2).
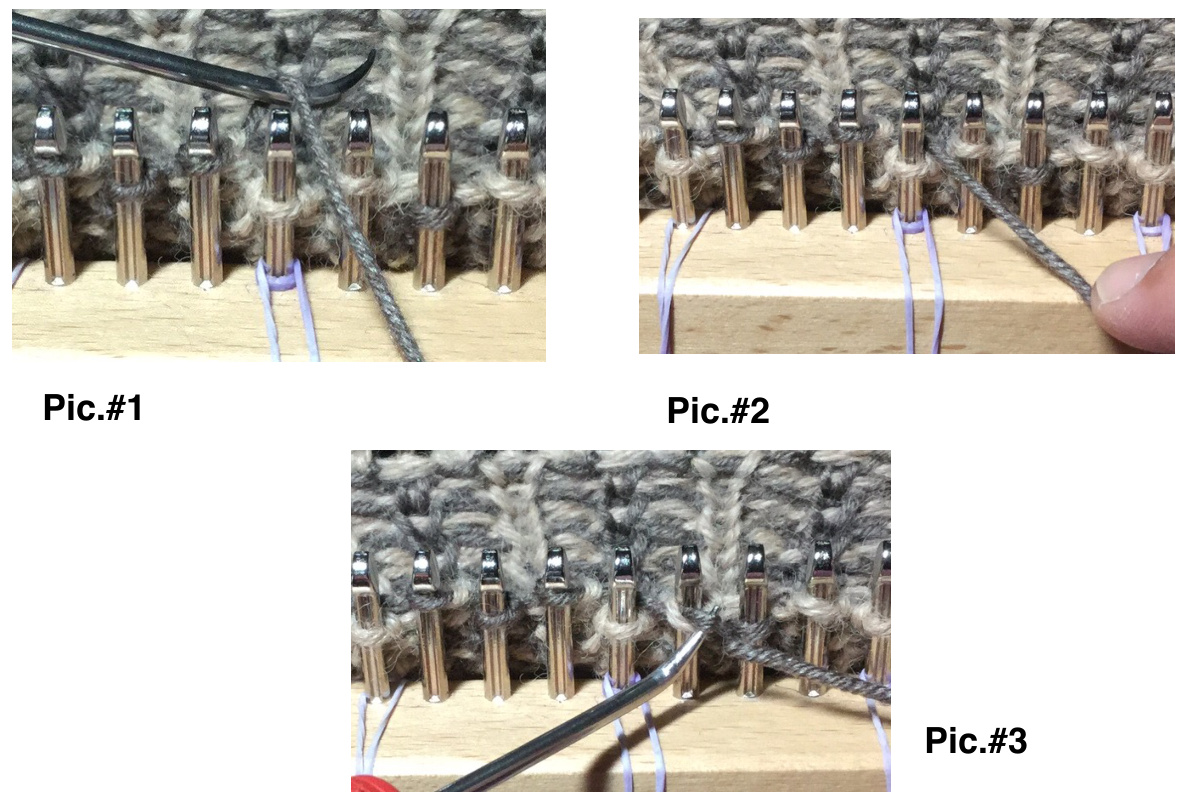
S1WYB: SLip one stitch with yarn in back of peg. Slip the peg, pass the WY behind that peg (Pic. #1-#2), and proceed to work the next stitch (Pic.#3).
Copyright @2016- Claudia Cano. All rights reserved. Do not copy or distribute except for personal use.
GRAFTING WITH DUPLICATE STITCH:
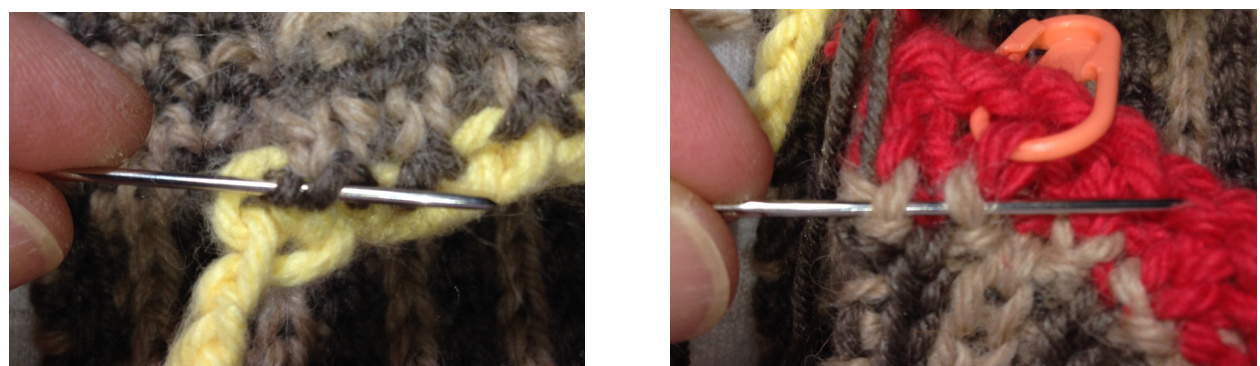
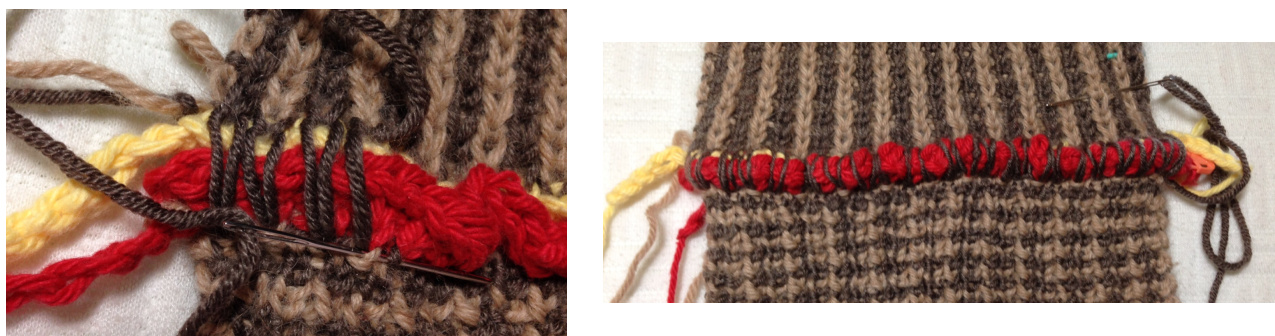
Put the opposite ends of the cowl close to each other, with the right side facing you. The CO end is above the BO end. Thread the color A tail through the yarn needle. Starting from the BO end, pass the needle through the first knit stitch, from back to front.

- Pass the needle behind the two loops that are forming the first knit stitch from the CO end. Then pass the needle, from front to back, through the first knit stitch from the BO end, and from back to front through the next knit stitch.
Copyright @2016- Claudia Cano. All rights reserved. Do not copy or distribute except for personal use. Repeat these steps until you reach the last knit stitch from both CO and BO ends.
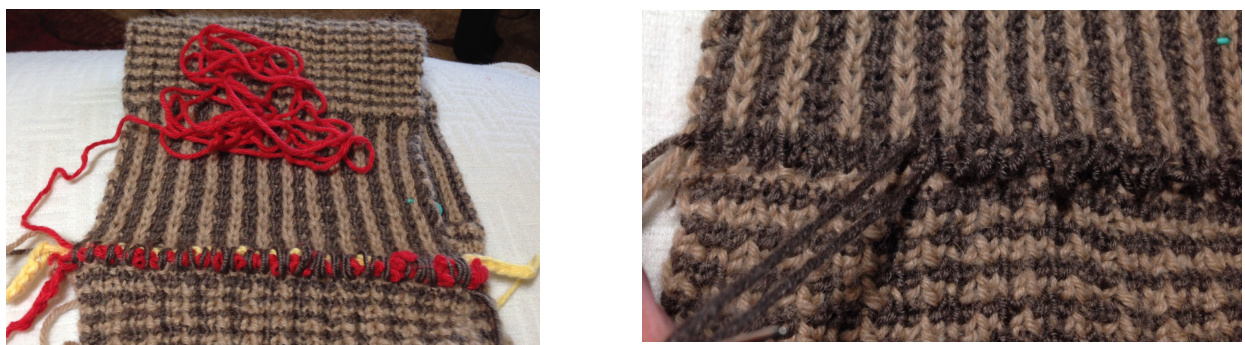
Flip the cowl, and graft the knit stitches from the wrong side.
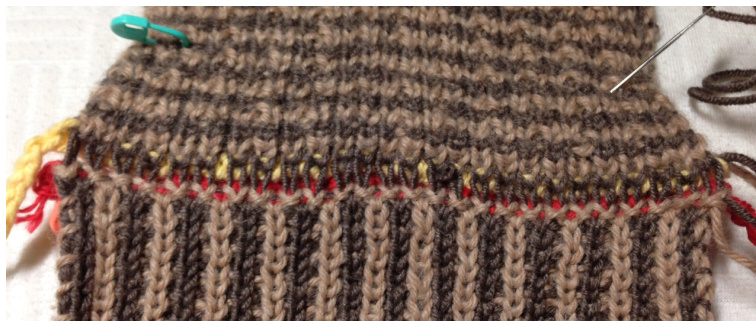
Carefully unravel one by one the stitches from the waste yarns. Then tighten the stitches, starting from the first knit stitch grafted on the right side, and continue in the same order you grafted the stitches to the end.
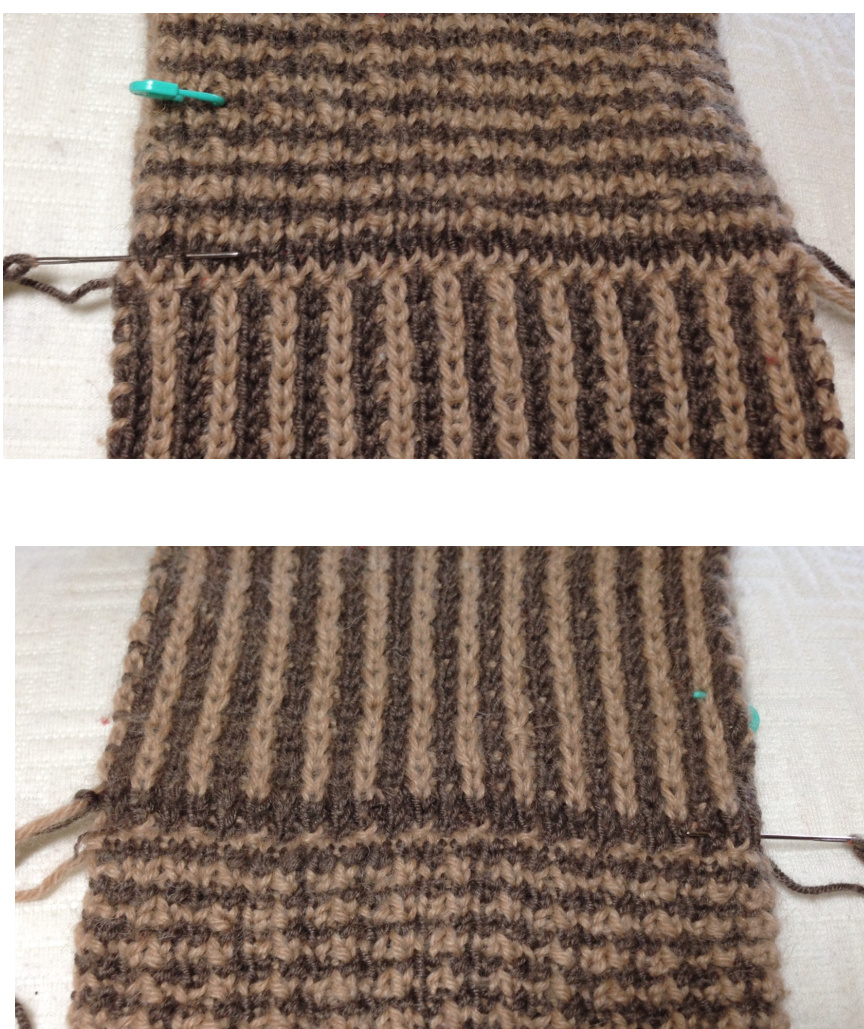
Copyright @2016- Claudia Cano. All rights reserved. Do not copy or distribute except for personal use. - This how it looks on the right, and wrong sides.
Copyright @2016- Claudia Cano. All rights reserved. Do not copy or distribute except for personal use.


