Self-intersecting basketweave coaster by Brent Annable
About the pattern
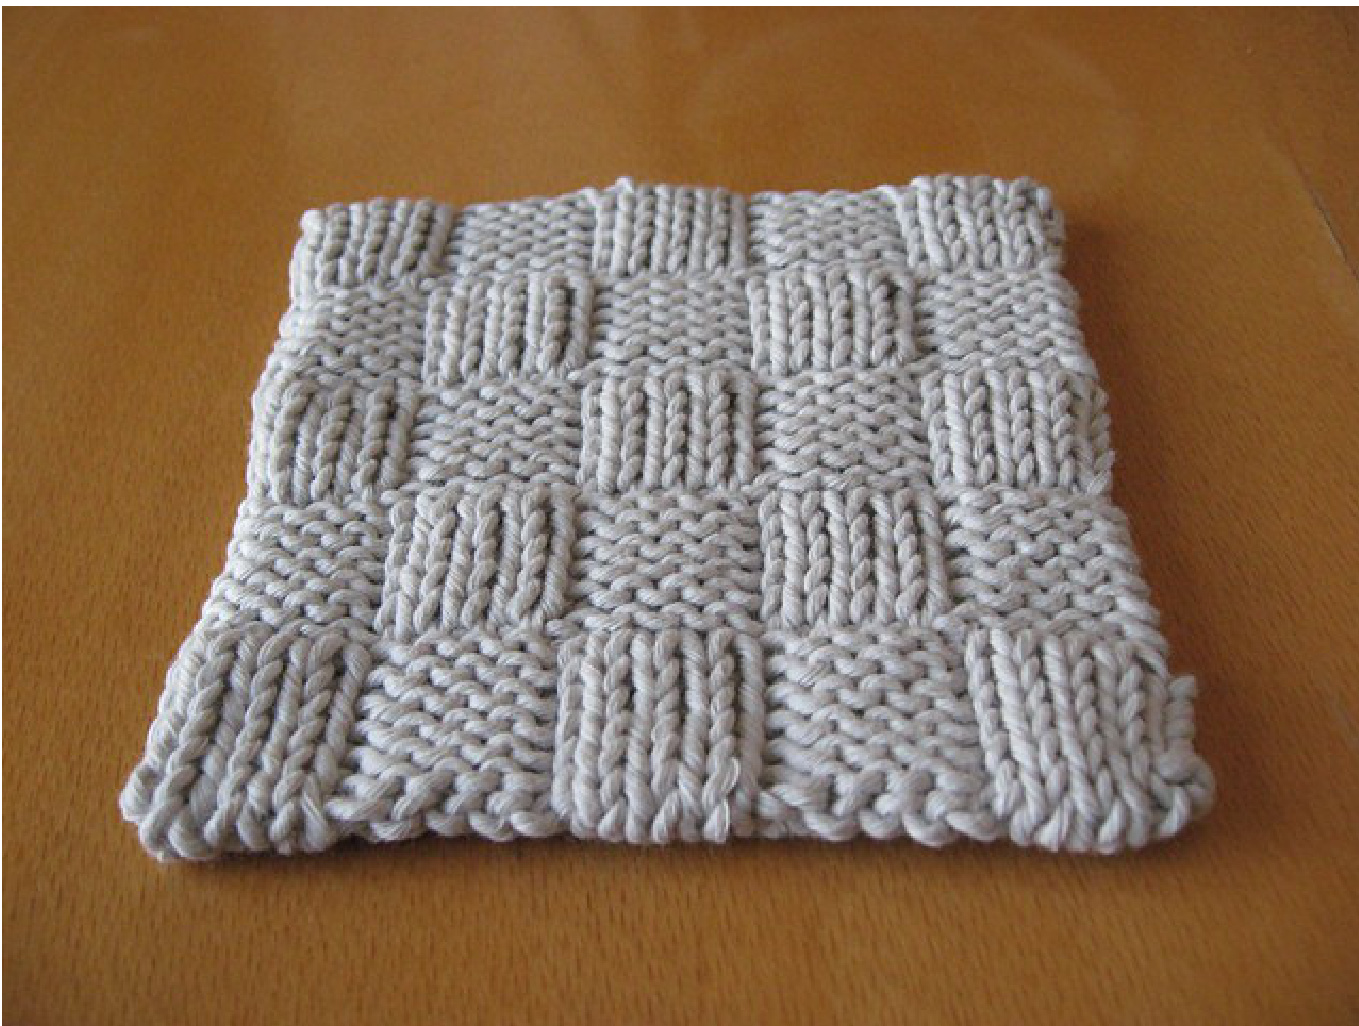
The basketweave pattern on this coaster is created by knitting two layers of fabric simultaneously and having them pass through each other to create the blocks. Aside from being an attractive and useful household item, it is also an interesting mathematical object: because the fabric is continuous around every edge, it actually forms a single self-intersecting plane.
Construction of the coaster
The coaster is knit back and forth on 2 straight needles. Only half of the stitches are worked in each row; the other half are slipped. The side on which the working yarn is held while slipping stitches determines the side of the fabric on which the stitches appear. This enables the two sides of the fabric to be constructed simultaneously yet independently, and interwoven during the process. But although its structure is complex, knitting it is actually incredibly simple. The pattern only has two rows! The trickier elements are the cast-on (page 3) and bind-off (page 4) required to make the knitting continuous around the top and bottom edges. However, if this aspect is not important to you, you should feel free to use whichever cast-on and bind-off you prefer.
Materials
- 10-ply worsted weight cotton (or similar) - two straight knitting needles (3mm, or size required to produce a sturdy fabric) - two double-pointed needles (DPNs) the same size as the straight needles -darningneedle -wasteyarn
Gauge
Gauge is not particularly important, however it is wise to use a needle size slightly smaller than normal, as double-knitting is usually looser than regular knitting.
Abbreviations
K = Knit S1WYIF = Slip 1 With Yarn In Front S1WYIB = Slip 1 With Yarn In Back
Start the coaster:
Cast on 40 stitches (72 if making a potholder) using the Simple Provisional Cast-on method (see page 3). Cut waste yarn, leaving about a 15cm tail. Now knit Row A (below) twelve times: Row A: \*[K1, S1WYIF] 4 times, [K1, S1WYIB] 4 times, repeat from \* until end of row. Turn. Note: For a neater transition to Row B, slip the very last stitch of the 12th row with the yarn in back. (This is not necessary at the very end of the coaster). Now knit Row B twelve times: Row B: \*[K1, S1WYIB] 4 times, [K1, S1WYIF] 4 times, repeat from \* until end of row. Tul Note: For a neater transition back to Row A, slip the very last stitch of the twelfth row with the yarn in front. Repeat this sequence until you have completed five rows of blocks, then bind off using the Intersecting Kitchener Bind-Off (see page 4). Once the bind-off is complete, return to the provisional cast-on. Undo the slip knot and remove the waste yarn simply by pulling it out. This may require some strength. The waste yarn will also be caught on a small loop at the non-slip-knot end; draw the short end of the waste yarn through the loop to free it. Looking now at the cast-on row, you will notice that it is very loose. Tighten it up by pulling on alternate legs of the stitches, starting at the end where the small loop is and finishing at the slip-knot end. Take care to pull the stitches in the purl blocks quite tightly, as these tend to sag. When complete, you should only have two ends left to weave in. Enjoy this process, and then sit back and admire your new coaster (or potholder)!
Simple provisional cast-on
1. Make a slip knot using the waste yarn and working yarn held double, and place it on the needle. Take the two threads in the left hand as for the long-tail cast on, with the waste yarn in back and the working yarn in front (Figure 1).
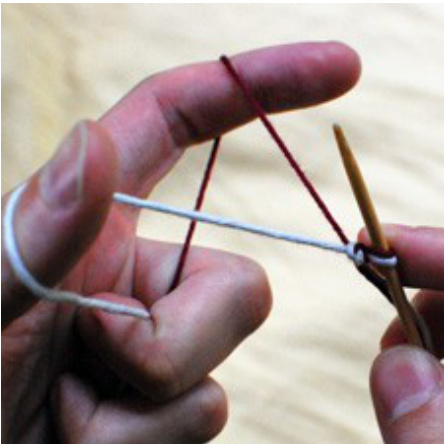
Fig. 1 ng the needle down between the two threads (Figure 2), and up around the near side of tl working yarn (Figure 3) - one stitch cast on.
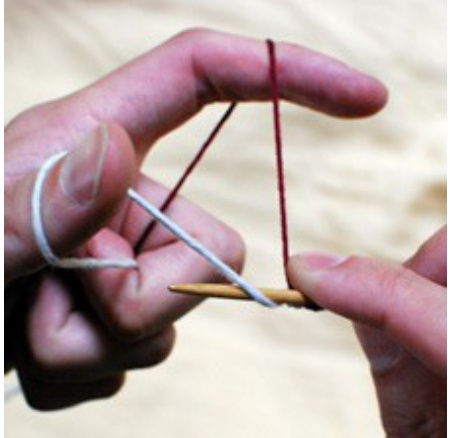
Fig. 2
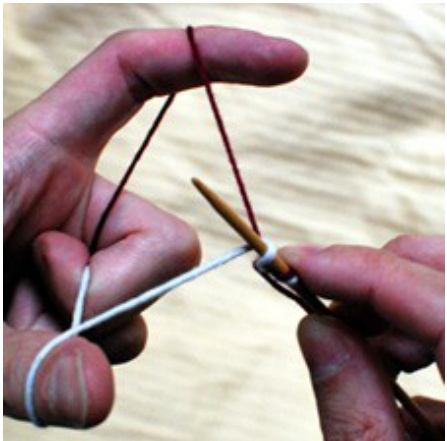
Fig. 3 3. Move the needle down around the back of the waste yarn (Figure 4), up around the front of the working yarn (Figure 5), then back up and around the back of the waste yarn (Figure 6) - two stitches caston.
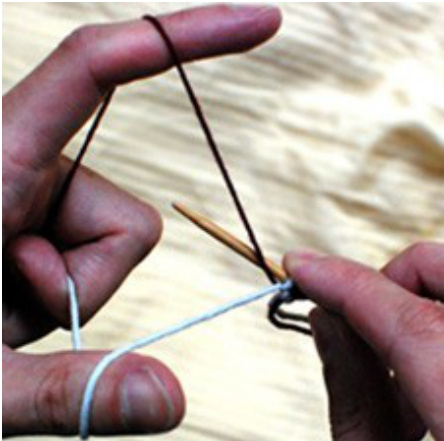
Fig. 4
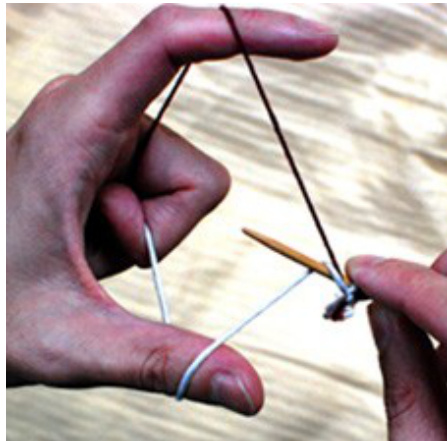
Fig. 5
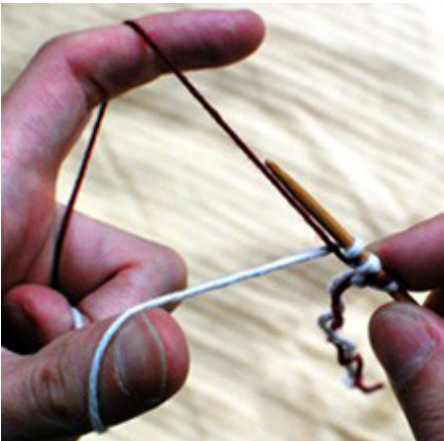
Fig. 6 4. Repeat steps 2 and 3 (Figure 7) until you have the required number of stitches.

Fig. 7 Note: When knitting, do not treat the original slip knot as a stitch. Instead, leave it on the needle until you have knit a few rows, then just slip it off, leaving the knot intact.
Intersecting Kitchener Bind-off
This bind-off consists of five parts. It begins with a set of preparatory steps for placing the stitches onto 2 needles, followed by a series of 4 separate grafting techniques for stitching together blocks in stockinette, blocks in reverse stockinette, and for the transition from knit to purl blocks and purl to knit blocks. These techniques are described below, in the order in which you will encounter them.
Preparation: Placing the stitches onto two double-pointed needles
1. Holding the knitting in the left hand and two DPNs parallel in the right (Figure 8), commence slipping stitches alternately from the working needle onto the DPNs, starting with the front needle (Figures 9, 10)

Fig. 8
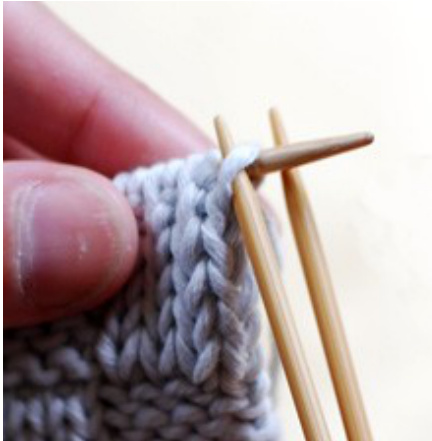
Fig. 9
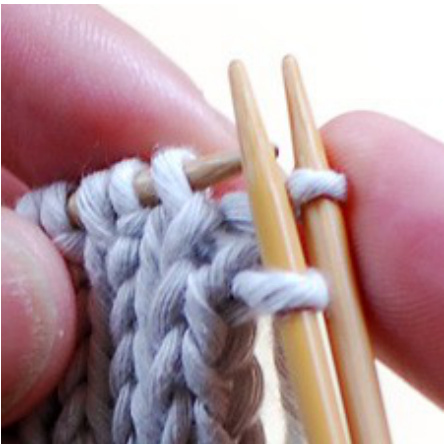
Fig. 10 2. When you have slipped all of the stitches from the first knit block onto the DPNs (8 stitches in total, see Figure 11), commence the alternating pattern again, starting with the back needle (see Figure 12) This ensures that all of the stitches on the back of the fabric stay at the back, and the front stitches stay at the front.
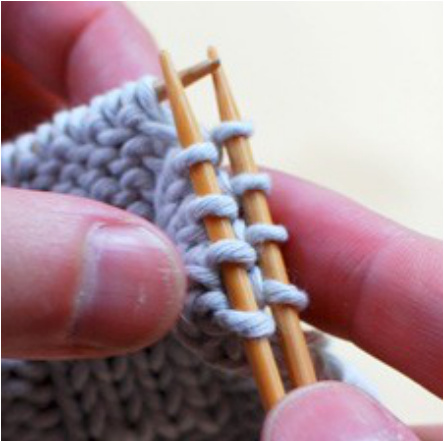
Fig. 11
Fig. 12 3. Continue in this manner, changing the pattern every 8 stitches, until all stitches have been transferred. Your knitting should now resemble Figure 13. Cut the working yarn leaving about a 70cm tail, and thread through a darning needle. You are now ready to commence the intersecting Kitchener bind-off.
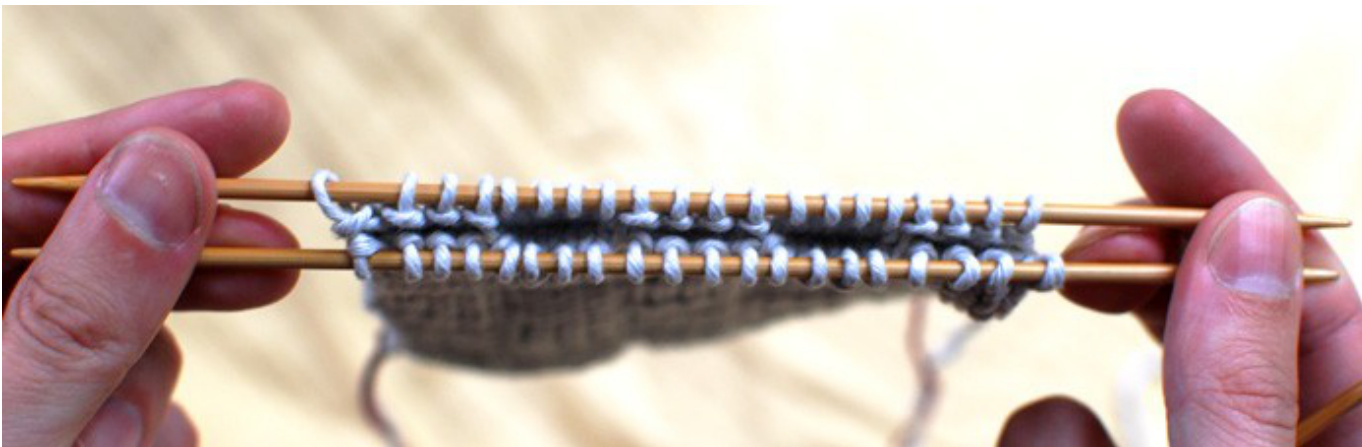
Fig. 13
Intersecting Kitchener bind-off 1: Stockinette
Note: This section is the same as the normal Kitchener stitch. If you are already familiar with it, just start kitchenering and move on to section 2 (see Figure 25). The Kitchener stitch is a way of sewing together two sets of live stitches without leaving a visible seam. What we are actually doing is making the yarn 'snake' in and out of the two sets of stitches, which creates a single row of fake' knitting. To start, you need two needles that each contain the same number of stitches, with the working yarn coming from the first stitch on the back needle (Figure 14). When starting, first carry out the following two preparatory steps (these do not form part of the repeated sequence in the body of the stitch):
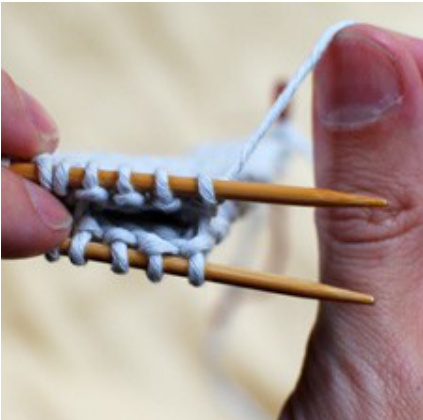
Fig. 14 1. Insert the darning needle through the first stitch on the front needle as if to purl (Figure 15), pull the yarn through, and tug on it so that it sits snugly but is not super-tight.
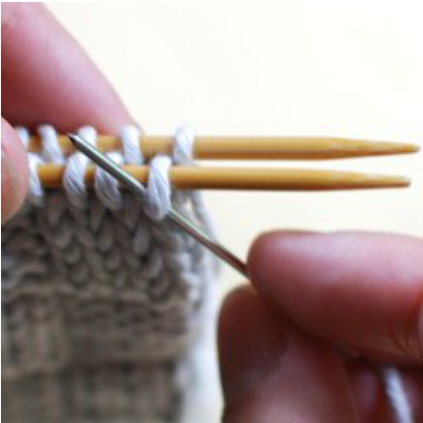
Fig. 15 2. Making sure the yarn stays beneath the knitting needles, insert the darning needle through the first stitch on the back needle as if to knit (Figure 16), and pull the yarn through.
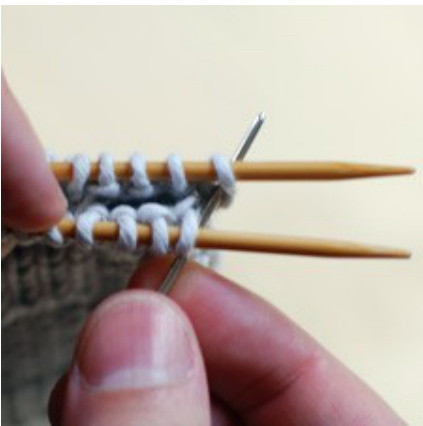
Fig. 16 Now commence the sequence proper: the needle through the first stitch on the front needle as if to knit, pull the yarn through, a : stitch from the needle (Figures 17 and 18).
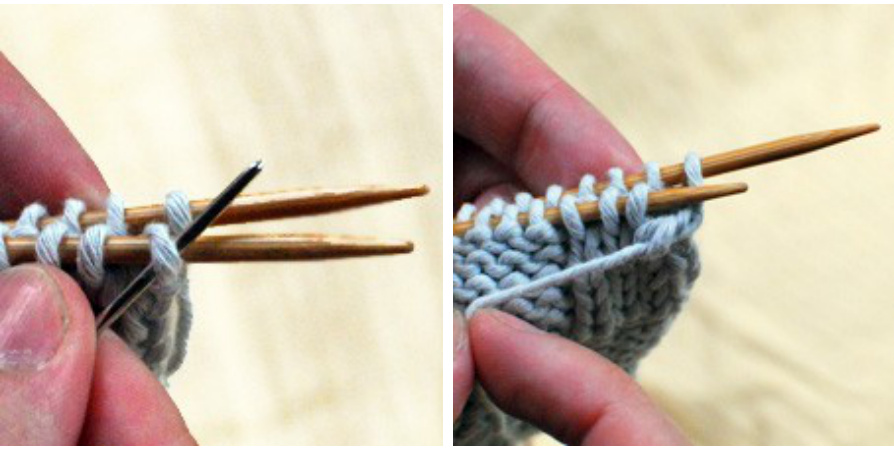
Fig. 17 Fig. 18 2. Insert the darning needle through the first stitch on the front needle as if to purl, and pull the yarn through (Figures 19 and 20).
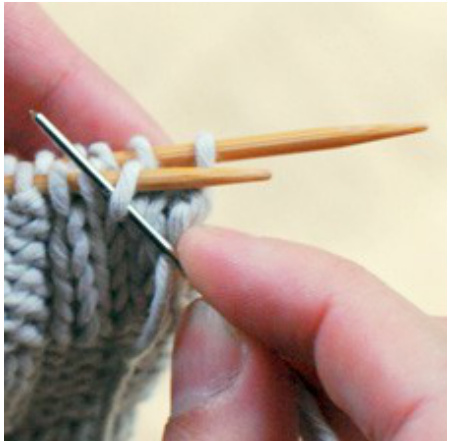
Fig. 19
Fig. 20 3. Insert the darning needle through the first stitch on the back needle as if to purl, pull the yarn through, and drop the stitch from the needle (Figures 21 and 22).

Fig. 21
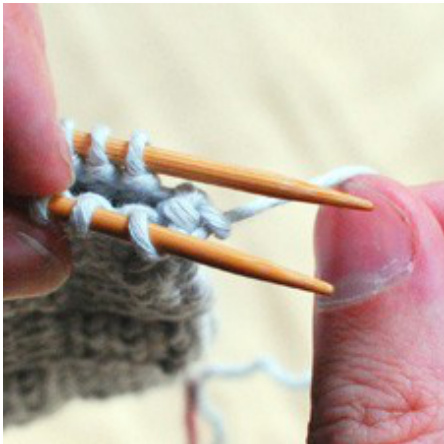
Fig. 22 4. Insert the darning needle through the first stitch on the back needle as if to knit, and pull the yarn through (Figures 23 and 24).
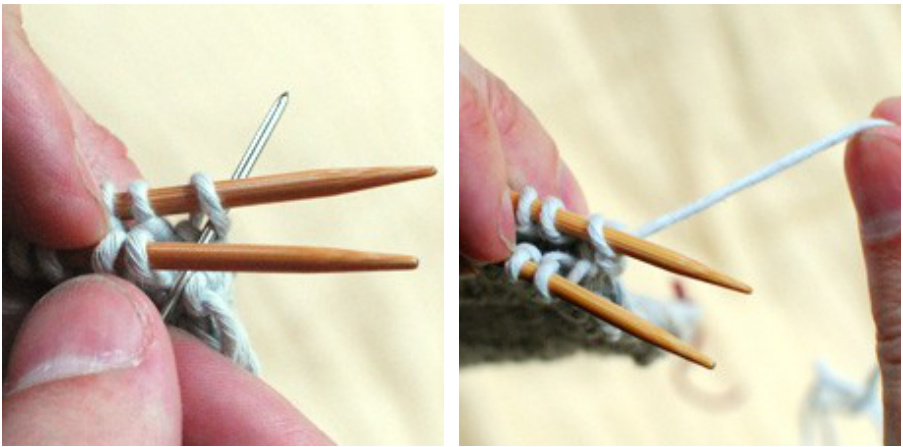
Fig. 23 Fig. 24 Looking at the words printed in bold above will reveal the traditional knit, purl, purl, knit' mantra that many use to keep track when performing the Kitchener stitch. Repeat these four steps until you have dropped the fourth knit stitch from the front needle (Figure 25), then move on to section 2: Transition from knit to purl. Intersecting Kitchener bind-off 2: Transition from knit to purl
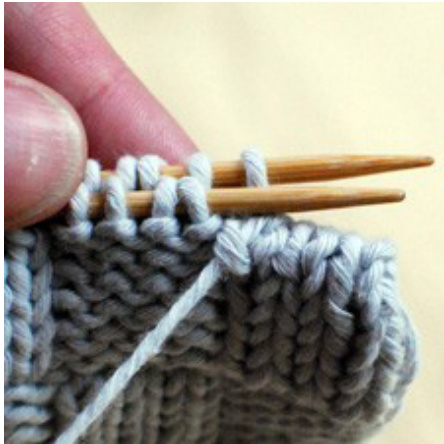
Fig. 25 After you have dropped the fourth knit stitch from the front needle, break the sequence and carry out the following steps: 1. Insert the darning needle through the first 2 stitches on the back needle as if to knit two together (k2tog), pull the yarn through, and drop the first stitch from the needle (Figures 26 and 27).
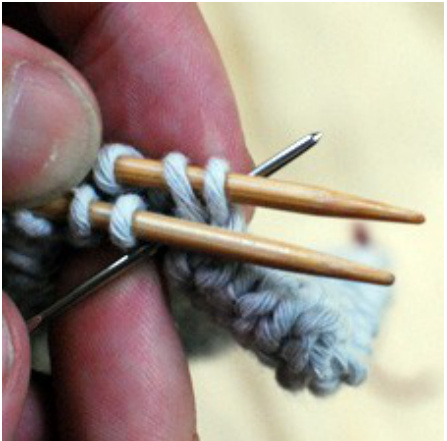
Fig. 26
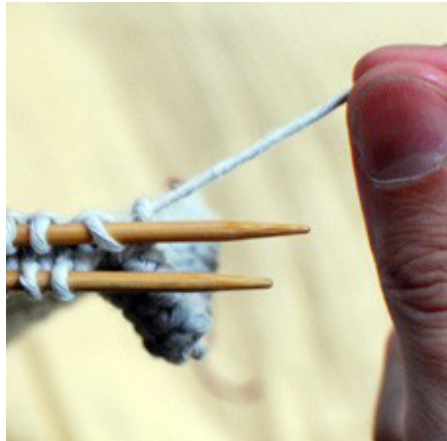
Fig. 27 2. Bring the needle to the front of the work by inserting it underneath the diagonal strand of yarn running between the last stitch dropped from the front needle and what is now the first stitch on the back needle (Figure 28). Pull the yarn snug.
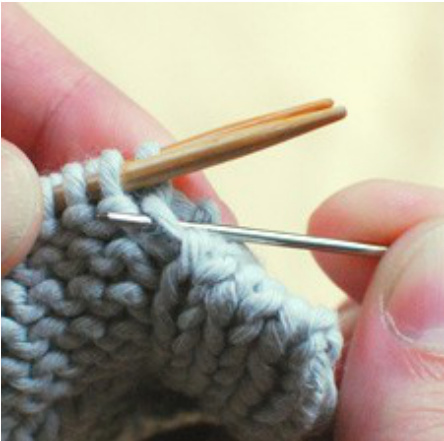
Fig. 28 3. Insert the darning needle through the first stitch on the front needle as if to knit (Figure 29), and pull the yarn through.
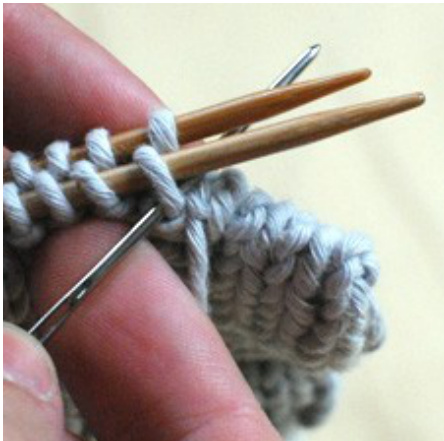
Fig. 29 You are now at the start of a purl block - move on to section 3: Reverse Stockinette.
Intersecting Kitchener bind-off 3: Reverse Stockinette
The sequence of steps for reverse stockinette Kitchener stitch is actually the same as for stockinette, with the order of knitting needles reversed. It is therefore possible to follow the regular knit, purl, purl, knit' mantra, but starting from the back needle instead of the front. Note: Because the yarn travels a smaller distance when grafting reverse stockinette, you must pull the yarn quite tightly after each step, or the graft will be too loose. Here are the full instructions: 3 needle through the first stitch on the back needle as if to knit, pull the yarn through, and tch from the needle (Figures 30 and 31).
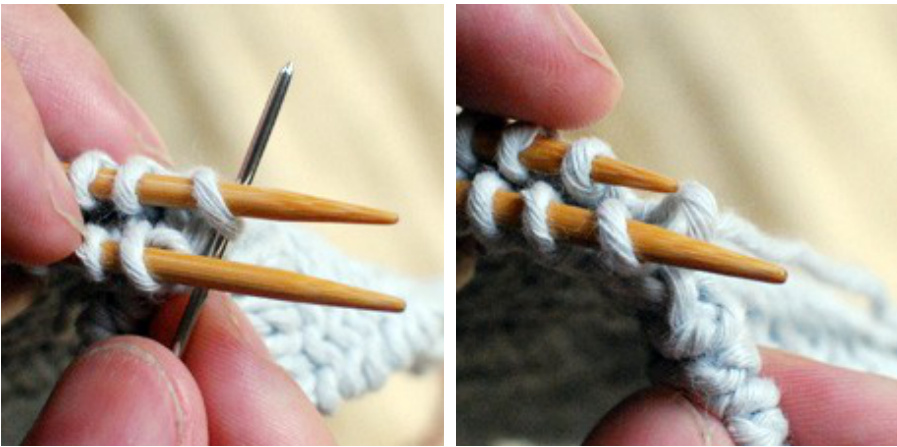
Fig. 30 Fig. 31 2. Insert the darning needle through the first stitch on the back needle as if to purl (Figure 32), and pull the yarn through.
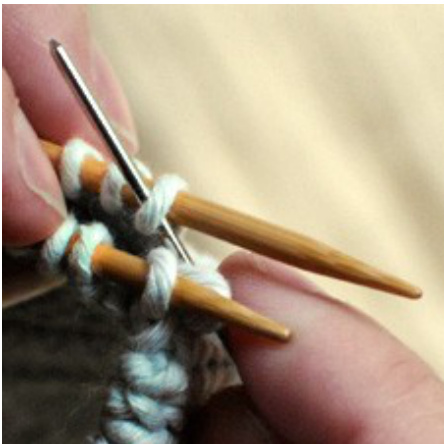
Fig. 32 3. Insert the darning needle through the first stitch on the front needle as if to purl, pullthe yarn through, and drop the stitch from the needle (Figures 33 and 34).
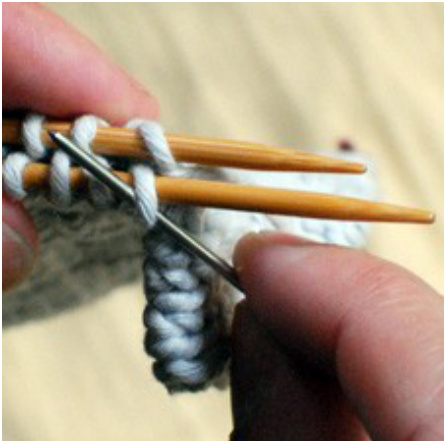
Fig. 33
Fig. 34 4. Insert the darning needle through the first stitch on the front needle as if to knit (Figure 35), and pul the yarn through.
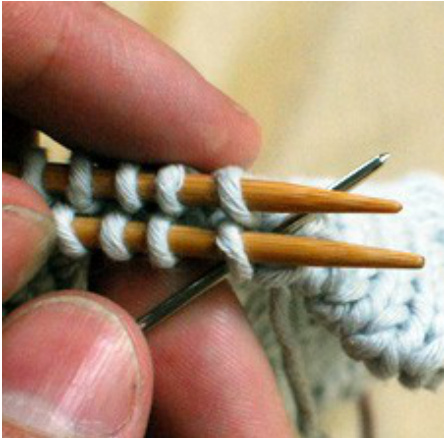
Fig. 35 Repeat steps 1-4 until you have dropped the fourth purl stitch from the back needle (Figure 36), and move on to section 4: Transition from purl to knit. Intersecting Kitchener bind-off 4: Transition from purl to knit
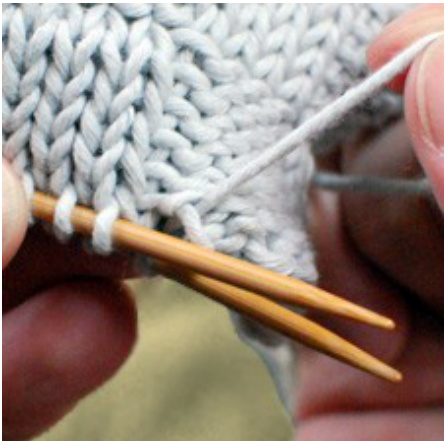
Fig. 36 After you have dropped the fourth purl stitch from the back needle, break the sequence and carry out the following steps: 1. Bring the yarn to the front by inserting the darning needle between the first 2 stitches on the front needle, and pulling the yarn through (Figure 37).
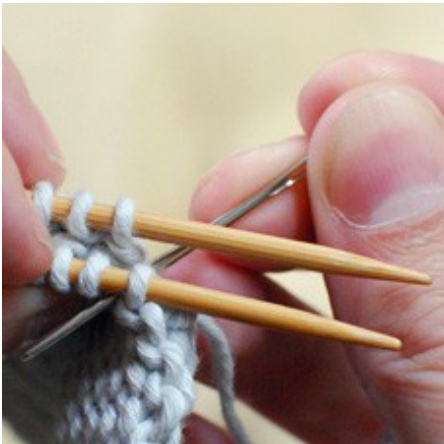
Fig. 37 2. Holding the working yarn up and out of the way with your left thumb, insert the darning needle through the first two stitches on the front needle as if to knit two together (k2tog), and drop the first stitch from the needle (Figures 38 and 39).
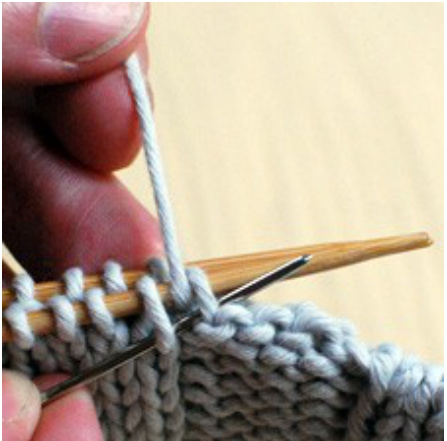
Fig. 38
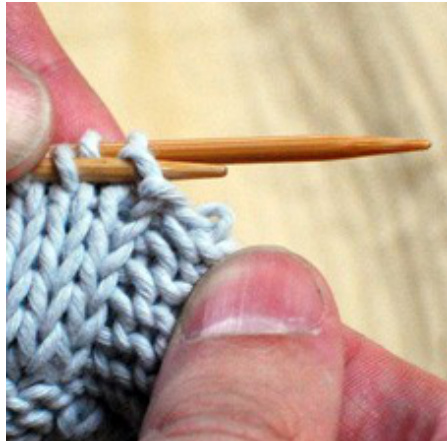
Fig. 39 3. Insert the darning needle through the first stitch on the back needle as if to knit (Figure 40), and pull the yarn through.
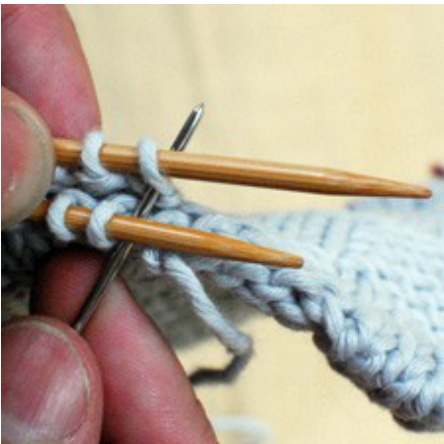
Fig. 40 You are now in exactly the same position as you were at the start of the regular stockinette Kitchener sequence. Repeat steps 1-4 of the bind off until you have one stitch left on each needle. To finish off, carry out the usual stockinette sequence, but eliminating steps 2 and 4.


