Basic
Information


medium
Yarn:
-Red Heart 100% acrylic; 5.0 oz/141 g, 256 yard/234 m Weight Category: 4 Medium/Worsted. Qty: 3 balls OR -Lion Brand Heaitland 100% Acrylic; 5.00 oz/142g, 251 yd/230 m Weight Category: 4 Medium/Worsted Qty: 3 balls I used a combination for dlisplayed amigurumi
Gauge:
4 SC within an inch.Be sure to check your tennsion before staiting your woik.
Hook Sige:
-Size J/6.0 Crochet Hook I prefer metal hooks to wooden ones, but beginmers may fund it easier to use wood. The stitches slip off less easily onn wood.
aaAonted needs
- Daming Needlle -Stitch Markers - Hot glue OR Thread/ Needle OR Fabric Glue - Polyfil -Felt (Black/Red/White)
ContentA
Basic Information.1 Abbreviations.2 Instiuctions.3-8 Social Media:9 Copyright Infommation.10

ommon
Abbreviations

Common Ahonthand pon Knit Grit patternA STS: Stitches \*: Repeat until end Beg: Beginning R: Round DEC: Decrease SC: Single Crochet DC: Double Crochet TC: Triple Crochet INC: Increase BPSC: Back post single crochet FP: Front post crochet HDC: Half Double Crochet CL: Cluster YO: Yarn Over
Instructions
Head (make Qne)
With White yarn, chain 6 and connect first chain to last tc create a circle. R1: Work 2 sc in each sc around (12 sts) R2: \*Sc 1, 2 sc in next sc\* Repeat 6 times R3: \*Sc 2, 2 sc in next sc\* Repeat 6 times R4: \*Sc 3, 2 sc in next sc\* Repeat 6 times R5: \*Sc 4, 2 sc in next sc\* Repeat 6 times R6: \*Sc 5, 2 sc in next sc\* Repeat 6 times R7-R24: \*Sc around R25: \*Sc 5, Dec next sc \* Repeat 6 times R26: \*Sc 4, Dec next sc \* Repeat 6 times, you will want to start stuffing with polyfil. R27: \*Sc3, Dec next sc \* Repeat 6 times R28: \*Sc2, Dec next sc \*Repeat 6 times R29: \*Sc2, Dec next sc \*Repeat 6 times R30: \*Dec every other stitch and slip stitch shut, close ofi
Pattern
Instructions
Noxe (make Qne)

With White yarn, chain 6 and connect first chain to last to create a circle. R1: Work 2 sc in each sc around (12 sts) R2: \*Sc 1, 2 sc in next sc\* Repeat 6 times R3: \*Sc 2, 2 sc in next sc\* Repeat 6 times R4: \*Sc 3, 2 sc in next sc\* Repeat 6 times R5: \*Sc 4, 2 sc in next sc\* Repeat 6 times R8-R10: \*Sc around, tie off at end, leaving a long tail to sew onto middle of face, stuff while sewing.
Pattern
Instructions
Ears (make Jwo)
With Black yarn, chain 6 and connect first chain to last to create a circle. R1:Work 2 sc in each sc around (12 sts) R2: \*Sc 1, 2 sc in next sc\* Repeat 6 times R3: \*Sc 2, 2 sc in next sc\* Repeat 6 times R4: \*Sc 3, 2 sc in next sc\* Repeat 6 times R5-R7: \*Sc around, Tie off and leave tail to sew onto head. You will want to place it on the left and right side around 2 inches north of the nose (Use your judgment, that's how I place them.)
Pattern
Instructions

rms (make Jwo)
With Black yarn, chain 6 and connect first chain to last to create a circle. R1: Work 2 sc in each sc around (12 sts) R2: \*Sc 1, 2 sc in next sc\* Repeat 6 times R3: \*Sc 2, 2 sc in next sc\* Repeat 6 times R4-R28: \*Sc Around, tie off and leave a long tail. Here is where you will want to either sew on or glue the head and the body together. You will then want to sew on the arms to the body close to the head.
Pattern
Instructions
fegA (Make Juo)
With Black yarn, chain 6 and connect first chain to last to create a circle. R1: Work 2 sc in each sc around (12 sts) R2: \*Sc 1, 2 sc in next sc\* Repeat 6 times R3: \*Sc 2, 2 sc in next sc\* Repeat 6 times R4-R10: \*Sc Around, Tie off and leave long tails to sew onto the bottom of the body. Use your judgment whensewing
Instructions
tssembly
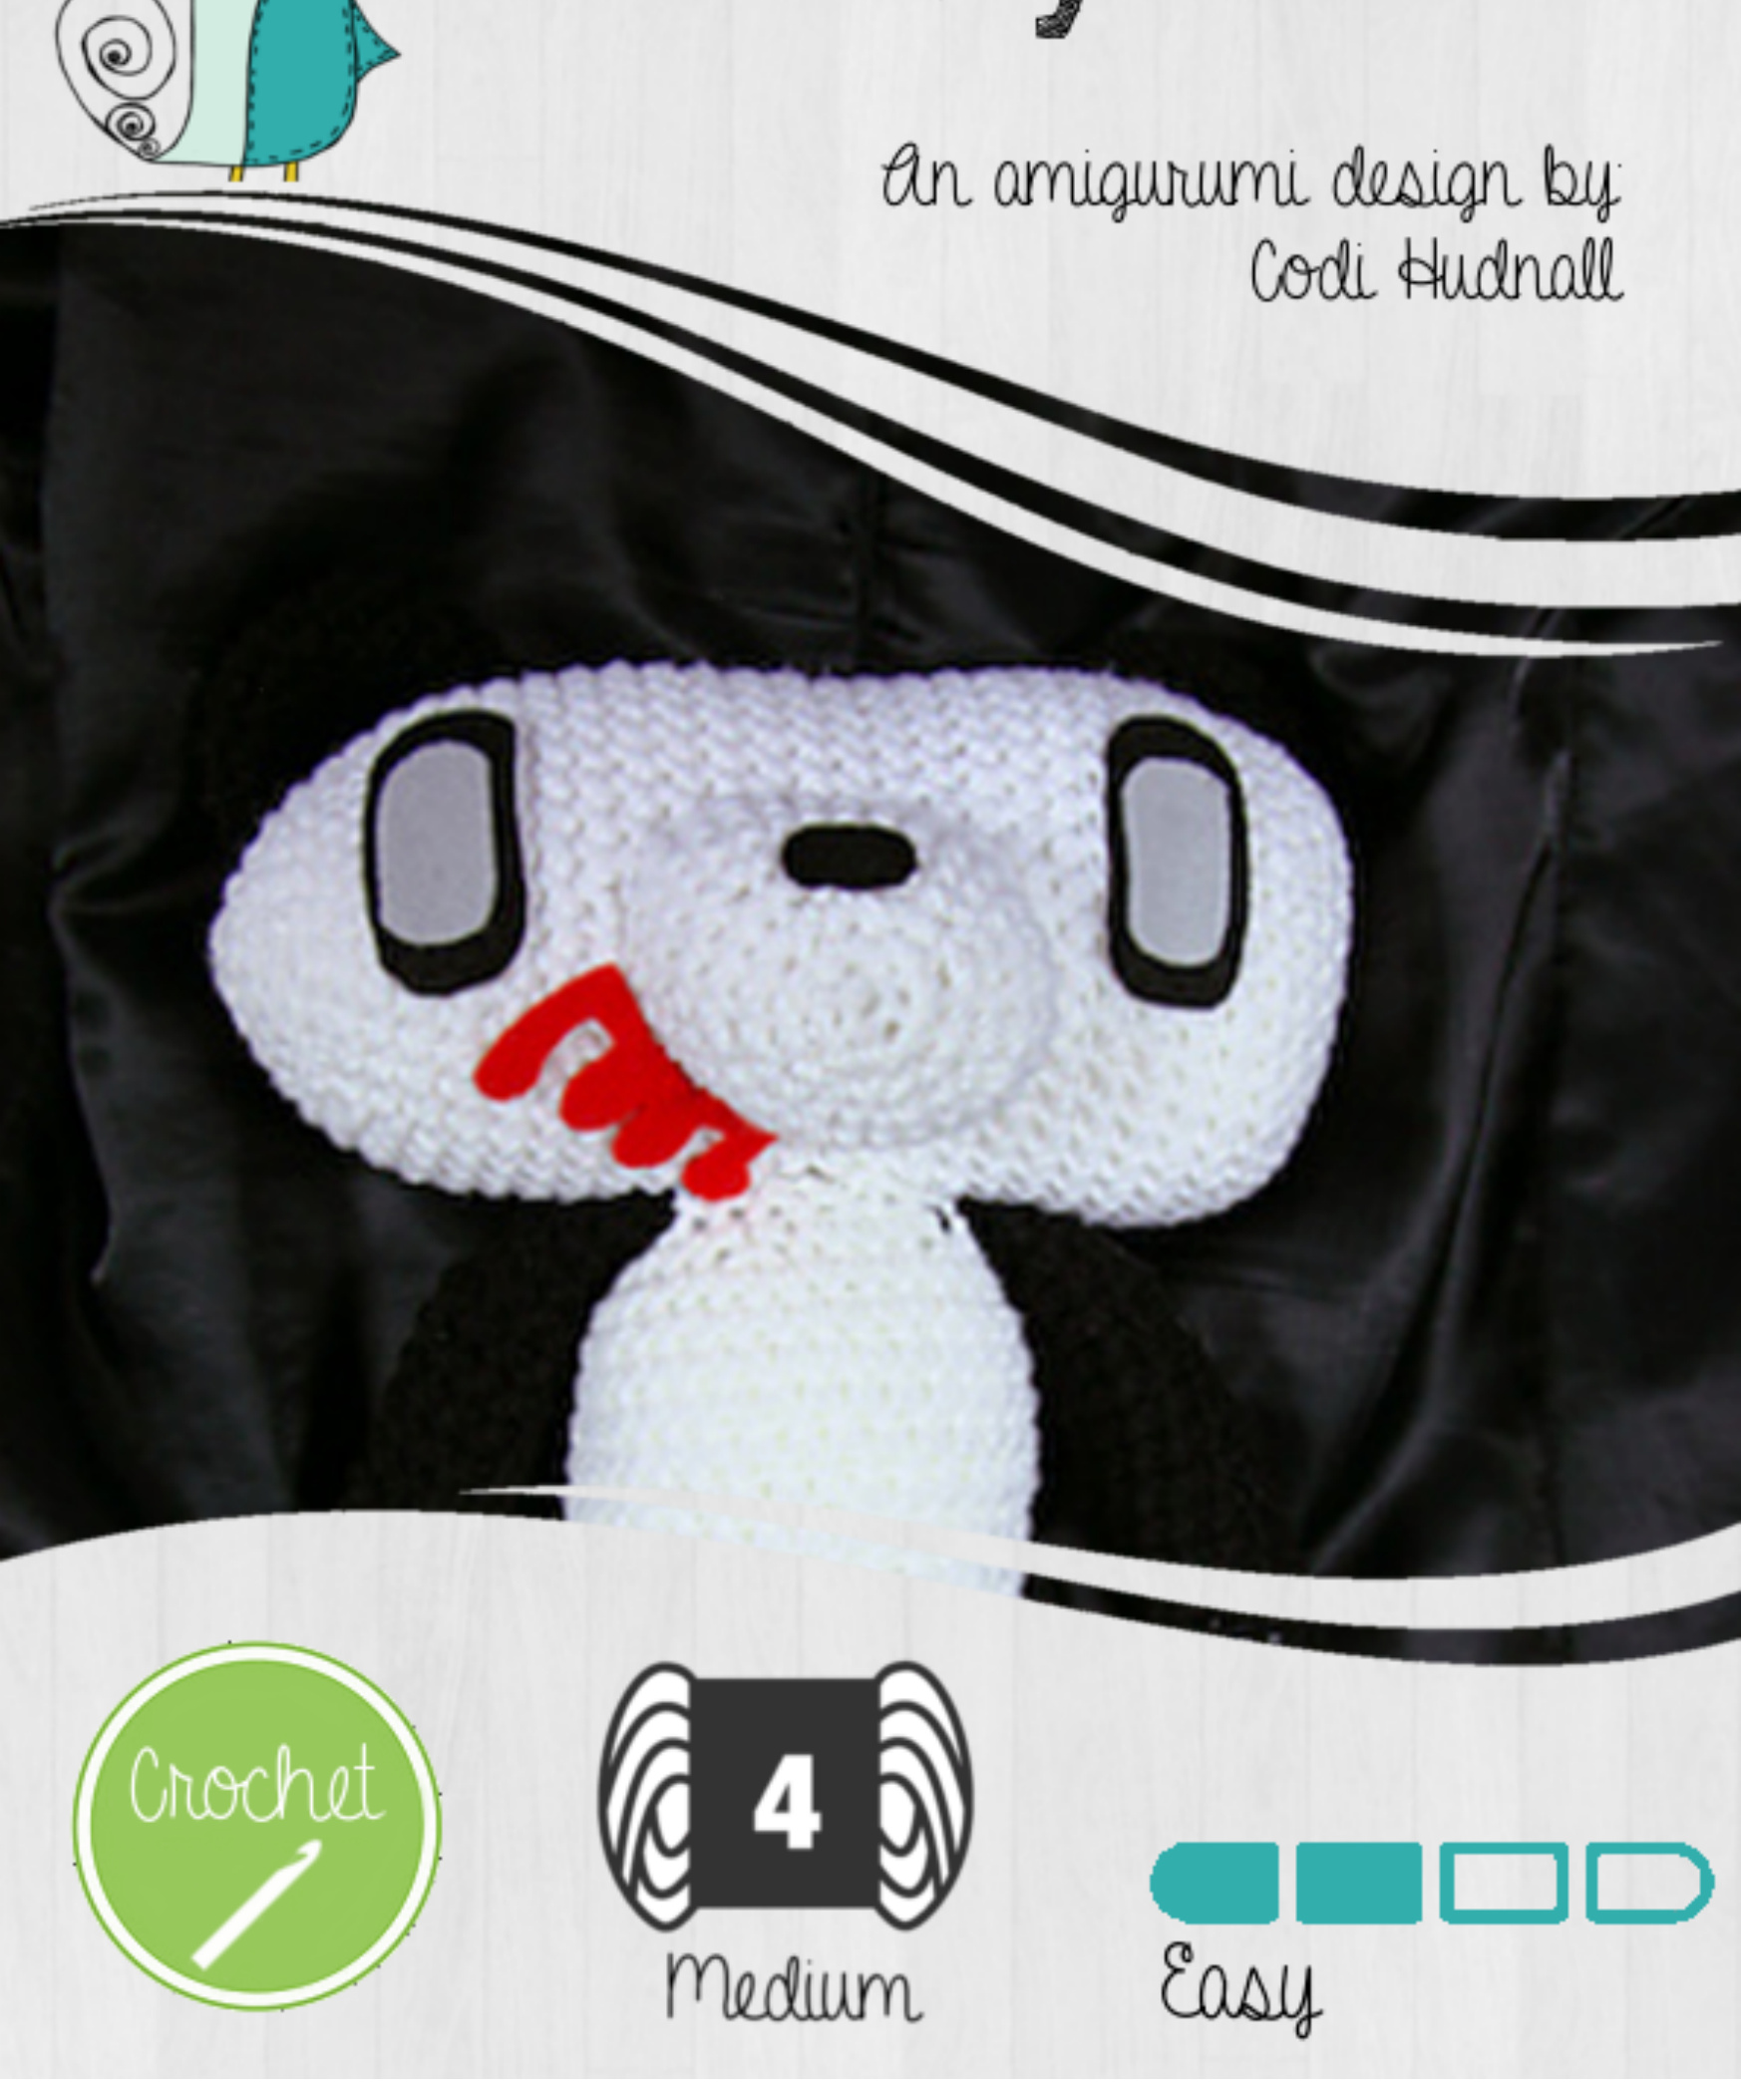
At this point you should have everything sewn together and you will want to tuck in any tails with your darning needle. Next, you will want to preheat your glue gun and begin cutting out the shapes to make the face and nails. Create two eyes with black and grey felt with the panda and only one black eye with the pink gloomy bear. You will want a straight line of blood to put on the bottom of the snout and then jagged triangles as shown for nails. Again, use your judgment. Once you get through with all of that you should glue on all the faces very carefully, you can sew it if you do not want to risk the glue, and then there, you're done!

auelruycom/designea codi-hudnall
Copyright Information
(c) Codi Hudnal tll Righta Reserved You may use thia pattern gon peaonal use, aA gigta on pot charity but you ane not permitted to Aell this pattern or the ginished item qon ginancial gain