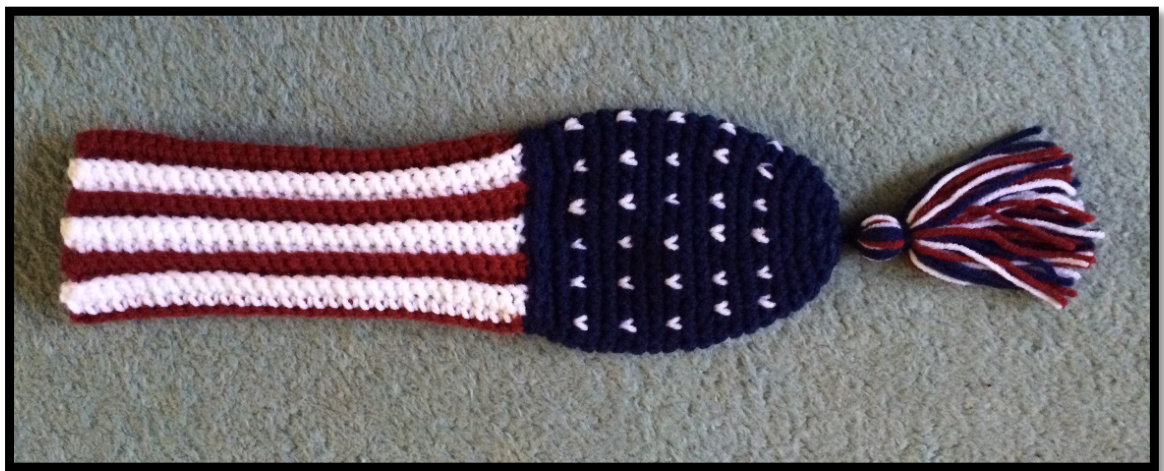
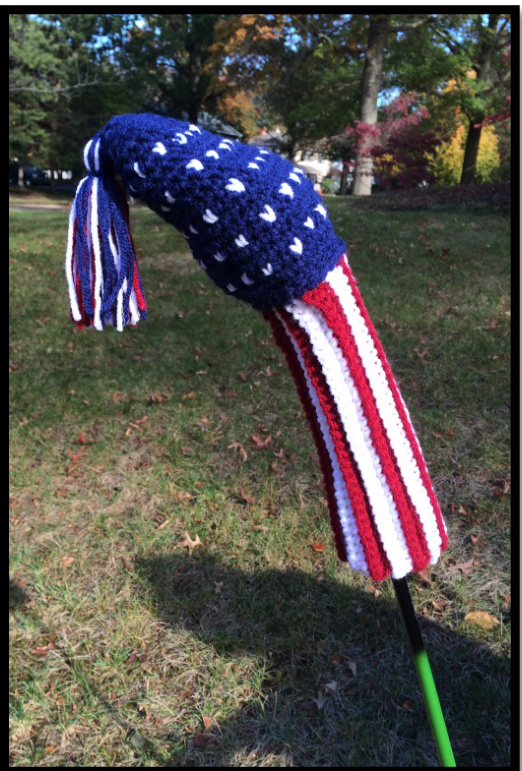
Patriotic Crocheted Golf Headcover for Fairway woods (Designed by Kristina Miller - October 2015)
Materials:
·1 skein each of red, white, and blue worsted weight acrylic yarn (so they can be machine washed and dried -I used Coats & Clarks Red Heart for its sturdiness - burgundy,bright navy, white) Set of #7 (4.5mm) crochet hook Optional: crochet loop marker or safety pin to mark beginning of rounds
Step 1: You will create the crocheted "sock" tube first:
With red yarn, chain 31 stitches. Row 1 (RS): Start with a sc in the back loop of 2nd st of your chain. sc in back loop of each chain until end (30 sc). Ch1 and turn your work. Row 2 (Ws): 30 sc in each st across working only in the back loops of the prior row sc. To change color, ch1 by pulling through a loop of white yarn and turn. Row 3 (Rs): With white yarn 30 sc in each st across working only in the back loops of the prior row sc. Ch1 and turn your work. Row 4 (Ws): Repeat Row 2, carrying up and changing to red yarn in final ch1 to turn. (See note below about how to be sure there will be enough "give" on this end.) Continue repeating Row2 while alternating 2 rows of the red wool and white wool for 24 rows total (you will have 6 rows red and 6 rows white carrying up the yarn between rows (To ensure there was enough "give" in the yarn, I made a dbl loop on my crochet hook and pulled it through the first loop & then continued with my ch1 as ultimately you need this end flexible enough to pull it over the club head). Or you may continue in pattern until you have reached the desired width to match your golf club (note that this will mean some changes in the construction of the top part). It is important that this tube can be pulled over the club head so you should test it. Be sure to have an even number of red and white rows. With right sides facing, join last row (white) and first row (red) with slip stitches. Then turn tube inside out. Fasten off leaving about an 8-12" length for finishing and weaving in later.
Step 2: Now the crocheted club head cover:
The head cover is next crocheted directly to the ribbing tube. Work in continuous rounds; do not join or turn unless otherwise instructed. Work the joining on the end that has the carried over yarn ends so you can cover them over. Start by using the blue yarn and working 24 sc (or sl st) on the side of the ribbed tube (i.e., 2 sc per stripe). Mark your last row and you will now start crocheting intheround. Round 1: To shape the wide part of the headcover, increase 6 st in this rnd as follows: \*(3 sc, 2 sc in next st), then repeat \*() 5 times. → 30 st at the end of round. Round 2: Increase 6 st in this rnd as follows: \*(4 sc, 2 sc in next st), then repeat \*() 5 times. → 36 st at the end of round. Round 3 (& every 3rd row ): \*(2 blue sc, then pull1 white loop through next st but finish the sc by pulling a blue loop on top),repeat \*() around carrying the white yarn and catching it behind and between the next 2 blue sc for neatness. You should have 12 white "flecks" on 36 st. Rounds 4-5: With blue, sc in each st around (36 st). Round 6: Repeat Round 3 being sure that the white "flecks" are lined up with the fleck below. (This will mean that on most of your rows you will need to add an ending sc (or two) but it won't matter in the end. More important the flecks line up nicely and that you have the right number of st around wherever you stop.) Continue Rounds 4-6 finishing with Row 10 (an all blue row). Row 11: With blue, decrease 6 st in this rnd as follows: \*(4 sc, sc next 2 st together), repeat \*() 5 times. →30 st at the end of the round. Row 12: Continue in sc in blue -- being sure to include 12 white flecks properly lined up with the row below. This will mean that sometimes there is only 1 blue sc between 2 white flecks. (30 st) Row 13-14: With blue, sc in each st around (30 st). Row 15: With blue yarn, plan to decrease another 6 st in this round as follows: \*(3 sc, sc next 2 st together), repeat \*() 5 times. AT THE SAME TIME, incorporate 12 white flecks in line with flecks in row 12. This can be a bit tricky. If some of the flecks occur as the 2nd st on a decrease, in order to make these look good, pullblue loop through first st, then white loop through 2d st, then REVERSE the order of these loops on your hook so white loop will be on top when you pull the finishing blue loop through both - white fleck should look like a V and be on top. This is the last row that will have the white flecks so after you have completed 12 flecks you can now cut the white yarn and leave a tail for weaving in. You will have 5 rows with white flecks. 24 st at the end of the round. Round 16-17: sc in each st around (24 st). Round 18: Decrease 6 st as follows: \*(2 sc, sc next 2 st together), then repeat \*() 5 times. →18 st at the end of the round. Round 19: Decrease 6 st as follows: \*(1 sc, sc next 2 st together), then repeat \*() 5 times. →12 st at the end of the round. Round 23: Decrease 6 st as follows: \*(sc next 2 st together), then repeat 5 times. →6 st at the end of the round. Fasten off leaving a long tail. Weave top hole together. Invert head cover and weave in all ends except top tail (which you will use to attach tassel). Optional: For added neatness, I crocheted a chain st as a topstitch (working on top of cover and carrying loose yarn on top and towards the bottom) in blue yarn around the base of the headcover between top and tubing to neaten the appearance. Remembertoweaveinends.
Tassel instructions:
Using all 3 yarn colors, hold 3 strands of yarn together and wrap yarn around a 4" square of cardboard approx 8 times. Wrap a 24" length of blue yarn several times around wound yarn at one edge of the cardboard, and tie securely (do not trim ends, use them later to tie tassel to cover). Cut yarn at lower end of cardboard. Wind another 24" length of blue yarn around wound yarn 4 times approx. 1" from top (to form tassel neck) and tie firmly. Trim ends of tassel evenly. Use strands at top of tassel and club cover to close up finishing hole and securely tie tassel to top of cover.