SIZE INFDRMATION
The smaller size measures 20' and fits 19-22" heads. The larger size measures 221/2"' and fits 22-24 heads.
GAUGE
》16 dc = 4" = 10 rounds on size E hook (or size needed to get gauge)
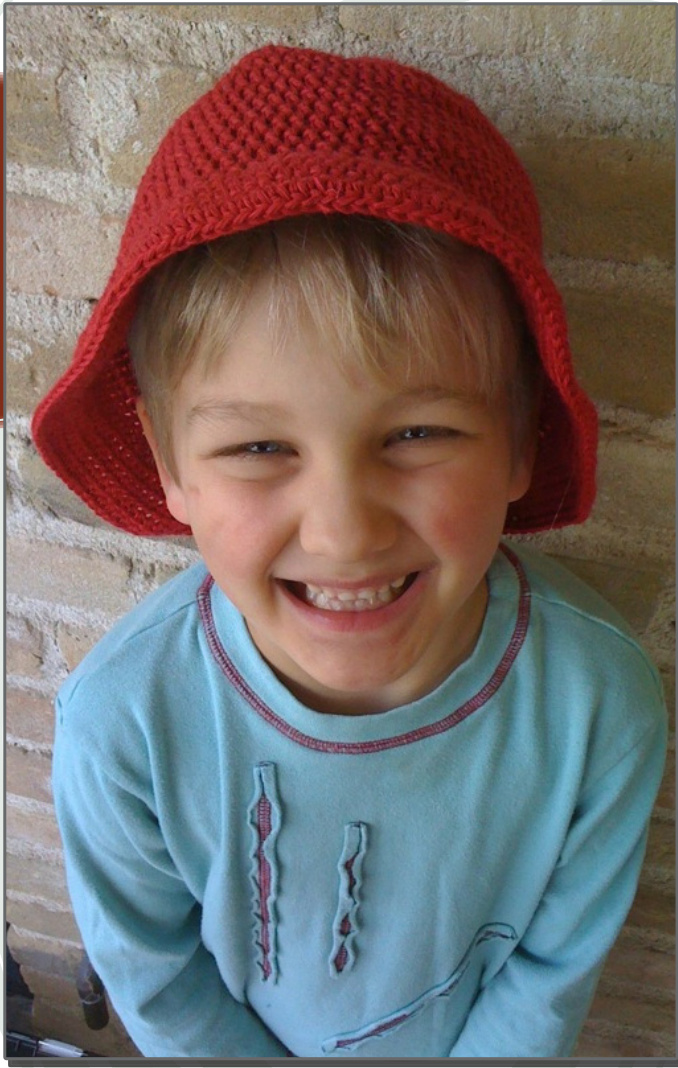
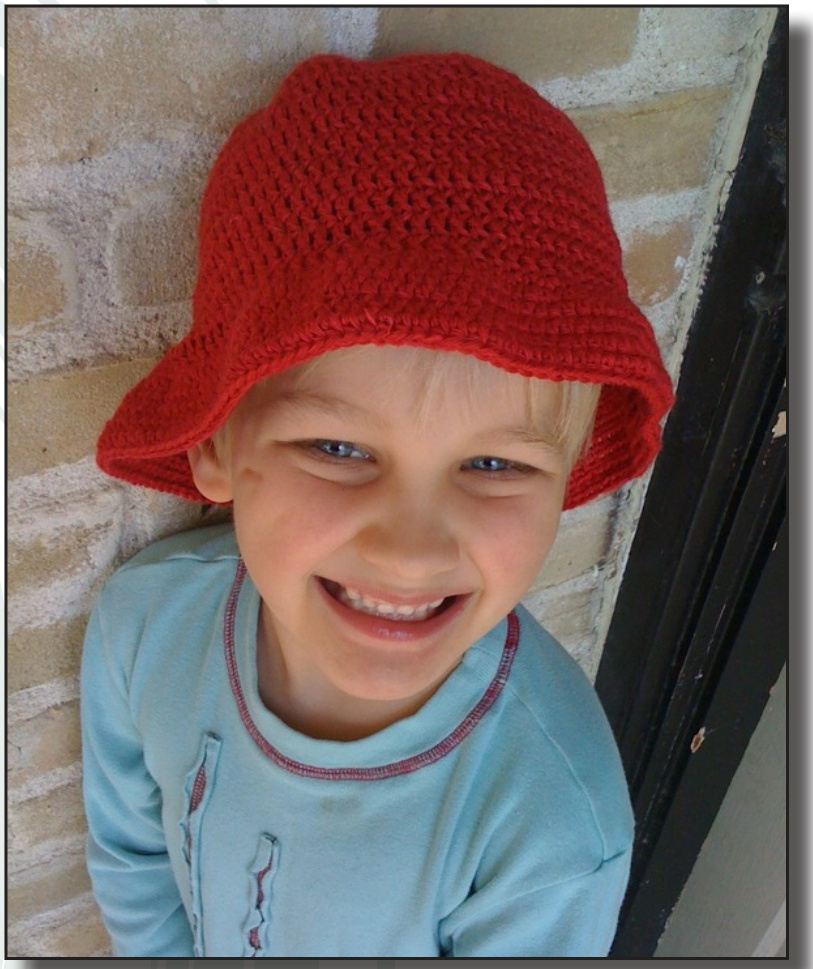
CHARLIE BUCKET HAT
Designed by Elizabeth Green Musselman Here in Austin, Texas, the long, sunny days of summer are very long, very sunny, and very hot. Sometimes a baseball cap just isn't enough to protect a kid's head. Hoorah for the bucket hat, with shady brim all around. This version is a very simple crochet project - simple enough fon even the most novice crocheter. The merino-linen blend provides just the right amount of airiness and structure. It looks great on children and adults.
MATERIALS
》1 skein Louet MerLin Worsted Weight (about 120 yards actually used): shown in Red size E crochet hook (or size needed to get gauge)
ABBREVIATIONS
ch = chain dc = double crochet hdc = half double crochet sc = single crochet sl st = slip stitch st(s) = stitch(es)
CHARLIE BUCKET HAT cont.
INSTRUCTIONS
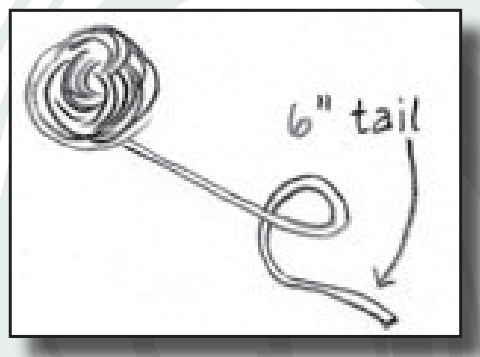
1. Leaving a 6" tail hanging, make a small loop of yarn. Using the image below as a guide, pinch the point where the loop crosses over in your left hand. Dc 8 times into that loop.
2. Holding the work so far at the edge, pull the tail until the original hole closes. Sl st into the first ch to complete the first round. 3. Round 1: Ch 3 (counts as 1st dc), 2 dc in each dc around, sl st in 3rd ch of turning join - 16 sts. 4. Round 2: Repeat instructions for round 1 - 32 sts. 5. Round 3: Ch 3 (counts as 1st dc), 2 dc in next dc, \* dc in next dc, 2 dc in next dc \*, rep from \* around, sl st in 3rd ch of turning join - 48 sts. 6. Round 4: Ch 3 (counts as Ist dc), 2 dc in next dc, \* dc in each of next 2 dc, 2 dc in next dc \*, rep from \* around, sl st in 3rd ch of turning join - 64 sts. 7. Round 5: Ch 3 (counts as 1st dc), 2 dc in next dc, \* dc in each of next 3 dc, 2 dc in next dc \*, rep from \* around, sl st in 3rd ch of turning join - 80 sts. 8. Larger size only: Round 6: Ch 3 (counts as 1st dc), 2 dc in next dc, \* dc in each of next 7 dc, 2 dc in next dc \*, rep from \* around, sl st in 3rd ch of turning join 90 sts.
9. All sizes: Work even for 10 rounds, or until hat is 51/2 (7)" from top center of hat to bottom edge. (For a teenager or adult, work until hat is 8" from top center to bottom edge.) 10. Begin brim: Ch 1, \* 2 sc in dc, 1 sc in dc \*. Rep from \* around - 120 (135) sts. 11. From here on, work in hdc until brim measures 1%2". (This suggested brim measurement is for a child under 7. You can certainly make the brim wider or narrower as you prefer. For an older child or adult, a longer brim will make the hat look more proportional to the wearer.) 12. Slip last st to complete final round. 13. Weave in ends.


