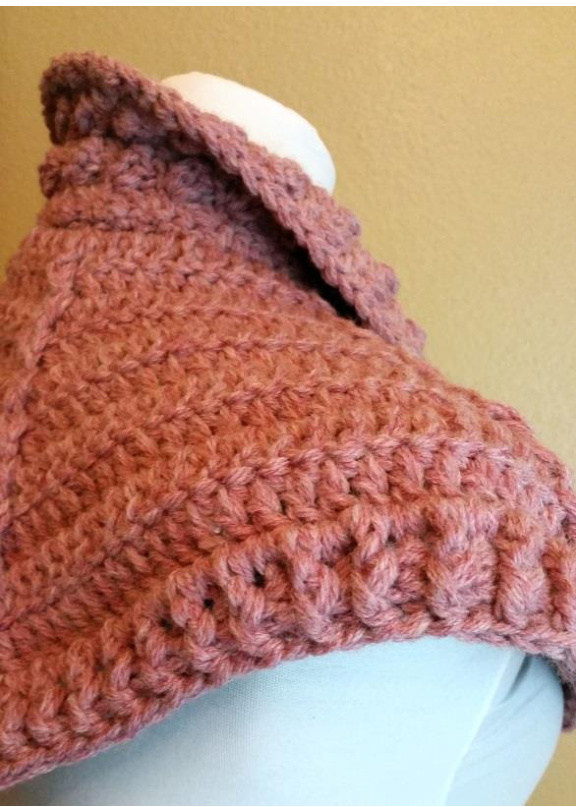
Jhe bonny Lass Gapelet
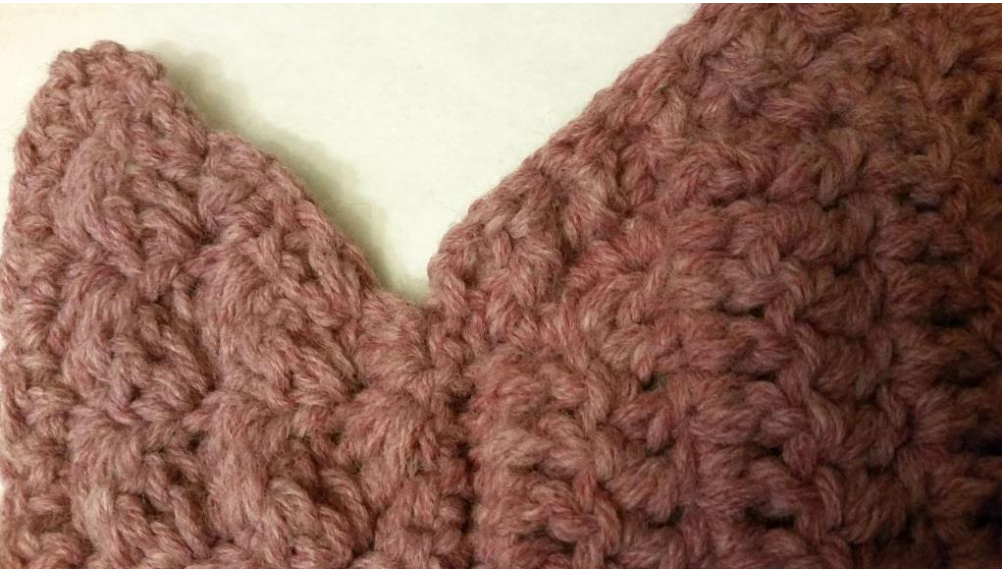
Skill Level: Intermediate. Should be familiar with post stitches. Supplies Needed: 3 skeins of Lion Brand Wool-Ease worsted in Rose Heather. You will hold two strands together to form a chunky weight. This is the best color match I have found. Alternate yarns: Cascade 128 Manos Maxima Suggested Hook:K Optional: Brown velvet ribbon for ties Copyright Crystal Hofegartner 2014 All rights reserved. Alternate yarns and hooks: Any chunky weight or 2 strands of aran/worsted held together will work well. I suggest wool or wool blends. You want a bit of sturdiness to your yarn so that it stands up the way it should and of course wool is more authentic to the time period we are attempting to recreate with this piece. You can also make it with a single strand of worsted, or even sport or DK, but will need to adjust the stitch count as explained in the pattern. Abbreviations used: CH=chain ST=stitch DC=Double Crochet FPDC=Front post double crochet BPDC=Back post double crochet SS=Slip stitch SC=single crochet Row 1. Chain 50. (55) (60) Row 2. DC in 4th chain from hook and in each stitch to end (total of 46 stitches)(51) (56) Ch 3, turn. (the pattern is somewhat adjustable here. If you want to use a thinner yarn for example you would need more stitches on this starting chain. This is the piece that forms the base of the collar so you want it to almost go around your neck but definitely not overlap. Other possible stitch counts shown in parentheses) Row 3. FPDC in first stitch. DC in next 8 (9, 10) stitches.\* FPDC in next stitch. DC in next 8 (9,10) stitches. \* Rep \*to \* to last stitch, FPDC in last stitch. You should have a total of 6 FPDC regardless of your original stitch count. These delineate the five sections. You will always have 6 post stitches in each row. Ch 3, turn. (46, 51, 56) Row 4. BPDC in FPDC below (the ch 3 just gives you height for the rest of the rows, you won't be working into it. It gets covered up when you make the edging. ) DC in the same stitch (this forms an increase). \*DC in each stitch until you reach the next post stitch (the FPDC from the previous row). We will be working three stitches into this stitch. DC in the FPDC, BPDC around the FPDC, then DC again all in that same stitch. This gives you an increase on each side which helps to form the triangle look. \* Repeat \* to \* to end of row except on the last stitch you will only make two stitches, dc in to the last post stitch, then BPDC around the FPDC. Remember you will retain the same 6 post stitches throughout, but your dc count in between will increase by a total of 10 in each row. (56, 61, 66) Ch 3, turn. ight Crystal Hofegartner 2014All rights rese Row 5. FPDC in BPDC below. Dc in same stitch. \*DC in each stitch until you reach the next post stitch (the BPDC from the previous row). We will be working three stitches into this stitch. DC in the BPDC, FPDC around the BPDC, then DC again all in that same stitch. This gives you an increase on each side which helps to form the triangle look. \* Repeat \* to \* to end of row except on the last stitch you will only make two stitches, dc in to the last post stitch, then FPDC around the BPDC. (66, 71, 76). Ch 3, turn. Repeat rows 4 and 5 to desired length. To look the most like the sample, you want the capelet to just graze the edge of your shoulder as a bit of additional length will be added with the edging. I think it works out the easiest to continue on with the edging if you end a row 4. If you continued counting that would be row 10, 12, or 14. I usually stop at row 10. When you have reached your desired size, do not break yarn and continue to the edging.
Edging:
Working across the bottom of your capelet. Alternate FPDC and BPDC in each stitch. Make sure that you match up the post ridges to maintain your lines. When you come to each of the ridges that are demarcating your sections you will make three stitches in those ridges. DC in the stitch, FPDC or BPDC in the same stitch (it will depend on what row you stopped on) and then DC in the same stitch again. Turning the corner: You now have formed the bottom edging of your cape and are going to make the turn to form the edging of one of the sides. After you have made the FPDC or BPDC in the last stitch of the bottom, make two more DC in the same stitch to turn the corner. Continue to make DC stitches evenly spaced along the side of the piece. The count will depend on many things including your tension and how many rows you made. Roughly, you should have 2-3 DC per row. The key though is that you want the piece to lay flat and not pull in or ripple out. If you made 10 rows, you should make approximately 22 DCs. Now you have reached the corner of the side and the top. Make 3 dcs into the corner SC from your first chain row. Next,SC all the way across the top in the free loop of the beginning chain. When you reach the next corner (going from the top ready to go down the next side) DC 3 in the corner stitch. Continue to DC down this remaining side for the same number of evenly spaced stitches that you used on the other side. (22 or whatever number you devised). At the remaining bottom corner: DC 3 in the corner stitch. Slip stitch in the top of the first DC on the bottom to make the edge smooth.
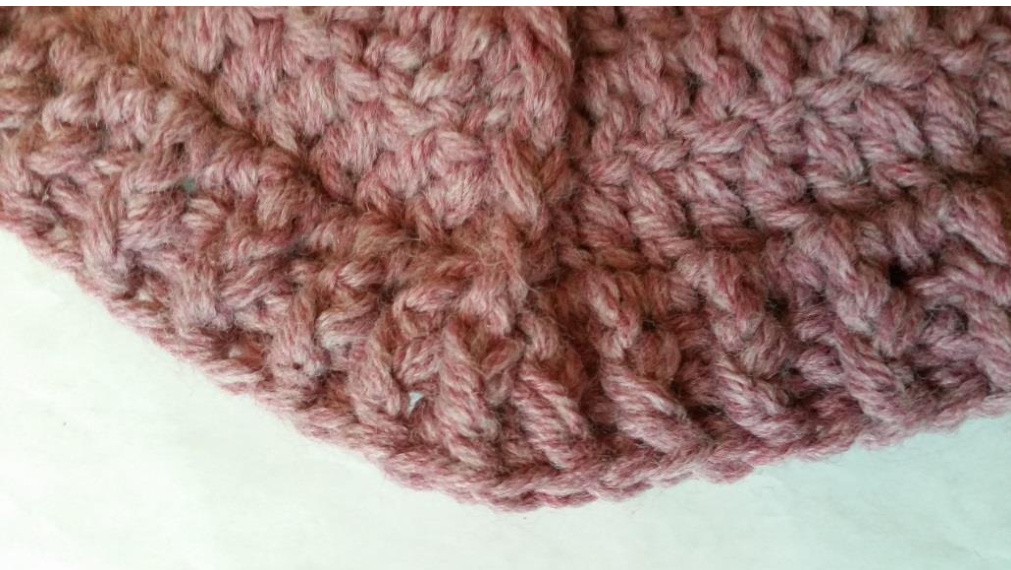
Ch3, turn. Now, alternate FPDC and BPDC along the side. Continue alternating the FPDC and BPDC in the 3DC group you made on the corner, then slip stitch into the first SC on the top edge. Now you are going to SC all along the top edge in either the front loop only or the back loop only. This part is a little tricky, but if you get confused make a stitch or two to see which way the collar will fall. You are doing this row in order to help the collar portion bend in the correct direction. So, when you are about to do this row, hold the cape so that the front side, the side where the post stitch ridges are showing, is facing out. If it is facing out, you will single crochet in the back loop Only. Last side: Alternate FPDC and BPDC in the DC stitches you made on this side. After you reach the last double crochet on the bottom corner, SS to the top of the first stitch of the bottom edging to make a neat corner. Break yarn, weave in ends. Continue to collar portion.
Collar:
The collar will be made up of a textured stitch worked back and forth in rows with increases at each end. Row 1: Attach yarn at one end of the back loop or front loop only single crochet row you made. SC, DC2 in same stitch,\* skip 2 SC, SC DC2 in next stitch.\* Repeat \*-\* to end of row. Regardless of what stitch you end up on, make sure that you complete a SC, DC 2 in the last stitch of the row. Ch 3, turn. Row 2: DC 2 times in first stitch. (For the rest of the row you will be stitching into the SC stitches from the previous row. You will be able to see the little dip that is formed by the SC. )\* skip 2 stitches, SC, DC 2 in next stitch (which is the sc from the previous row).\* Repeat \*-\* to the end of the row. Sc, DC 3 times in the last stitch of the row. Copyright Crystal Hofegartner 2014 All rights reserved. Repeat Row 2 until the collar is the size that you would like. I suggest that you repeat it 3 times for a total of 5 rows in the collar. Break yarn, weave in ends and proceed to ties.
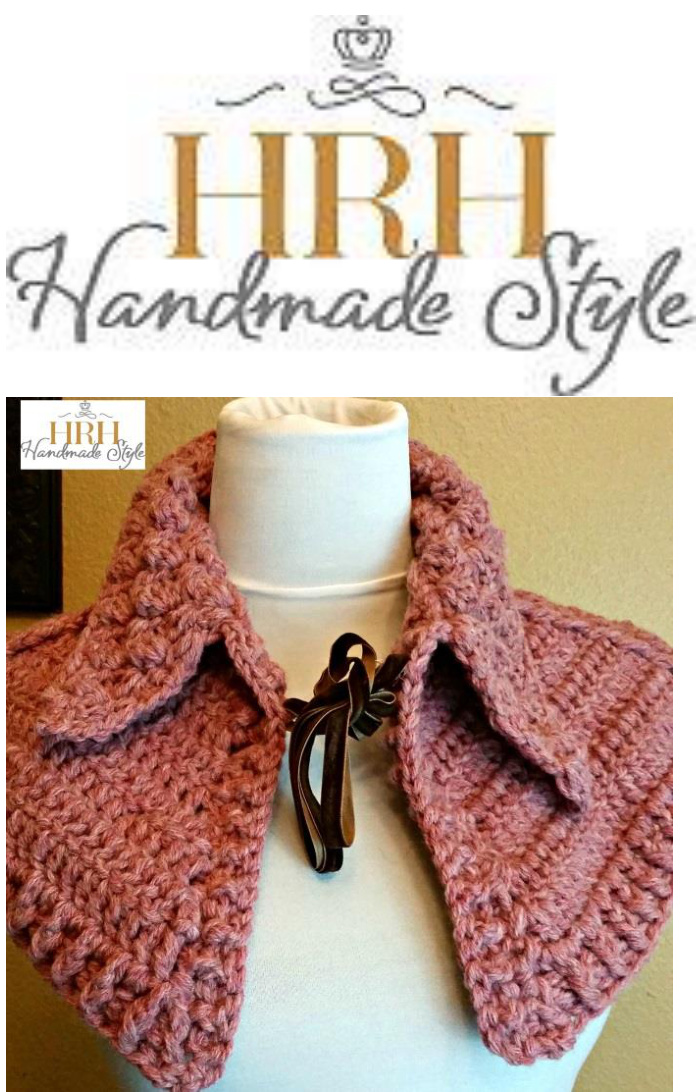
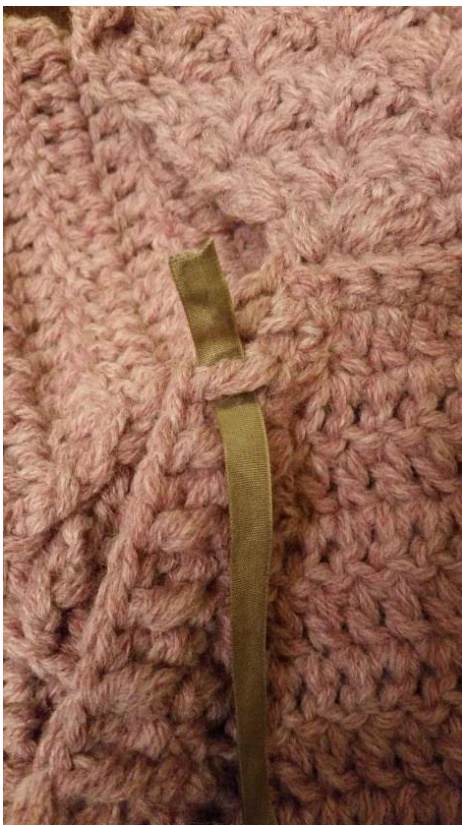
Ties:
You have some options when it comes to ties. To look the most authentic you will want to sew on some brown ribbon or leather strips. Ribbon or leather ties: Cut two 12 inch lengths of ribbon (in the sample I used brown velvet ribbon). On the inside of the front edge, find the second post stitch below the spot where the body and collar meet. Weave the ribbon through the post with the right side down. Pull it through so that the ribbon is in half with the right sides together. Hand or machine sew the ends. Turn the ribbon right side out and slip the seam under the post stitch so that it is hidden. You can also tack it in place there with a few stitches by hand.
Crocheted tie option.: Attach yarn with a slip stitch at the spot where the collar joins the body of the cape. Ch 50 (or more if you want the tie longer) . Turn and slip stitch in each stitch back to the spot where you joined. Slip stitch in the same stitch you used for attachment and in one more stitch next to it for additional anchoring. Break yarn and weave in ends. Repeat process on the opposite side. Now go out and look beautiful, maybe you'll snag yourself a hunk in plaid.